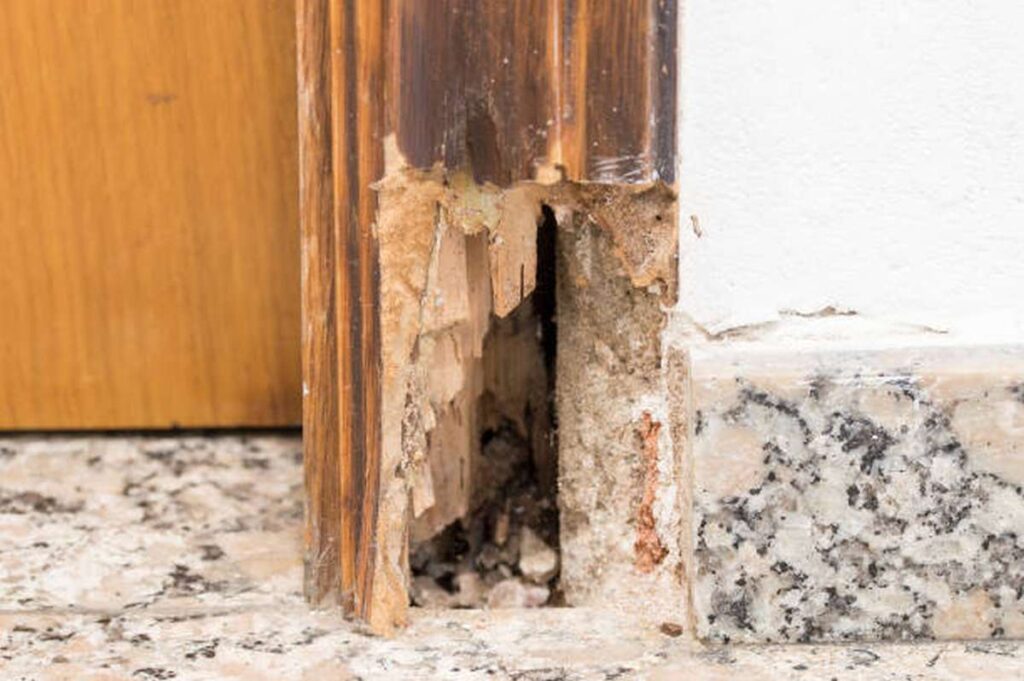
A wooden door frame is more likely to split or break if it is left out in the elements for extended periods of time. In some cases, the door frame will break if the door is forced open. Broken or cracked door frames should be fixed as soon as possible. Have you been searching for Melbourne roofers? Roof Repair & Restoration Systems is here to help.
Wood putty can be used to repair a tiny crack in a door frame. Next, apply a coat of paint or varnish to the surface. Wood glue and a clamp can be used to secure the frame if the crack is particularly large. Apply wood putty or wood filler once the glue has cured to level the surface before painting or varnishing.
Here are some suggestions for fixing a door or door frame that has been damaged by a kick or other force. In extreme cases, the wood around the doorknob and the door frame may crack and break. In most cases, wood glue, wood filler, and a wood clamp will suffice to make the necessary repairs. As a last resort, you can fix both the door and the door jamb/frame with a repair kit or a reinforcing plate. Repair kits for door jambs normally comprise a striking plate and metal overlay to cover up damage and fortify the structure.
You don't need a kit to repair a crack in the door frame if it's not too big, as was previously mentioned. A little crack in the wood can be fixed by following the steps below. The need for a repair kit increases if the wood crack was caused by an extremely forceful event, such as a door being kicked in. If your door jamb needs fixing, you can give the methods below a try. However, the wood may have been weakened and has to be strengthened. Wood filler can be used to attempt repairs on the wood. If the damage to your door frame cannot be fixed with glue and filler, keep reading.
The door frame must be reinforced with a long metal piece that covers the broken area. You can buy this as part of a set to secure your door. Because it includes multiple components, it can be used for a wide variety of door frame repairs, making it the best all-around option.
How to Fix or Replace a Broken Door Frame
There are numerous reasons why a door frame may be cracked. If the crack is particularly large, you may need to replace the entire door frame. If it's little, you can probably repair it yourself using a few tools and supplies you already have. Our door frame repair professionals describe the steps for repairing your break below:
First, the broken frame must be taken apart.
The old frame was first taken off the broken side. Because the frame's top and hinge sides were still functional, we only needed to fix the latch side. Thankfully, we didn't have to replace the moulding, but we did had to take it off before we could remove the door frame.
- As a first step, we used a small crowbar to carefully pry off the mouldings. We didn't want to ruin it for future usage, so we carefully removed the long small brads or staples holding it in place. The children had previously removed the moulding from the door's interior, but other than a single scratch on one edge, the door was in pristine shape.
- The next, trickier step was taking off the door frame on the latch side. It wasn't as easy as just ripping the carpet away from the door frame; the upper end was fastened to the upper part of the frame, and the lower part was buried in the carpet. To protect the door stop from being broken, we decided to remove it first. This is the piece of wood that the door shuts against when it is fastened to the frame, or to a section of the frame. Ours also had large strands attached, but we were able to take them off without damaging the product and save them for another time. We were careful to keep these shims for future use when we installed them between the door frame and the studding behind it. These shims are essential for levelling any crooked or warped frame and making the hole the right size, so we left them in place. The core of the door frame had to be pryed out, and then the bent section of the frame had to be pried free of the carpet at the base. We found that the very top was nailed into the top frame piece, but we were able to remove the side pieces without damaging the top one, so we just left it there. We were careful not to damage the door frame when taking it out, but even if we had, we already had a new one on order.
Repairing The Door Frame Is Step Two
The next step was to instal a new door frame and reattach the casings and door stop. We found a jamb (door frame) that was just short of the subfloor and bought it. It was not too short that it couldn't reach the floor, and it wasn't too long that it was awkward to manoeuvre.
- For a perfect fit, we nailed it through the frame and shims into the studding behind, leaving the exposed faces flush with the wall's completed surfaces. To prevent the frame from warping, we only hammered in two nails at each shim and a few more in between.
- Then we closed the door and gently pressed the doorstop's bottom end against the door, making sure to align the doorstep with the door frame's top. Once again, the door was opened with the doorstop firmly against the frame, and this time, finishing nails were used to secure the doorstop to the door's frame. The doorstop was found to be slightly misshapen, but after nailing it together at the top and bottom, we were able to bend it into the back of the closed door. The stop was firmly attached to the frame with just six nails.
- It was then time for the updated strike plate to be introduced. When the door was closed, we placed a mark at the strike's centre on the edge of the frame and traced it onto the frame's face. When the door was closed, the exact location of the strike on the door frame was determined, along with a 3/4 inch clearance." The hole was drilled with a spade bit. The strike was then held in position while the chalk was moulded around it; the strike should be installed slightly flush with the frame. We used a hammer and chisel to create the strike plate's inset, although a router would have done a better job. We were able to get more done in less time with the chisel. It is imperative that the door be closed, and that the 34 "The depth of our hole was insufficient to allow the lock to extend all the way through the door, but this was easily remedied with a cordless drill. Two wood screws were used to secure the new striking plate into place, and then we could start putting up the trim.
- The moulding was then nailed into place, which required little more than keeping it in place. When the moulding was bent out from the door frame, we used longer finishing nails to drive them through the moulding and into the studding behind. We then drove a couple of smaller finishing nails into the new door frame, and one at an angle into the top piece of moulding. So that the children wouldn't mess with the new paint, we decided to apply a second coat of paint later that night, after they had gone to bed.
Fixing the door frame took us approximately two hours, but it could have been done in much less time with just the two of us. At noon, we stopped to rest, have some refreshments, and play with my granddaughters; my son had taken over the most of the work, and I had been present primarily to advise and train him. Considering that the project just required a package of nails and a new door frame, it was well worth it to have a bedroom door that Mom and Dad could close again (and the whole cost was only about $12). Additionally, it was discovered that figuring out how to fix a broken door frame was not as difficult a task as first thought.
The Easiest Way To Fix A Broken Door Frame Is…
- Take off the metal door catch or strike, as well as the lock catch or strike, whichever is applicable.
Remove using a scraper any loose splinters or chips of wood that are sticking out from the door frame. - Check that your door can shut all the way before you leave. If this is not the case, remove any pieces of wood that are blocking the door from shutting. Proceed to the following step as soon as you are certain that your door can be closed.
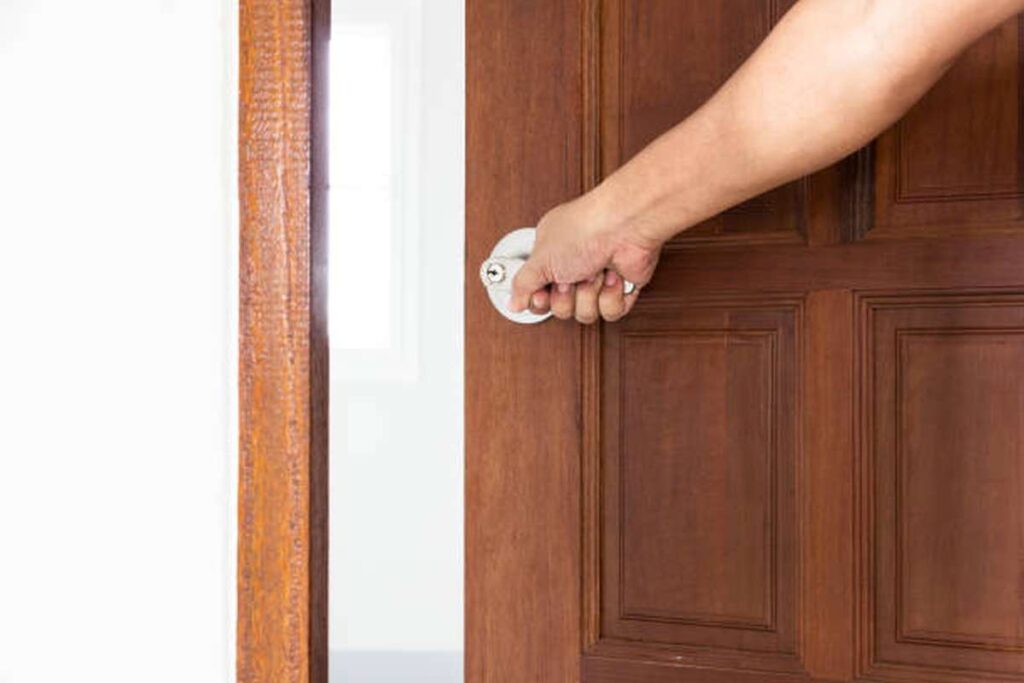
- To gain access to the door frame, the door must be fully opened.
- Wood glue or wood filler should be applied into the crack or cracks, and you should be sure to get it as deep as possible.
- After the crack has been filled with wood glue, numerous wood clamps will need to be added in order to squeeze the crack shut.
- Keep the wood clamps in their current positions for the next few hours. It is important to note that your door must remain open while the clamps are being secured and the adhesive is allowed to dry.
- After the glue has had sufficient time to dry, remove the wood clamps. There should be little to no evidence of the crack at this point.
- Sanding the wood and then painting it will be required to finish the project.
Reinstall the door, then test both the catch and the strike before using the door.
What You’ll Need To Fix A Cracked Door Frame
- The pry bar is flat.
- Screwdriver
- Adhesive for wood or wood filler
- Clamps for the wood
- Sandpaper
- Paint
Steps:
- Taking off the trim from both sides of your door frame is the first thing you need to do in order to repair the door frame. You will need to use your flat pry bar in order to accomplish this.
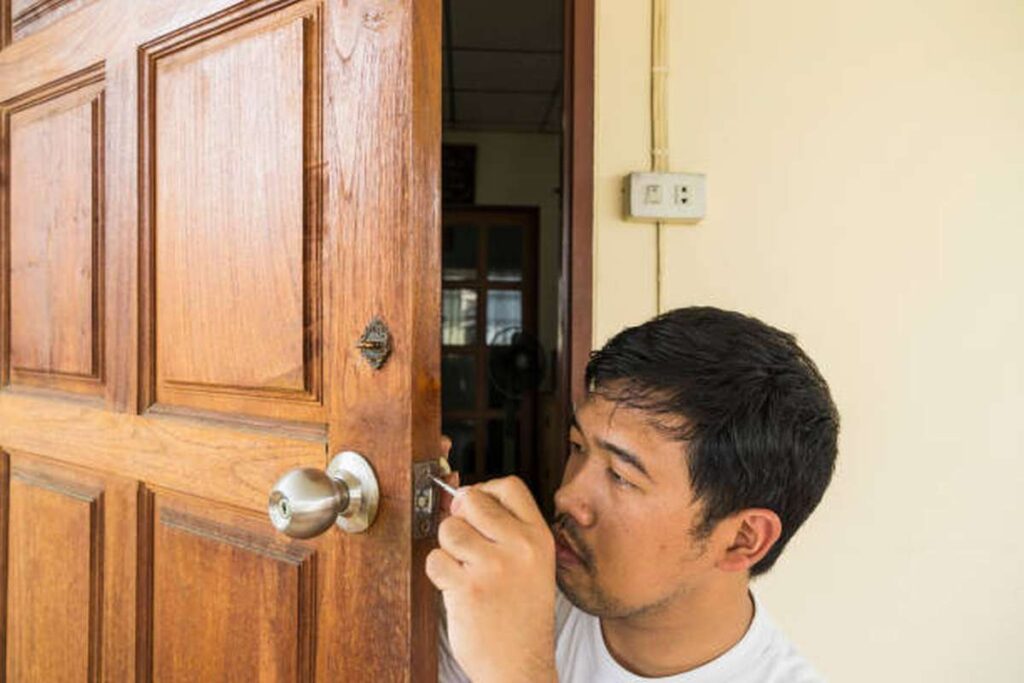
- Remove the metal catch and hit plate the next step using the screwdriver that you have.
- Take care to remove any stray splinters or chips of wood that may be protruding from the door frame.
- After that, would you please make sure the door closes by closing it for me? In the case that it does not, and there are pieces of wood that are preventing it from doing so, remove those pieces as well.
- Wood glue or wood filler should be used to fill up the crack. (Be sure to get as far down as you can with the filling.)
- After it has been filled, a number of wood clamps should be used to firmly compress the frame in order to remove the crack.
- Keep your door open and wait for the wood glue and filler to thoroughly dry before closing it.
- When the wood glue or filler has had enough time to cure, you can remove the wood clamps.
- Sand down any leftover glue or filler using the sandpaper you have available in order to make the area flush with the rest of the door frame.
- Next, give your door frame a facelift by painting it to conceal the crack and give it a more modern appearance.
- Wait for the paint to fully dry.
- Last but not least, using your screwdriver, reattach the catch and strike plate on your door, and double check that it shuts correctly.
Wooden Door Repair
Repairing a wooden door that has a split panel, a shaky frame, or loose hinges may seem like a lot of labour, but it is possible. When compared to the effort of replacing a door and its frame, however, this is often a quicker and easier option. Repairing a wooden door typically only requires a few inexpensive tools and some fundamental carpentry know-how.
If your wooden door is cracked, you can learn how to repair it by reading this article. When it comes to surface repair, our experts are here to help in any way they can. You can trust Roof Repair & Restoration Systems to provide you with the best roof restoration in Melbourne. There is no point in continuing your search.
The wood Is Rippled
Possible damage to your door includes cracks in several of its panels. Because of excessive drying of the wood or just plain old wear and tear from opening and closing the door so often. The type of finish already applied to the wood will dictate your repair strategy.
To Fix a Crack in A Painted Wooden Door
A painted door can be repaired quickly and easily by filling the damaged area with wood filler, letting it dry, sanding it smooth, then repainting it to blend in with the rest of the door. This is the most straightforward door model to service. The worst-case circumstance is that you will need to repaint the entire face of the door in order to make it match the rest of the door.
Door Repair: Split/Crack In Natural Or Glossed Wood
Even though it may seem like a simple task, repairing a door made of natural or varnished wood is more difficult than it sounds because any wood filler used will be visible when the repair is complete. The best and quickest way to fix the crack is to use a dowel driven into the door's edge to force the two sides of the panel back together. It's imperative that you do the following to reach your goal:
- Make sure there is no varnish or other debris stuck in the crack. Carefully wipe away any lingering residue. Avoid removing any of the material's wood at any costs.
- Put two or three holes, 8 millimetres in diameter, into the door's edge where the cracked panel is. Before commencing, measure the width of the door stile with precision and mark the drill bit so that you only drill into the door's side for the necessary depth.
- A piece of 8mm dowel, cut to a length just longer than the stile's width, is what you want to use. The crack will be patched using this.
- Care and dexterity are required while applying PVA wood glue to the cracked panel and the holes you drilled.
- To reassemble a panel that has been separated, drill holes in it, insert the dowels, and tap them in until they are snug.
- First, you need to wait for the adhesive to set before you can remove any excess. After the glue has dried completely, you may sand down the rough edges and trim off the excess length of the dowels with a hacksaw. If any glue has oozed out of the crack, you can remove it by sanding it away with fine grit paper.
Dangerously Loose Links
If a door's hinges or joints are loose, it will begin to catch on the floor when opened and closed. Indicating the necessity for door maintenance. If the hinges are loose, try tightening the screws.
The screws should be removed and the holes filled with bonded dowels if they cannot be tightened using an 8 mm drill bit. The dowel can be removed and new holes drilled for the screws after the wood has dried.
If the door is still dangling while you fix the hinges, prop it up so that it is in the right place. By doing so, the door's weight won't be able to strain the hinge in its current, functional state.
Wobbly Door Positions
As time passes, the corner joints of wooden doors might weaken or split. The door needs to be removed from its hinges and laid flat on a workbench in order to be worked on. Remove any glue, debris, or filth from the joint, and clean it well.
A quick fix could be to re-glue the joints with wood glue and bind the two portions together while the glue dries. Conversely, if you want the fix to last longer, you can use a dowel to pin the two pieces together. Do you want us to replace the roof? Then you need the help of Glaze Roofing Systems, a leading provider in the industry.
Carefully drill an 8-millimeter hole through the door's face and into the joint itself. A piece of 8 mm dowel should be trimmed to a length only longer than the door's thickness. The next step is to squeeze some PVA wood glue into the hole and knock the dowel into position so that it protrudes marginally on both sides of the door. Once the glue has dried, you can sand the dowel down, repaint or varnish it, and then hang the door.
Conclusion
Wooden door frames should be fixed as soon as possible. In most cases, wood glue, wood filler and a clamp will do the job. Repair kits for door jambs normally comprise a striking plate and metal overlay. They can be used for a wide variety of door frame repairs. If your door frame has a crack, you may need to replace the entire thing.
If the crack is not very large, you can probably repair it with a few tools and supplies. Our door frame repair professionals describe the steps for repairing your broken door frame. The door stop is the piece of wood that closes the door when it is fastened to the frame, or a section of the frame. It's essential for levelling any crooked or warped frame and making the hole the right size. The core of the door frame had to be pryed out.
The doorstop was found to be slightly misshapen, but after nailing it together at the top and bottom, we were able to bend it into the back of the closed door. The stop was firmly attached to the door frame with just six nails. "We used a hammer and chisel to create the strike plate's inset, although a router would have done a better job". The depth of our hole was insufficient to allow the lock to extend all the way through the door, but this was easily remedied with a cordless drill. “The Easiest Way To Fix A Broken Door Frame Is.” is a weekly look at how easy it is to fix door frames.
The easiest way to fix a broken door frame is to simply replace the door frame with new nails and a new door frame. Take off the trim from both sides of the door frame and apply wood glue or wood filler to fill up the crack. Sanding the wood and then painting it will be required to finish the project. If your wooden door has a cracked panel or shaky frame, it is possible to repair it. Repairing a wooden door typically only requires a few inexpensive tools and some basic carpentry know-how.
The type of finish already applied to the wood will dictate your repair strategy. If a door's hinges or joints are loose, it will begin to catch on the floor when opened and closed. Indicating the necessity for door maintenance. Care and dexterity are required while applying PVA wood glue to the cracked panel and the holes you drilled. As time passes, the corner joints of wooden doors might weaken or split.
A quick fix could be to re-glue the joints with wood glue and bind the two portions together while the glue dries. Conversely, you can use a dowel to pin the two pieces together and then hang them.
Content Summary
- Broken or cracked door frames should be fixed as soon as possible.
- Wood putty can be used to repair a tiny crack in a door frame.
- Here are some suggestions for fixing a door or door frame that has been damaged by a kick or other force.
- As a last resort, you can fix both the door and the door jamb/frame with a repair kit or a reinforcing plate.
- Wood filler can be used to attempt repairs on the wood.
- If the damage to your door frame cannot be fixed with glue and filler, keep reading.
- There are numerous reasons why a door frame may be cracked.
- If the crack is particularly large, you may need to replace the entire door frame.
- Our door frame repair professionals describe the steps for repairing your break below:First, the broken frame must be taken apart.
- The old frame was first taken off the broken side.
- The next, trickier step was taking off the door frame on the latch side.
- To protect the door stop from being broken, we decided to remove it first.
- This is the piece of wood that the door shuts against when it is fastened to the frame, or to a section of the frame.
- We were careful to keep these shims for future use when we installed them between the door frame and the studding behind it.
- The core of the door frame had to be pryed out, and then the bent section of the frame had to be pried free of the carpet at the base.
- We found that the very top was nailed into the top frame piece, but we were able to remove the side pieces without damaging the top one, so we just left it there.
- We were careful not to damage the door frame when taking it out, but even if we had, we already had a new one on order.
- Repairing The Door Frame Is Step Two
- The next step was to instal a new door frame and reattach the casings and door stop.
- Once again, the door was opened with the doorstop firmly against the frame, and this time, finishing nails were used to secure the doorstop to the door's frame.
- The stop was firmly attached to the frame with just six nails.
- It was then time for the updated strike plate to be introduced.
- When the door was closed, the exact location of the strike on the door frame was determined, along with a 3/4 inch clearance."
- The hole was drilled with a spade bit.
- The strike was then held in position while the chalk was moulded around it; the strike should be installed slightly flush with the frame.
- We used a hammer and chisel to create the strike plate's inset, although a router would have done a better job.
- It is imperative that the door be closed, and that the 34 "The depth of our hole was insufficient to allow the lock to extend all the way through the door, but this was easily remedied with a cordless drill.
- Two wood screws were used to secure the new striking plate into place, and then we could start putting up the trim.
- The moulding was then nailed into place, which required little more than keeping it in place.
- We then drove a couple of smaller finishing nails into the new door frame, and one at an angle into the top piece of moulding.
- So that the children wouldn't mess with the new paint, we decided to apply a second coat of paint later that night, after they had gone to bed.
- Fixing the door frame took us approximately two hours, but it could have been done in much less time with just the two of us.
- Considering that the project just required a package of nails and a new door frame, it was well worth it to have a bedroom door that Mom and Dad could close again (and the whole cost was only about $12).
- Additionally, it was discovered that figuring out how to fix a broken door frame was not as difficult a task as first thought.
- Check that your door can shut all the way before you leave.
- To gain access to the door frame, the door must be fully opened.
- Screwdriver Adhesive for wood or wood filler Clamps for the wood Sandpaper Paint Steps: Taking off the trim from both sides of your door frame is the first thing you need to do in order to repair the door frame.
- You will need to use your flat pry bar in order to accomplish this.
- Wood glue or wood filler should be used to fill up the crack. (
- Keep your door open and wait for the wood glue and filler to thoroughly dry before closing it.
- Next, give your door frame a facelift by painting it to conceal the crack and give it a more modern appearance.
- Repairing a wooden door that has a split panel, a shaky frame, or loose hinges may seem like a lot of labour, but it is possible.
- Repairing a wooden door typically only requires a few inexpensive tools and some fundamental carpentry know-how.
- If your wooden door is cracked, you can learn how to repair it by reading this article.
- The wood Is RippledPossible damage to your door includes cracks in several of its panels.
- The best and quickest way to fix the crack is to use a dowel driven into the door's edge to force the two sides of the panel back together.
- Make sure there is no varnish or other debris stuck in the crack.
- Put two or three holes, 8 millimetres in diameter, into the door's edge where the cracked panel is.
- Care and dexterity are required while applying PVA wood glue to the cracked panel and the holes you drilled.
- Indicating the necessity for door maintenance.
- If the hinges are loose, try tightening the screws.
- If the door is still dangling while you fix the hinges, prop it up so that it is in the right place.
- Carefully drill an 8-millimeter hole through the door's face and into the joint itself.
Frequently Asked Questions About Wooden Door Frame
Repairing a door frame is a job that ranges from a simple fix to one requiring a little more handiwork, depending on how the door is damaged and how you intend on fixing it.
The average cost of replacing a door frame in your home is approximately $400, including two hours of labour at $70 per hour. The frame can cost anywhere from $80 to $500, depending on the type, material, and style.
Tools You'll Need
Fill the hole with expanding foam and leave to dry overnight. Use the utility knife to carefully cut away excess foam, leaving about a 3mm depth below the surface for the next step. With the putty knife, smooth the multipurpose filler over the hole, taking time to get a good finish and let it dry.
You can replace any exterior door in your home without removing the jamb if the jamb is in good shape and not out of the square. You just need the same size door without the hinge cutouts. You don't need special tools. You can cut the hinge mortise with a chisel and a hammer.
The time it takes to replace a door and doorframe will likely take several hours and less than one day. The old door frame must come out, the trim must be removed, and the rough opening may have to be adjusted in size to accommodate the new door.