It can be confusing to know where to start when you want to tile a wall. Tiles come in a wide range of sizes and can be found in a wide variety of design patterns and surface textures.
Putting up tiles on your walls might seem like a daunting task at first, but with the right preparation and equipment, you'll discover that it's actually quite simple. If the thought of wall tiling is giving you the willies, you need not worry any longer; we have provided a comprehensive guide that covers all the bases.
If you aren't sure which tile is best for your home and the project you're working on, we've compiled some helpful suggestions that should help make things easier for you. Read on for the rest of the story!
In Preparation for Wall Tiling
Prior To Tiling Your Floor
Before beginning your project, check that the surfaces you'll be working on are dry, level, and free of debris. Tiling over wallpaper necessitates stripping the wallpaper all the way down to the plaster and then patching any holes or cracks you may find. In order to avoid any problems, you should wait until the freshly applied plaster is dry (this could take up to two months) and then prime any exposed areas to prevent water from getting in.
The two most crucial aspects of any do-it-yourself endeavour are safety and preparation. Here is a rundown of what you'll need to tile a room in a safe and professional manner, including materials, protective gear, and tools.
You Need To Know How Many Tiles To Buy.
Your first order of business is to calculate the total surface area of the area you'll be covering in order to get an accurate estimate of how many wall tiles you'll need. Once you have the area's height and width, multiply those figures together to get the area.
Don't forget to deduct the area occupied by the doors, windows, and cabinets from the total. Sometimes it's best to just whip out a quick drawing with all the dimensions listed so that nobody gets confused.
After double-checking your math, you can go ahead and order your tiles. Even though most ceramic tile boxes cover one square metre, it's still a good idea to have 5 to 10 percent extra on hand.
How to Begin?
It is recommended that you start tiling your grid in the middle of the wall. It's now much less of a hassle to make sure your pattern is perfectly symmetrical. Further, it specifies that identically sized half-tiles can be used at the end of each row.
If you're making rows, resist the urge to begin in the corner. You'll end up with uneven rows and a sloppy appearance.
Putting Up Tiles on a Wall
You should hold off on getting help from professionals for a while. Tiling a wall is a surprisingly easy Do It Yourself project that most homeowners can complete in a weekend. Is tiling a wall on your to-do list? You'll be relieved to know that it's not quite as hard as you fear it will be. Rather than drawing them on the floor, layout lines are much more manageable if they are drawn on the walls.
Using the level mounted perpendicular to the horizontal and vertical planes, you can draw intersecting lines through the centre of the bubble in the glass. You'll need to take extra care while working with tiles because their weight makes them susceptible to falling off the wall as you tile.
Using organic mastic is a viable option because tile can be installed almost immediately after it has been applied. Thin-set mortar has greater tensile strength and resistance to water than mastic. You'll need to use tape, spacers or nails to keep the tiles in place if you want to use this set.
When tiling both a wall and floor, it's best to start with the floor so that the grout joints on the wall match the pattern on the floor. When the cove base is in place, you can start tiling the wall above it. If you're tiling the walls around you, the back wall is where you should begin. Tapered side walls hide their sharp edges better. Obviously, the more wall space you need to tile, the longer it will take you to finish the job. About 20-50 minutes per square yard is needed for tile preparation and installation.
Fix any structural problems before you begin. As an added precaution, you should check your level-reading skills, trowel technique, tile-laying skills, and grouting skills before beginning this DIY project.
What You Need
- Large bladed putty knife
- The same as 4 feet
- Block for sanding
- Chisel and a little sledge to break the ice
- Stud finder
- Tape measure
- Chalk line
- Knife for general use
- Carbide scriber
- Trowels with notches and a margin
- Straightedge
- Cordless drill
- The grout knife
- Or a wet saw, if you prefer.
- Tile nippers
- Stone used in masonry
- Caulk gun and caulk
- Hammer
- Floating grout
- Agents that remove gloss and liberate the pigment
- Bucket
- Putty for thin-set mortar
- Dimensional lumber for battens
- Backerboard
- Screws
- Tape
- Tile
- Spacers
- Grout
- Rags
- Sponge
- Or bullnose for the tile base
- Nylon wedges
- Finishing nails
Method 1: Clear The Area Of Any Obstructions
Whether or not wall coverings are present, they should be removed and the paint deglossed. If you're taking down wallpaper, you can get rid of the dust and scraps left behind by sanding or wiping them away with a damp sponge. Make sure the surface is completely dry before laying tile on it.
Method 2: Check For Flaws
Take a 4-foot-long level and section of wall to check for high spots, depressions, or other imperfections that will prevent the tile from fitting correctly. The corners are especially important to check when making sure the wall is plumb. Taking your time and being thorough when surveying the wall now will save you work later.
Method 3: Set Up The Backerboard And Thinset.
Walls that aren't perfectly vertical should have a skim coat of thin-set applied to them to fill in any uneven areas. If you intend to instal backer board, you should first mark the stud centres on the ceiling. Once the studs have been located, the backing board can be cut to size and secured with screws. Arrange the backer board pieces in a way that will minimise waste and cutting.
Method 4: Add Gridlines
Two feet out from a wall's corner, set a four-foot vertical level over a grout junction. If the two walls are butting up against each other on an outside corner, set the level so that the inside edge of the bullnose will fall. Get out your pencil and measure the entire length of the floor from floor to ceiling. Repeat the procedure, but this time apply it to the horizontal plane.
Method 5: Identify The Ideal Placement For The Tiles.
Place a mark on the wall at the level where the horizontal line was drawn and extend it outward until it's the same length as the tiles you plan to use. Continue to make marks on the wall at the same intervals you used before. Snap layout grids from the wall across from these points to ensure the straightness of each horizontal course as you build.
Method 6: Installing The Initial Group Of Tiles.
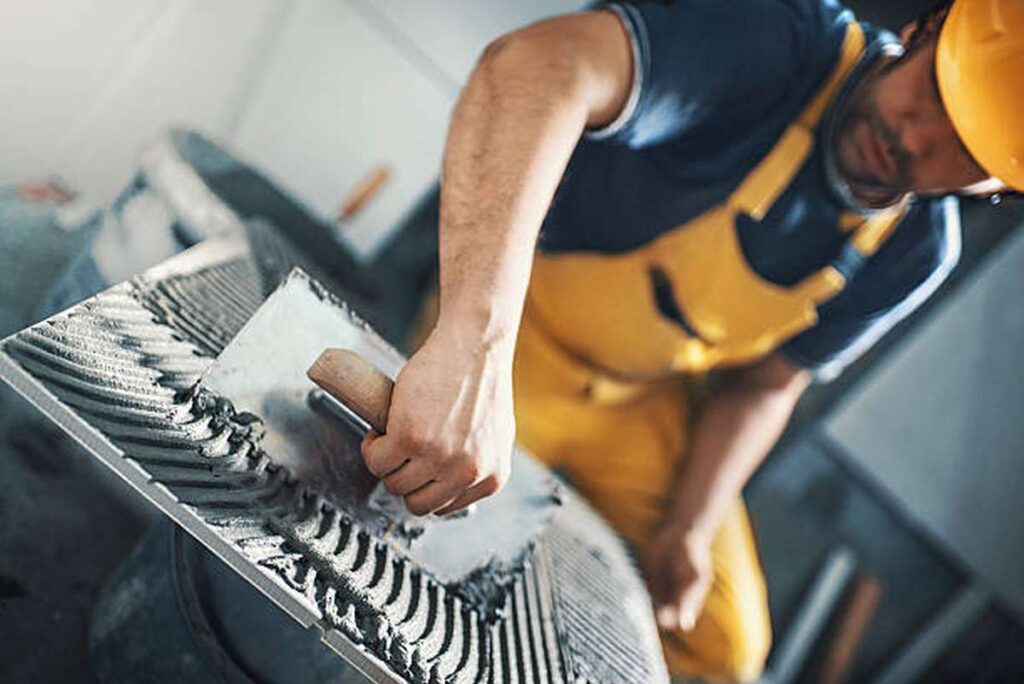
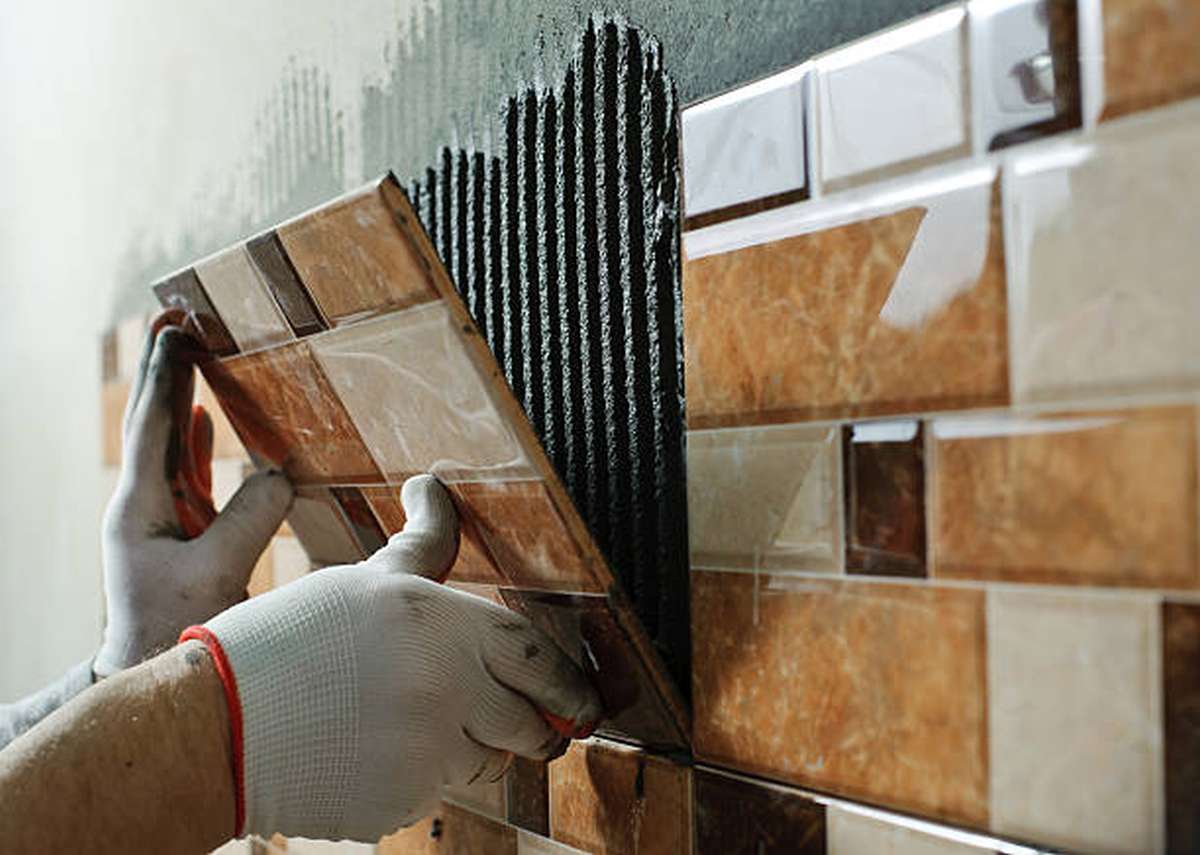
Put together a batch of glue that will cover at least as much ground as you can spread before it dries out. Spread and blend the glue using the trowel's notched edge, starting at the bottom and working your way up. As you work your way up from the bottom, press each tile into the mortar with a batten and a quarter turn of your wrist.
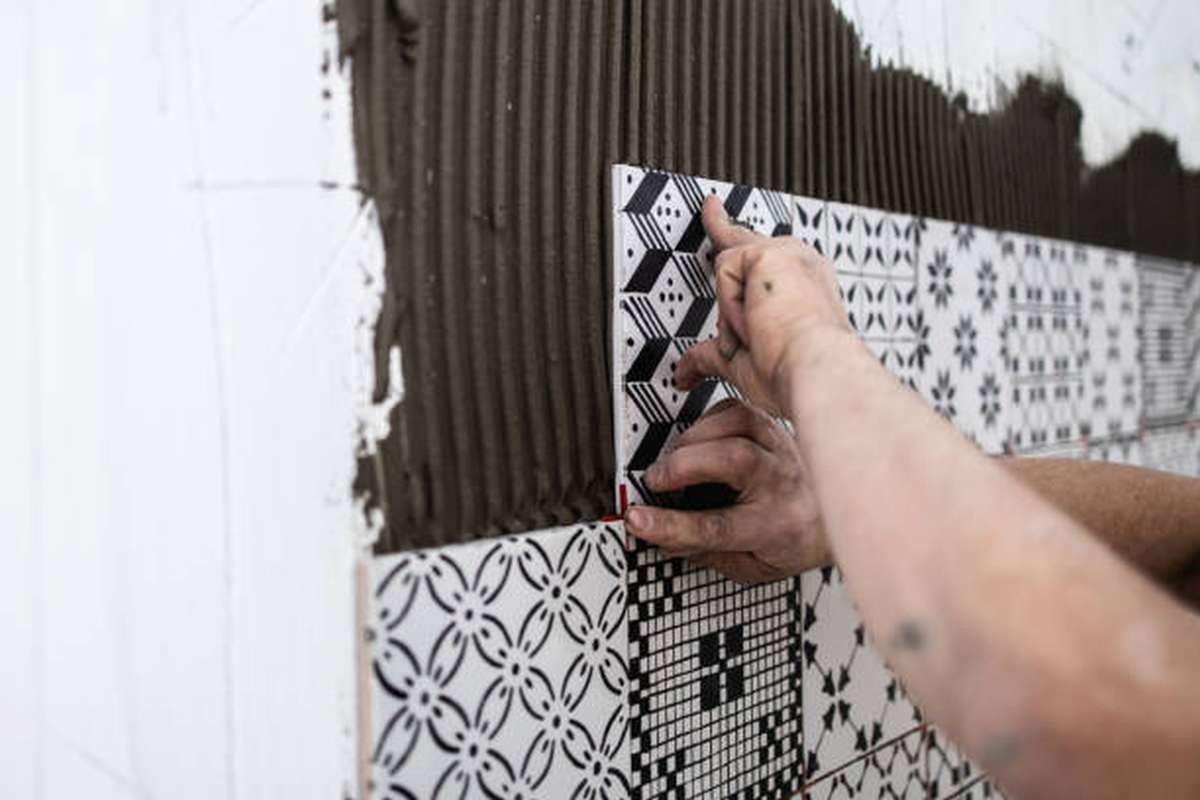
Method 7: Keep Putting Down Tiles
If the tiles didn't come with spacers, continue arranging them in the pattern you like best. Observe the positioning of the spacers. Putting the spacers flush with the tile's surface makes them difficult to remove later. It will be easy to take them out if you instal them using the procedure outlined above. Cutting and arranging the edge tiles can wait until the field tiles are in place.
Advice from the Editor: If your floor plan requires you to use cut tiles, tack a level 1x or 2x batten along the plane on which you'll set your first full tiles if you're not using a coved base. The broken tiles won't be visible anymore.
The tiles won't move or shift as a result of the batten, and the rows will stay put. A coved base or batten and spacers may not be enough to keep the tile in place on the wall while the adhesive sets, so you may need to take additional measures.
Masking tape should be applied to the back of each tile after nails have been driven into the wall at least one-third of the tile's length. Nylon wedges can be used to achieve a perfectly flat surface after the installation of a tiled base, if that is what your plans call for. Now tile the wall, starting at the floor and working your way up.
Method8: Grout Application Mixing And Spreading
After the recommended curing time has passed, double-check the joints to make sure there isn't too much adhesive. Use a utility knife or grout knife to scrape off any adhesive that has dried in the joints and to clean the tile surface.
Pack the grout into the joints with a grout float at a 90-degree angle after making a batch of grout large enough to cover a section. The float should be moved in a back-and-forth motion when filling the joints, and in a diagonal motion when cleaning up the excess.
Method 9: Remove Excess With A Cloth
When the grout has dried to the point where it can't be sponged away, you should scrape off the excess with a float held almost perpendicular to the surface. After scrubbing the area with a wet sponge and smoothing out the joints, a second cleaning with fresh water and a fresh sponge is in order. In the event of haze, a clean rag can be used to remove it. You may need to apply more pressure when wiping in order to remove the haze.
In order to circumvent a window, how do I?
Window placement complicates design. If at all possible, arrange the pattern so that a full tile goes around the edge of the window and partial tiles go along the wall's edges. You shouldn't have too much trouble finding this sweet spot if you centre the window and cover the surface evenly with tiles, or if you leave at least half a tile in the corners.
If the perfectly balanced plan doesn't work, experimenting with different grout lines or adding decorative tile may yield better results. Tiles may need to be trimmed around the window's perimeter in order to achieve visual harmony. After the window tiles are in place to mark the grout lines for the wall field tile, tile the remaining back wall, starting at the bottom and working your way up.
Use of Lugged Tiles in Construction?
Lugged tiles allow for clean, even spacing between wall installations. They are pre-aligned with little bisque lugs that are raised on the edges, so you won't need any extra spacers.
Tiles with lugs cannot have their grout joints reduced further than they already are, as the lugs are an integral part of the tile. When you first purchase the tile, measure it to get an accurate idea of how much square footage it will cover.
Solutions for Avoiding Plugs
The thickness of the completed surface will exceed the borders of electrical outlet boxes unless the wall surface has been removed. This holds true even if the wall covering has been taken down. Because of this, the receptacle screws were too short to provide sufficient stability.
In order to fix this, you can either use longer screws or have the box extended, depending on whether or not this is required by your local building codes. Firstly, the circuit's power supply must be disconnected. The next step is to take out the receptacle screws and the cover plate.
So that you can get a screw that is half an inch longer, you should take one of the screws with you to the hardware store. In order to get the container out of the way, you can push it into the box.
You'll need to trim the tiles down to fit snugly around the container. Cut V-shaped notches into the bottom and top of the box with tile nippers; make sure the notches line up with the tabs and screw holes.
Apply glue to within a quarter of an inch of the box's edge, and then set the tile in place. Once the mortar has set, you can take the receptacle out of the box and fasten it in place using the longer screws and the notches.
How To Turn A Corner?
Especially if they are not plumb, outside corners can be a source of frustration. However, if a thin-set is used to skim coat the wall, any imperfections in the wall's plumbness will be hidden. The next step is to overlap the full tiles on the opposite wall with the bullnose or edge tiles. Grout cleaning can help disguise a slightly out-of-square wall.
The Best Ways to Tile a Wall in Your House
Installation of wall tile requires adherence to a certain set of rules that might have disastrous consequences if ignored. The perpetrator must spend the remainder of his or her life staring at the tile on the wall that was installed upside down. The project will go more smoothly, be less frustrating, and cost significantly less if you adhere to these tips for installing wall tiles.
Wall Tile Basics And Warning Signs
When arranging a room's tiles, remember that floor tiles on the horizontal are less noticeable than tiles on the vertical. Sometimes you can't even see the floor tiles because they're hidden under desks, carpets, or other furniture. Tiles on the walls are, however, almost always obvious.
If you're tiling a wall, gravity is your worst enemy. Vertical tiles have some wiggle room before they are securely bonded in place. Separators between tiles, tile spacers are commonly composed of plastic. Easy removal of the spacers is possible after the thin bonding set has had enough time to cure.
Ceramic wall tile can either bring about a state of artistic harmony when placed in relation to doors, windows, walls and other reference points, or a state of chaotic discord. Putting tile on a blank wall is easier than you might think because you only need to think about the tile. However, you'll need to figure out how to incorporate additional geometric shapes into the design as they are introduced.
Batten board prevents tile slipping
In addition to tile spacers, you can also use a batten board to counteract gravity's pull. With the aid of a batten board, you may begin installing the first row of tiles. A batten board is typically a one-by-four or a two-by-four board that is directly screwed into the wall. The batten board needs to be flat and level.
The batten board shouldn't be on the floor at the outset. Instead, make the height of the board equal to around three quarters of the height of the tiles. Therefore, the bottom of the batten board should be raised up by 3 inches from the ground if you're using 4 by 4 inch tiles.
Create a pyramid with the tiles.
There's a bit of a conundrum now that the first tile has been laid in the bottom row: where do we go from here? Do you start with the highest column and work your way down, stacking the tiles vertically? Do you alternate between working on multiple rows at once or just one? The best way is to create a draped pyramid using your wall tiles.
- Make a pyramid out of the first four tiles by placing three at the base and one at the top.
- The next row is created by draping back and forth over and around the pyramid.
- Either the right or the left side can be used as the starting point for the first drape, which is then pulled up, over, and down the other side.
- The direction you face during your second drape is important.
- Move back and forth between the two sides, alternating.
Check level floor and plumb walls
Square areas are ideal for tiling because of the symmetry that results. Use a bubble level and a straight board that is either six or eight feet in length to ensure that the walls and the floor are plumb (vertical) and level. They are likely not going to be square and plumb.
A tile installation will show any deviation from plumb or level of more than half an inch over a distance of 8 feet. However, if you proceed to the following step, the issue will be resolved. If the gap is more than half an inch, you will need to modify the wall or floor. Baseboards and trim can be added to cover up structural problems.
Don't settle with half-width tiles.
Slivers are pieces of tile that are narrower than half a full tile. A non-vertical wall can be easily identified by the presence of tile slivers along the field's border. Resolving this issue is as simple as rearranging the tiles so that no slivers are wasted. Also, make sure the tiles are evenly spaced. If a row is missing a tile, it should be placed to the far left or right of the row. Additionally, each half tile in a row should have the same width.
Make Sure To Cut The Tiles While They Are Wet
If you want a tiled surface that is free of dust and debris, use a wet tile saw rather than a snap tile cutter. However, when using baseboards or shoe moulding to cover the tile's uneven edges, snap tile cutters perform brilliantly.
However, this luxury is not afforded by wall tile due to the glaring visibility of its edges. For this reason, it is advisable to either purchase or rent a wet tile saw in order to get clean, straight cuts while slicing tiles.
Conclusion
It's easy to be intimidated by the prospect of tiling a wall, but with the right approach and tools, you can get the job done in no time. There is a wide range of tile sizes available, each with its own unique pattern and finish. For the average homeowner, tiling a wall is a weekend-long project they can do themselves. The time required to tile a wall increases in proportion to the area of the wall that must be tiled. Preparing and installing tile typically takes between 20 and 50 minutes per square yard.
It is recommended to degloss the paint regardless of whether or not there are wall coverings. Check for high spots, depressions, and other imperfections that will prevent the tile from fitting correctly by using a 4-foot-long level and a section of wall. When grout has dried and can no longer be sponged away, remove any excess by scraping it off with a float held at a perpendicular angle to the surface. After using a damp sponge to scrub the area and buff out the seams, a second cleaning with clean water and a clean sponge is in order. Cutting the tiles to size so they fit in and around the container is a must.
When grout is clean, even a slightly crooked wall can pass for square. A thin-set skim coat can conceal the wall's lack of plumbness. The first row of tiles can be set in place with the help of a batten board. Because of the inherent symmetry of a square area, it is particularly well-suited for tiling. If you want a level floor and ceiling, you need to make sure the walls and floor are plumb (vertical) and level.
Tile slivers are fragments that are even narrower than a half tile. Slivers of broken tile along the wall's edge are a telltale sign that it is not a vertical surface. If a tile is needed to complete a row, it should go at the end of the row, either to the left or right.
Content Summary
- When you want to tile a wall, it can be difficult to know where to begin.
- Even though tiling a wall can look like a complicated project at first, it's actually quite easy with the right preparation and tools.
- We have compiled some helpful suggestions that should make it easier for you to choose the tile that is best for your home and the project that you are working on.
- You Must Determine How Many Tiles Will Be Needed.
- Before purchasing any wall tiles, you should determine the total area that needs to be covered.
- After you've checked your numbers twice, you can place your tile order.
- Making sure your pattern is perfectly symmetrical is now a lot less of a pain.
- In addition, it states that the half-tiles used at the end of each row must be the same size.
- It's much easier to manage layout lines if they're drawn on the walls instead of the floor.
- You can use the level mounted perpendicular to the horizontal and vertical planes to draw lines that intersect in the middle of the bubble in the glass.
- If you want to use this set of tiles, you'll need to resort to tape, spacers, or nails to keep them in place.
- Tiling a wall and floor at the same time requires you to start with the floor so that the grout joints on the wall will match the pattern on the floor.
- You can begin tiling the wall above the cove after the base has been installed.
- Tiling the walls around you? Start at the back.
- The length of time it takes to tile a wall depends on how much wall space you need to cover.
- Preparing and installing tile typically takes between 20 and 50 minutes per square yard.
- If there are any structural issues, fix them first.
- Before beginning this DIY project, you should double-check your level-reading abilities, trowel technique, tile-laying abilities, and grouting abilities.
- Before you begin tiling, check to see if the area is dry.
- Assemble the backerboard and thinset for the third technique.
- If you want to put up backer board, you should measure and mark the ceiling stud centres first.
- To reduce time spent cutting and waste, arrange the backer board pieces in the most efficient way possible.
- Method 4: Incorporate Grids Place a four-foot vertical level over the grout junction two feet from the wall's corner.
- Take a measuring stick or pencil and make sure to get the full length of the room.
- After the horizontal line has been drawn, make a mark on the wall at that height and continue it outward until it's the same length as the tiles you intend to use.
- Press each tile into the mortar using a batten and a quarter turn of the wrist, starting at the bottom and working your way up.
- See where the spacers are placed.
- When spacers are flush with the tile's surface, they are more difficult to remove in the future.
- Cutting and arranging the edge tiles can wait until the field tiles are in place.
- Editorial Recommendation: If you are not installing a coved base and your floor design calls for the use of cut tiles, you should tack a level 1x or 2x batten along the plane on which you will set your first full tiles.
- You may need more than just a coved base or batten and spacers to keep the tile in place on the wall while the adhesive sets.
- When the nails are in the wall at least a third of the tile's length deep, masking tape can be applied to the back.
- Start tiling the wall at floor level and work your way up.
- A utility knife or grout knife can be used to remove dried adhesive from tile joints and clean the tiled area.
- After making a batch of grout large enough to cover a section, pack it into the joints with a grout float at a 90-degree angle.
- Once the grout is too hard to be sponged away, you can remove the excess by holding a float almost perpendicular to the surface and scraping it off.
- After using a damp sponge to scrub the area and buff out the seams, a second cleaning with clean water and a clean sponge is in order.
- The pattern should be arranged so that a complete tile surrounds the window and half-tiles run along the wall, if at all possible.
- If you tile the window's surface evenly, centre it, and leave at least half a tile out of each corner, you should be able to locate this sweet spot with relative ease.
- After the window tiles are set to serve as a guide for the grout lines in the wall field tile, tile the remainder of the back wall, beginning at the floor and working your way up.
- Tiles with a lugged edge make for neat, uniform spacing between wall fixtures.
- Even if the wallpaper has been removed, this remains true.
- You can either use screws of a different length or have the box extended to make up for this, depending on what your area's building codes mandate.
- You can push the container inside the box to hide it out of sight.
- Cutting the tiles to size so they fit in and around the container is a must.
- Tile nippers are used to cut V-shaped notches into the bottom and top of the box, with the tabs and screw holes in mind.
- Set the tile in place after applying glue to within a quarter of an inch of the box's edge.
- Once the mortar has dried, remove the receptacle from the packaging and secure it in place using the longer screws and the notches.
- Techniques for Tiling a Home Wall There is a specific protocol that must be followed when installing wall tile, and if you don't follow it, you could end up with a disastrous result.
- If you follow these suggestions for installing wall tiles, your project will go more smoothly, be less frustrating, and cost significantly less.
- However, the wall tiles are usually visible.
- The first row of tiles can be set in place with the help of a batten board.
- The batten board must be perfectly parallel and flat.
- When you first start out, don't put the batten board on the ground.
- Building a pyramid with the tiles.
- The optimal solution is to arrange your wall tiles in the form of a draped pyramid.
- Place three of the first four tiles at the bottom and one at the top to form a pyramid.
- Wall or floor modifications will be required if the space is more than half an inch.
- Issues with the structure can be hidden by installing baseboards and trim.
- Stop settling for narrow tiles.
- Tile slivers are fragments that are even narrower than a half tile.
- Fragments of tiles along the field's edge indicate a wall that is not vertical.
- Changing the layout of the tiles so that no pieces of tile are wasted will solve the problem.
- Verify that there is consistent spacing between each tile.
- In addition, the width of each half tile in a row must be the same.
- It is imperative that the tiles be cut while still wet. Tiles cut with a wet tile saw, as opposed to a snap tile cutter, leave behind less dust and debris.
- Snap tile cutters aren't the best option when cutting tiles, but they shine when covering the uneven edges with baseboards or shoe moulding.
Frequently Asked Questions About Tiling A Wall
When tiling the wall around a bath, start from the bottom and move towards the top. Cut tiles will be less visible at the top. Also, if you start tiling from the top of the wall, tiles may slip and fall because of the weight. If you don't tile from floor to ceiling, it is easy to end with a full tile.
The line crossing at the room's centre is the starting point of the tile. Lay a row of tiles along a straightedge more than halfway across the room. For consistent joints, use tile spacers. This row determines the size of cut tiles along the walls.
- Step 1: Prepare the wall. Prepare your wall for tiling by ensuring it is clean, dry and free from dust and dirt.
- Step 2: set out your tiles.
- Step 3: Fix the tiles into position.
- Step 4: Cut the tiles.
- Step 5: grouting.
- Step 6: finishing up.
A 'straight pattern' will automatically make your space seem more modern, whereas an 'offset pattern' will make your space more traditional.
By starting in the centre of a wall or a focal point, you can better manage tile placement for a cleaner and more professional look.