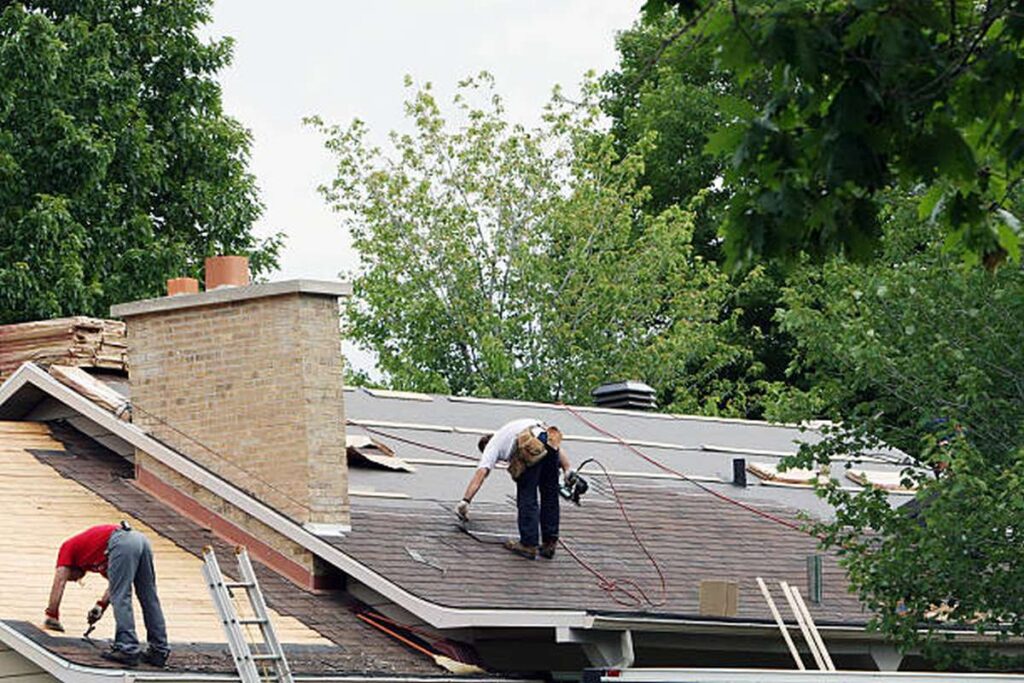
If the roof decking is broken, it must be repaired immediately since it can collapse at any time, especially if it is constantly exposed to adverse weather conditions such as strong winds and rain. This is one of the first signs that your roof decking needs to be fixed if it is already drooping. If you wait too long to address this issue, it will eventually lead to leaks and foundation collapse.
Do not wait until the foundation collapses altogether. Instead, you should take action to resolve the issue before it reaches that point by doing any necessary repairs to restore the roof decking to a functional state. Repairing the roof decking is a straightforward chore that does not require any special construction skills. Here are some pointers for completing roof decking repairs at home on your own.
Things Homeowners Need To Know About Roof Decking
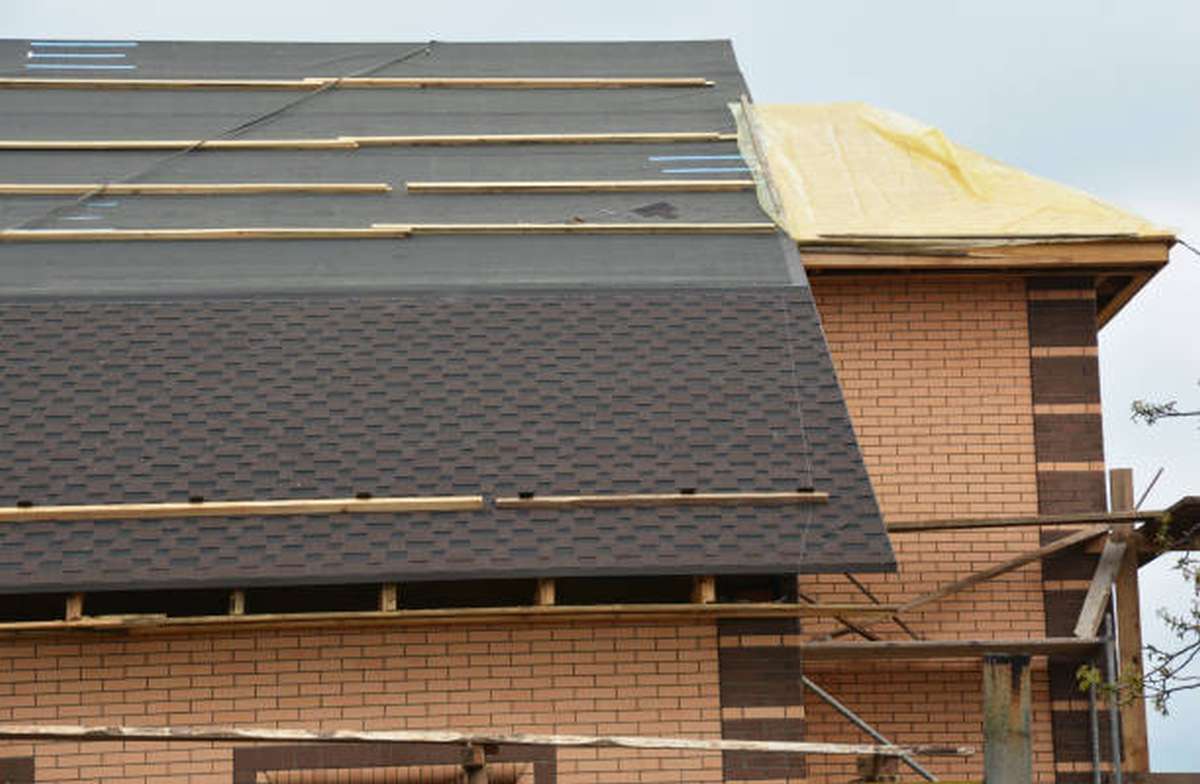
There is a good chance that a plywood deck was laid down before the shingles were affixed to your roof. This plywood, which serves as a foundation for the layers of underlay and the shingles on your roof and connects the roof to the structure of the home, is sometimes referred to as roof sheathing or a roof deck. Its primary function, however, is that of a roof deck. Therefore, despite the fact that it cannot be seen, it plays an extremely significant role in the structure of your home.
Unfortunately, because the roof sheathing is typically not visible, homeowners may not notice damage to their roofs until it is too late. Once you become aware of the issue, it may be too late to avoid costly repairs that will be catastrophic. You can, however, prevent the same thing from happening to your house if you take preventative measures.
Keep reading to find out why it's so important to evaluate the plywood base of your roof, as well as the warning signals that indicate it could be time to replace the plywood.
What Does Roof Decking Do?
Roof decking fulfils a number of critical functions, including but not limited to the following:
- Asphalt shingles are heavier than you might think, with a single shingle weighing in at a whopping 2.5 pounds. Supporting Shingles Asphalt shingles are heavier than you may think. In addition, there are additional layers between the decking and the shingles, such as tar paper or felt. These layers protect the decking from moisture. It all adds up to a significant amount of weight, and decking is what bears all of that weight on a roof.
- Even though plywood decking cannot provide a foolproof barrier against fire, flame retardants are frequently sprayed on the material before it is installed as an additional layer of protection. Talk to your roofing contractor about the company's regulations about this technique, as there is a school of thought that holds that flame retardants reduce the overall performance of the decking.
- Decking helps disperse weight throughout the structure of your home, which can help your roof better withstand falling branches and other forms of harsh weather. Decking also helps protect against the elements. It is better to have as much support available to you as possible because an attack by mother nature could happen at any time.
- less leaks It is inevitable that there will be some water loss. The use of robust plywood decking is an additional line of defence against leaks. Although shingles are largely responsible for preventing water infiltration, they are not the only line of defence.
Why Is Rotted Plywood Decking An Issue?
Plywood that has rotted can lead to a variety of problems. The weight of a roof cannot be supported by rotten plywood in the same manner that it can be supported by healthy wood, nor can it safely hold the nails that are driven into the roof and keep them held fast.
- Wood will rot when it is exposed to moisture, and decaying wood will absorb water even more quickly than new wood would. If there is decaying decking, the problem is probably caused by moisture getting under the shingles. It is only a matter of time before the rotted timber in your ceilings and attic allows water to enter your home if it hasn't already.
- When you attempt to instal shingles on decaying wood, it might cause the roof to shift, which in turn can lead to an increased number of leaks.
Do I Have To Replace Damaged Decking?
If you are getting a new roof, you should have it carefully evaluated by a competent roofing contractor; however, it is possible that you may not necessarily need to replace the plywood decking. If you are getting a new roof, you should have it properly inspected by a certified roofing contractor. When the old shingles have been taken off, it is the time for the inspection to take place.
Although the additional expense of replacing the plywood may be pricey, this will still be a far more cost-effective solution than the problems that will be caused by decaying or leaky sheathing. Therefore, it is in one's best interest to bear the cost at this time in order to save money and prevent damage in the future.
If you are looking at hiring a contractor for your project, make sure that you bring up the subject of replacing the plywood and how much it would cost each plank. Going into your project, you want there to be no surprises.
Attic Moisture And Roof Decking
When there is an abundance of moisture in your attic, the sheathing there might become saturated with water. Because of the higher temperatures that are rising from the attic, the sheathing that covers your roof could become a breeding ground for mould and mildew.
Your roofing contractor needs to do an attic inspection in order to analyse the roof ventilation and identify any potential problems that could be caused by an excessive amount of moisture content.
Your home is safeguarded by its roof, which in turn is safeguarded by its plywood sheathing. Be sure to hire a roofer who is familiar with all of the most effective processes and procedures for checking, removing, and re-applying roof sheathing before beginning the next phase of your roofing project. Your house will be grateful to you.
Tools And Materials Needed:
- Decking constructed out of wood planks
- Hand saw or power saw
- Tape measure
- Nail
- Hammer or nail gun
Assess The Damage To Your Roof Decking
First, you need to determine the extent of the damage to the roof decking so that you can move on with any repairs. Next, you will need to go up into the attic and look over the decking and the rafters to see if there are any cracks or bad posts that need to be fixed.
Damage to the roof decking can be caused by a wide variety of factors, including an infestation of termites or damage caused by water. In order to make the necessary repairs, you must first conduct an accurate analysis of what caused the damage. For instance, if the damage was brought on by an infestation of termites, the first step in fixing the problem would be to treat the entire house for termites before moving on to the next step in the process.
Remove The Damaged Roof Decking
Before even thinking about removing the damaged roof decking, you need to make sure that the region is properly and firmly propped up. Only then should you even consider removing the damaged roof decking.
Because of this, the entire structure is kept from falling down. After the location has been stabilised with the necessary amount of propping, use a hammer to pry loose the damaged roof decking. Carefully pry the damaged roof decking away from the underside of the roof so that you do not cause damage to the other components of the roof's underside.
Replace The Damaged Roof Decking
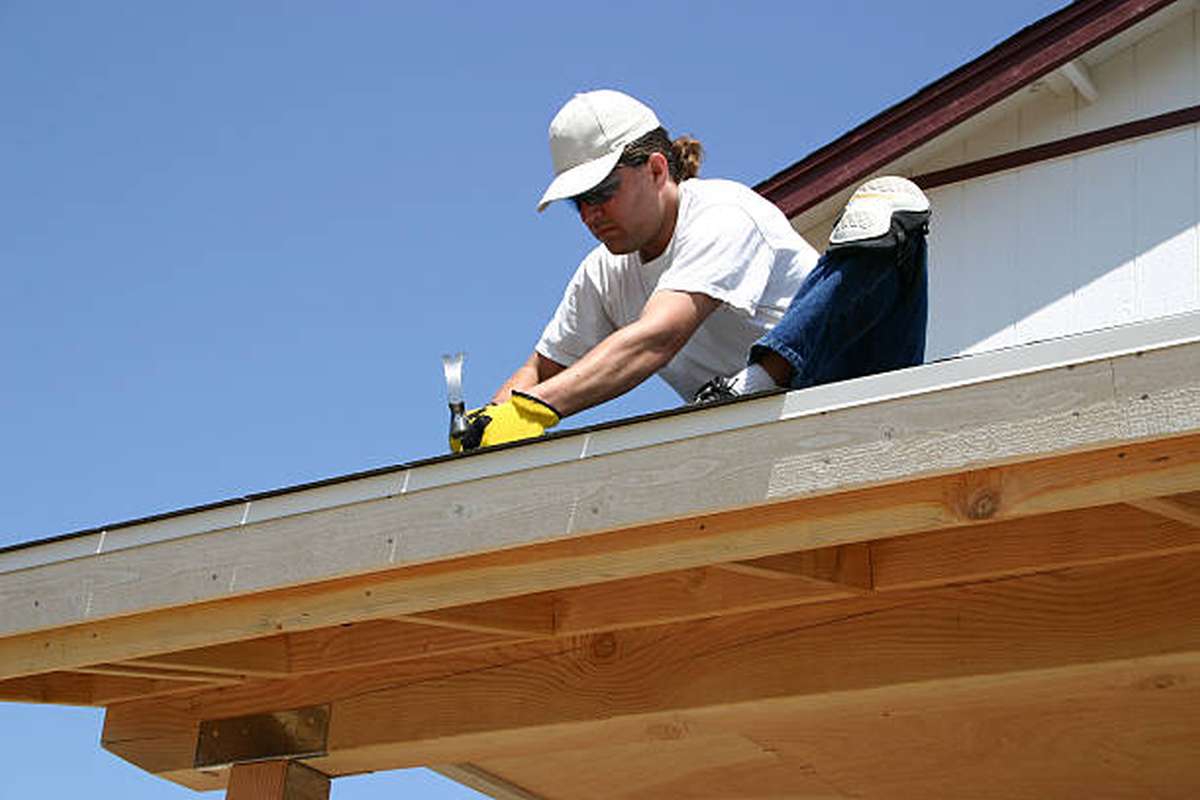
After the damaged roof decking has been removed, you will need to instal new roof decking in its place. This must be done as soon as possible.
In order to accomplish this, you must ensure that the wooden planks you will be using have been pre-measured. You may then either use a nail gun to swiftly drive nails into the roof decking to replace the damaged roof decking, or you can use a hammer to drive nails into the wooden boards to attach the roof decking to the roof. Either method will allow you to repair the damaged roof decking.
How To Fix Rotten Wood On A Roof
Whether you are rebuilding your complete roof or just repairing a small piece, it is essential to fix any decaying areas of the roof decking or sheathing in order to create a solid structure that is watertight.
Roof decking, which is secured to the trusses of the roof using nails, not only serves to hold roofing materials such as felt paper and shingles, but it also helps to protect the structure of your home from the wind and makes it more rigid. In addition, by exchanging damaged roof boards with new ones, you may assist safeguard the structural integrity of your property and protect it from water damage.
Locate Dry Rot Roof Damage
If you are merely going to replace the section of the roof that is damaged, you need to determine the scope of the damage as well as the specific placement of it. Check to see if there are any cracks or holes in the interior of your home.
When it has been raining, check the ceilings, attics, and crawl spaces of the home for discoloured drywall or wood. In order to identify the location of water stains on the underside of the roof decking, it may be required to remove the drywall and insulation. After the shingles and underlayment have been removed from the roof during a re-roofing project, the decking should be inspected. Use a hammer to test the integrity of the water-stained pieces by tapping on them.
Remove The Shingles
Remove the shingles that are located surrounding the affected region. Each shingle is fastened with eight nails; four are driven through the middle of the shingle immediately above the tabs, and four are driven through the shingle directly above it.
To remove the felt paper from behind the shingles, pull it up. As you make your way up to the roof, expose all of the wood that has decayed. By carefully removing the second set of four nails, you can maintain the integrity of the subsequent course of shingles. Whenever you are replacing the roof, it is important that you begin at the highest point of the structure and work your way down the slope, prying up the shingles with a pitchfork as you go.
Remove The Rotten Wood
When you are rebuilding the roof decking, the first step is to get rid of the old portion that has rotted away. It is possible that you may need to cut a little bit further in order to expose enough of the trusses and ensure that all of the bad wood is removed. Your circular saw's depth setting should be adjusted to match the thickness of the roof decking.
Remove the injured tissue completely. Use a claw hammer or a pry bar to pry out the nails, and then remove the section that was cut off.
You will need to uncover at least two trusses in order to secure the replacement section with the replacement wood by nailing it to the exposed trusses. Keep the section that was taken out in one piece if at all feasible so that you can simply measure and cut the replacement piece.
Replace The Roof Decking
Choose a thickness of plywood or oriented strand board that corresponds to the profile of the wood that is being replaced.
Take some measurements of the section that was cut out, assuming you were able to keep it in one piece. If this is not the case, you will need to climb up onto the roof and take measurements of the opening so that you can cut the replacement piece to be an exact match.
Cut a piece of the replacement material to the exact dimensions of the aperture after it has been oriented so that the grain of the material runs in a direction that is perpendicular to the roof trusses. Insert the section that has been cut into the opening, and then secure it to the trusses using nails that are spaced every 4 to 6 inches.
Replace Underlayment And Shingles
After you have fixed the hole in the plywood that makes up the roof, you will need to caulk the seams and then recover the roof.
Bitumen tape should be used to cover any seams that exist between the old and new decking. When applying felt paper to the roof, make sure to overlap it with the paper that is already there to ensure complete covering. Attach it to the roof decking with roofing staples or nails that have plastic caps over the heads.
You are now prepared to instal new shingles in place of the ones you removed. To instal new shingles, slide them beneath the top course without disturbing it. Nail it first through the centre of the shingle that is directly above it, then through the centre of the shingle that is directly above that one. Laying shingles in the previously determined pattern should be continued until the entire repair has been covered.
By replacing rotten wood on your roof, you are helping to ensure that it is watertight, which will avoid leaks and additional damage. Your roofing will have a longer lifespan as a result of the work you undertake, regardless of whether you replace the complete roof or just a piece of it.
How To Fix A Hole In The Roof
A hole in the roof is an invitation to disaster, which can take many forms, including water damage to the walls and flooring as well as animal infestation. The effectiveness of temporary repairs is limited to the time before it starts to rain. Any homeowner should put the maintenance and repair of their roof at the top of their to-do list. Repairs to this house can be made without the assistance of a roofing contractor if the handyman or roofer in the household is comfortable working with basic carpentry abilities.
Step 1
Put on safety eyewear, and make sure your work shoes have rubber soles. To get access to the roof, position the third rung of an extension ladder so that it is flush against the eave. Wear a tool belt to transport your equipment.
Step 2
Remove the shingles that are covering the hole. To remove the nails that are keeping the damaged shingles in place, slide a pry bar under the shingles that are located above the affected area. To assist in the removal of all nails from the shingles that cover the hole, hammer claws can be used.
Step 3
In the area surrounding the hole, prepare the plywood or sheathing. It is possible that the wood can be repaired if the hole is a cutting for a vent. On the other hand, a hole created by damage to a tree will be of an unusual shape and fragmented. Remove any splintered wood that you find by using a reciprocating saw to cut a square or rectangle around the hole in the wood. If the space between the rafters is large enough, you can cut the plywood in half between them.
Step 4
Wood plywood of the same thickness as the damaged wood should be used to patch the wood. Put a 2-by-4 brace that is three times the width of the opening underneath a hole that is only a few inches in diameter. Pulling it up through the hole will allow you to secure it against the inside of the plywood while you continue to drive deck screws through the roof and into the bracing.
Make a hole in the plywood in the precise location where you want the circular shape to go by using a jigsaw. When you need to repair big areas, use 10-penny nails to attach 2-by-4 braces inside the existing rafters. Put in a fresh piece of plywood that has been cut to the precise dimensions of the old one. Use nails with an 8-penny head to attach the plywood sheet section to the bracing. On top of any roof patch, apply roofing tar to the wooden borders, and then screw the bracing screws into place.
Step 5
On top of the missing shingles, cover them with tar paper or roofing felt. To cover the repair on the shingle roof, tuck the top of the paper under the flaps of the shingles. In the event that two layers of tar paper are required to completely cover the area, position the upper sheet so that it is 2 inches higher than the lower sheet.
Nail tar paper onto the surface using roofing nails every 18 inches around the perimeter, and do the same for any sheets that overlap.
Step 6
Over the portion that needed repair, lay down new shingles. First, remove the cover strip from the adhesive, and then begin installing the tiles in the bottom row. To ensure that each shingle is well-anchored, drive three roofing nails along the horizontal centre line. Protect the lowest row by covering it with the flaps from the row above it.
To further prevent water damage, use a dab of roofing tar on top of each newly hammered nail after you have tucked the straight edges of the uppermost row under the remaining shingles and nailed them under the flaps.
When the ends of your rafters on your gable roof start to rot, here's what you need to know.
Dry rot can quickly spread to the roof sheathing or the rafters in the attic, so it's important to address it as soon as possible if it's discovered on the ends of your gable rafters. Hiring a contractor to remove and replace the rotting rafters and sheathing and treat the dry rot is necessary if there is a considerable quantity of dry rot.
A handy homeowner with basic carpentry skills and the right tools might, however, replace several rotten rafter tails on their own. For this activity, you will need to use a temporary scaffold, which may be hired from a hardware store or somewhere similar.
Preparation
Set up the temporary scaffolding close to the grounded rafter's end. Make sure the scaffolding can be easily climbed to reach the overhang and the roof.
Remove shingles from the roof between the edge and the overhang's upper line using a nail bar (16 inches in length) and a hammer for extracting roofing nails. Start by cutting a length of roofing paper from the roll using a utility knife. Pulling straight out the nails will free the overhang sheathing from the deteriorating rafter tail.
It will be essential to equip a reciprocating saw with a metal-cutting blade and arrange the scaffolding so that it can reach the underside of the overhang. Trim the nails that hold the fascia board to the rafter by placing the blade into the joint between the exposed end of the rafter tail and the fascia board and slicing through it.
Replace the saw's blade with one made specifically for chopping wood. Please start your renovations at the junction of the rafter tail and the wall. At that point, you can get rid of the rotten rafter tail by cutting it vertically up to the underside of the sheathing.
Repairing the End of an Awning
The bottom of the sheathing along the line where the rafter was removed should be flush with the handle of an adjustable square. The square's blade should be aligned with the vertical cut along the rafter's wall side.
Using the square as a measuring stick, jot down the angle of the roof pitch on one end of a framing timber that is the same size as the rafters, such as a two-by-six or larger. We slashed the angle using a circular saw.
When on a scaffold, measure up from the top end of the newly cut rafter to where the fascia meets the roof sheathing. It should be the same as the distance between the two places. In order to frame properly, this measurement must be transmitted to the lumber. The square can be used to make a mark at the roof pitch angle before the rafter tail is cut.
Get ready a battery-operated drill with a screwdriver bit. A rafter tail should be positioned such that it is flush against the underside of the sheathing, between the rafter's severed end and the fascia. Every four inches, you should drill through the sheathing from above and into the top edge of the rafter tail. The deck screws should have a diameter of two inches.
You can use a screw to fasten the rafter tail's top end to the rafter's cut end if you operate from below. The screw can be placed through the rafter tail's lower edge to accomplish this.
The fascia board should be fastened to the rafter tail using galvanised, 16d box nails. Nailing the fascia face to the rafter tail requires at least three separate nail penetrations. Each nail needs to be placed at the same distance from the next.
Simply repeat the aforementioned procedures to replace any other rotten rafter tails. Finally, the exposed sections of sheathing are set up to receive roofing paper and shingles that are color-matched to the rest of the roof.
Conclusion
If the roof decking is broken, it must be repaired immediately since it can collapse at any time. There is a good chance that a plywood deck was laid down before the shingles were affixed to your roof. Roof decking fulfils a number of critical functions, including but not limited to the following. Decking helps disperse weight throughout the structure of your home. There are additional layers between the decking and the shingles, such as tar paper or felt.
Decking also helps protect against the elements and is an additional line of defence against water loss. If you are getting a new roof, you should have it carefully evaluated by a competent roofing contractor. It is possible that you may not necessarily need to replace the plywood decking. The additional expense of replacing plywood may be pricey, but this will still be a cost-effective solution. Damage to the roof decking can be caused by a wide variety of factors, including an infestation of termites or damage caused by water.
The first step in fixing the problem would be to treat the entire house for termites before moving on to the next step in the process. When it has been raining, check the ceilings, attics, and crawl spaces of the home for discoloured drywall or wood. In order to identify the location of water stains on the underside of the roof decking, it may be required to remove the drywall and insulation. Take some measurements of the section that was cut out, assuming you were able to keep it in one piece. By replacing rotten wood on your roof, you are helping to ensure that it is watertight, which will avoid leaks and damage.
Your roofing will have a longer lifespan as a result, regardless of whether you replace the complete roof or just a piece of it. Repairs to a hole in the roof can be made without the assistance of a roofing contractor. The effectiveness of temporary repairs is limited to the time before it starts to rain. Any homeowner should put maintenance and repair of their roof at the top of their to-do list. Dry rot can quickly spread to the roof sheathing or the rafters in the attic.
Hiring a contractor to remove and replace the rotting rafters and sheathing is necessary if there is a large quantity of dry rot. Repairing the End of an Awning is a fairly simple task. A handy homeowner with basic carpentry skills might, however, replace several rotten rafter tails on their own. For this, you will need to use a temporary scaffold, which may be hired from a hardware store. Using a square as a measuring stick, jot down the angle of the roof pitch on one end of a framing timber that is the same size as the rafters. A battery-operated drill with a screwdriver bit should be used to cut the rafter tail.
Content Summary
- This is one of the first signs that your roof decking needs to be fixed if it is already drooping.
- Do not wait until the foundation collapses altogether.
- Instead, you should take action to resolve the issue before it reaches that point by doing any necessary repairs to restore the roof decking to a functional state.
- Repairing the roof decking is a straightforward chore that does not require any special construction skills.
- Here are some pointers for completing roof decking repairs at home on your own.
- This plywood, which serves as a foundation for the layers of underlay and the shingles on your roof and connects the roof to the structure of the home, is sometimes referred to as roof sheathing or a roof deck.
- Unfortunately, because the roof sheathing is typically not visible, homeowners may not notice damage to their roofs until it is too late.
- Once you become aware of the issue, it may be too late to avoid costly repairs that will be catastrophic.
- In addition, there are additional layers between the decking and the shingles, such as tar paper or felt.
- These layers protect the decking from moisture.
- The use of robust plywood decking is an additional line of defence against leaks.
- If you are getting a new roof, you should have it carefully evaluated by a competent roofing contractor; however, it is possible that you may not necessarily need to replace the plywood decking.
- If you are getting a new roof, you should have it properly inspected by a certified roofing contractor.
- In order to make the necessary repairs, you must first conduct an accurate analysis of what caused the damage.
- Replace The Damaged Roof DeckingAfter the damaged roof decking has been removed, you will need to instal new roof decking in its place.
- Either method will allow you to repair the damaged roof decking.
- If you are merely going to replace the section of the roof that is damaged, you need to determine the scope of the damage as well as the specific placement of it.
- Check to see if there are any cracks or holes in the interior of your home.
- In order to identify the location of water stains on the underside of the roof decking, it may be required to remove the drywall and insulation.
- After the shingles and underlayment have been removed from the roof during a re-roofing project, the decking should be inspected.
- Remove The ShinglesRemove the shingles that are located surrounding the affected region.
- As you make your way up to the roof, expose all of the wood that has decayed.
- Remove The Rotten WoodWhen you are rebuilding the roof decking, the first step is to get rid of the old portion that has rotted away.
- Your circular saw's depth setting should be adjusted to match the thickness of the roof decking.
- Remove the injured tissue completely.
- You will need to uncover at least two trusses in order to secure the replacement section with the replacement wood by nailing it to the exposed trusses.
- Insert the section that has been cut into the opening, and then secure it to the trusses using nails that are spaced every 4 to 6 inches.
- Replace Underlayment And ShinglesAfter you have fixed the hole in the plywood that makes up the roof, you will need to caulk the seams and then recover the roof.
- Attach it to the roof decking with roofing staples or nails that have plastic caps over the heads.
- By replacing rotten wood on your roof, you are helping to ensure that it is watertight, which will avoid leaks and additional damage.
- The effectiveness of temporary repairs is limited to the time before it starts to rain.
- Any homeowner should put the maintenance and repair of their roof at the top of their to-do list.
- Repairs to this house can be made without the assistance of a roofing contractor if the handyman or roofer in the household is comfortable working with basic carpentry abilities.
- Step 2Remove the shingles that are covering the hole.
- Step 3In the area surrounding the hole, prepare the plywood or sheathing.
- Remove any splintered wood that you find by using a reciprocating saw to cut a square or rectangle around the hole in the wood.
- Step 4Wood plywood of the same thickness as the damaged wood should be used to patch the wood.
- Use nails with an 8-penny head to attach the plywood sheet section to the bracing.
- Step 5On top of the missing shingles, cover them with tar paper or roofing felt.
- To cover the repair on the shingle roof, tuck the top of the paper under the flaps of the shingles.
- When the ends of your rafters on your gable roof start to rot, here's what you need to know.
- Dry rot can quickly spread to the roof sheathing or the rafters in the attic, so it's important to address it as soon as possible if it's discovered on the ends of your gable rafters.
- Hiring a contractor to remove and replace the rotting rafters and sheathing and treat the dry rot is necessary if there is a considerable quantity of dry rot.
- PreparationSet up the temporary scaffolding close to the grounded rafter's end.
- Make sure the scaffolding can be easily climbed to reach the overhang and the roof.
- Remove shingles from the roof between the edge and the overhang's upper line using a nail bar (16 inches in length) and a hammer for extracting roofing nails.
- Pulling straight out the nails will free the overhang sheathing from the deteriorating rafter tail.
- It will be essential to equip a reciprocating saw with a metal-cutting blade and arrange the scaffolding so that it can reach the underside of the overhang.
- Trim the nails that hold the fascia board to the rafter by placing the blade into the joint between the exposed end of the rafter tail and the fascia board and slicing through it.
- Please start your renovations at the junction of the rafter tail and the wall.
- At that point, you can get rid of the rotten rafter tail by cutting it vertically up to the underside of the sheathing.
- The square's blade should be aligned with the vertical cut along the rafter's wall side.
- Using the square as a measuring stick, jot down the angle of the roof pitch on one end of a framing timber that is the same size as the rafters, such as a two-by-six or larger.
- When on a scaffold, measure up from the top end of the newly cut rafter to where the fascia meets the roof sheathing.
- The square can be used to make a mark at the roof pitch angle before the rafter tail is cut.
- A rafter tail should be positioned such that it is flush against the underside of the sheathing, between the rafter's severed end and the fascia.
- Every four inches, you should drill through the sheathing from above and into the top edge of the rafter tail.
- The fascia board should be fastened to the rafter tail using galvanised, 16d box nails.
- Nailing the fascia face to the rafter tail requires at least three separate nail penetrations.
Frequently Asked Questions About Roof Decking
Oriented strand board (OSB) – OSB is the most common type of material used for roof decking. It's durable and readily available and has relatively low costs. OSB is made of interwoven strands of wood bonded with adhesive.
Most roofs are engineered to last about 20 years, although the actual lifespan varies depending on the materials, quality of the installation, and the local climate. Another thing that can lead to a damaged roof deck is excessive interior moisture caused by insufficient venting in the attic.
Signs of Damaged Roof Decking
- Bulging paint.
- Stains on the ceiling.
- Water is leaking from the attic.
- Sagging ceiling.
- Sagging roofline.
Roof decking is available in 4 by 8-foot grid-marked sheets. It would be best to install them perpendicular to the frame and never attach roof decking with nails or screws. The decking should be at least 19/32-inch thick. A normal roof decking has a thickness of between ⅜ inches to ¾ inches.
Roof decking, also called sheathing, is the foundation of your roofing system that connects the roof to your house. It's the base that lays on top of the structural trusses—the “bones” of your attic—to cover the rafters and support the weight of the roofing shingles.