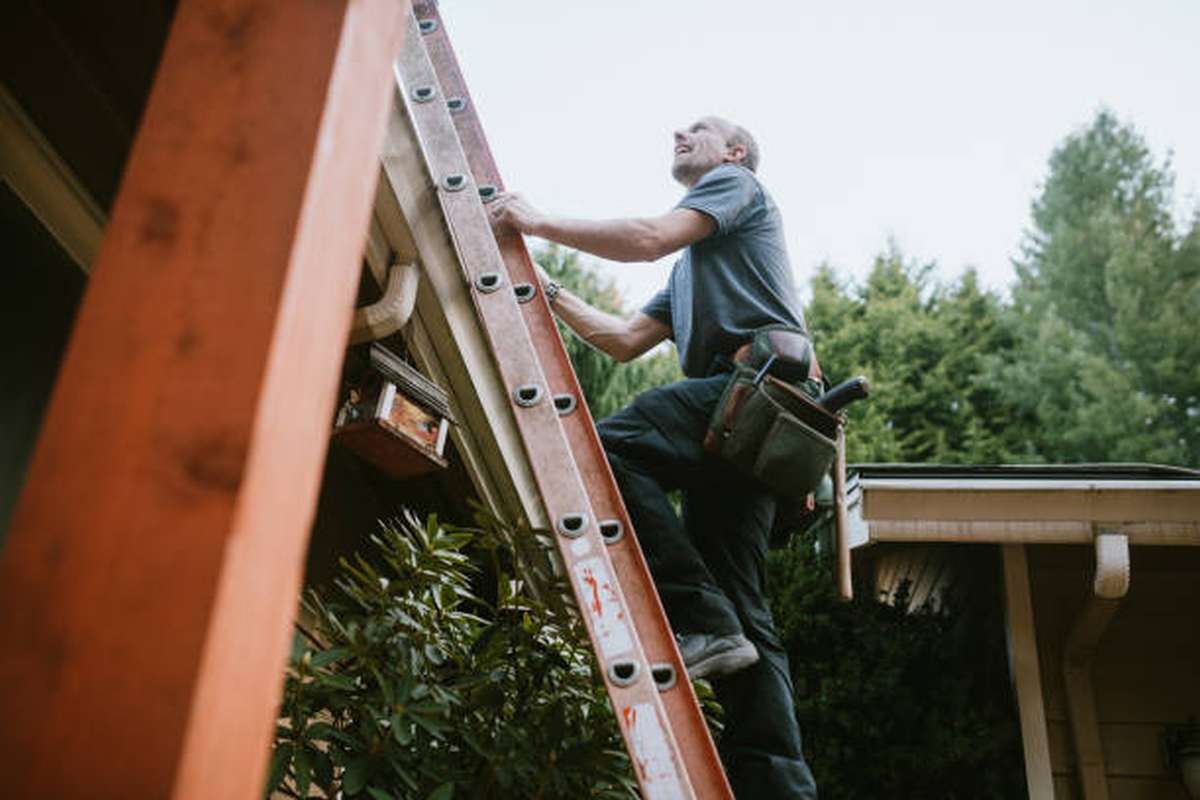
The truth is that with the help of the countless DIY websites, anyone can easily replace their roof.
Residential roofing replacements typically take two days to complete; the first day is spent removing the old roof, and the second day is spent installing the new roof. Depending on the size of the roof, installation may take an additional day or two.
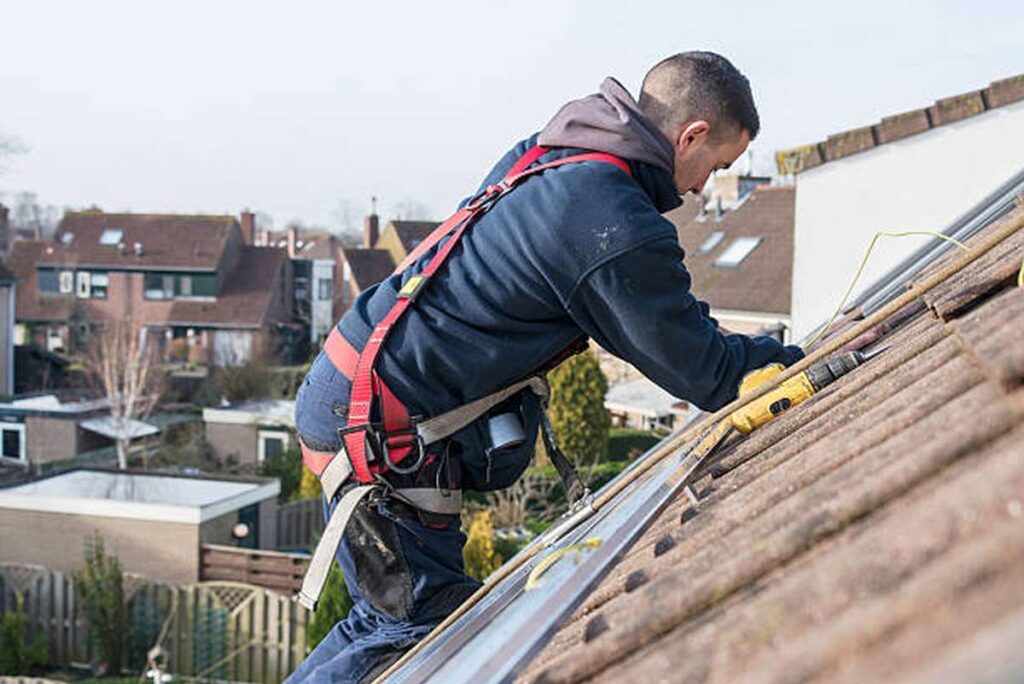
Should You Replace Your Roof Yourself?
However, you must consider yourself whether you want to and whether you should do it yourself. It is generally not advised for a homeowner to attempt to repair or replace their roof. On the other hand, if you don't know what you're doing, you could cause serious damage to your roof and, more significantly, yourself.
DIY websites typically depict fairly simple roofs, and if you are handy and follow all safety guidelines, you may be able to roof your own home. However, it is not as straightforward as it appears. Please do not attempt this if you have a steep roof or a roof with particular flashing concerns.
You might perform a good job on a tiny, straightforward house with only a few penetrations, but those are uncommon. Also, if you only need to replace one or two shingles, you might be able to do it yourself. But you should also consider why one or two shingles are missing in the first place and whether there is more extensive damage somewhere else. If there is a leak, you must hire a professional.
Because t-lock shingles are no longer available, you will need to replace the entire roof, although your insurance should cover the costs. Architectural shingles are joined together by a seal, which must be replaced if it is broken.
Newer homes are more energy-efficient than ever before, which has created new problems. For example, you should think about ventilation because poor ventilation is one of the leading reasons of roof collapse.
It can cause shingles to deteriorate, deck decay, and even mildew. Inadequate ventilation might even cause moisture to accumulate in your attic. Though you do not correctly flash chimneys, walls, or valleys, you may cause leaks and damage to your property, even if there are no obvious evidence. When you observe damage to your ceiling, the structural damage may already be substantial.
Safety And Insurance Considerations
Even walking on the roof can damage the shingles if you are unsure of what you are doing. Also, keep in mind that certain insurance companies may not pay the entire claim unless you can demonstrate that you engaged a skilled contractor.
So, while you can repair or replace your roof, we strongly advise against it. There are far too many potential hazards to the roof and to your safety. If you do not take the proper steps, you may end up paying significantly more than you saved by not employing a competent contractor right away.
Advice on Identifying and Repairing a Leaking Roof
There is no prerequisite knowledge or expertise needed to seal leaks. Locating and repairing the most common types of roof leaks is covered in detail. Leaks can be quickly fixed by a trained professional.
Summary of the Roof Leak
Leaks in the roof can be easily identified by the presence of water stains that cover the entire ceiling or run down the walls. Repairing a leak in a roof is normally not too difficult, but finding the source of the leak might take a lot of effort. Here we'll go over some simple methods for locating and fixing the most typical roof leaks. In the Snow Belt, leaks only happen on days when the temperature is above freezing and the sun is shining brightly, which is rarely during the winter. You probably have issues with ice dams.
The process of mending the roof leak is outside the scope of this narrative. A leaky roof needs to be fixed as soon as possible, regardless of whether you consider the leak to be serious or whether you plan to replace your roof in the coming year. Mold development, framing and sheathing deterioration, insulation loss, and ceiling damage are just some of the major issues that can result from even a little water leak.
After almost two years, the flashing leak was discovered thanks to the ceiling stains, and costly repairs were made. Potentially catastrophic damage and costly fixes
What To Do If Your Roof Is Leaking
Finding the cause of a leak requires starting at the top and working your way down. The presence of roof penetrations is the first thing to look for. In most cases, things that are small enough to pass through the roofing material are to blame for the leak. Leaks in open regions covered by continuous shingles are quite unusual, even on older roofs.
Pipes, roof vents, chimneys, dormers, and anything else that projects through the roof are all examples of penetrations. They could be above the leak by a few feet, to the left or right, or everywhere in between.
The easiest way to find the source of a leak is to walk up into the attic with a flashlight and look about for any telltale signs. The initial signs of water damage may include discoloration, spotting, or the growth of mould. However, if you have a vaulted ceiling or limited access, you may need to conduct your search for the culprit from on top of the building's roof (s).
How to Locate Hidden Water Losses
Take a garden hose up to the roof and see if you can find the leak between you and your pal. First, you need to completely soak the floor above the area of the home where the leak was found. Before using the hose, it should be cut into manageable parts. To properly water a chimney, one should start at the bottom and work one's way up the downward facing side. Tell your helpers to stay inside until someone notices the trickle.
Leaving the hose in one spot for a few minutes will water a larger section of the roof effectively. Your assistant should be instructed to immediately inform you of any ceiling leaks. Most leaks occur around points of entry and exit, so you'll be near the action.
Please wait up to an hour for this to complete, and move the hose only if absolutely required. Tonight, after work, you and your aide should get together. Don't give up if the sound of running water isn't leading you directly to the leak's origin. It's time to start removing shingles from the area that's been flagged as a possible entry point.
Once you've taken them out of the equation, you'll have concrete evidence that the leak exists, and you'll know exactly where it's coming from. Water stains, rotten wood, and discoloured felt paper are all signs of a leaky roof that can be found both beneath and all around the structure.
Repair For A Minor Water Seepage
Finding the source of a roof leak might be difficult in several cases. Water can appear on the ceiling at odd angles or in places other than directly above the leak. If your ceiling has drywall that is sandwiched between the plastic vapour barrier and the insulation, you should take the insulation out of the attic and inspect it for flow stains. The ceiling light fittings are an example of an opening in the vapour barrier that water is likely to seek out.
If the stain is extremely faint and there are no obvious flow patterns, look for'shiners' on the roof's underside. The carpenter might have forgotten to hammer in all the nails when attaching the roof sheathing to the rafters. A "shiner" is a nail that extends beyond the rest of the nail. Condensation commonly forms on the nails in the cool attic when moisture from the rooms below makes its way up there.
On a cold night, if you venture into your attic, you may be able to make out this detail if you look closely. As a result of the frosting process, the nails become bright white. The ice on the nails melts and drips during the day as the attic warms up, but then refreezes over night. Side-cutting bladed nail trimming pliers are a useful tool for dealing with this issue.
Vent Boot Repairs In Plumbing
Plastic, plastic with metal, and two-piece metal are all viable materials for plumbing vent boots. To start, look for cracks in plastic bases and damaged seams in metal bases. After that, inspect the pipe's rubber sleeve for damage.
Over time, this can deteriorate or break, creating a gap through which water can enter the home via the pipe. Replace your current vent boot if it has any of the issues listed above. If the soles of your boots are in decent condition but the nails have been wrenched away or stripped out totally, you can repair them with screws and rubber washers. These screws are essential for attaching metal roofing. They could be near the screws at your local hardware store.
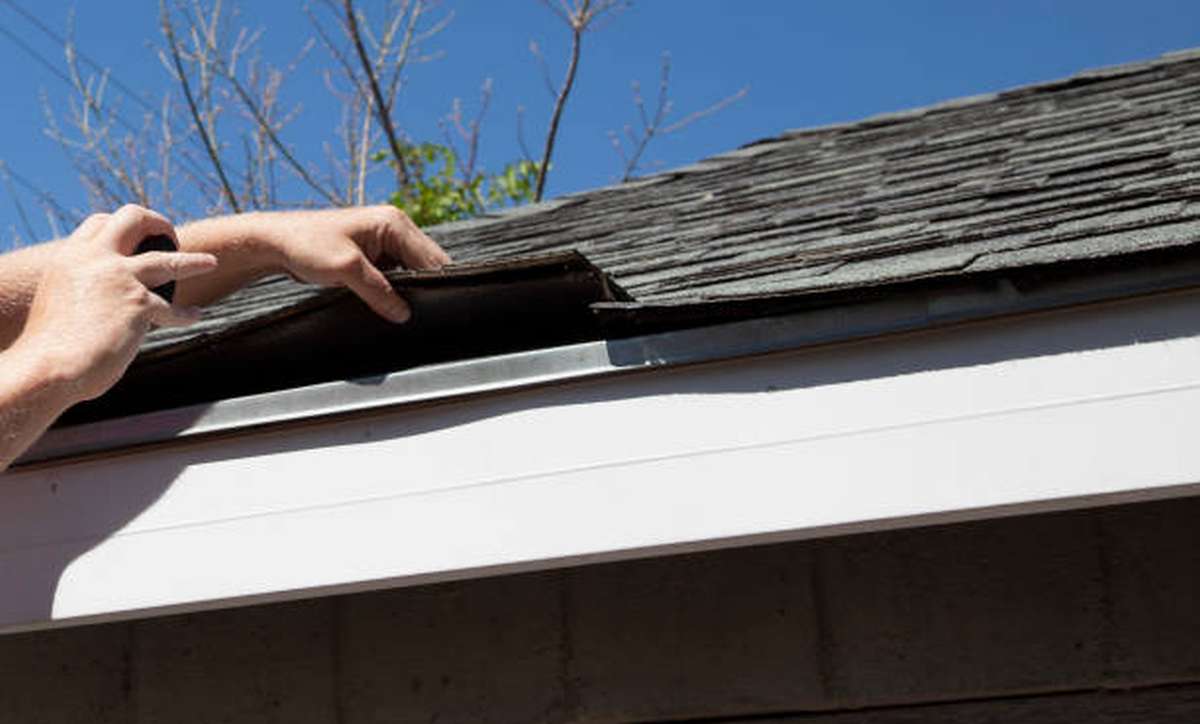
Remove the shingles adjacent to the one you're working on. Take extra care to preserve the shingles for future usage while removing them from a roof. The sealant between the layers can be pried apart using a flat bar. Then, you can use a flat bar to pry out the nail heads from under the nails.
Roof Vent Repair Guide
You should inspect the metal roof vents for leaking seams and check the plastic roof vent housings for cracks. Caulk may seem like a quick and easy solution, but in reality, it won't stay up for very long. The only option is to get new vents installed in places where they are broken.
Find and replace any missing or loosened nails along the underside of the base. Replace them with rubber-washered screws. To liberate the vent, remove the nails from under the tiles on either side of it.
Along with this, the top of the vent will be covered in nails. Those can usually be loosened without first having to remove the shingles. Using screws with rubber washers, secure the bottom in place. On either side of the vent, a thin bead of caulk should be squeezed out and applied under the shingles to serve as a water barrier and secure the shingles. Compared to renailing the shingles, that is a really easy task.
Repair the Walls and the Dormers
Water does not necessarily come through the shingles themselves. Wind-borne precipitation often finds its way inside buildings through the ceiling. This typically occurs through knotholes and fractures in the siding, as well as around windows and in the spaces between corner boards.
Water can easily seep through the dormer's numerous cracks and into the attic. Old, broken, or absent caulk between the corner boards, window edges, and siding is another common problem. These cracks allow water to seep in, travel behind the flashing, and ultimately enter the home.
Although the caulk may look fine, it may not be properly sealing the gaps between the adjacent surfaces. A putty knife investigation will reveal whether or not the area has been sealed up. Do away with any suspect caulk and replace it with something of higher quality.
The siding above the step flashing should also be inspected. If a piece of siding is damaged, rotten, or missing, replace it, ensuring sure the new siding extends at least two inches below the step flashing. Remove the corner boards and check the overlapping flashing in the corner if water is still leaking in. Sometimes you'll find old, hardened caulk in the inside corner where the two caulk pieces meet.
Difficult Issue With the Roof
Inadequate flashing is almost certainly to blame for the leaks that occur in this roof throughout the winter when it snows and during the summer when there are storms. The joint between the soffit and the roof is notoriously difficult to waterproof. In this picture, you can see the frozen remains of an ice dam. In the event that snow accumulates on a roof and the ensuing water flows to the roof's cooler edges, an ice dam will form.
Water will collect below the dam, then work its way back up under the shingles and soffit before finding a breach in the roof. First, make sure the flashing is done properly to seal off water from rain and snow, and maybe ice dams as well. First, strip the roof down to the wood sheathing by removing all of the shingles. Next, instal an ice and water barrier by sliding a strip of adhesive ice and water barrier beneath the seam where the soffit and main roof meet.
Depending on the angles at which the roofs meet, you may need to carve a slot in one of them to make room for it. It needs to extend beyond the underside of a newly placed ice and water barrier all the way to the eaves of the roof. All the likely leak points should be protected now.
After that, put in new shingles and a metal step flashing behind the fascia board (the trim behind the gutter). When erected over the seam where the two roofs meet, the valley flashing and the step flashing must overlap by at least two inches.
If ice dams continue to create leaks in your roof, you should think about placing heating cables along the roof edge. (Local hardware and home improvement stores will carry these.) The best way to prevent ice dams is to increase the attic's insulation and ventilation, however in the complex scenario of a leaky roof, this solution may not be effective.
Restoration of Step Lighting
Step flashing is used along the vertical surfaces of the walls where the roof meets them. Water is deflected over the shingle below it thanks to the multiple shorter portions that make up this sort of flashing. However, if the flashing rusts through or if a piece of it falls free, water will pour straight behind it and enter the residence.
Rust has built up on the flashing, thus it has to be replaced. As a first step, you'll need to take off the roof's shingles, then peel back the siding, and last take off the step flashing so it can be repaired. This sums it up nicely. But every once in a while, a roofer will forget to nail one down, and it will finally slip down, revealing the wall below. To learn more about how to set up your step flashing in the right way, read this post.
The Caulk Is Not Reliable!
As a general rule, a leaky roof cannot be permanently fixed by using caulk or roof cement. Therefore, you should always try to fix the leaking roof using "mechanical" measures, wherever possible.
This indicates that instead of using sealant to prevent leaks, the current flashing should be replaced or repaired. Caulk should only be used to fill in very small holes or in cases when flashing cannot be utilised to stop a leak.
Patch Up the Cracks
Tiny holes in shingles are deceiving because they can cause rot, a leaky roof, and other damage over a period of years before the obvious symptoms of a leak become apparent.
You could come across holes that were originally occupied by a satellite dish or antenna mounting brackets, or virtually anything else. Nails used in an improper location for roofing repairs should be removed and the resulting holes filled. It's not hard to patch up a tiny leak, but the treatment doesn't include putting caulk into the crack. Instead, you'll flash the roof to prevent more water damage.
Leaks Around Brick Chimneys
Near brick chimneys, disasters can range from minor to catastrophic. This paper obviously cannot go into detail on every significant subject. Chimney flashing composed of galvanised steel is especially vulnerable to rusting through at the bottom 90-degree bend.
A quick fix that should hold up for some time is to instal new flashing underneath the old, rusted flashing. If some water does manage to seep through the cracks, it will be diverted in this fashion. In contrast, after sawing a kerf into the mortar, installing new flashing is the best course of action.
Good Explanations for Why You Shouldn't Repair Your Roof Yourself
There's just a tiny crack in the ceiling and a few deteriorating asphalt shingles; surely you can fix them without hiring an expert, right? In addition, you may find a wealth of how-to videos on roof repair on the web, and roofing supplies can be easily acquired from a nearby hardware store.
Despite their allure, DIY roofing projects should be avoided at all costs. The following are some strong arguments that support this view:
- You can make the situation more worse for yourself. Professional roofers know the best technique to repair your roof because of their years of experience in the field. No, you don't. Since you don't have a firm grasp of the situation, you risk making matters worse.
- The problem, for instance, may be attributed to anything as insignificant as a single leak. If you try to fix the leak by walking on an unstable part of the roof, it may collapse and leave you in a sticky situation.
- Damage to the roof might come from improper use of roofing equipment or the execution of roofing procedures.
- When you want to do it yourself (DIY), you'll have to buy everything from the smallest nail to the most expensive shingle. The work may not hold up when the wind gets up if you don't get it right the first time; if shingles start flying and flashings come loose, you'll have to bring in the pros and pay those fees anyhow.
- If there's anything, it'll be your time, not the labour, that comes free of charge. DIY repairs still need time and energy, so in theory you'll be paying money even if you save money in the long run.
- If you do this, your guarantee will be void. In order for the manufacturer's warranty to be in effect, the product must have been installed in accordance with the manufacturer's specified procedures. If you do any harm to these products during your do-it-yourself roof repair, the manufacturer's warranty will be null and void.
- If your home is damaged by an act of nature, your homeowner's insurance should pay for any and all necessary repairs or replacements. However, the insurance company can reject your claim if you caused the harm yourself. If your insurance company finds out you've tried to make roof repairs yourself after you've already paid premiums, they can cancel your policy.
- If you do this, you're putting your life in jeopardy. It's possible to break a finger or break your neck if you drop off the slanted part of your roof, and you could wind up in a wheelchair if you have a spill.
- Unless you enjoy taking unnecessary risks with your life, you should let the professionals handle roof maintenance and repairs.
- The quality of your work will suffer. If you haven't installed or reconstructed many roofs before, you probably won't be very good at it, and the outcome will be a roof that looks dreadful. Even if do-it-yourself tutorials make house improvements seem easy, remember that you won't be able to perfect a talent without putting in the essential practise.
- Repairs could take longer to finish - Working with inexperienced hands makes the roof inspection, tool collection, and actual work a time-consuming process. Do-it-yourself roofing projects might take anything from a few days to several weeks to complete, whereas the same job would take professionals only two or three days to finish. You should probably back the first option because it's the most effective. There will be more hassle and expense as a result of any delays.
As a crucial industry, roofing demands skilled workers. Working with roofing contractors that have the expertise to make the repairs in the specified time and budget is essential.
Conclusion
DIY websites depict fairly simple roofs, and if you are handy and follow all safety guidelines, you may be able to roof your own home. If there is a leak, you must hire a professional. Newer homes are more energy-efficient than ever before, which has created new problems. While you can repair or replace your roof, we strongly advise against it. There are far too many potential hazards to the roof and to your safety.
Repairing a leak in a roof is normally not too difficult, but finding the source might take a lot of effort. Finding the cause of a leak requires starting at the top and working your way down. The presence of roof penetrations is the first thing to look for. Leaks in open regions covered by continuous shingles are quite unusual, even on older roofs. Most leaks occur around points of entry and exit, so you'll be near the action.
Water stains, rotten wood, and discoloured felt paper are all signs of a leaky roof. A "shiner" is a nail that extends beyond the rest of the nail. Condensation commonly forms on the nails in the cool attic when moisture from the rooms below makes its way up there. Remove the shingles adjacent to the one you're working on. Caulk may seem like a quick and easy solution, but in reality, it won't stay up for very long.
Replace your current vent boot if it has any of the issues listed above. Inadequate flashing is almost certainly to blame for the leaks that occur in this roof throughout the winter when it snows and during the summer when there are storms. Make sure the flashing is done properly to seal off water from rain and snow, and maybe ice dams as well. If ice dams continue to create leaks in your roof, you should think about placing heating cables along the roof edge. Caulk should only be used to fill in very small holes or in cases when flashing cannot be utilised to stop a leak.
The best way to prevent ice dams is to increase the attic's insulation and ventilation. Chimney flashing composed of galvanised steel is especially vulnerable to rusting through. A quick fix that should hold up for some time is to instal new flashing underneath the old, rusted flashing. Professional roofers know the best technique to repair your roof because of their years of experience in the field. If you do any harm to these products during your do-it-yourself roof repair, the manufacturer's warranty will be null and void. It's possible to break a finger or break your neck if you drop off the slanted part of your roof, and you could wind up in a wheelchair if you have a spill.
Content Summary
- Should You Replace Your Roof Yourself?However, you must consider yourself whether you want to and whether you should do it yourself.
- It is generally not advised for a homeowner to attempt to repair or replace their roof.
- On the other hand, if you don't know what you're doing, you could cause serious damage to your roof and, more significantly, yourself.
- Also, if you only need to replace one or two shingles, you might be able to do it yourself.
- Even walking on the roof can damage the shingles if you are unsure of what you are doing.
- Also, keep in mind that certain insurance companies may not pay the entire claim unless you can demonstrate that you engaged a skilled contractor.
- So, while you can repair or replace your roof, we strongly advise against it.
- Advice on Identifying and Repairing a Leaking RoofThere is no prerequisite knowledge or expertise needed to seal leaks.
- Locating and repairing the most common types of roof leaks is covered in detail.
- Leaks can be quickly fixed by a trained professional.
- Repairing a leak in a roof is normally not too difficult, but finding the source of the leak might take a lot of effort.
- Here we'll go over some simple methods for locating and fixing the most typical roof leaks.
- The process of mending the roof leak is outside the scope of this narrative.
- A leaky roof needs to be fixed as soon as possible, regardless of whether you consider the leak to be serious or whether you plan to replace your roof in the coming year.
- Finding the cause of a leak requires starting at the top and working your way down.
- The presence of roof penetrations is the first thing to look for.
- The easiest way to find the source of a leak is to walk up into the attic with a flashlight and look about for any telltale signs.
- Water stains, rotten wood, and discoloured felt paper are all signs of a leaky roof that can be found both beneath and all around the structure.
- Repair For A Minor Water SeepageFinding the source of a roof leak might be difficult in several cases.
- Water can appear on the ceiling at odd angles or in places other than directly above the leak.
- If your ceiling has drywall that is sandwiched between the plastic vapour barrier and the insulation, you should take the insulation out of the attic and inspect it for flow stains.
- If the stain is extremely faint and there are no obvious flow patterns, look for'shiners' on the roof's underside.
- Vent Boot Repairs In PlumbingPlastic, plastic with metal, and two-piece metal are all viable materials for plumbing vent boots.
- Replace your current vent boot if it has any of the issues listed above.
- Remove the shingles adjacent to the one you're working on.
- Replace them with rubber-washered screws.
- To liberate the vent, remove the nails from under the tiles on either side of it.
- Along with this, the top of the vent will be covered in nails.
- Do away with any suspect caulk and replace it with something of higher quality.
- The siding above the step flashing should also be inspected.
- Remove the corner boards and check the overlapping flashing in the corner if water is still leaking in.
- Sometimes you'll find old, hardened caulk in the inside corner where the two caulk pieces meet.
- In this picture, you can see the frozen remains of an ice dam.
- In the event that snow accumulates on a roof and the ensuing water flows to the roof's cooler edges, an ice dam will form.
- First, make sure the flashing is done properly to seal off water from rain and snow, and maybe ice dams as well.
- It needs to extend beyond the underside of a newly placed ice and water barrier all the way to the eaves of the roof.
- If ice dams continue to create leaks in your roof, you should think about placing heating cables along the roof edge. (
- Restoration of Step LightingStep flashing is used along the vertical surfaces of the walls where the roof meets them.
- As a first step, you'll need to take off the roof's shingles, then peel back the siding, and last take off the step flashing so it can be repaired.
- To learn more about how to set up your step flashing in the right way, read this post.
- A quick fix that should hold up for some time is to instal new flashing underneath the old, rusted flashing.
- Despite their allure, DIY roofing projects should be avoided at all costs.
- Professional roofers know the best technique to repair your roof because of their years of experience in the field.
- No, you don't.
- Damage to the roof might come from improper use of roofing equipment or the execution of roofing procedures.
- In order for the manufacturer's warranty to be in effect, the product must have been installed in accordance with the manufacturer's specified procedures.
- If you do any harm to these products during your do-it-yourself roof repair, the manufacturer's warranty will be null and void.
- If your home is damaged by an act of nature, your homeowner's insurance should pay for any and all necessary repairs or replacements.
- However, the insurance company can reject your claim if you caused the harm yourself.
- If your insurance company finds out you've tried to make roof repairs yourself after you've already paid premiums, they can cancel your policy.
- Unless you enjoy taking unnecessary risks with your life, you should let the professionals handle roof maintenance and repairs.
- The quality of your work will suffer.
- Working with roofing contractors that have the expertise to make the repairs in the specified time and budget is essential.
Frequently Asked Questions About Roof
Theoretically, yes, but most experts will recommend against it. If any part of your roof is damaged, contact a roofer or contractor immediately to determine your options and next steps.
The truth is, anyone can replace their roof with the help of the many DIY websites. For residential houses, roof replacements typically take two days – the first day to remove the old roof and the second day to install the new one.
Although you won't have to worry about a missing shingle since it won't necessarily cause a leak, this is not always the case. Even though a leak isn't occurring, having a part of the roof's interiors exposed to the different weather elements will greatly increase the likelihood of water getting inside.
In general, this is the recommended replacement schedule based on the material used: Composition Shingles: 12-20 years. Asphalt Shingles: 15-30 years. Wood Shingles: 20-25 years.
Knowing when a roof was installed (and what it's made of) offers insight into how much life it has left. For instance, a typical asphalt shingle roof lasts 20 to 25 years, while a roof installed over an existing layer of shingles should be replaced after 20 years.