In most cases, well-loved furniture is also well-used; it often serves as the epicentre of various mishaps, such as stains, scratches, and spills. It is essential to take care of damaged finishes on wood furniture as soon as possible and treat them appropriately in order to prevent future damage or discoloration in order to preserve the beauty of wood furniture. Repairs that are not done correctly can have the desired effect, which is to bring attention to the damage. Even though refinishing a piece of wood is always an option, there are instances when performing a simple spot repair is the best course of action.
If you are sick and tired of seeing the finish of your furniture look dingy and dusty, it is possible that it is time to take some action. The good news is that there are many different methods available to you for restoring the natural beauty of the wood or veneer finishes on your furniture or cabinetry. This blog post will provide you with some useful advice on repairing the finish on your furniture so that it looks as good as new again.
Types Of Damage

The nature of the damage has a direct bearing on the treatment cure, and it is frequently the determining factor in determining whether a total refinishing or spot repairs are necessary. The white water marks or rings that are left behind by glasses are the easiest to correct and should always be treated first. They are located in the initial layer of clear finish, both on top of it and in it.
Minor surface scratches that do not include a dent or loss of colour are contained within the clear finish; nevertheless, chips and dents will require filling. Minor surface scratches that do not include a dent or loss of colour are contained within the clear finish. It is possible that they do not require any additional staining unless the raw wood is visible beneath the finish. In conclusion, wear on corners or heavily-trafficked surface areas will comprise some mixture of all of these, necessitating a repair that is more labor-intensive and time-consuming.
Before making any attempts to fix the damage, wipe down the wooden surface with a solution of soap and water using a rag that is free of lint. Although Murphy's soap oil was developed specifically for this objective, regular dishwashing liquid will accomplish the same goals with far less effort. Before any repairs can be completed, the surface will need to be cleaned once more if the project calls for any sanding of any kind.
White Water Marks/Rings
Please take note that this method of repair will not be successful if the watermark is soiled and dark in colour. A professional in the field of furniture restoration should be consulted about the discoloration since it indicates the presence of mould development within the raw wood. One of the many treatments that can be found online involves applying heat to the wood in order to "draw" the moisture out of it. However, you should not utilise this strategy because there is a significant chance that it will result in more negative consequences than positive ones.
To successfully complete this repair, you will need patience and a soft hand. To remove a stain, dampen a rag that does not contain lint with denatured alcohol and lightly dab it on the stain without completely saturating it. If the finish on the mark becomes cloudy as a result of being soaked, it will need to be allowed to dry naturally.
Another option is to cover the marks with an oily material like petroleum jelly or mayonnaise and let it sit there overnight. The moisture that was trapped will be displaced by the oils, which will result in the disappearance of the opaque white mark.
After the stain has been removed, use steel wool and paste wax to lightly rub the finish until it reaches the desired level of shine. This will restore the satin gloss that had been lost. The next step is to apply an automotive polishing solution to achieve a glossy surface, and then swirl it into the areas around the repair so that it blends in.
Chips and Shallow Scratches
The solution to the problem of shallow chipping in the clear finish can be found in a manicure kit. A tiny drop of clear nail polish should be applied to the chip, and then you should wait for it to absorb into the finish all around it. After the drop has had ample time to air dry, sand it down to a flush level with the previous finish using sandpaper with a grit of 600.
In the case of a scratch, you should first perform a careful inspection of it, looking for any denting of the scratch. If there is a dent, it will likely need to be filled in before any attempt can be made to repair the finish. Examine the varnish for any signs that it is peeling. This will manifest themselves as loose fragments and little chips around the margins of the object.
In order for the new finish to adequately attach to the region that is adjacent to it, any flaking that is present will need to be sanded away. Applying steel wool in a swirling motion will remove any flaky residue from the affected region. The next step is to lightly fill in the scratch with a wipe-on clear oil finish using an artist's brush or a cotton swab until the scratch is filled, and then allow it to dry naturally. It may need multiple coatings applied over a period of time in order to successfully hide the damaged region.
This method is not going to work on hard clear coat finishes such as polyurethane, which is commonly used for tabletop surfaces. On this surface, oil finishes might even amplify the scratch rather than covering it up like they would on another. Sandpaper with a grit of 600, together with some water or lemon oil, should be used to delicately remove the scratch. It should be possible to polish out the scratch if it is not too deep.
After the area that was repaired has been allowed to dry fully, you can finish off any of the ways described above by polishing it. Utilize steel wool, and then polish it with paste wax, to achieve a satin sheen. Utilize an auto polishing product to achieve the high gloss finish you desire. To finish, blend the polish across the mended areas and the regions that are next to them using a rag that does not contain lint and a swirling motion.
Stain Penetrating Scratches
Stain markers and pens of a wide variety of brands and hues can be found in stores that sell supplies for woodworking. To begin, pick a shade that is a touch lighter than the one being used for the finish. After that, make sweeping motions with the marker as you apply it to the scratch.
Take care to avoid letting the marker rest at any point or allowing any stain to seep over any of the entire surfaces. In the event that this does place, remove it as soon as possible using a cloth that does not contain lint. The next step is to apply multiple layers of the marker until the desired colour is reached.
Wood that has recently been damaged or exposed will absorb the stain more quickly and will darken more quickly as a result. If the wood becomes too dark, soak a rag in mineral spirits and dab at the area until the colour lightens. The next step is to polish the area with paste wax, which will assist conceal the healing location.
This method can also be utilised for worn edges as well as other wear pattern marks; however, it will not assist in the rebuilding of the shaping of the wood. However, it will conceal the damage and make it appear to be less severe than it actually is.
Gouges, Nicks, and Dings
Before attempting to make repairs, gouges, nicks, and dings should be given a mild sanding with sandpaper that has a grit of 600. This will eliminate any burr edges. By doing this, the repair will be less obvious because there will no longer be a seam where the repaired area and the adjacent wood join.
Wax sticks can be matched to the finish, or different finishes can be blended together to find the perfect match. In either case, rub the wax stick into the gouge to fill in the lacking depth until it is just slightly more than adequate. Then, using the flat side of a credit card, scrape the wax until it is smooth till the gouge is the only thing that is filled. In the end, any leftover wax on the wood should be removed by rubbing it with a wood block that has a paper bag wrapped over it.
Polish both the area that was mended and any wood that was adjacent to it using paste wax. This kind of repair is simpler to perform on vertical surfaces, but it is less likely to be durable or unnoticeable when applied to horizontal surface areas.
Refinishing Furniture Without Stripping: Advantages
The process of stripping furniture is one that is untidy and time-consuming. And there will be instances when the outcomes fall short of the expectations you had for them. You are fortunate in that you do not always need to resort to stripping your furniture in order to return it to its previous lustre. We’'ll show you an easier alternative by recommending a professional in furniture restoration. The maintenance and repair of antiques, as well as the application of bespoke wood finishes.
He also provides consulting services in these areas. The end product of over 20 years of experience working with and learning about many types of wood finishes, as well as furniture restoration and repair. You don't need all of the dirty chemical strippers or the arduous sanding because we're going to show you some ways for restoring, cleaning and repairing finishes.
You will economise a great deal of time. Your furniture will continue to have the look of an antique even after you restore it because you will maintain the patina and character of the original finish. However, if you believe the item in question to be an antique of significant value, you should first seek the advice of a specialist before taking any action with it.
Mineral Spirits Inspection of the Final Coating
Wiping your refinished furniture down with mineral spirits can assist you determine what the next step in the process should be before you begin making any repairs or applying finishing touches. Mineral spirits have the ability to temporarily saturate the finish, which reveals how the piece of furniture would seem after only having a single coat of wipe-on clear finish applied to it. Don't be concerned; the finish won't be harmed by this.
After wiping it down, if the surface still looks nice, you can finish it with an oil-based wipe-on coating. If the finish cannot be restored simply by moistening the surface with mineral spirits, you will need to take additional steps to rectify the situation. In the steps that follow, we will demonstrate a few of these.
Please Sweep That Up
A crucial first step in any undertaking involving the refinishing or replacement of furniture is to give it a detailed washing. It may be difficult to believe, but it is completely OK to wash the furniture with water and soap. Removing decades' worth of filth and grime will sometimes restore a significant portion of the item's original brilliance. We suggest using a mixture of liquid Ivory water and dish soap.
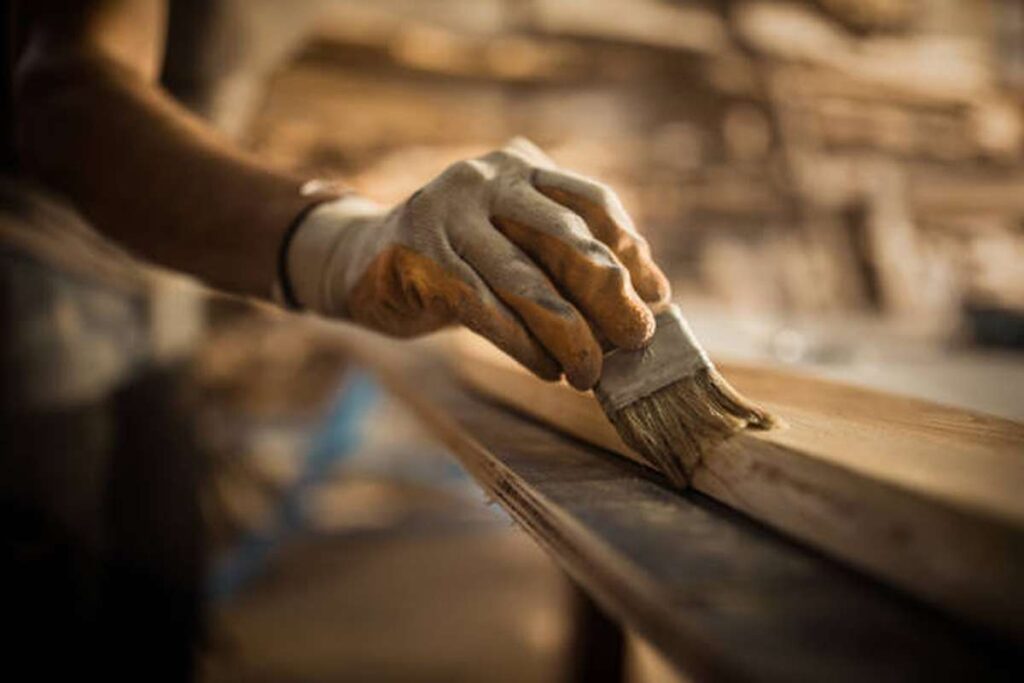
Combine using the same ratio that you would use to wash the dishes. After that, soak a sponge in the solution, squeeze off any excess liquid, and then use it to gently scrub the surface. When it comes to cleaning carvings and mouldings, a paintbrush is your best bet. When you are through washing the surface with soapy water, use a sponge that has been squeezed out and clean water to rinse it. After that, pat it dry with a fresh towel.
Fix White Rings
The removal of white rings may be a simple task or a very difficult one. Apply some petroleum jelly to the ring and leave it alone overnight. Oil from the petroleum jelly will often seep into the finish, erasing the ring or at least making it less noticeable.
To Remove Paint From Surfaces Without Ruining Them
Paint splatters are rather frequent on older furniture, but the good news is that they are typically simple to remove without causing any harm to the surface. So, here's a tip that we picked up on how to convert a regular straight-edge razor into a fine paint scraper:
Start by taping either end of the blade with masking tape. Next, give the blade a little curvature. The last step is to take the tape off the knife. You can scrape paint splatters off the wood without damaging the surface since the masking tape holds the blade just above the surface. The next step is to make sure the blade is held perpendicular to the workpiece.
Another advantage is that the tape will protect the wood from the blade's sharp corner. The bent blade of the scraper gives you the ability to customise the level of depth. If you tilt the blade just a little, the curved section in the middle will move closer to the surface, which will make it possible for you to peel off extremely thin coats of paint when you are working on refinishing furniture.
Fill in Wood Decay with Epoxy
Epoxy putty is an easy-to-use repair option for a variety of damage types, including missing veneer, chipped wood, and broken moulding. The end result is a fix that looks so natural that it's almost impossible to detect. When it has reached its final state, the epoxy has a light colour and a solidity comparable to that of wood. You can even mould it, sand it, and stain it like wood to make it look like it belongs there.
When working with this kind of epoxy, you start by cutting off a small piece of it with a utility knife or a razor blade, and then you knead it in your gloved hand.
When all components have been thoroughly mixed to a colour that is uniform throughout, and the epoxy putty has begun to get tacky, the putty is ready to be used. You will have between five and ten minutes to apply the epoxy to the repair before it begins to harden and become unworkable. Because of this, you should only cut off as much as you can utilise in a short amount of time.
Before the putty starts to solidify, there are a few things you can do to decrease the amount of sanding and shaping that will need to be done later. To begin, use your finger to work the epoxy into the desired form and smooth it out.
In order to stop the epoxy from adhering, first wet the surface with water. After that, scrape the surface with the edge of a straightedge razor until it is virtually level with the veneer that is surrounding it. When mending wood with an open grain such as oak, add grain features by making small slices with a razor while the epoxy is still fresh. This should be done while the epoxy is still flexible.
Restore the Wood and Complete the Epoxy
After the epoxy has completely hardened, which often takes a few hours, you will be able to stain and stand the repair. Make precise sanding blocks by applying self-adhesive sandpaper on tongue depressors or craft sticks and sticking them together. Sandpaper can also be attached with spray adhesive or regular wood glue. Both of these options are readily available. Sand gently so that you don't remove the finish from the surrounding area.
You can make the repair blend in with the surrounding veneer by painting gel stain in a colour and pattern that is identical to the original grain. You might use touch-up stain markers, but we like gel stain since it is opaque enough to function like paint and can be removed with a rag soaked in mineral spirits if you make a mistake or decide you want to begin again from scratch.
Choose two shades of stain that go well with the light and dark sections of the wood you have chosen. Place a small amount of each on a scrap of wood, and then mix them together to produce a wide spectrum of colours using the scrap as a palette. Create the grain effect by painting it on with an artist's brush now. If, after the stain has dried, the sheen of the patch does not correspond to that of the rest of the wood, you can balance out the sheen by recoating the entire surface with a finish that can be wiped on.
Applying Gel Stain Will Help Restore the Color
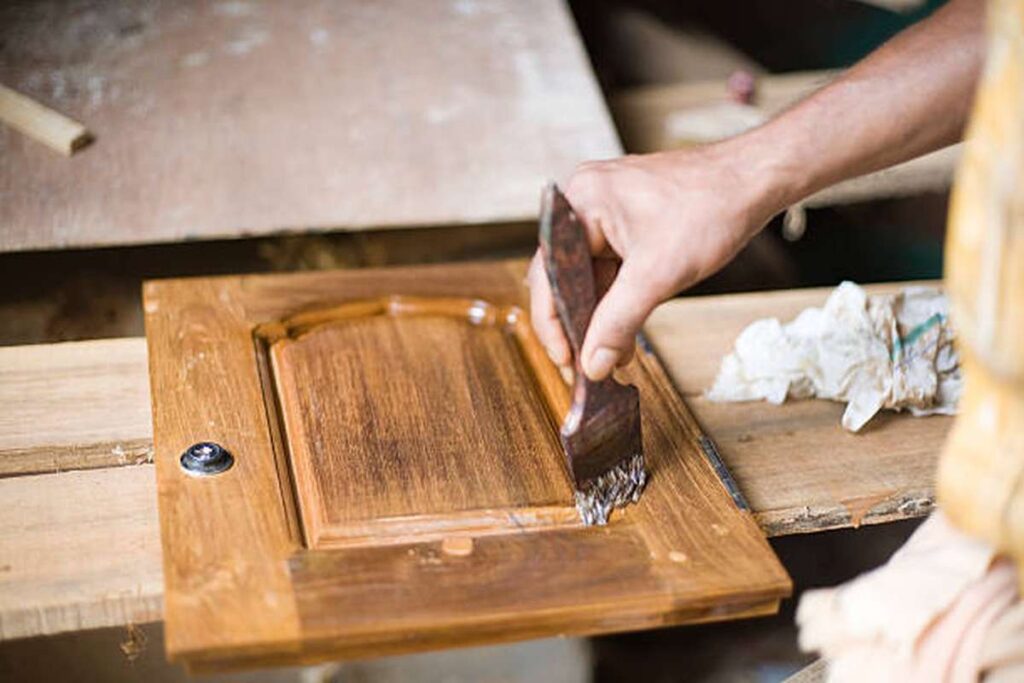
A layer of gel stain may do wonders for revitalising the look of old, tired furniture. This is a fantastic time-saver because it eliminates the need to strip away the previous coating before use. This useful hint was demonstrated on this circular oak table. Everywhere you looked, you could see scratches and discoloration in the finish. Therefore, he used a soft cloth soaked in a black gel stain to smear it across the surface.
Then he used a clean towel to wipe it away. Again, this was a sudden shift in the status quo. Gel stain won't hide deep water stains or serious faults, but it can hide fine scratches and bring back the colour where the finish has worn away.
Although there are many options for treatment, he prefers gel stain because he can more precisely manage the colour and, if necessary, apply a thicker layer. Because it does not soak into the surface as quickly as thinner stains, gel stain can be removed to some extent. If the final result doesn't please you, simply wipe it with mineral spirits while it's still wet. Gel stains offer some protection, but for a longer-lasting finish or to balance out the sheen, you should let the stain dry overnight and then apply a coat of wipe-on finish, as demonstrated in the following image.
Spot-Weld Or Fill Up Tiny Holes.
After applying the final finish, if you discover any nail holes or minor cracks, you can fill them with coloured wax repair sticks, fill pencils or wax fill sticks, all of which can be obtained at home improvement centres and paint stores.
It is instructed in the directions that you should massage the stick over the imperfection. However, it is recommended to break off a piece and allow it to become pliable in your hands. After that, mould it such that it covers the defect, then use a smooth instrument to press it into place. He used a dowel measuring 3/8 inches long and angled at one end. Create a thin wafer, slip it into the crack, and work the wax in both directions to fill the crack. Afterward, buff it with a soft cloth. This method can be used for cracks.
Removing Dings
When you wet tiny dents, you may be able to remove them completely. Because of the moisture, the wood fibres that have been crushed are able to return to their former shape. (However, punctures and wounds cannot be repaired with this method.)
Moisture absorption by the wood is essential for this to work. Unfortunately, finishes prevent water from penetrating, therefore we suggest making a series of extremely small holes with a razor blade to allow water to get through. Use the blade's corner and keep the knife perpendicular to the grain's direction for best results.
The next step is to fill the dent with water and then wait for it to dry completely. You may need to repeat the method if the ding isn't quite as deep but is still noticeable. To achieve the finest possible appearance, the surface that was restored may require a layer of wipe-on finish, just like the majority of the repairs that we discuss in this article.
Steps To Restoring Old Furniture
There are very few items that are more valuable than a family heirloom, with the possible exception of a family treasure that has been restored using modern methods such that it appears to be brand new. The process of giving a piece new life is not a quick one, but when you are finished, you will have a lovely piece of furniture that you can enjoy for many years to come. This makes the effort well worth it.
The process of restoring antique furniture may take a lot of time, but it is not always difficult if you follow the steps in the procedure in the correct order. Having the appropriate instruments and supplies will make the undertaking noticeably simpler and considerably more enjoyable. After following these six procedures for refurbishing ancient furniture, those antique items will once again be in demand.
Safety First
In order to restore ancient furniture, you are going to need to use chemicals and tools that, if proper safety measures are not taken, could be harmful to your health. To begin, it is imperative that appropriate equipment be used at all times. Not only will this make the task easier, but it will also keep you and your family safe. Second, when working with chemicals, it is important to protect yourself by donning protective gear such as rubber gloves, long sleeves, and eyewear.
Work in a place that has adequate ventilation, ideally outside, to prevent breathing in hazardous vapours. To protect your home from the risk of combustion and fumes, you should store oily rags in accordance with the directions provided on the package of the solvent you use.
Lastly, be wary of older paint finishes as they may contain lead if they are not updated. If you have any reason to believe that the paint on your piece of furniture contains lead-based paint, you should only strip it with adequate ventilation or have a qualified professional do it for you.
Identifying an Old Finish
Find out what kind of finish is currently on the wood of the antique furniture you plan to restore. Natural finishes like as shellac, varnish, and lacquer are difficult to recognise based just on appearance and may take a little bit of trial and error. Applying denatured alcohol to a portion of the surface that is not easily seen is the first step in conducting a test of the surface.
Shellac is used as a coating if the finish dissolves when alcohol is applied to it. If removing the finish requires lacquer thinner, then the finish is lacquer. If neither of these products works, then you are most likely dealing with varnish. Pigmented finishes, such as paint or enamel, are significantly simpler to distinguish from one another. The absence of shine can help identify whether or not the surface needs extra finishes like as oil, wax, or a penetrating sealer.
Cleaning
The process of recovering ancient furniture may consist of nothing more than giving each piece a thorough cleaning. Scrubbing surfaces made of wood, rattan, or wicker can be accomplished by following the instructions provided in this article. To begin, remove the layers of filth and wax that have accumulated on the surface of your item by utilising a commercial wood cleaner that is oil-based.
Change to a solution of warm water and liquid detergent if the wood cleaner on its own is unable to restore the furniture to the sheen it had when it was first purchased. While applying the mixture with a towel, take precautions to prevent the wood from being overly moist. To protect the wood from water damage, you should give the region a thorough rinsing and then dry it with a clean, soft towel.
If neither of these cleaning procedures does a good enough job for you, you may need to resort to solvent cleaning in order to bring back the shine to your ancient furniture.
Mineral spirits, turpentine, or even denatured alcohol could serve as this product's solvent. When working with these substances, you should try to do it outside if at all feasible, or at the very least in a room with enough ventilation. When applying the substance, it is best to do it with a rough cloth such as an old towel or a burlap bag, and then remove it as soon as possible. After the surface of your piece has been meticulously cleaned, apply a commercial wood cleaner to the surface, and then lightly buff the wood with a different clean cloth.
Reamalgamation
Scratches and cracks that appear in the finish can cause the surface of the wood to become less shiny and give the finished product a crackled appearance. A method called as amalgamation, which employs the direct application of a solvent to buff out any defects in the finish, is the simplest and most effective technique to fix the finish. But before we do anything else, we need to clean the piece using one of the methods described above.
Next, select a solvent, which should be denatured alcohol when working with shellac and lacquer thinner when working with lacquer. In most cases, varnish cannot be combined with anything else. Apply the solvent to the completed surface using a brush with natural bristles, working as quickly as possible while avoiding allowing the brush to become overly dry.
When the solvent has completely dried, the surface will have a shiny, dull appearance and will be completely free of cracks and scratches. Steel wool, used softly in one direction following the grain of the wood, should be used to buff the area in question. Applying a coat of hard paste wax as the final step of the process will result in an enhanced sheen.
Stripping
In the event that the antique furniture needs to be refinished, the first step in the restoration process is to remove the existing finish so that space can be made for the new stain.
A more robust paint stripping solution, such as a semi-paste that can sit on the surface to loosen the old coats so that they may be scraped off, will be required if there are multiple layers of paint to be removed. Apply the stripper freely in a single direction, working from the top down. Pay special attention to carved regions, since the finish on these places will be more difficult to remove.
After waiting anywhere from five to twenty minutes, you can start scraping the surface with a putty knife or other stripping instrument. The amount of time you need to wait depends on the thickness of the finish. Be patient since it may require multiple applications before the finish is removed completely.
To remove the remaining five to ten percent of the finish, turn to a liquid stripper once you have removed approximately 95 percent of it. Apply the liquid using a paintbrush with natural bristles, then wait a few minutes before removing the brush once it has been used. After that, remove the finish from the carvings and corners of the object with a piece of steel wool or a brush with brass bristles.
To remove the very last traces of finish and paint film from the surface, perform a final rinse with clean stripper. For flat surfaces, use a squeegee, and for more intricate areas, use a putty knife wrapped in a paper towel.
Refinishing
Applying a fresh coat of stain and finishing your item to give it an entirely new appearance is the next step in the enjoyable process of restoring antique furniture. Before you start this process, perform any necessary repairs to the antique furniture you will be using, such as replacing cracked chair seats or mending damaged chair seats. After that, sand the piece with sandpaper that has a grit range of 100 to 120, and then clean the surface with a tack cloth and a vacuum.
Conclusion
If you're tired of the dust and grime settling into the finish of your furniture, it's time to do something about it. Depending on the type of wood or veneer finish you have on your furniture or cabinets, you can use a variety of techniques to bring out their original beauty. Scratches and chips can be fixed by applying a drop of clear nail polish to the affected area. Lightly dab the stain with a rag that has been dampened with denatured alcohol and is lint-free. You can fix scratches by sanding down the peeling and then applying a clear oil finish that you can wipe on.
Also, you can give it a mirror-like sheen with paste wax or car polish. The stain will penetrate and darken freshly damaged or exposed wood more rapidly than it would unblemished wood. Gouges, nicks, and dings should be lightly sanded with 600 grit sandpaper before any attempts at repair. There is no need to use unpleasant chemical strippers or to laboriously sand. We'll demonstrate techniques for sprucing up and fixing worn surfaces.
If you restore your furniture while preserving the patina and character of the original finish, the pieces will look as though they were never touched. It is recommended to use a paintbrush for cleaning intricate mouldings and carvings. Epoxy putty is a simple solution for fixing many different kinds of damage. The result is a repair that blends in perfectly and is nearly undetectable. While the epoxy is still wet, make small slices with a razor to add grain features to open-grained woods like oak.
Adhesive sandpaper adhered to tongue depressors or craft sticks can be used to create precise sanding blocks. Gel stain has the potential to completely transform the look of worn out furniture. It can restore the original colour and cover up minor scratches in the finish. Apply a coat of wipe-on finish for a longer-lasting finish or to achieve a more uniform sheen. Restoring antique furniture can be a laborious process, but it doesn't have to be if you take your time and do things the right way.
Using these six steps, you can bring your antique furniture back to life and ensure its continued popularity. Safeguards should always be observed when working on an old piece of furniture. Shellac, varnish, and lacquer are all examples of natural finishes that are difficult to identify visually. Painting and enamel are pigmented finishes that are easily distinguished from one another. Cleaning furniture may necessitate the use of solvents to restore an antique's original lustre.
Scratches and cracks in the wood's surface can dull the wood's sheen and give the final product a crackled appearance. Buffing out finish flaws via reamalgamation is a direct application of a solvent. The first step in giving antique furniture a new stain is to strip off the old finish. To achieve the highest shine, apply a coat of hard paste wax as a final step.
Content Summary
- To keep wood furniture looking its best, it's crucial to address any damaged finishes right away and treat them as needed to prevent further damage or discoloration.
- Improper repairs may achieve the intended result of drawing more attention to the problem.
- While refinishing wood is always an option, sometimes a simple patch job is all that's needed to get the job done.
- If you're tired of your furniture's finish looking worn and dusty, you might want to do something about it.
- Fortunately, there are a variety of options for bringing back the original lustre of the wood or veneer finishes on your furniture and cabinetry.
- This article will teach you how to restore the finish on your furniture to its original condition.
- Harm Categories
- Because different types of damage require different kinds of treatment, the nature of the damage is often the deciding factor in whether or not a full refinishing or local repairs are required.
- Clean the wooden surface with a soap and water solution using a lint-free rag before attempting repairs.
- If the repairs require sanding of any kind, the surface will need to be cleaned again before work can begin.
- Identifying Rings or White Water Marks Please note that if the watermark is dirty and dark in colour, this method of repair will not work.
- Patience and a gentle touch are required for this repair.
- The mark must be left to dry naturally if its finish becomes cloudy as a result of being wet.
- To finish, apply an automotive polishing solution to the repair area and blend it in with the surrounding area using a circular motion.
- Damage: Chips and Light Scratches To repair minor scratches in the glossy top coat, all you need is a manicure set.
- First, if there's a scratch, make sure to inspect it closely for any denting.
- Before attempting to fix the finish, it's likely that a dent will need to be filled.
- To get rid of the flaky residue, use steel wool and rub it in a circular motion around the damaged area.
- Next, using an artist's brush or a cotton swab, lightly fill in the scratch with a wipe-on clear oil finish until the scratch is filled, and then let it dry naturally.
- If the scratch is not too deep, it may be able to be removed with polishing.
- Once the repaired area is dry, you can complete any of the aforementioned methods by giving it a final polish.
- To get a satin finish, use steel wool and finish by polishing with paste wax.
- You can get the mirror sheen you want by using an automobile polish.
- Deep, Penetrating Scratches That Make It Hard To Cover Up A Mess Woodworking supply shops stock a wide selection of stain pens and markers in a rainbow of colours.
- Then, use broad, sweeping motions to fill in the scratch with the marker.
- A rag dampened with mineral spirits can be used to restore the wood's original hue if it becomes too dark.
- Paste wax is then polished onto the area to help hide the healing wound.
- This technique can also be used to repair worn edges and other wear pattern marks, but it won't help with reshaping the wood.
- But it will cover up the damage and make it look like it wasn't as bad as it actually is.
- Scratches, dents, and nicks Gouges, nicks, and dings should be lightly sanded with 600 grit sandpaper before any attempts at repair.
- At the end of the process, rub the wood with a paper bag–covered wood block to remove any remaining wax.
- Apply paste wax and thoroughly buff the repaired area and any nearby wood.
- Putting a New Coat on Old Furniture without Ruining the Original There is a lot of mess and time spent during the process of stripping furniture.
- We'll demonstrate a less difficult option by suggesting a qualified furniture restorer.
- Antique upkeep and repair, as well as custom wood finishing.
- The culmination of more than 20 years spent working with and learning about various wood finishes and restoring and repairing furniture.
- We will demonstrate methods for restoring, cleaning, and repairing finishes without the use of messy chemical strippers or laborious sanding.
- However, if you have reason to believe the item in question is a valuable antique, you should consult an expert before doing anything else.
- Petroleum Distillates Examining the Finished Coating Before making any repairs or applying any finishing touches, wiping your refinished furniture down with mineral spirits can help you figure out what you should do next.
- If the surface is still in good shape after wiping it down, an oil-based wipe-on coating can be applied to preserve it.
- If applying some mineral spirits to the affected area doesn't bring back the finish, you'll have to take more drastic measures.
- Although it may seem counterintuitive, you can safely clean the furniture with water and soap.
- It is recommended to use a paintbrush for cleaning intricate mouldings and carvings.
- White Rings, Please! The process of removing white rings could be straightforward or extremely challenging, depending on the individual case.
- What follows is advice we were given for transforming a common straight-edge razor into an effective paint scraper: As a first step, tape the blade's ends together with masking tape.
- Since the blade is held just above the surface by the masking tape, you can safely scrape paint splatters off the wood without damaging the surface.
- One more perk is that the tape will shield the wood from the blade's pointy end.
- Epoxy can be used to repair rotten wood. If you have any damage, such as missing veneer, chipped wood, or broken moulding, epoxy putty is a quick and easy fix.
- Cutting off a small piece of epoxy with a utility knife or razor blade is the first step in working with it, followed by kneading it in your gloved hand.
- You'll have about 5–10 minutes to apply the epoxy to the repair before it hardens and becomes unusable.
- Therefore, you should only take as much as you can use quickly.
- While the epoxy is still malleable, proceed with this.
- Finish the Epoxy and Wood Repairs The repair can be stained and sanded after the epoxy has fully hardened, which usually takes a few hours.
- Applying gel stain in a colour and pattern that matches the original grain will help the repair blend in with the surrounding veneer.
- Apply a small amount of each to a piece of scrap wood and use it as a palette to create an array of colours.
- Now is the time to paint on the grain effect to create the desired look.
- Sheen differences between the patch and the rest of the wood can be corrected by recoating the entire surface with a wipe-on finish after the stain has dried.
- Restoring the colour by applying gel stain. A new coat of gel stain could do wonders for sprucing up worn furniture.
- This helpful tip was shown on this oak table with a circular top.
- All around, the surface was marred by scratches and discoloration.
- So, he smeared a black gel stain across the surface with the help of a soft cloth drenched in the stain.
- Gel stains are easier to clean than thinner stains because they do not penetrate the surface as quickly.
- Gel stains provide some protection, but for a more durable finish or to achieve a more uniform sheen, it is recommended to wait for the stain to dry overnight before applying a coat of wipe-on finish, as shown in the image below.
- If you find any nail holes or small cracks after applying the final finish, you can fill them with coloured wax repair sticks, fill pencils, or wax fill sticks, all of which can be purchased at hardware stores and paint shops.
- Wax can be used to fill cracks if a thin wafer is made, slipped into place, and then worked in both directions.
- Removal of Dings Dents in metal may disappear entirely after being wet.
- Due to the impermeable nature of finishes, we recommend drilling a series of tiny holes into the surface with a razor blade to let water in.
- When the dent is dry, fill it with water.
- Techniques for Restoring Vintage Pieces In the rare case that a family treasure is restored using modern techniques to the point where it appears brand new, it may be more valuable than a family heirloom.
- Restoring antique furniture can be a laborious process, but it doesn't have to be if you take your time and do things the right way.
- Using these six steps, you can bring your antique furniture back to life and ensure its continued popularity.
- Restoring antique furniture requires the use of chemicals and tools that, without the right protections, could be harmful to your health.
- As a first step, always use proper gear.
- Finally, if the paint isn't recent, it could contain lead.
- You should only strip furniture with proper ventilation if you suspect that it has been painted with lead-based paint, or have a professional do it for you.
- Recognizing an Aged Coating Determine the type of finish that was originally applied to the wood of the antique piece you intend to restore.
- If the wood cleaner is not sufficient to return the furniture's original shine, switch to a solution of warm water and liquid detergent.
- It's important to take care not to get the wood too wet while applying the mixture with a towel.
- Rinse the area thoroughly and pat it dry with a clean, soft towel to prevent water damage to the wood.
- Solvent cleaning is another option if you want to restore the lustre to your antique furniture but neither of the previous methods work well enough.
- After giving the surface a thorough cleaning, use a commercial wood cleaner and a different clean cloth to give the wood a light buff.
- The easiest and most reliable method to repair the finish is called amalgamation, and it involves the direct application of a solvent to buff out any defects.
- But first, let's clean the piece with one of the methods we covered above.
- Use a brush with natural bristles to apply the solvent to the finished surface as quickly as possible without letting the brush become too dry.
- To buff the area, use steel wool gently, moving in one direction along the wood's grain.
- To achieve the highest shine, apply a coat of hard paste wax as a final step.
- Stripping If the antique furniture needs to be refinished, the first step is to strip away the old finish to make room for the new stain.
- Stripper should be applied liberally in a single direction, beginning at the top and working downward.
- Depending on the coat of finish you applied, the drying time could be anywhere from a few hours to a few days.
- Once you've removed about 95% of the finish, you can use a liquid stripper to get rid of the last 5- 10%.
- Then, using steel wool or a brush with brass bristles, scrub the finish off the carvings and corners of the object.
- Apply a final rinse of clean stripper to the surface to get rid of any remaining finish or paint film.
- Refinishing The next exciting part of restoring antique furniture is giving it a brand new look by applying a new coat of stain and finishing it.
- Do not begin until you have repaired any broken or cracked antique furniture you will be using (such as chair seats).
Frequently Asked Questions About Furniture Finish
To fix the cratering of the polyurethane finish, you need to sand the surface lightly and wipe the surface with a clean cloth and re-apply a thin polyurethane coat. Once it is completely dried, you won't notice any craters on the surface.
Updating your furniture is now easy with our simple and creative ideas:
- Strip Old Painted Finishes.
- Clean Stain from Your Chairs, Dresser or Tables.
- Add a Fresh Coat of Spray Paint.
- Re-Cover Dining Chairs with a New Cushion.
- Refinishing Furniture.
- Go For Milk Paint.
The key to re-staining a wood dining table top without having to strip off the original factory finish is to create a soft, faux wood grain appearance with gel stain. Followed by several coats of a durable clear sealer. It's not that hard to do. The main thing you will need, besides supplies, is TIME.
Mix one part vinegar to one part olive oil and apply a thin layer to the furniture before buffing up. However, it's always a good idea to try on a small area on the underside before applying it over the whole piece.
As long as you have enough patience to wait for the solvent to dissolve the finish, it is almost always better to strip than sand. Fortunately, older furniture finished with shellac or lacquer dissolves quickly, turns to sludge, and easily wipes off.