The ceiling is one of the components of a room that is commonly overlooked and undervalued. This component is frequently overlooked since it is located so high up, despite the fact that it has the potential to be one of the most crucial parts of a house. Continue reading if you need assistance recovering your tiles or want to learn how to paint them.
Ceiling Tile Restoration
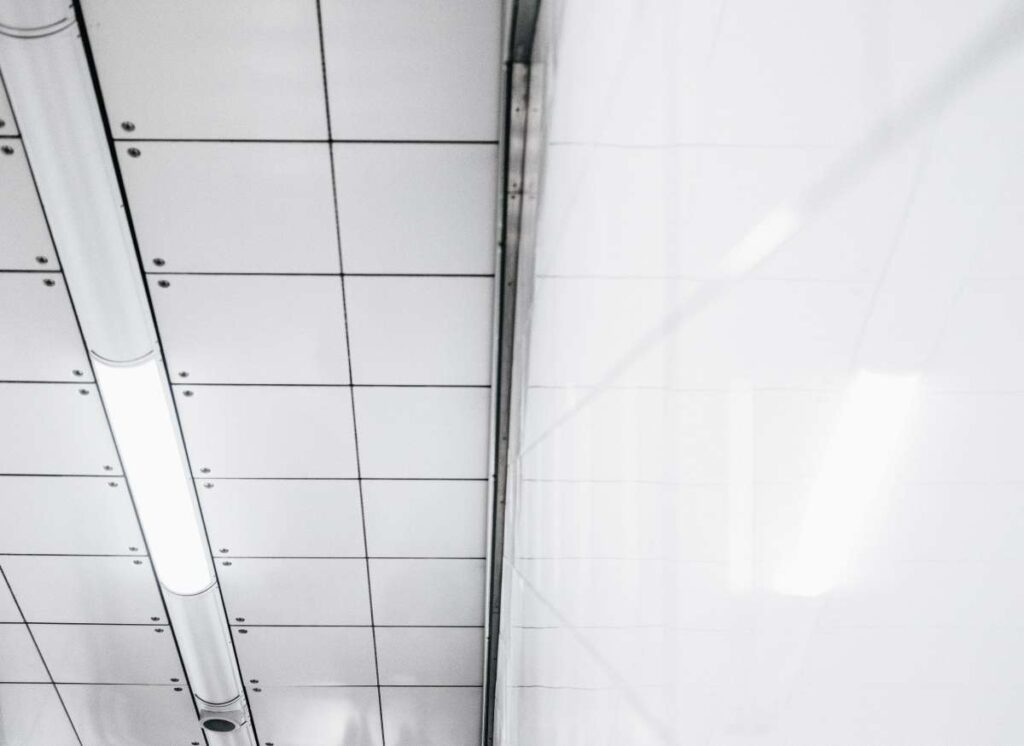
A suspended ceiling, also known as a false ceiling or a dropped ceiling, can be used to conceal the ceiling voids that are found underneath the internal roofs of a building. These ceiling voids may contain ducting, cables, and pipes.
There is evidence that fake ceilings were installed in Japan as early as the thirteenth century, and there is a long history of false ceilings being constructed for the purpose of improving a room's acoustic properties.
These factors are still important to consider in the modern world when it comes to the installation of suspended ceilings. Because we spend a significant amount of time beneath ceilings, it is essential that they perform effectively. Because it is difficult and time-consuming to replace them, refurbishment is a better option than replacement because ceiling tile restoration can be done quickly.
A grid that is suspended from the internal roof structure of a building using wires is the typical component of a suspended ceiling. This gridlocks together to form a cell pattern, and each cell in the pattern is occupied by a tile that can be removed to provide convenient access to the mechanisms located above.
Tiles can be created using a variety of materials, the most common of which are metal pan and mineral fibre. These materials are typically used in commercial buildings. As ceiling tiles age, they become discoloured and soiled with dust, mould, grease, carbon emissions from HVAC (heating, ventilation, and air conditioning) systems, and other pollutants. This causes the tiles to lose their original appearance and become unappealing to the eye.
Even if it is now forbidden to smoke in the workplace, older interiors may have already been damaged by smoke damage from before the ban was implemented. For example, a yellowed ceiling that was once white is not an attractive sight. These ceilings not only have a drab appearance, but they also do not reflect light as well. As a consequence of this, rooms do not have the same amount of natural light as they would if they had a new coat of paint, which of course can have a negative impact on productivity.
In addition, a flat ceiling results in an increase in the amount of lighting required, which results in a negative impact on the environment. Unfortunately, the removal and replacement of a ceiling has an even more detrimental impact. But since the tiles and metal grid might be repurposed, throwing them away in landfills would be a waste of resources; therefore, recycling the elements that are already there is unquestionably the superior choice.
If the tiles are repainted in a light colour, then a fresh coat of paint will cause a greater amount of light to be reflected, hence reducing the need for additional sources of artificial illumination. Remember that tiles may be painted in any colour to match a brand or simply for a change of scenery. White is commonly selected for ceilings because it reflects the most amount of light possible, but it is important to keep in mind that tiles can be painted in any colour.
It is possible to paint the gridwork, vents, ductwork, speaker plates, and tiles themselves. After the tiles have been painted and resprayed, they will not adhere to the t-bar system that is used on the grid.
Ceiling tiles in commercial and public buildings, such as retail stores, restaurants, offices, educational institutions, and medical facilities, can be restored. Ceiling tiles can be disinfected and deodorised as part of the restoration process, which is a very vital step in healthcare facilities and eating restaurants. In most cases, re-coating may be accomplished in a live environment, which means that products do not even need to be removed from supermarkets.
What Is Involved In Re-spraying Ceiling Tiles?
Polythene sheets will be used to protect the walls, floors, furniture, and stock as well as any other surface or item that should not be painted by an experienced ceiling paint spraying firm. In addition, in order to ensure their safety, the smoke alarms, sprinklers, speakers, and lights will all be covered up.
To restore ceiling tiles, a sprayer might utilise stilts, ladders, a lance, or even an access tower, depending on the height of the room and how much free space there is (though not if the floor becomes too slippery).
Paint should often be sprayed onto suspended ceilings from four different angles in order to ensure that the surface is completely covered. A professional ceiling paint sprayer will know this. When it comes to re-coating tegular shelters, where the tiles are arranged in rectangular grids, this is an extremely essential consideration.
In contrast, the entire process of resurfacing can take place after hours, when a facility has been closed for the night, whereas replacing a suspended ceiling would require taking the entire area out of commision for a considerable amount of time.
Advantages Of Restoring Ceiling Tiles
- When compared to replacing tiles, repairing them results in financial savings.
- Re-spraying an area is a significantly more eco-friendly option than completely replacing the tiles.
- There will be no change to the acoustic characteristics.
- The fire rating of class 'O' has not been compromised in any way.
- The lifespan of the ceiling is lengthened.
- There will be just minor interference with corporate operations.
- There is no disorder present.
- There are no odours that linger in the air.
- Coatings can be purchased in virtually any colour imaginable.
- Nothing has been damaged, including the walls, ceilings, or furnishings.
- The visual value of the entire space can be enhanced by the restoration of ceiling tiles.
Simple Ceiling Restoration Can Be A Decorative Improvement As Well
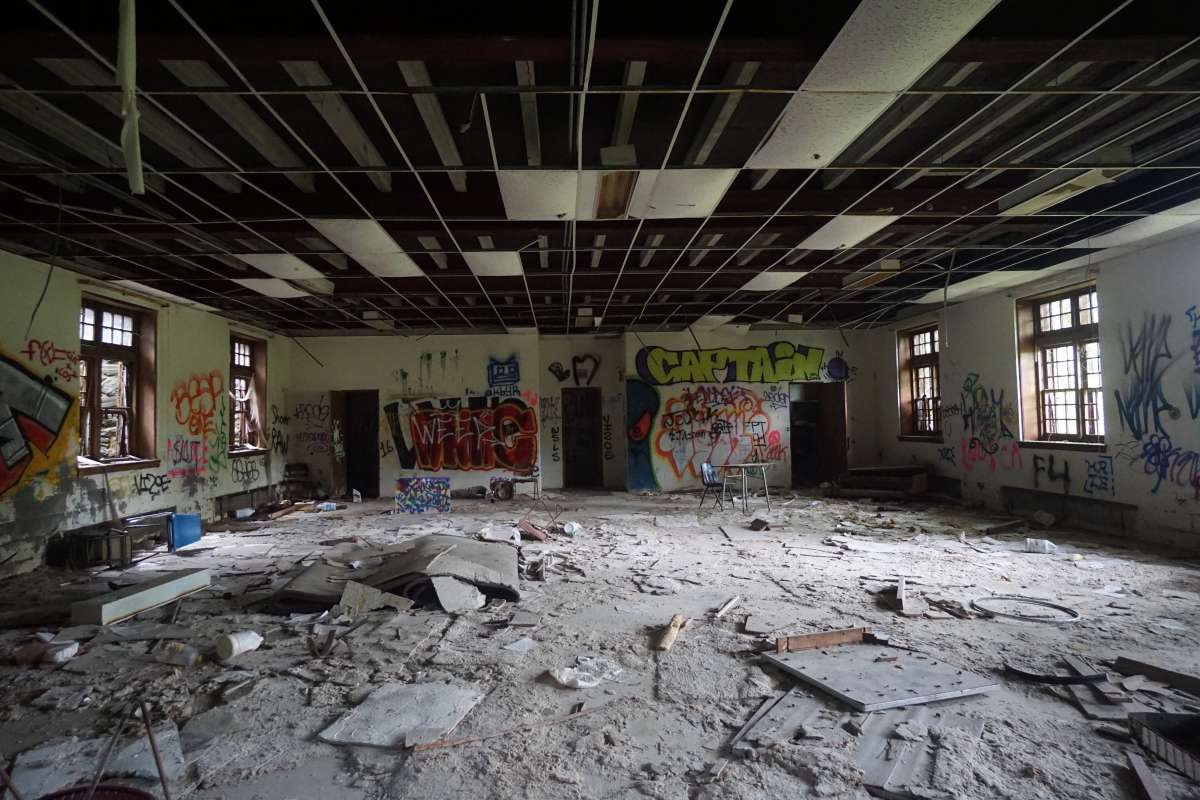
The severely damaged ceiling is an issue that arises at a high altitude and is one that frequently appears to be resistant to decorative remedies.
Radical solutions are required in situations when there is cracked plaster, drooping drywall, and water stains that cannot be concealed with a coat of paint. There are, to your good fortune, a number of low-cost and simple-to-carry-out alternatives, some of which you may very well have disregarded in the past.
The installation of acoustical ceiling tile is frequently seen as a solution of last resort, despite the fact that it is one of the most practical solutions for repairing a damaged ceiling and is also relatively inexpensive.
It is frequently seen in offices and grocery stores, but its application in private residences is typically restricted to recreation rooms located in the basement. For a very good reason: it is not a very attractive material, and it frequently makes a surface that would normally be unnoticeable into one that is undeniably noticeable.
However, it was back then. The ceiling tile and suspended ceiling panel markets are showing signs of improvement. These ceiling fixings have now been given a fashionable upgrade.
If you have previously disregarded these resources as being of insufficient quality, it is time to give them another look. Plum, rose, peach, and tan, in addition to the ever-popular white, are some of the colours and patterns that may be found in today's fashions.
That's a pattern, not just a plain old texture like they used to have back in the day. Some of the tiles and panels have a striking similarity to the traditional plasterwork that was popular around the turn of the century.
Some have edges that have been delicately bevelled to create the appearance of raised panels, while others have edges that have been scalloped and fluted to look like they are framed with picture-frame moulding.
Armstrong, a company that is one of the most significant participants in the ceiling tile market, even manufactures a 4-foot strip tile that has the appearance of a 6-inch-wide timber board.
There is a difference between ceiling tiles and ceiling panels, but both are lightweight mineral fibre.
Tiles are approximately 12 inches square. They are secured to the existing ceiling with invisible clips that are attached to metal furring strips that have been hammered or screwed in place.
On the other hand, the dimensions of ceiling panels are often either 24 inches square or 24 inches by 48 inches. These are supported by a metal grid that is almost invisible because it is painted to resemble the ceiling and is suspended from the original ceiling by wires.
Installing either ceiling can be done over the course of a weekend by do-it-yourselfers who have a minimum of aptitude and a few key tools.
The ability of suspended ceilings, particularly those designed for use in older homes, to conceal newly installed overhead wiring as well as exposed heating ducts and pipes is one of the advantages of using these ceilings.
In most cases, there must be at least three inches of clearance available. On the other hand, if your ceilings are at least nine feet high, this won't be much of a sacrifice for you.
Both the panels and the tiles are able to be cleaned and painted (but avoid the deeply textured types). In addition to their acoustic features, several of these materials also have fire-retardant qualities.
There are, of course, further treatments available in the event that you have a ceiling that is damaged, stained, or continually peeling. Plaster repair can frequently be excessively expensive; however, replacing plaster with gypsum wallboard is both less expensive and a work that only needs to be done once in a person's lifetime.
However, unless you are a seasoned renovator yourself, you should engage a contractor to carry out the task. Putting up sheets of wallboard with dimensions of 4 feet by 8 feet overhead is no easy task. Taping and mending the joints and nail holes is an artistic process that combines elements of both science and engineering.
Covering an existing ceiling with tongue-and-groove boards, which are often fastened to wood furring strips that are either nailed or bolted to the existing roof, is yet another option.
Boards with a width of six inches are the most common, but the bead boards with a width of four inches, which are typically used for the ceilings of older porches, provide a wonderful appearance. In any scenario, the wooden surface can be customised to your preferences by painting or staining it.
Do not disregard the possibility of installing embossed metal ceiling panels in your historic home (or your dream home), since these were common in general stores at the turn of the 20th century. Instead, you could look in the Yellow Pages for a distributor in your area.
Wallpaper is yet another viable alternative to consider if your ceiling is riddled with spider-web fractures. Embossed ceiling papers are currently being offered by some wallpaper makers, and these papers are designed to simulate the effect of intricately plastered ceilings.
Choose a wallpaper of high quality and a neutral colour if all you want to do is conceal the cracks and bring back the smooth surface they destroyed.
In order for you to be able to paint the ceiling in the colour of your choosing, you should ask the dealer to assist you in selecting one that can be painted. It's possible that you'll need to instal liner paper first, but it would depend on how severe the fractures are.
Keep in mind, however, that restoring a ceiling that is in poor condition is of no use if the underlying problem — or, rather, the problem that is on top of the ceiling — has not been resolved.
If there is a leak in the roof or a weak rafter in the attic, the first thing that needs to be fixed is either of those things; otherwise, your entire investment of time, energy, and money would have been for nought.
Regardless of the method that you choose, you should think about adding ornamentation to your ceiling in order to make the most of its decorative possibilities.
You might want to think about painting it a buttery yellow, peach, or sky blue; a colour other than white can affect the light and character of an entire room.
Shape and dimension can be added with the help of a wallpaper border or a painted border. A classic architectural element can be added by using either a thick crown moulding or a thin picture-frame UTC moulding.
Ceiling medallions are composed of lightweight synthetic material that are designed to imitate ornamental plaster. They are useful for drawing attention to a chandelier or a ceiling fan that has a pleasant design.
In spite of the fact that they are sometimes neglected, ceilings contain a significant amount of untapped potential in terms of the ability to give colour, pattern, and surface variation to a room. It's important to remember that just because a roof is out of reach doesn't imply it's invisible.
Decorative Ceiling Tiles Restoration
What You'll Need
The majority of decorative ceiling tiles are not designed to be restored after being damaged. Instead, broken tiles need to be replaced since the substance they are manufactured from is extremely brittle. It is hard to hide even the smallest bit of damage, hence even the smallest amount of damage will require a replacement tile. However, there are a few trade secrets that may be utilised to make the ceiling look better, such as hand-tooling the edges, resurfacing the tiles, or painting over the entire ceiling, as the steps that follow indicate.
Protect The Area
Spread a protective covering over the entire floor underneath the repaired area. You are going to be spraying the paint upwards, which will result in a substantial amount of dots at floor level.
Placing down some thin sheets of plastic will make the cleanup process much simpler and quicker. When dealing with ceiling tiles, always be sure to protect your eyes by wearing protective eyewear. They are renowned for kicking up dust at the least movement, and since you will be looking directly upward into the path of the falling particles, you will be exposed to the dust.
Rearrange The Tiles
If one of your ceiling tiles is broken, an easy fix is to simply relocate the broken tile to a location where it will be less obvious to everyone who walks into the room. To lessen the effect of the broken tiles, move them away from the middle of the ceiling and position them in the four corners instead. When it comes to making replacements, edge pieces are your best bet, particularly along the back wall of the room. It is important to avoid putting damaged tiles in areas that are easily seen by everyone who enters the building through the doorway.
Vacuum The Tiles
Carefully clean the ceiling tiles in the basement using the hose and stair tool that come with a standard household vacuum cleaner. Cleaning off the built-up dirt and dust will make it possible for the paint to adhere more evenly and will prevent dusty patches from appearing in the final coat of paint. Spend extra time dusting around light and ventilation fixtures, as these are areas that frequently attract dust due to air currents.
Replacing Bad Tiles
The only time that rearranging tiles makes sense as a solution is when their defects are very minor. It is necessary to replace any tiles that are severely damaged.
It is impossible to restore broken bones or patch holes or cuts in ceiling tile, and there is no means to repair ceiling tile. Remove the tiles that are damaged with care, then replace them with brand new tiles. Always make sure that the direction that is marked on the back of the tile is aligned correctly with the other tiles that are in the ceiling.
Painting
A certain kind of paint known as non-bridging paint is required for use on suspended ceiling tiles. This type of paint must be used. Because it is a special kind of paint, it is possible to paint the ceiling tiles and the grid work at the same time without having to remove individual tiles. In addition, once the adhesive dries, the tiles will not adhere to the grid, and they can be readily removed at a later time.
Long, even strokes should be used when painting the ceiling while the paint can should be held around 8 inches away from the surface. After you have started spraying in a specific direction, you should keep utilising the same pattern throughout the entire process. Altering the pattern of the spray in the middle of the job will produce discernible variances once the paint has dried.
Metal Ceiling Tiles Restoration
Metal ceiling tiles are a gorgeous accessory that look great in any home. They give your construction a touch of elegance and sophistication, and they may even help it become more sturdy. Despite the numerous advantages, metal tiles can become stained and damaged just like any other surface can, regardless of how beneficial they may be. You can preserve the appearance of your metal ceiling tiles as spotless and fresh as the day they were installed for many years to come if you follow the recommended cleaning procedures and perform the necessary maintenance.
Step 1
When you are cleaning or restoring metal ceilings, the first thing you should do is dust them. This is an important step. This enables you to eliminate the initial layer of dirt, which, if left on the surface, could smear or become more difficult to remove in subsequent steps of the cleaning procedure.
The difficulty here is to clean the tin tiles without damaging them by rubbing the dust off of them. You can accomplish this objective by making use of a feather duster. You can even vacuum the ceiling tiles to eliminate any residue that may have been left behind after the dust has been cleaned up. This will ensure that all of the dust has been gone.
Step 2
After the tiles have been vacuumed, combine the dishwashing liquid and hot water in a mixing bowl. Scrub the tiles with soapy water and a sponge to get rid of any stains and to give the tiles a thorough cleaning.
If the tiles are dingy or dusty, this step is what will restore their shiny appearance and make them look brand new. Because metal ceilings are nonporous, it is unlikely that you will need to be concerned about discoloration from spills or stains.
If you do that, they will be minor, and the water with the soap in it will be sufficient. After washing them in soapy water, you should rinse them well to get rid of any remaining soap and any other foreign material.
Step 3
After the tiles have been cleaned, you should polish them so that they shine. This prevents them from accumulating dust in the future and safeguards them against any potential damage that may occur.
Remember that there are many distinct kinds of metals to choose from. Therefore, in order to ensure that you get the results that you want, you will want to look for a polish that is developed specifically for the type of metal ceiling tile that you have. Keep in mind that even a small amount of polish can make a big difference.
After completing these three processes, you should find that the appearance of your metal ceiling is just as stunning as it was on the first day it was placed.
Because metal ceilings require very little upkeep on the whole, you shouldn't have to do this very frequently. On the other hand, ensure that you keep these suggestions in mind the next time you perform spring cleaning or get the house ready for guests to arrive!
Conclusion
The ceiling is a crucial architectural element. Dust, mould, grease, and other pollutants can discolour and smudge ceiling tiles over time. If you want to save time and money, refurbishing is the way to go instead of replacing. Commercial and public buildings with ceiling tiles can have their tiles repaired. The tiles, grid, vents, ductwork, and speaker plates can all be painted.
Using the t-bar system will no longer work after the tiles have been painted or sprayed. If you want to completely cover a suspended ceiling in paint, you should spray it from four different directions. Re-spraying a room is a much greener alternative to ripping up the floor and starting over with new tiles. Simple ceiling repair can also serve as a cosmetic upgrade. Decorators' use of ceiling tiles and ceiling panels is on the rise.
Some of the patterns are extremely reminiscent of classical plasterwork from the nineteenth and twentieth centuries. For those with even a modicum of skill, they are doable over a weekend. Plaster can be expensive to replace, but gypsum wallboard only needs to be installed once and will last a lifetime. The process of taping and mending the joints and nail holes is both scientific and engineering in nature. At the turn of the twentieth century, general stores frequently featured metal ceiling panels with embossed designs.
A leaking roof or sagging rafters in the attic are both problems that must be addressed. As a result of being made of a very fragile material, ceiling tiles must be replaced. Most decorative ceiling tiles can't be repaired if they get scratched. When painting the ceiling, keep the paint can 8 inches away from the surface and use long, even strokes. If you decide to change the spray pattern in the middle of the job, the finished product will look noticeably different.
To get rid of any residue that may have been left on the ceiling tiles, simply vacuum them. Using soapy water and a sponge, scrub the tiles thoroughly to remove any stains and finish the cleaning process. Overall, metal ceilings require very little maintenance, so this isn't something that needs to be done every time you clean.
Content Summary
- The ceiling is often the least noticed and appreciated part of a room.
- Read on if you're interested in learning how to paint or recover your tiles.
- Repairing Ceiling Tiles Ceiling voids under the interior roofs of a building can be hidden with the help of a suspended ceiling, also called a false ceiling or a dropped ceiling.
- Even in the twenty-first century, these are crucial factors to think about when putting in a suspended ceiling.
- When compared to the hassle and delay of replacement, the speed with which ceiling tiles can be restored makes refurbishment the preferable option.
- The typical component of a suspended ceiling is a grid that is hung from the building's internal roof structure by means of wires.
- More energy is used to illuminate a room with a flat ceiling, which has an adverse effect on the natural environment.
- To make matters worse, tearing out an old ceiling and installing a new one has a domino effect that can last for years.
- Recycling the existing materials is the best option because the tiles and metal grid could be reused in other projects.
- Re-painting the tiles in a light colour will increase the amount of light reflected, thereby decreasing the amount of artificial lighting needed.
- Keep in mind that tiles can be painted any colour to fit a brand or just to add some variety.
- Although white is the most popular choice for ceilings because of how well it reflects light, remember that tiles can be painted any colour you like.
- Ceiling tiles in public and private buildings can be restored, including shops, restaurants, offices, schools, and hospitals.
- Experts in ceiling paint spraying will use polythene sheets to shield the walls, floors, furniture, stock, and anything else they don't want painted from the paint.
- Depending on the height of the room and the availability of working space, a sprayer may need to use stilts, ladders, a lance, or even an access tower to reach the ceiling tiles (though not if the floor becomes too slippery).
- Painting suspended ceilings often requires spraying from four different directions to ensure an even coat.
- Those who make a living spraying paint on ceilings will be aware of this.
- This is a crucial factor to think about when planning a re-paint job for standard shelters, where the tiles are typically laid out in square or rectangular grids.
- The Benefits of Restoring Ceiling Tiles You can save money by fixing tiles instead of replacing them.
- Re-spraying a room is a much greener alternative to ripping up the floor and starting over with new tiles.
- Extending the ceiling's life is achieved.
- Restoring ceiling tiles can increase the room's aesthetic value.
- Fortunately, you can choose from a number of low-priced and easy-to-carry-out options, some of which you may have overlooked previously.
- As a result, acoustical ceiling tile installation, despite being one of the most practical solutions for repairing a damaged ceiling and also relatively inexpensive, is often seen as a solution of last resort.
- Tiles and panels are reminiscent of turn-of-the-century plasterwork in design and appearance.
- Ceiling tiles and ceiling panels are different, but both are made of lightweight mineral fibre.
- These are held up by a metal grid painted to blend in with the ceiling and suspended from the real ceiling using wires.
- However, if your ceilings are at least nine feet high, this won't be too much of a hardship for you.
- Tiles and panels can both be painted and cleaned (but avoid the deeply textured types).
- Several of these materials have fire-retardant properties in addition to their acoustic ones.
- Plaster repair is often prohibitively expensive, but installing gypsum wallboard is a one-and-done job that can save you money in the long run.
- If you aren't a seasoned renovator, however, you should hire a professional.
- Mounting ceiling-height 4'-by-8' sheets of wallboard is a challenging task.
- Regardless of the situation, the wooden surface can be altered to suit individual tastes by means of painting or staining.
- If your ceiling has spider-web cracks, wallpaper is another option to consider.
- Select a high-quality, neutral-colored wallpaper if your only goal is to hide the cracks and restore the smooth surface they damaged.
- If you want to paint the ceiling a specific colour, you should consult with the retailer for help in making that decision.
- Bear in mind, though, that restoring a ceiling in poor condition serves no purpose if the underlying problem, or rather the problem that is on top of the ceiling, has not been resolved.
- The roof or rafters in the attic need to be repaired first if there is a leak or structural damage; otherwise, all of your efforts will be in vain.
- You should consider decorating your ceiling in some way to make the most of its aesthetic potential.
- The ceilings of rooms have a lot of unrealised potential in terms of adding colour, pattern, and surface variation, but are often overlooked because of this.
- The fact that a roof is out of reach doesn't make it any less there.
- Repairing Damaged Ceiling Tiles Materials Required Most decorative ceiling tiles can't be repaired if they get scratched.
- However, as the steps below will show you, there are some industry secrets that can be used to improve the ceiling's appearance, such as hand-tooling the edges, resurfacing the tiles, or painting over the entire ceiling.
- Always wear safety glasses when working with ceiling tiles to prevent damage to your eyes.
- Put the Tiles Back Together Again If one of your ceiling tiles is broken, an easy fix is to simply relocate the broken tile to a location where it will be less obvious to everyone who walks into the room.
- The broken tiles can be less noticeable if they are relocated to the four corners of the ceiling, away from the centre.
- It's a bad idea to put broken tiles near the entrance, where they'll be seen by everyone who enters the building.
- Cleaning the Floor Tiles Vacuum the basement ceiling tiles carefully using the hose and stair tool that came with your vacuum.
- All broken tiles must be replaced immediately.
- Neither ceiling tiles nor broken bones can be repaired, and neither can cuts or holes in the ceiling.
- Carefully remove the broken tiles and replace them with new ones.
- Prior to installing a ceiling tile, check that the arrow on the back of the tile points in the same direction as the rest of the tiles.
- It's a special kind of paint that allows you to paint the ceiling tiles and the gridwork simultaneously without taking any tiles down.
- When painting the ceiling, keep the paint can about 8 inches away from the surface and use long, even strokes.
- If you decide to change the spray pattern in the middle of the job, the finished product will look noticeably different.
- Repairing Metal Drop Ceiling Tiles Stunning and timeless, metal ceiling tiles are a great addition to any room.
- If you clean your metal ceiling tiles regularly and give them any other necessary TLC, they will look as good as new for years to come.
- Cleaning or restoring metal ceilings begins with a thorough dusting as the first step.
- The difficulty here is to clean the tin tiles without damaging them by rubbing the dust off of them.
- You can achieve your goal by using a feather duster.
- After the dust has been removed, you can even vacuum the ceiling tiles to get rid of any residue that may have been left behind.
- All the dust will be eliminated in this manner.
- When you're finished vacuuming the tiles, grab a bowl and fill it with hot water and dishwashing liquid.
- In order to remove any stains and to clean the tiles thoroughly, use a sponge dipped in soapy water to scrub them.
- In Stage 3, after the tiles have been cleaned, they are polished to a brilliant shine.
- You should therefore seek out a polish that is developed specifically for the type of metal ceiling tile you have to ensure you get the results you want.
- A little bit of polish goes a long way, so don't overlook the importance of that extra effort.
- Following these three steps, your metal ceiling should look as good as the day it was installed.
Frequently Asked Questions About Ceiling Tiles
Grab a ladder or step stool and don your safety glasses, and spray the affected tiles with a 50/50 solution of bleach and water. Wait 30 minutes or until the tile is dry, and repeat until the stain disappears. You can also apply the solution with a paint roller.
Painting the ceiling a different colour is an easy and inexpensive way to update the look of a ceiling instantly. One easy idea is to take 50% of your wall colour mixed with 50% white. Make sure the resulting colour doesn't look dingy on the ceiling (it depends on your starting wall colour).
How to Refurbish Vintage Pressed Metal Tiles
- Lay plastic sheeting on the floor and tape the edges to seal.
- Fill a bucket with vinegar and water solution.
- Prime the ceiling with a coat of primer if you choose to repaint the tiles.
- Roll up the plastic sheeting when the job is complete.
Use the soft brush of a vacuum or a high-quality duster. Wipe Tiles with Lint-Free Cloth – Dampen your cloth, then use it to wipe the ceiling tiles gently.
Use a bleach/water solution to blot and wipe the stain away. After the area dries, if it is still stable, you can directly paint over the area. Remove the damaged part of the ceiling/ceiling tiles and drywall and replace them with new, clean sections. Sand off the damaged layer and seal the area (wood ceiling)