
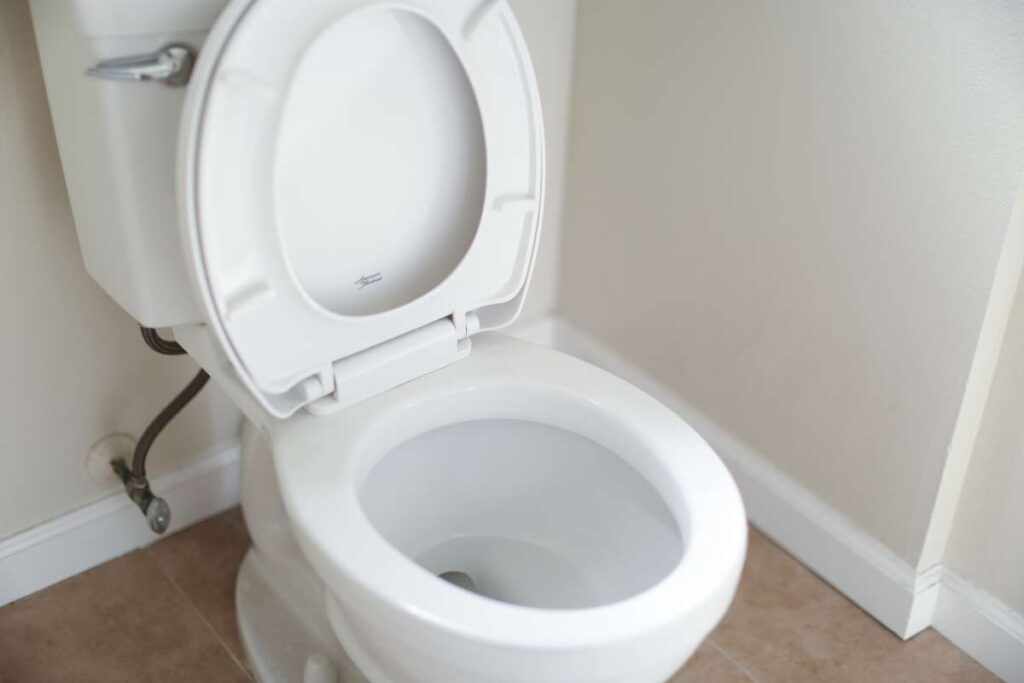
Do you see a puddle collecting at the foot of your toilet, where it meets the floor? Does it appear that the floor around the toilet is spongy? Will the finished flooring be installed soon? If this is the case, the seal between the toilet horn (the orifice through which waste is discharged) and the drain line is most likely faulty.
Put an immediate stop to your procrastination. If even little leaks are trapped below the toilet, the floor surfaces and even the framework beneath it might deteriorate. Repair costs will rise if you wait too long, especially if you consider the prospect of having to replace finished flooring in addition to underlayments, subfloors, or possibly the structure.
In the following paragraphs, we will first cover how to remove the toilet and then how to detect and repair the most common causes of leaks. Finally, we'll walk you through the steps of resetting the toilet. After removing the toilet and investigating the origin of the problem, you may find that you merely need to replace the wax ring and remount the toilet. If that's the case, it shouldn't take you more than an hour to get the stool working again. Any well-stocked home centre or hardware store will have the goods you need to complete the repairs we recommend. Pick These Up Before You Flush the Toilet:
- A new wax ring
- Two different sets of bolts for the toilet, each with a 5/16-inch diameter.
- A silicone caulk tube in a colour that matches the finish of the toilet.
- If your toilet was swinging, you should purchase a set of plastic toilet shims.
The failure of the seal underneath the toilet is typically the source of the leak. Both the installation of a new flexible water supply tube and a new wax gasket that will produce a watertight seal between the flange of the closet and the toilet will be covered in the following instructions.
The wax seal has broken if water begins to gather around the toilet's base. On the other hand, there are cases where the problem lies elsewhere. Water on the floor can be soaked up with a sponge, and the toilet can be dried with a towel. To determine whether water is leaking from the base of the toilet due to a broken shutoff valve, a damaged tank, or a sweating bowl, one must wait till a new puddle emerges on the floor. Water leaking from the bowl rather than the tank or the floor indicates a loose supply line, a broken tank, or a damp bowl.
Tightening the cabinet bolts again should fix a leak coming from the toilet's base. This will lessen the likelihood of more flooding. With a slotted screwdriver or putty knife, remove the bolt caps. Afterward, tighten each bolt by turning it clockwise with a wrench. In order to avoid damaging the toilet's base, it's important to avoid applying too much force. If you're fortunate, the leak won't continue to spread. In the event that tightening the bolts does not resolve the issue, you will need to remove the toilet and replace the wax gasket.
Take Out The Bathroom Vanity
The water supply to the toilet must be shut off at the shutoff valve, which is typically situated behind the commode or directly below it in the crawl space or basement. Removing the old wax gasket from the toilet bowl is the first order of business when installing a new one. To change the time, turn the dial counterclockwise.
Remove the tank lid, flush the toilet while pressing the lever, and the water should drain out of the tank. You can use a small paper cup to remove any remaining water from the bowl, and you can empty the tank by washing it with a sponge.
- Step two involves releasing the pressure nut on the shutdown valve in order to release the water supply tube.
- To remove the bolts and nuts from the cabinet, you'll need to pry off the covers and then turn them with a tool.
- While turning the nut, if one of the bolts begins to spin, grip its head with a pair of needle-nose pliers.
- Grasp the bowl's rim just below the hinges, and shake the toilet back and forth gently to loosen the wax seal. The third step is to remove the toilet from the floor and set it on a cardboard box or a blanket. A narrow-bladed putty knife can be used to scrape the old wax gasket from the floor flange of the closet and the bottom of the toilet. Check the flange for flaws like cracks and dents, and fix them if you find any. Once we scraped the wax away, we saw that a sizable chunk of the flange had broken off. There are three possible solutions to this problem: either completely replacing the flange, which is a major undertaking, installing a new flange, or using a repair strap to patch up the damaged area.
- After removing the flange's two screws, the curved metal strap can be installed. Before installing a new closet bolt, the strap must be pushed under the flange. Turning the flange screws clockwise will tighten the strap into place. Put the last bolt in the closet's flange. Put a bit of wax from the old gasket around the base of each bolt if they won't stand upright.
- Install a new wax gasket onto the flange of the closet. Place it smack dab in the middle of the flange. The bulk of wax gaskets are simply solid wax rings, however we went with the relatively inexpensive Harvey's Bol-Wax No. 5. This one features a urethane foam core surrounded by wax, allowing it to easily conform to the flange and create a watertight seal. Putting it in place is a breeze as well.
Changing The Toilet
If your toilet's supply tube is comprised of chrome-plated copper, you should upgrade to a stainless steel-enmeshed polymer supply tube for greater flexibility and durability. There is a significant reduction in complexity during installation, and the product is assured to last for decades. We purchased a 12-inch, $5 Fluidmaster supply tube, but they are available in 8- to 24-inch lengths as well.
First, you'll need to apply a small layer of pipe joint compound to the fittings on both ends of the supply tube. Then, using a pipe wrench, secure one end of the tube to the fill-valve shank protruding from the bottom of the toilet tank.
It is now safe to reinstall the toilet in its original location. Take hold of the toilet by the bowl near the seat hinges, lift it up, and slide it over to the flange. Position the toilet so that it sits on top of the wax gasket, using the closet bolts as guides. Screw the nuts on after placing the washers on top of the bolts. However, before tightening them, you must first compress the gasket by putting all of your weight on the bowl's rim.
Inspect the toilet tank to ensure that it is level with the back wall. Alternately tighten each of the closet bolts until they both feel secure. The next step is to press down on the bowl once more and draw the nuts together even more. Keep doing this until pressing down on the nuts with the toilet no longer produces the feeling that they are slack. Again, be cautious not to apply too much pressure with the wrench, as this could cause the toilet to break. The bolt caps can be snapped on after cutting the closet bolts with a hacksaw to flush the nuts.
In the final step, fasten the loosely connected end of the water-supply tube to the shutdown valve. To open the valve, turn it clockwise and flush the toilet several times. If there is a leak, apply pressure to the bowl and then tighten the nuts even further. After a few weeks, peel off the bolt caps and retighten the nuts, presuming the toilet isn't leaking. The toilet will frequently settle after a few uses.
Instructions That Can Be Followed Easily
- Disconnect the shutoff valve from the supply tube using the wrench. First, you need to drain the toilet and then you need to turn the valve all the way off.
- Remove the hex nuts from the closet bolts with a wrench after prying off the rounded covers with a screwdriver.
- Be sure to lift the toilet by the bowl, not the tank, and set it down on a thick blanket or a piece of cardboard when you move it.
- A scraper can be used to get rid of the old wax gaskets from the closet's flange. Notice how the flange is broken off in one spot.
- When repairing a closet, unscrew the flange from the floor and put a repair strap under it.
- A new wax gasket should be centred on the flange of the closet. Make sure to keep in mind that each of the closet doors have secure bolts.
- Connect the new water supply pipe to the toilet tank's threaded fill-valve shank.
- To compress the gasket, press down on the rim of the bowl. Once you've double-checked the security of the closet's bolts, press down again.
- To make the closet bolts easier to use, trim off the tops with a hacksaw in tight spaces. Be sure to fully tighten the nuts before replacing the caps.
- To turn off the water, connect the supply tube to the valve. After that, turn the water back on, clean the bathroom, and inspect for leaks.
Before You Begin
The most common fix for a leaky toilet base is to replace the wax ring that seals the toilet against the drain opening; however, there are two other possible explanations that you should look into first:
- It's likely that the bolts that hold the toilet to the floor are coming undone. Two floor bolts are used to secure the toilet's base to the floor. These floor bolts are threaded upward from the drain flange via holes in the toilet's base. If these bolts are not tight enough, the toilet may rock, causing the wax ring's seal to break. Each time the toilet is flushed, there is a chance that drain water will leak out around the base of the toilet.
- Water could be pouring down and accumulating around the base of the toilet as a result of condensation on the toilet tank and bowls. It is not unusual for the water in the toilet tank and bowl to be chilly. Because of the chilly porcelain and the high relative humidity in the room, condensation can collect in the air and drip to the floor. If this is the case, you will notice water droplets collecting on the porcelain bowl and the tank's outside.
What You'll Need?
Tools and equipment
Adjusting the Floor Nuts and Bolts
- a variable-setting wrench
Modifications to the Wax Ring
- Channel lock pliers with a Bucket Sponge
- a variable-setting wrench
- Miniature hacksaw (if needed)
- Putty blade
- Gloves for the workplace
Materials
Managing Condensation Effects
- Drip tray for toilet tank
- Panels for toilet tank insulation
Floor Bolt Tightening
- Bathtub and tile caulking
Modifications to the Wax Ring
- A new ring of wax
- Floor bolts have been replaced.
- Bathtub and tile caulking
How To Deal With Condensation?
The chilly water within the toilet can cause condensation to form on the surfaces of the porcelain, which can lead to puddles of water forming on the floor around the toilet. This condensation occurs when moisture drips from the humid air in the bathroom onto the surfaces of the porcelain. It is possible that there are droplets of moisture on the bottom of the toilet tank, in addition to "sweating" on the porcelain surfaces of both the tank and the bowl. There are a number of approaches that can be taken to mitigate the effects of this problem.
- Reduce the Humidity in the Bathroom Since the air in the bathroom is humid, the moisture is condensing onto the toilet; therefore, one solution to the problem is to work towards keeping the air in the bathroom drier. Taking showers that are both shorter and cooler can help lessen the amount of moisture in the air. Always ensure that the exhaust fan is turned on before getting into the tub or shower.
- When the air conditioner in the house is used during the warm summer months, the relative humidity of the air will decrease, which will result in less condensation.
- Cut Down on the Number of Flushes If you cut down on the number of times you flush the toilet, the water in the tank will be able to reach room temperature, which will lessen the amount of condensation that forms on the tank. Following the advice of the proverb "if it's yellow, let it mellow," you may wish to urge your family to flush the toilet only when disposing of solid waste if you live in a climate that is very humid. If the water in the toilet tank is warmer, there will be less condensation.
- Check for Leaking Flappers You need to check to see if the flapper on the flush valve inside the tank is sealing correctly. If it is allowing water to flow down into the toilet bowl, this will keep a continual stream of new cold water entering the tank, which will increase the likelihood that condensation will form on the tank's outside. Condensation on the toilet tank may typically be eliminated by repairing a faulty flapper.
- Utilise a Drip Tray Since the majority of condensation forms under the toilet tank, placing a drip tray there will help collect it and stop it from pooling on the floor. Although this may not be the most aesthetically pleasing approach, it does eliminate the risk of the flooring being damaged.
- Install a Tank Liner Tank liners are dense foam insulating panels that prevent the cold tank water from chilling the porcelain to a temperature that causes moisture in the room air to condense. This is accomplished by preventing the porcelain from reaching a temperature lower than the temperature of the tank water. After the water has been removed from the tank, the tank liner kits are then cut to size and glued to the interior of the tank.
How To Tighten The Floor Bolts?
Over time, the floor bolts that attach the toilet might become loose, sometimes as a result of the wax ring that seals the toilet becoming compressed. This results in the toilet being able to rock, which ultimately results in the drain seal being broken. Be aware, however, that this is an indication that the wax ring is getting close to the end of its useful life and should be thrown away soon. It's possible that tightening the floor bolts will help for a little while, but you'll probably need to replace the wax ring in the not too distant future.
- Take Off the Floor Bolt Caps Take off the plastic covers that are on either side of the floor bolts that run down the base flange of the toilet. Please check that the bolts and the nuts that are threaded onto them are in good condition. If the nuts or bolts are badly rusted, you might need to take the entire toilet apart in order to replace the bolts. On the other hand, you might find that the nuts are simply loose and can be tightened again.
- Adjustable Wrench Required to Tighten Floor Bolt Nuts In order to get the toilet back flush with the floor, you will need to use an adjustable wrench to tighten the nuts on the floor bolts. By turning the bolts clockwise, you will apply pressure to the wax ring, which will seal the toilet to the drain outlet and put an end to the leak.
- To inspect the toilet, flush it multiple times while keeping an eye out for any signs of leaking around the base of the toilet. If you observe any seepage, even the tiniest bit, you will need to remove the toilet and replace the wax ring. This is necessary even if the seepage is minimal.
- If there is no leak and the toilet appears to be securely sitting on the floor without swaying, then you should apply a bead of tub-and-tile caulk around the toilet's base, where it meets the floor. If there is a leak, you should call a plumber immediately.
How To Replace The Wax Ring?
Although tightening the floor bolts can help in some instances, removing the toilet and replacing the wax ring that seals the base of the toilet to the floor drain will last considerably longer and require less care. Generic wax rings fit the vast majority of toilets, but some toilet brands require slightly different wax ring diameters. If you're not sure which replacement wax ring will fit your toilet, describe it to the clerk at the hardware store or home centre and ask for help selecting a replacement wax ring.
- Turn off the water supply. As the first step in this process, turn off the water supply to your toilet. In most situations, this is performed by closing the fixture shutoff valve, which connects the water supply pipe to the supply tube that leads to the toilet's fill valve. This valve, which turns off the water flow, is frequently found under the left side of the toilet tank. Turn the handle all the way counterclockwise to turn off the water.
- If your toilet does not have its own shutoff valve, you must turn off the water at your home's main shutoff valve. (You might want to take advantage of this opportunity to have a shutdown valve installed for the fixture that regulates your toilet.)
- First, flush the toilet to eliminate the majority of the water from the tank. Next, use a sponge and a bucket to drain any remaining water from both the tank and the toilet bowl.
- Unscrew the mounting nut that secures the water supply tube to the fill valve tailpiece on the left side of the toilet tank to disconnect the fill valve. The fill valve can be unplugged when this nut is removed.
- To loosen the floor bolts, first remove the covers that cover the floor bolts on the toilet base's flange, and then unscrew the nuts threaded onto the floor bolts. It's probable that you'll need to use a little hacksaw to separate the rusted nuts and bolts. Be patient because this method of cutting through the bolts may take some time and strength on your part.
- To Remove the Toilet: First, raise the toilet away from the floor drain, then carefully place it on its side. It's probable that gently rocking the toilet will be required to break the seal. It is simple to shatter the tank of the toilet if you are not careful when you tilt the toilet to lay it on its side, therefore take extra precautions to avoid doing so. Because toilets have an off-kilter centre of gravity, it can be challenging to raise them by oneself; therefore, it is recommended that you seek assistance from a third party in order to avoid injuring yourself or damaging your toilet.
While the toilet is out of the way, you should give the floor and the subfloor a thorough inspection. If the subfloor beneath the toilet has become weakened or rotted as a result of persistent leaks, it is possible that the subfloor must be removed and replaced in order to provide a stable foundation for the toilet. This is a large carpentry work that would require outside assistance from an expert. In order to complete the task, the drain flange must be removed, the damaged subfloor must be taken away, new subflooring must be cut to size and installed, and a new drain flange must be installed. However, if the subfloor is not stable, merely putting a new wax ring will not produce the desired results.
Conclusion
A leak is usually caused by the seal failing under the commode. In order to do the necessary repairs, you may get what you need at any decent home centre or hardware store. Purchase a set of plastic toilet shims if your toilet is swaying. If water is leaking from the toilet's base, it could be because the supply line is loosened or the tank is broken. The first step in replacing a wax gasket in a toilet bowl is removing the old one.
To turn off the water supply to the toilet, find the shutoff valve, which is usually hidden under the bowl. Instead of having the toilet sit on the floor, place it on a thick cardboard box or a blanket. The old wax gasket can be removed from the flange with a narrow-bladed putty knife. If your toilet's supply tube is made of chrome-plated copper, consider replacing it with a polymer tube reinforced with stainless steel wire. Look at the toilet tank and make sure it is flush with the back wall.
Guide the toilet's placement on top of the wax gasket using the closet bolts. Press down on the bowl and tighten the bolts even more if there is a leak. If your toilet base is leaking, try replacing the wax ring that fits around your drain. It's also possible that the toilet's bolts are loose and falling out of the floor. Condensation on the porcelain is common due to the cold water in the tank.
You can lessen the blow of this issue by employing a few different strategies. One option is to take steps to ensure the restroom remains a somewhat dry environment. One more thing you may do is to reduce how often you flush the toilet. Tank liners are thick layers of foam insulation that stop the water in the tank from chilling the porcelain to the point where humidity in the air condenses on it. For the wax ring to effectively seal the toilet's drain exit, you must turn the floor bolts clockwise.
Flush the toilet several times and look for leaks while you do so. Toilets require removal and wax ring replacement if even a small amount of seepage is detected. The vast majority of toilets can use generic wax rings, however there are a few types that need specially sized wax rings. Taking off the protective coverings from the flange of the toilet base is the first step in releasing the floor bolts. You may need to use a small hacksaw to separate the corroded fasteners. It can be difficult to lift a toilet by yourself due to its off-center of-gravity.
Content Summary
- Cease delaying right now. Small leaks that aren't noticed might damage the subfloor and possibly the structure of the bathroom.
- If you put off repairs for too long, you may end up having to replace not only the completed flooring, but also the underlayment, subfloor, or even the structure.
- First, we'll discuss removing the toilet, and then we'll get into finding and fixing the most typical leak sources.
- At long last, we'll show you how to reset the toilet. It's possible that after removing the toilet and figuring out what's causing the issue, all that has to be done is to swap out the wax ring and reinstall the unit.
- In order to do the necessary repairs, you may get what you need at any decent home centre or hardware store. Common causes of toilet leaks include a broken toilet seal and a faulty wax ring.
- If water begins to pool at the toilet's base, the wax seal has broken. The only way to tell if water is leaking from the base of the toilet because of a damaged shutoff valve, tank, or sweating bowl is to wait for a new puddle to form on the floor.
- If water is leaking from the base of the toilet, try tightening the cabinet bolts again. If the problem persists after tightening the bolts, you'll have to take the toilet apart and replace the wax gasket.
- The first step in replacing a wax gasket in a toilet bowl is removing the old one. The water in the tank can be drained by removing the lid and flushing the toilet while pressing the lever.
- If you want to get the bolts and nuts out of the cabinet, you'll need to pry off the covers and then turn them with a tool. Step three involves lifting the lavatory off the ground and placing it on a thick blanket or cardboard box.
- Old wax gaskets on the floor flange of the closet and the bottom of the toilet can be removed with a narrow-bladed putty knife. Cloakroom flange bolt, final installation. Replace the wax gasket on the closet flange.
- Performing a Toilet Repair
- Supply tubes made of chrome-plated copper are less flexible and less long-lasting than those made of stainless steel-enmeshed polymer.
- The toilet may be put back in its proper place immediately. Guide the toilet's placement on top of the wax gasket using the closet bolts.
- After the washers have been set atop the bolts, the nuts can be tightened. Tighten each of the closet bolts in turn until you feel confident in their security.
- Next, secure the water supply tube's disconnected end to the valve. Turn the valve clockwise to release the seal, then flush the toilet a few times to open it.
- Using the wrench, disconnect the valve from the supply tube. Pry off the rounded covers from the closet bolts with a screwdriver, and then use a wrench to remove the hex nuts.
- You can remove the old wax gaskets from the closet's flange with a scraper. When installing a new wax gasket, make sure it is centred on the door flange.
- Replace the old water line by attaching it to the threaded fill-valve shank on the toilet tank.
- Changing the wax ring that seals the bowl to the drain is the most typical solution to a leaking toilet base, but there are also two additional potential causes to consider:
- The bolts that secure the toilet to the floor are probably loosening.
- The base of the toilet is bolted to the ground using two bolts. Toilets typically have holes drilled in the base for floor bolts to thread up through and secure the drain flange.
- When the toilet is flushed, water from the drain may seep out of the base and pool there. It's possible that condensation on the toilet tank and bowls is causing water to drip and pool at the floor.
- Water temperature in the toilet bowl and tank is typically low. Condensation forms on the porcelain surfaces of the toilet as a result of the cold water inside the bowl, resulting in pools of water on the floor.
- Due to the high humidity in the bathroom, condensation forms on the porcelain surfaces. There may be condensation on the inside of the toilet tank, and the porcelain of the tank and bowl may be "sweating."
- The Bathroom Needs Less Moisture Since the moisture in the air is condensing onto the toilet bowl because of the high humidity, one approach to addressing the issue is to reduce the humidity in the bathroom.
- Reduce the amount of water vapour in the air by taking shorter, cooler showers.
- Trying to Limit the Frequency of Flushing Condensation on the toilet tank can be reduced by reducing the frequency with which it is flushed, as this allows the water in the tank to warm to room temperature.
- Condensation can be reduced by heating the water in the toilet tank. Flaps should not be leaking. Be sure the flapper on the flush valve inside the tank is doing its job properly.
- Drip trays should be used. A drip tray should be placed under the toilet tank, where condensation is most likely to form, to prevent it from dripping onto the floor.
- If the wax ring that seals the toilet has grown crushed over time, the bolts that link the toilet to the floor may break loose.
- Inspect the condition of the bolts and the threaded nuts that secure them.
- To Tighten the Nuts of the Floor Bolts, You Will Need an Adjustable Wrench. You'll need an adjustable wrench to tighten the nuts on the floor bolts and bring the toilet back to a level with the ground.
- In order to stop the leak, spin the bolts clockwise to apply pressure to the wax ring and seal the toilet to the drain outlet.
- The toilet can be checked for leaks by flushing it many times while keeping an eye on the floor around the bowl's base. Toilets require removal and wax ring replacement if even a small amount of seepage is detected.
- If the seepage is even a little bit, this needs to be done. You can ask for assistance at any hardware store or home centre in finding the right replacement wax ring by describing your toilet to the staff.
- The water must be turned off. First, make sure the water is turned off to the toilet. To stop the flow of water, spin the handle completely counterclockwise.
- First, detach the nuts that are threaded onto the floor bolts by unscrewing the covers that cover the floor bolts on the flange of the toilet base.
- You may need to use a small hacksaw to separate the corroded fasteners. In order to get rid of the bathroom: You should carefully place the toilet on its side after you have lifted it up and out of the way of the floor drain.
- While the toilet is removed, you should check the floor and subfloor carefully.
- The subfloor beneath the toilet may need to be removed and replaced if it has gotten compromised or rotted as a consequence of repeated water leaks.
- The task cannot be finished until the drain flange is removed, the damaged subfloor is disposed of, new subflooring is cut to size and installed, and a new drain flange is placed.
Frequently Asked Questions About Leaking Toilet
The leak is usually caused when the seal under the toilet fails. Below you'll learn how to install a new wax gasket to create a watertight seal between the toilet and the closet flange and a new flexible water-supply tube.
The wax ring is exactly what it sounds like: a ring made of sticky wax that helps form a watertight seal between the bottom of the toilet and the sewer pipe. It requires no maintenance and can last 30 or more years, often as long as the toilet itself. But sometimes, wax rings can dry out, crumble, and fail prematurely.
The first sign of a failing wax ring is water that seems to be seeping out of the base of your toilet. Other signs to look for include: Water stains on the ceiling from the floor below. A lingering, unpleasant bathroom odour from escaped sewer gasses.
Common Causes of a Leaky Toilet
- Condensation on the bowl.
- Crack on the tank or bowl.
- Rusted pipes.
- Loose or worn-out seal at the base.
- Loose or worn-out tank-to-bowl connections.
- Misadjusted flush valve assembly.
- Worn out, flapper.
It all comes down to your personal preference. If you feel more comfortable using something tried and true, stick to a wax ring. For a newer mess-free approach, wax-free toilet seals are the way to go.