Waterproofing is a vital part of keeping your house in good condition. It's another great idea that should be incorporated into any construction or renovation projects you're working on for the exterior of your home. A variety of methods exist for making sure that walls are impermeable to water, but in this piece, we'll be focusing on one technique in particular: hydro jetting.
Hydro Jetting involves blasting water under pressure through tiny holes drilled into the face of the stone or brick wall at key points where water may penetrate and cause damage. These cracks are strategically placed in high-risk entryways for water to unleash havoc. Cracks and fissures are fixed during this procedure by injecting cement grout behind them to form a waterproof barrier. As a result, rainfall is kept out of the construction of the building. After that, mastic sealer is used to further protect the mortar joints from water intrusion.
If the outer walls are exposed to precipitation or a high relative humidity, water and moisture may permeate the brickwork and affect the inside walls of your home. This means that it may take a long time for your walls to dry after being wet, which can lead to the growth of mould and irreparable damage. When it comes to water damage in walls in humid locations like Florida, it's not if, but when.
Exterior Wall Waterproofing
Several alternatives, such as whether or not to employ a trencher and a bobcat, would also affect the project's final cost. This might increase your daily spending by an extra $100-$200, not counting delivery fees. Given how close the trench is to the Wall, using machinery like a Trencher, Mini-Excavator or Bobcat would be challenging. If you don't regularly work with this kind of machinery, this will be very challenging for you. What we found was that the tried-and-true approach worked the best.
Go in there and begin digging with your hands. After waiting around a month for the dirt to settle, we rented a small Bobcat and planted some shrubs and grass in the trench up against the Wall to finish the landscaping. Nothing now remains to indicate that anything of note occurred there. Without the Excavator or Bob Cat, the price of this project was roughly $1,000; the actual cost would depend on the length of the wall being waterproofed. For a hand-dug hole, post hole diggers, in addition to the shovels, and wheel barrels you likely already have on hand, you'll need the following:
Look For Cracks In The Walls.
Only if the outer walls become damp from moisture or rainwater is waterproofing the proper solution. That's why, before you go looking for waterproofing materials, you need to eliminate any other possible sources of structural moisture. It could be a leaky pipe, crumbling bricks, condensation on the inside of the Wall, or anything else. After you've fixed the problem, you might use a waterproofer as a preventative measure.
Make Sure Your Gutters Are Clear
Clogged gutters not only cause water to spill over the edge and down the walls, but they also collect water that can rot the fascia boards and rafters on your roof. Problems including leaking, mould growth, and rotting wood are possible outcomes. Having water spill over the edge and down your walls isn't the only issue with clogged gutters. These issues can be avoided and your home's health maintained if you clear up your gutters twice a year.
When selecting a waterproofing agent, please use caution. Today, homeowners may choose from a wide selection of waterproofing materials designed to fend against water from the outdoors. Here's a rundown of some items worth considering for your shopping cart:
- Waterproofing coating for concrete is a cement-like material that bonds to masonry and concrete permanently; it may be applied to any surface, even painted walls, and keeps water out of concrete.
- A silicate-based concrete sealer that creates a waterproof coating by reacting with the elements of masonry and concrete; this sealer is only suitable for use on walls that have never been painted or sealed before;
- Waterproofing paint is notably more watertight than acrylic wall paint. Painting a wall with acrylic paint is like painting with waterproofing paint. If you want your walls to be able to breathe and release excess moisture, you need to choose a formulation that allows this to happen. You can use this product even on previously painted walls.
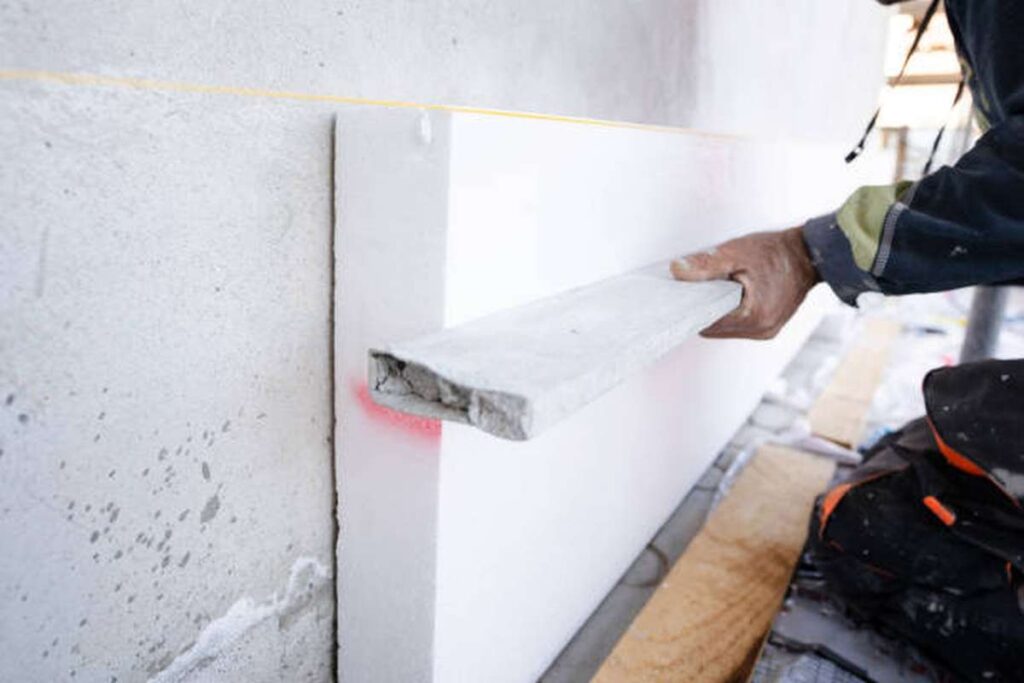
Apply a Waterproofing Agent to Plaster
By applying plaster, you may strengthen walls, give your home a more finished aspect, and prevent moisture damage. Waterproofing additives can be mixed into plaster to fix water penetration problems and prevent them in the future, even though most exterior plasters already have these capabilities built in.
Get Your Walls Waterproofed Now
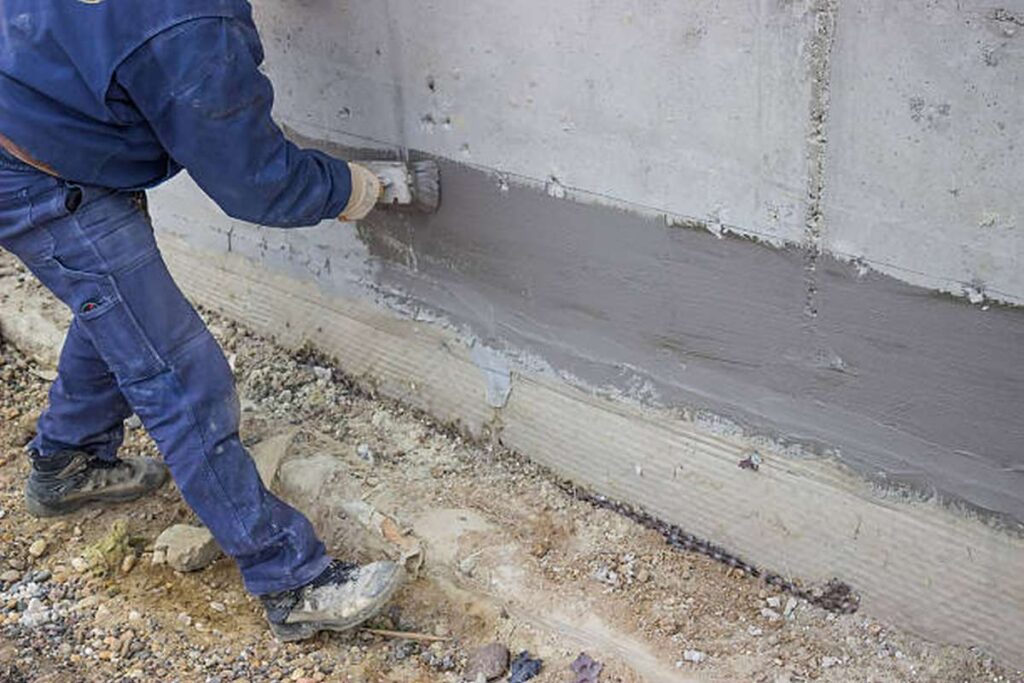
You should fix up the exterior walls and get them up to code before you try to waterproof them with any method. The use of a high-quality filler is essential for mending chips and holes. Filler should be completely dry before being ground. The walls must be sanded down to remove any rough or uneven areas, washed down to remove any dust and allowed to dry completely before the waterproofer is applied.
Use a brush or roller to spread the waterproofing agent across the surface. If you need to apply a second coat, wait until the first one is dry before doing so. In order to create an impenetrable barrier against infiltration, it is imperative that you use an adequate amount of the substance.
Test
A water-tightness test is essential for establishing whether or not the materials are suitable for waterproofing exterior walls. As part of this experiment, you'll spray water onto the wall's surface at a 30 degree angle and leave it there for a few hours. If a moisture metre reads 0%, your home is dry and will pass inspection. Waterproofing the exterior walls of your home will not only protect it from costly damage, but also boost its resale value.
The Sealant Paint for Waterproofing
Example: Thoro-seal, a cement-based paint that has been on the market for many years, sells for $50.00 for 5 gallons. More recent products can cost as much as $250 for a 5-gallon bucket. Water blocks, like Krystol T2 from more current technology, are installed on the surface to counteract hydrostatic pressure. Small crystals grow as a result, and they eventually fill all the crevices and gaps in the concrete. It can restore damaged membranes and serve as an additional defence for many years to come. Typically, this quantity is enough to cover up to 300 square feet of wall surface. Either a spray can or a paintbrush will do the trick.
Heavy Duty Plastic 6 mil Membrane
Less than fifty dollars will get you a roll of oversize wallpaper measuring 10 by 50 feet (about 500 square feet). Both of those options would make you safer.
Tar Pitch, 4.85 Gallons
The products can be applied to exterior walls above and below ground and cover an area of about 120 square feet for $80. Masonry walls, such as those made of concrete or cinder blocks, can be treated with this product.
Brushes and Trowells
The overall price of having these items applied is between $60 and $85. Applying the products to these surfaces would be impossible without them.
Fluid Cement, or Hydraulic Cement
Can prevent water from draining through porous masonry, such as concrete and blocks. When subjected to 5500 psi for 8 to 10 minutes, hydraulic cement can be used above or below ground. Fixes Wall cracks as large as golf balls. You'll need it to patch any holes or cracks in the surface before painting, and it can harden and set even when submerged in water.
Gravel, 3/4 Inch, Bulk
Between $30 and $40 per tonne, plus an additional $100-150 for delivery to each site. Please have it delivered by truck during the week. You'll save money compared to the weekend rate. Picking it up by yourself is not only impractical due to the time commitment involved, but also potentially disruptive to other passengers' pickups.
4″ Polypropylene Drain Pipe
If you buy some extra socks, the cost per foot drops to about $35, and there's no need to buy a fabric separator. Pipes of this size are often used for drainage purposes. The use of any impediment requires caution.
High-Pressure Cleaner
Many retailers, including Home Depot, charge up to $100 per day to rent or sell them, or you may simply purchase your own. Using a pressure washer can be useful in a variety of situations. Not counting the Wall, you could find a hundred uses for it. Even though we already had one installed, we decided to buy a pool anyhow, and it was the best decision we had made.
How To Waterproof An Existing Exterior Wall?
- It is necessary to remove the fill and soil that was originally used to backfill against the Wall in order to see its exterior. It must be dug up and hauled away, together with any discarded drainage pipes or field tiles, all the way to the Footer.
- The next few steps will go more smoothly if the caked-on dirt on the wall is removed. The wall has to be cleansed of the filth and debris that has accumulated there. It is recommended to use a broom or brush to clean the wall first, and then a power washer to get the job done quickly and thoroughly.
- Fill any visible holes or cracks in the wall using hydraulic cement once you've cleaned it. If you detect any significant cracks or holes in the Wall, use hydraulic cement to patch them up. Follow the cement's instructions to the letter before using this product, and make sure there are no cement or loose stones left over from the previous application.
- After the Wall has dried completely, seal it with an exterior-grade, watertight paint using a paintbrush. Afterwards, when the Wall has been painted, this can be done. This needs to dry out fully.
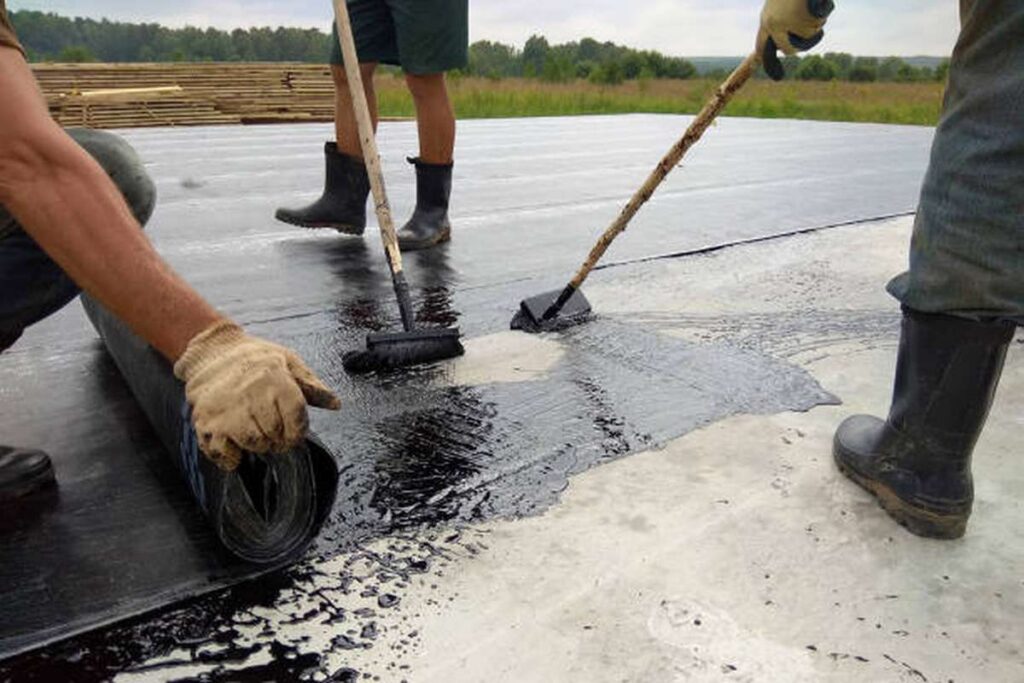
- Put up the wall with a tar-based substance. You can pitch the wall by trowelling on a product based on tar.
- To ensure the drainage pipe has something to rest on, fill the trench beneath the footer with a gravel base measuring 3/4 inches thick. There needs to be a layer of gravel at the bottom of the trench to effectively support the perforated plastic drain pipe that will be laid in it.
- Cover the drainage pipe with gravel and lay it on its side, holes up. Place it so that its surface is even with the footer. Next, use the gravel to backfill the area and cover the pipe with at least a foot of material.
- Over the perforated plastic pipe, you should lay a cloth or other barrier. This is an important measure to take to keep dirt and other debris out of the pipe, which could otherwise cause a backup.
- Filling the Dighole with Dirt The trench must be backfilled with dirt and the top surface must be raised so that water can drain away. Try to tilt the ground away from the house to create a runoff area. Adjust the rain gutters as needed to divert roof runoff away from the foundation.
Can Bricks Be Sealed?
Brick walls are sturdy, long-lasting, and both functional and visually appealing. Brick walls can be found within homes separating rooms as well as outside homes as the facade. However, because of its porous nature, brick is susceptible to water infiltration if not properly sealed.
Things You'll Have to Have
The brick wall needs to be sealed since water seepage might lead to the formation of mildew and mould.
- Drop cloths can be used to protect the finish of your plants, grass and floor against a brick wall.
- Mix four parts warm water with one component TSP in a big container. Wearing rubber gloves, combine the TSP and water with a bristle brush. For best results, let the brush soak in the liquid for around ten minutes.
- Using the cleaning solution, give the brick wall a good scrubbing to get rid of the filth and dirt that has accumulated there. The bricks used to construct the Wall must be free of any debris or grime.
- It is recommended to dry the brick wall with a heat gun or a hairdryer after cleaning it thoroughly. Do not let the brick wall air dry; doing so could lead to the formation of water stains. If you want to get into the cracks of a brick wall, use a heat gun or a dryer. After the brick wall has dried, rinse the bucket thoroughly and put it away.
- Masonry and concrete sealant cans are typically sealed with metal lids and require a flat-head screwdriver to be opened. Dip a paintbrush into the sealer and apply a thin layer. Seal each brick by brushing sealer onto it, working slowly from the top down. Then, after the recommended drying period has passed, the product can be used.
- Apply a second brush application of masonry and concrete sealant once the first has dried. Dry the product according to the manufacturer's instructions, which is usually between 24 and 48 hours.
Conclusion
Home maintenance that includes waterproofing is essential. Waterproofing walls can be achieved in a number of ways. When hydro jetting, water is blasted at high pressure through microscopic holes drilled into the face of the stone or brick wall. To dig a trench, you will need wheel barrels, shovels, post hole diggers, and a hand dug hole. Waterproofing supplies shouldn't be sought until all other moisture hazards have been dealt with.
If you clear out your gutters twice a year, you won't have to worry about them getting clogged and posing a risk to your health. Compared to regular acrylic wall paint, waterproofing paint is noticeably more water resistant. This product can be applied to previously painted walls. You can save money on repairs and increase your home's value by waterproofing the external walls. Using a high-quality filler is crucial when fixing cracks and breaks.
A roll of extra-long wallpaper (10 feet by 50 feet) costs less than $50. (about 500 square feet). Modern 5-gallon buckets can cost as much as $250. 4.85 gallons of tar pitch, which may be used on both above- and below-ground walls, costs $80. Home Depot and other stores will rent or sell them to you for up to $100 per day, or you can buy one outright. Besides the Wall, you might think of a hundred different applications for it.
We had had a pool put in, but we decided to go ahead and get a new one anyhow. Brick walls are permeable and so subject to water seepage. If the area is not properly sealed, mildew and mould could grow due to water seepage. We recommend using a bristle brush in a mixture of warm water and water for 10 minutes. Sealant containers for masonry and concrete often have metal lids that demand for a flat-head screwdriver to remove. Apply a thin layer of sealer by dipping a paintbrush into it and spreading it throughout the surface. Hang or lay the product flat to dry for the recommended time, usually between 24 and 48 hours.
Content Summary
- Home maintenance that includes waterproofing is essential.
- It's another fantastic plan that ought to be incorporated into any outside home construction or repair you undertake.
- Hydro jetting is just one of several methods for making sure that walls are watertight, but it will be the focus of this article.
- In hydro jetting, water is blasted at high pressure through tiny holes drilled into the face of the stone or brick wall at strategic locations where water may penetrate and cause damage.
- Rainwater is thus prevented from penetrating the structure.
- Water and moisture can seep through the brickwork and influence the interior walls if the exterior is subjected to precipitation or a high relative humidity.
- As a result, it may take a long time for your walls to dry after getting wet, perhaps resulting in the formation of mould and permanent damage.
- Water damage to walls is an inevitability in humid climates like Florida.
- The ultimate price tag could be affected by a number of variables, such as whether or not a trencher and bobcat were used.
- Using heavy equipment like a Trencher, Mini-Excavator, or Bobcat would be difficult because of how near the trench is to the Wall.
- One month later, after the soil had settled, we rented a small Bobcat and used it to place plants and grass in the trench up against the Wall to complete the landscaping.
- The cost of this project without the Excavator or Bob Cat was close to $1,000; the final price would depend on the length of the wall that needed to be waterproofed.
- Waterproofing is necessary if the exterior walls become wet due to moisture or precipitation.
- Therefore, before searching for waterproofing materials, it is necessary to rule out any other potential causes of structural moisture.
- The source could be anything from a broken pipe or brick to crumbling mortar or even just dampness on the inside of the Wall.
- The use of a waterproofer as a preventative step after the initial problem has been fixed is a good idea.
- The problems caused by clogged gutters aren't limited to water overflowing and running down your walls.
- You can keep your home healthy and prevent these problems by clearing out your gutters twice a year.
- Please exercise caution when deciding on a waterproofing agent.
- As a result, there is a plethora of waterproofing materials on the market today that may protect a property from rain and other external moisture.
- Compared to regular acrylic wall paint, waterproofing paint is noticeably more water resistant.
- Using acrylic paint on a wall is similar to using waterproofing paint.
- Plaster has the potential to fortify walls, improve the look of a property, and protect it from water damage.
- Before attempting to waterproof the outer walls, you should have them brought up to code standards.
- Waterproofing agents can be applied with a brush or roller.
- In order to determine if the materials are adequate for waterproofing exterior walls, a water-tightness test must be performed.
- This amount may typically cover a wall area of up to 300 square feet.
- The goods have a 120-square-foot coverage area and cost $80. They may be applied to exterior walls both above and below ground.
- The product is suitable for use on masonry walls, such as those constructed from concrete or cinder blocks.
- In the absence of certain components, the products cannot be applied to these substrates.
- Can impede the seepage of water through porous masonry materials like concrete and blocks.
- It can harden and set even while soaked in water, so you can use it to mend any holes or cracks in the surface before painting.
- It's inconvenient to pick it up on your own because it takes too much time and could cause delays for other travellers.
- Polypropylene Drainage Pipe, Four Inches In Diameter
- Inexpensive sock purchases can reduce per-foot costs to around $35 and eliminate the need for a fabric separator, bringing the total cost to approximately $70.
- There are many applications for a pressure washer.
- In order to examine the Wall's exterior, the original fill and earth used to backfill against it must be excavated.
- Cleaning the wall with a broom or brush and then a power washer is the best method for getting the job done quickly and effectively.
- After the wall has been cleaned, use hydraulic cement to fill any gaps or fractures.
- Paint the Wall with an exterior-grade, impermeable paint and seal it with a paintbrush when it has dried completely.
- This must be allowed to dry completely.
- Tar the wall and erect it.
- Fill the trench under the footer with gravel to a thickness of 3/4 inches to provide a cushion for the drainage pipe.
- Gravel the area and lay the drainage pipe on its side, holes facing up.
- You should drape some sort of barrier, such as a cloth, over the perforated plastic pipe.
- In order to prevent a backup, it is crucial to take this precaution against dirt and other material entering the pipe.
- Putting Earth Back in the Hole After the trench has been dug out, it must be backfilled with dirt and the top surface raised so that any water that collects in the hole can flow out.
- Try sloping the land away from the home to make a drainage ditch.
- Roof water should be directed away from the building's base, so make any necessary adjustments to the gutters.
- You can use drop cloths to shield your brick wall's finish from damage while protecting your landscaping and flooring.
- Scrub the brick wall with the cleaning solution to remove the grime and dirt that has built up over time.
- There can be no dust or dirt on the bricks used to build the Wall.
- After a thorough cleaning, you should use a heat gun or a hairdryer to dry the brick wall.
- When the brick wall is dry, empty the bucket and store it.
- Once the initial coat of masonry and concrete sealer has cured, apply a second coat using a brush.
- Hang or lay the product flat to dry for the recommended time, usually between 24 and 48 hours.
Frequently Asked Questions About Waterproof An Outside Wall
Waterproofing is only "necessary" if you don't want water damage. Meanwhile, in the real world, digging down on the exterior and waterproofing the walls, along with a perimeter drain system, is the only truly effective waterproofing.
As everyone knows, that has been to a new construction site, there is trash, building waste and un-compacted soil used for backfill. These things contribute to an exterior waterproofing system that does not last for more than about 7-10 years.
External waterproofing systems use moisture impervious coatings and Geodrain membranes to block and divert the hydrostatic pressure that may be acting against a structure. This reduces the risk of water ingress and any failure of any internal waterproofing systems.
Although this method does involve some excavation, it can be well worth it. Exterior waterproofing is also more expensive than interior waterproofing because it requires more work and more material. Still, it efficiently stops water from getting close to the foundation of your home.
External tanking is the coating of a waterproof membrane to the outside of the property for protection against flood risk and water damage. The many flood control systems for external tanking include sheet membranes, pre-applied membranes, liquid systems, spray-applied elastomeric systems and cementitious systems.