You will be able to go on many exciting off-road adventures with your new recreational vehicle. Therefore, it is essential that you maintain your RV in pristine condition.
Your investment should serve you well for many years of trouble-free journeying provided you keep up with routine maintenance. Normal use and accidental damage can cause issues in even the most well-made RVs.
Those who own recreational vehicles know all too well how difficult and expensive it can be to fix a leaking roof (RVs). Your recreational vehicle's resale or trade-in value will take a serious hit if you have a leaking roof. If your roof is leaking, you should have it fixed immediately.
Thus, it is in your best interest to quickly find and fix the source of any roof leaks in your RV.

Types of Rv Roof Repairs Can I Use Seal on My Roof?
Fixes will vary depending on the nature of the damage, so it's important to keep that in mind. Perhaps you've returned from a trip and seen what appears to be a leak at a roof seam.
Or perhaps you have a major leak in the middle of nowhere during the monsoon season. One of the elements that determines the best or even appropriate materials for RV roof repair or sealant is the situation in which you find yourself.
An eternal fix is the first option. For the most part, this sort of upkeep is best left to a dealer or an RV repair service. It will require a large time commitment and monetary outlay.
If you choose to take matters into your own hands, though, you may find everything you need to permanently fix the roof leak in your RV. The second issue is the emergency situation at the roadside repair shop.
If you're camping in the middle of the Nevada desert and a tree branch falls on your RV, producing a leak, that's one scenario. This type of leak necessitates prompt action on your part to fix it. Although helpful, solutions of this nature are usually only a stopgap.
To reiterate, this second type of treatment is not meant to be a long-term option. Instead, it's a stopgap measure to buy you some time while you plan a more permanent repair to the roof.
RV Roof Replacement in an Emergency
The roof of your RV needs immediate attention if it is leaking. Allowing a leak to persist for too long will result in more expensive repairs due to the added damage caused by water.
Finding a leak in the roof of your RV necessitates a procedure that can effectively and quickly repair the damage.
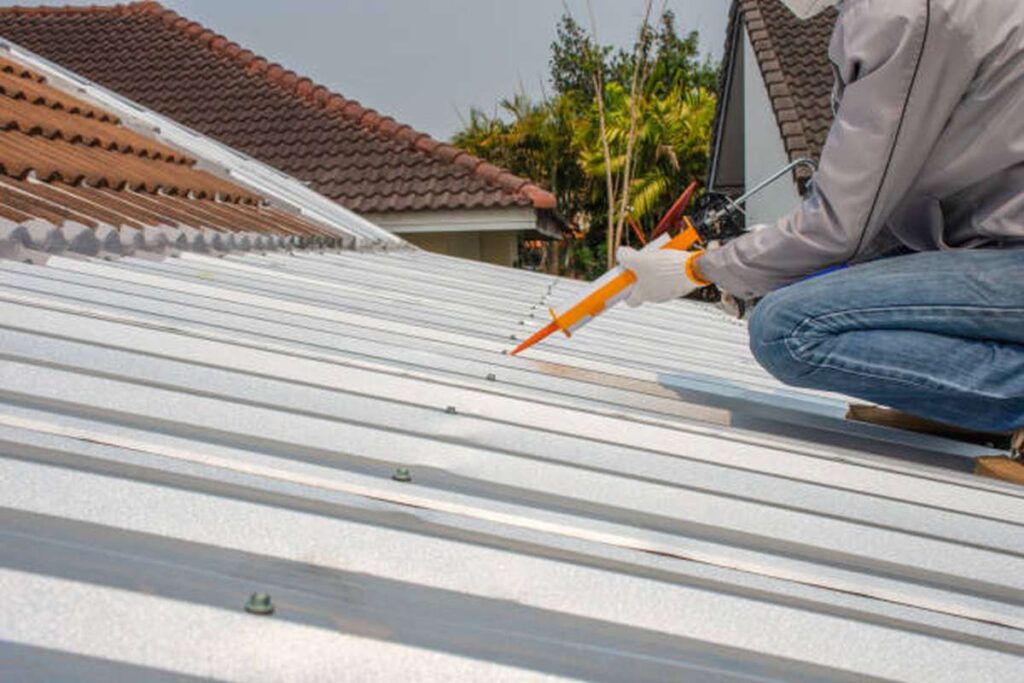
Furthermore, you will likely need an item that can be transported in one of the storage compartments of your RV to execute this activity. In such a case, you can try to stop the leak in your RV's roof by covering the affected area with a sealant that is both long-lasting and waterproof.
Many recently developed rubber coating materials have just entered the market. The question that must be addressed is which of these options has the best chance of successfully fixing the leak in your RV.
The use of seal should be considered. However, Seal has limitations like any other product. There are advantages to utilising this product, but there are also some disadvantages.
Seal's Many Benefits
Using seal is a cheap substitute for more costly repairs. On the other hand, the price of roof repair is likely to much outweigh the price of using Seal.
When applied, it takes only a few minutes to dry and completely seals any leaks. Seal, available from many different retailers, is great for making quick fixes on the road while waiting for a better long-term option to present itself.
Downsides of Using a Seal
Seal is not a permanent repair for the leak and must be replaced eventually. Hence, a Seal shouldn't be used to fix the entire roof. When there is a sizable quantity of roof space to be covered, it's a good idea to consider several options.
How To Stop A Roof Leak With Seal
Locate the Water Main Break.
Verifying that you've located the source of the water leak is the first and most important step.
To do this, just sprinkle a little amount of water over the region of your roof where you suspect the hole is located, and then look for the leak underneath the water. In order to track down the source of the leak, it is best to examine increasingly minuscule items.
Make sure to check the roof's junctures and any new additions like vent pipes.
a Spotless Region
Before you put on the Seal, make sure the surface is dry and free of dirt and debris. Be sure that your roof is free of any dirt, leaves, grease, or other material that may have accumulated over time. We recommend waiting for drying time for optimal results.
Get Ready for Product
Shake the can well before each use if you're using the original Seal Spray. If you want to get the most out of your seal, give it a good ten second shake. For best results, open the can of Seal Liquid and give it a quick, gentle stir before using it (do not shake.)
Use the Product
To solve the problem, point the Seal Spray directly at it and spray in a wide arc. Seal Liquid can be brushed on or poured onto the area to be sealed.
Allow each coat to dry to the touch before applying a new one. A coat may need between 24 and 48 hours to dry completely. Fill all the cracks and holes by repeating the procedure. Determine if the roof needs further coating, and apply it if it does.
To What Extent Does It Work?
Roof Leak Seal
When sealing a roof to prevent leaks, it is essential to get ready for the job ahead of time. Rubber sealant is sprayed with liquid and then soaks up the moisture to fill the gap in your roof. The procedures below are meant to act as a manual for reassembling your roof using this product.
Inspecting Seal for Signs of Life
Taking that first step is crucial. It ensures that the spot where the leak was found is the right one. You can do it by filling the suspicious-looking hole in your roof with water. Finally, check for seepage underneath it. To find where the leak is happening, you need to investigate one area at a time.
Washing It Down
Before applying the sealant, make sure the area is completely clean and dry. Repeatedly inspect your roof for any signs of stains, grease, dead leaves, or any other debris that may have settled there. The top of the container can be sealed to prevent leakage.
Weirdly Shaking It
Check that you are giving the can a good enough shake. To ensure optimal performance, it is shaken for one full minute.
Spraying
A fun way to go about things. You'll be able to direct the spray towards the trouble spot and apply it with the right techniques from this view point.
It is essential that this spray completely seals all of the cracks and pores, as well as the surrounding region. Once you've achieved the desired level of coverage, double-check that it's completely burned. It has an approximate worldwide shelf life of 48 hours. After the initial application of coating has dried, apply a second coat to the roof to completely seal any leaks.
Repair Roof Sealant
The seal then gets put to use in the fixing procedure. The source of the leak could be anywhere. Why water is so versatile and successful is because of this. It has a wide range of applications, including roofs, pools, basements, birdbaths, and more. It's easy to understand how to apply it as a repair method. Just what are you trying to say there?
You Must Get Your Roof Ready
Using a seal will not lead to any complications. However, prior planning is necessary in order to select the required place with leaks. The next step is to spray seal the area to repair the leak's effects. It makes no difference what degree of tilt the roof has.
Taking Care Of The Roof's Outer Layers
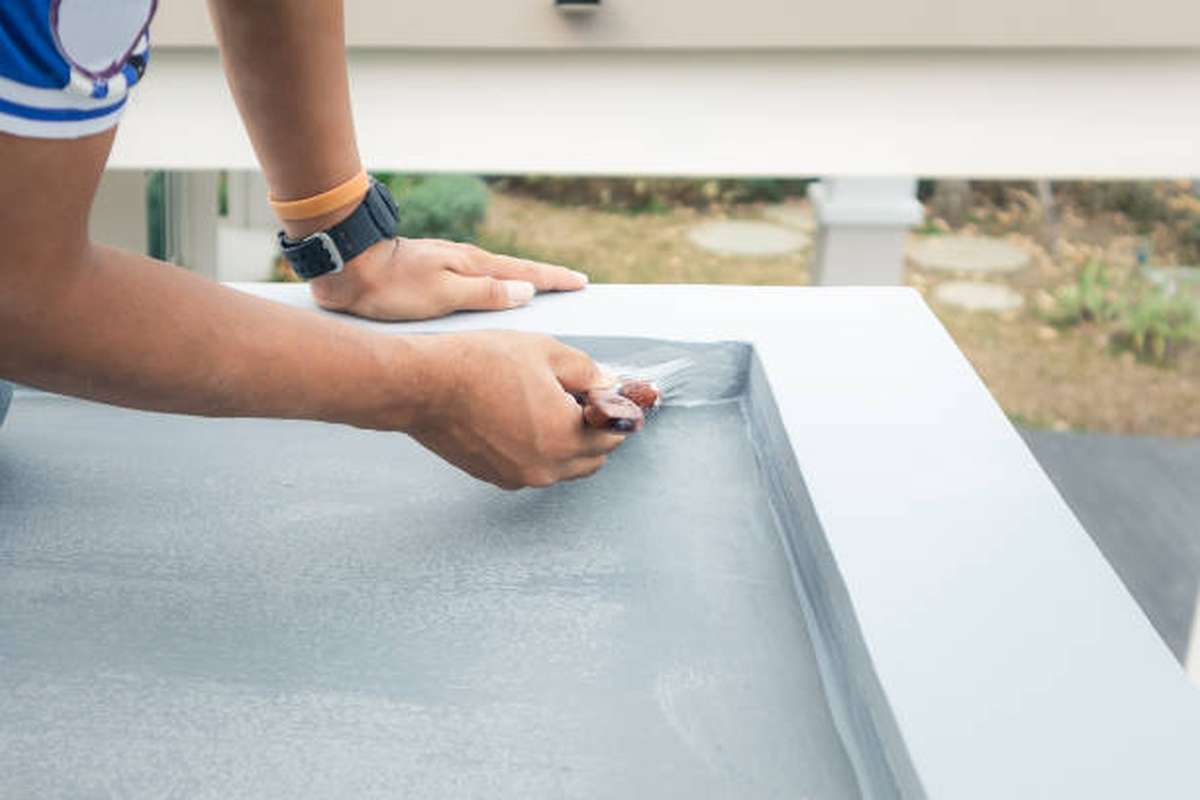
The roof's surface may need to be cleaned before the sealant can be applied. First, make sure the area to be sealed is free of dirt, dust, grease, and other contaminants. Sanding the surface beforehand increases the bond's strength.
Cleaning With A Brush And A Roller
Brush and roll the roof in the same motions to seal the surface. When attempting to fix the leaks, be sure to brush and roll the bigger area first. Allow each layer to dry for an entire day before applying the next. It may apply coating layers to seal all the cracks and fill all the holes.
Putting It Through a Wash
Spinning it in a circle in the seal will help you get all the dirt off of it. Let off of the surface when you're done covering it, and the seal will fall onto the can.
Roof Coating Sealant
It's possible to apply the seal roof coating ahead of schedule. Layers of coating can be made by a technique called coating.
There will be a drying time after spraying the sealant onto a roofing surface. You can reapply this compound to a previously sealed area once the layers beneath it have been dehydrated. Once it is done, hang it up to dry. Repeat this process twice or thrice to ensure complete coverage. You should give it at least 24 hours and as much as 48 hours to dry. The advantages of a coated seal will then be available to you.
Weatherproofing vs. Roofing Tar
The differences and similarities between roof tar and seal coating will be discussed after the topic of seal coating has been covered. Both appear to be equally effective at stopping leaks. A seal is a thin film of liquid rubber used to keep water or other fluids from leaking past. Meanwhile, roof tar is a chemical with a creamy consistency that is used to repair damage to roofs caused by a number of different problems.
Benefits of Using Roof Tar
- It can effectively and permanently stop the leak. The best possible outcome requires using only one, and this means that you should stick to that strategy.
- It's convenient since you can just take it with you and spray it wherever you need it.
- As time passes, the thin liquid will harden into a covering that effectively masks any imperfections.
- This part prevents water from escaping vessels and storage containers composed of rubber, metal, plastic, or wood.
- Its versatility lies in the fact that it can be used on both dry and wet floors, depending on the circumstance. With its noise-cancelling and music-playing features, it's a must-have.
How to Seal Your RV Roof with Four Different Materials
You can choose from seal liquid, seal spray, or seal shot. Black, white, and transparent variations of the Seal Liquid and Seal Spray are all readily available to consumers. You can get shot in two different colours: white and clear. Seal's compatibility with such a wide variety of RV roof materials is a major selling point for the product.
Preservative Fluid for Seals
To immediately seal leaks, you can use a product called Seal Liquid, which is a liquid rubber that comes in a can. The roof of your RV is vulnerable to corrosion, but a Seal will keep it from spreading. Also, it can withstand extreme temperatures without melting, peeling, or splitting.
Seal is a thick liquid that can be brushed over, poured over, rolled over, or dipped into for various effects. After curing, the rubber coating will be impervious to water, strong, and flexible.
Oil for Seals
The most popular choice among liquid rubber sealers that may be sprayed on is Seal Spray. There is no need for brushes or rollers while applying seal because you can just use the aerosol spray. Care must be taken to avoid spraying oneself. Keeping it tidy isn't always a breeze.
Shot
When dealing with tight, inaccessible spaces, shot is the best option. It can be used in a variety of ways, but it is most effective as caulking around air conditioners and windows. To use, simply release the bottle's downward pressure. This will immediately stop the flow of liquid.
Tape for Sealing Envelopes
Applying some Seal Tape to the dripping spot is a good first step before resorting to the other methods described above. If a branch from a tree were to fall on your roof and cause damage, the tape would be perfect for mending the tear.
In What Ways Can Seal Be Used To Fix Rv Roofs?
Rubber roofing for recreational vehicles is typically made from one of two main types of materials. They are more formally known by their acronyms, EPDM and TPO. While the structure and appearance of TPO and EPDM rubber roofing are similar, the terms are used interchangeably.
Top
Thermoplastic olefin (TPO) roofing is currently the most popular choice for recreational vehicle (RV) roofs. The fact that it's cheap and readily available in white has also led to its widespread adoption.
TPO membranes have a plastic-like outer layer that gives them a glossy, laminated appearance. A rubbery texture can be felt on the membrane's innermost layer. Mechanical fasteners, like screws, may be used for attachment. Another option is to use glue to secure it. When it comes to finishing touches and seams, glue and heat are equally effective.
Rubber Epdm Roofs
EPDM is also frequently utilised as a roof material for recreational vehicles. There are many ways in which it differs from TPO. First of all, EPDM is a vulcanizable synthetic rubber. That it can be dried and afterwards solidified into sheets is indicated.
You might try using EPDM before it was vulcanised. It can't fully solidify in its current form. It is normal practise to use multiple varieties of EDPM while building an RV roof.
The roof membrane would be made from vulcanised EPDM, whereas non-vulcanized EPDM might be used for flashing and other details. EPDM rubber roofs usually don't need any maintenance for about 10 years, however they will oxidise over time.
Fiberglass Shingles
Fiberglass has also been a common material for RV roofs in recent years. Over time, fibreglass RV roofs will oxidise just like EPDM roofs. Most modern RVs with fibreglass roofs come with a clear coat finish, which reduces the rate at which the roof oxidises.
RV Roofs Made of Metal
Prior to the widespread availability of TPO and EPDM, metal was the material of choice for RV roofing. A seal can be adhered to almost any dry (or wet) surface, including wood, metal, aluminium, plastic, fibreglass, rubber, vinyl, and more. Even if the surface isn't totally dry, Seal will still stick to it. It is more effective on dry surfaces, but if you need to stop a leak and it is raining outside, you can still do it.
How To Use Seal
Any of the aforementioned materials can be used in place of seal to fix a leaking RV roof. But I want to stress that even though we're on the go, the most critical thing is to fix the leak so that no more water is wasted.
Seal is an excellent material for this purpose. Once you return from your trip, though, you'll be in a better position to design and execute a more permanent fix. This should prevent the issue from occuring again. However, while it will stop the leak in your water system for the time being, it is not a long-term solution.
Does Seal Work As Well As Dicor Lap Sealant?
When it comes to fixing leaks in RV roofs, Dicor Lap Sealant is a common recommendation. Dicor Lap Sealant, a self-leveling product applied in a bead, is ready for use when it has had a chance to spread and seal the leak.
Most people agree that Dicor Lap Sealant is a high-quality item that does an excellent job. Dicor Lap Sealant requires precise temperature conditions and careful preparation work to ensure a correct level and seal.
It is likely that these preparation actions and the necessary temperature conditions will not always be achievable or accessible during an emergency repair while travelling through the Alaskan wilderness or the deserts of the Southwest.
When you have the time and the relevant tools to adequately prepare the leaking location for repair and the ideal temperature to allow Dicor Lap Sealant to level and seal the leak, it is, in fact, the superior product.
However, having a couple of cans of Seal Spray hidden away in one of your storage compartments can be exactly what you need if you find yourself pulled over on the side of the Trans-Canada Highway with a leaking RV roof as storm clouds are developing in the distance.
What Have We Decided About Seal Rv Roof Repairs?
Many camper van owners have turned to Seal to seal up leaks in their vehicles. It's clear from perusing RV forums that while some individuals are thrilled with the results, others can't find anything good to say about it.
Seal may not be the greatest option for a permanent remedy on a leaking RV roof. It could be argued that Seal wasn't designed to be used in this particular application (repair of RV roofs). On the other side, it seems that many of the negative comments were written by consumers who were hoping that Seal would be a permanent fix to their problems.
Since you can find Seal Liquid, Spray, and Shot at most any department shop, as-seen-on-TV store, or internet vendor, it's easy to keep a supply on hand in case of an unexpected situation. It should go without saying that having a spare roll of tape is always a good idea.
At the same low cost, seal is also on offer. It works well in a wide range of temperatures and humidity levels, as well as on both dry and wet surfaces. It will definitely afford you some time to investigate more permanent alternatives for repairing the roof of your RV, as it is effective at avoiding leaks.
Conclusion
If your roof is leaking, you should have it fixed immediately. Normal use and accidental damage can cause issues in even the most well-made RVs. An eternal fix is not meant to be a long-term option; an emergency fix is usually only a stopgap. The roof of your RV needs immediate attention if it is leaking. Allowing a leak to persist for too long will result in more expensive repairs.
Seal, available from many different retailers, is great for making quick fixes on the road while waiting for a better long-term option. Before applying the sealant, make sure the area is completely clean and dry. Inspect your roof for any signs of stains, grease, dead leaves, or any other debris. Seal Liquid can be brushed on or poured onto the area to be sealed. A coat may need between 24 and 48 hours to dry completely.
Water is versatile and successful in a wide range of applications, including roofs, pools, basements, birdbaths, and more. It's easy to understand how to apply it as a repair method for leaks and other issues with the roof. Sanding the surface beforehand increases the bond's strength. A seal is a thin film of liquid rubber used to keep water or other fluids from leaking past. Roof tar is a chemical with a creamy consistency that is used to repair damage to roofs.
The best possible outcome requires using only one and this means that you should stick to that strategy. Seal is a thick liquid that can be brushed over, poured over, rolled over, or dipped into for various effects. When dealing with tight, inaccessible spaces, shot is the best option. Seal Tape is a good first step before resorting to the other methods described above. EPDM, fibreglass and other materials can be used to fix leaking RV roofs.
Seal can be adhered to almost any dry (or wet) surface, including wood, metal, aluminium or plastic. Dicor Lap Sealant is a popular choice when it comes to fixing RV leaks. Seal may not be the greatest option for a permanent remedy on a leaking RV roof. Having a couple of cans of Seal Spray hidden away in one of your storage compartments can be exactly what you need. It's easy to keep a supply on hand in case of an unexpected situation.
Content Summary
- Therefore, it is essential that you maintain your RV in pristine condition.
- If your roof is leaking, you should have it fixed immediately.
- Thus, it is in your best interest to quickly find and fix the source of any roof leaks in your RV.Types of Rv Roof Repairs Can I Use Seal on My Roof?Fixes will vary depending on the nature of the damage, so it's important to keep that in mind.
- One of the elements that determines the best or even appropriate materials for RV roof repair or sealant is the situation in which you find yourself.
- If you choose to take matters into your own hands, though, you may find everything you need to permanently fix the roof leak in your RV.
- This type of leak necessitates prompt action on your part to fix it.
- The roof of your RV needs immediate attention if it is leaking.
- Finding a leak in the roof of your RV necessitates a procedure that can effectively and quickly repair the damage.
- In such a case, you can try to stop the leak in your RV's roof by covering the affected area with a sealant that is both long-lasting and waterproof.
- Downsides of Using a SealSeal is not a permanent repair for the leak and must be replaced eventually.
- Hence, a Seal shouldn't be used to fix the entire roof.
- How To Stop A Roof Leak With Seal Locate the Water Main Break.
- Verifying that you've located the source of the water leak is the first and most important step.
- In order to track down the source of the leak, it is best to examine increasingly minuscule items.
- Before you put on the Seal, make sure the surface is dry and free of dirt and debris.
- Seal Liquid can be brushed on or poured onto the area to be sealed.
- Fill all the cracks and holes by repeating the procedure.
- Inspecting Seal for Signs of LifeTaking that first step is crucial.
- Washing It DownBefore applying the sealant, make sure the area is completely clean and dry.
- The top of the container can be sealed to prevent leakage.
- After the initial application of coating has dried, apply a second coat to the roof to completely seal any leaks.
- Repair Roof SealantThe seal then gets put to use in the fixing procedure.
- The source of the leak could be anywhere.
- It's easy to understand how to apply it as a repair method.
- The next step is to spray seal the area to repair the leak's effects.
- Taking Care Of The Roof's Outer LayersThe roof's surface may need to be cleaned before the sealant can be applied.
- Putting It Through a WashSpinning it in a circle in the seal will help you get all the dirt off of it.
- There will be a drying time after spraying the sealant onto a roofing surface.
- Once it is done, hang it up to dry.
- You should give it at least 24 hours and as much as 48 hours to dry.
- The advantages of a coated seal will then be available to you.
- Weatherproofing vs. Roofing TarThe differences and similarities between roof tar and seal coating will be discussed after the topic of seal coating has been covered.
- How to Seal Your RV Roof with Four Different MaterialsYou can choose from seal liquid, seal spray, or seal shot.
- Seal's compatibility with such a wide variety of RV roof materials is a major selling point for the product.
- Oil for SealsThe most popular choice among liquid rubber sealers that may be sprayed on is Seal Spray.
- Tape for Sealing EnvelopesApplying some Seal Tape to the dripping spot is a good first step before resorting to the other methods described above.
- If a branch from a tree were to fall on your roof and cause damage, the tape would be perfect for mending the tear.
- While the structure and appearance of TPO and EPDM rubber roofing are similar, the terms are used interchangeably.
- TopThermoplastic olefin (TPO) roofing is currently the most popular choice for recreational vehicle (RV) roofs.
- The roof membrane would be made from vulcanised EPDM, whereas non-vulcanized EPDM might be used for flashing and other details.
- How To Use SealAny of the aforementioned materials can be used in place of seal to fix a leaking RV roof.
- Seal is an excellent material for this purpose.
- However, while it will stop the leak in your water system for the time being, it is not a long-term solution.
- Does Seal Work As Well As Dicor Lap Sealant?When it comes to fixing leaks in RV roofs, Dicor Lap Sealant is a common recommendation.
- Most people agree that Dicor Lap Sealant is a high-quality item that does an excellent job.
- When you have the time and the relevant tools to adequately prepare the leaking location for repair and the ideal temperature to allow Dicor Lap Sealant to level and seal the leak, it is, in fact, the superior product.
- However, having a couple of cans of Seal Spray hidden away in one of your storage compartments can be exactly what you need if you find yourself pulled over on the side of the Trans-Canada Highway with a leaking RV roof as storm clouds are developing in the distance.
- What Have We Decided About Seal Rv Roof Repairs?Many camper van owners have turned to Seal to seal up leaks in their vehicles.
- Seal may not be the greatest option for a permanent remedy on a leaking RV roof.
- It could be argued that Seal wasn't designed to be used in this particular application (repair of RV roofs).
- On the other side, it seems that many of the negative comments were written by consumers who were hoping that Seal would be a permanent fix to their problems.
- Since you can find Seal Liquid, Spray, and Shot at most any department shop, as-seen-on-TV store, or internet vendor, it's easy to keep a supply on hand in case of an unexpected situation.
- It should go without saying that having a spare roll of tape is always a good idea.
- At the same low cost, seal is also on offer.
- It works well in a wide range of temperatures and humidity levels, as well as on both dry and wet surfaces.
- It will definitely afford you some time to investigate more permanent alternatives for repairing the roof of your RV, as it is effective at avoiding leaks.
Frequently Asked Questions About RV Roof
Dicor self-levelling lap sealant is one of the most common and one of the top picks for your RV's roof when looking for RV sealant. It does a great job and does not harden or crack. Dicor lap sealant is typically used for skylights, TV antennas, and air conditioners.
The rubberised leak stopper is also great for RV roof repair. It sells for $17 per gallon and seeps into cracks and crevices to bond with the metal and create a permanent seal.
The members of the Flex Seal family of products are silicone-based. Silicone is not what you want to use on your RV's roof because it leaves a residue that NOTHING else can stick to (including more silicone!), which bodes very poorly for future repairs.
When you need a watertight seal, think Liquid Rubber. Use on all RV Roofs. For hard-to-stick surfaces like EPDM (Rubber Sheet-like membrane), use Liquid Rubber EPDM primer to promote adhesion.
Eternabond is one of the only RV caulking types of sealant made in a tape form and will stop almost any leak or prevent one. A wide variety of people use and love Eternabond. It's trusted for its ease of use and quality.