
There is no reason for you to be concerned if inquiries about ceiling damage and leaks pass straight over your head. You are not by yourself! Even if we don't think about it much, the ceiling is a crucial part of any structure, whether it's a house or a place of business. If you find yourself in a sticky situation with a leaky ceiling, you must take the necessary steps to dry it out and protect your property from future damage. Only then can a calamity be avoided.
If you have a leak in your ceiling, the first thing you should do is dry out the affected area. The majority of experts think that the best course of action is to use a dehumidifier and shut off the area. Keep the windows closed if you're using a dehumidifier. If you are unable to do so, you should ensure proper air circulation by utilising fans and keeping the windows slightly cracked. Are you looking for roofing specialists in Melbourne? Roof Repair and Restoration Systems will handle it for you.
A different sort of drying technique is one that uses heat and a shop vacuum. Directing hot air from a shop vacuum into the ceiling, where it can help evaporate any remaining moisture, will help speed up the drying process. During this procedure, you must ensure that the wet drywall is adequately supported; otherwise, it will sag indefinitely.
Water is the most common cause of pollution in most cases. Those who have drywall ceilings risk having mould grow and smelling musty if the board is not thoroughly dried. If you have lath and lime, there is a chance that the lath will rot if the water is left to sit for an extended amount of time. The type of repair work that has to be done after you and your contractor have found the source of the water damage in your ceiling will also be dictated by the cause of the problem. Putting a stop to the leak is a critical first action that must be addressed. If this does not occur, the ensuing fixes will be in vain.
This is one of the most common mistakes that DIY homeowners make when it comes to home renovation tasks. They believe that just plastering over the damaged sections of the ceiling and fixing the leaks will cure the problem, rather than preventing the water from leaking in the first place. Unfortunately, this is only a band-aid solution that does not address the core problem. Even if you are unable to detect the leaks, this does not mean they do not exist. To give you an idea, here is a list of the steps that must be taken to address the source of the ceiling leaks mentioned in the preceding sentence:
- It is recommended that you check with a specialist regarding the condition of your home's appliances. The appearance of a leak is frequently an early indicator that an equipment, such as a water heater, is about to fail. Continuing to use leaking appliances might not only aggravate the leaks but also expose users to additional threats such as fires and electric shocks.
- In most circumstances, the problem can be solved by simply adding more waterproofing material to the bathroom; however, this is not always the case. If this is the case, you should have a professional evaluate your toilets, bathtubs, faucets, sinks, and showers to see if they need to be fixed or replaced.
- Roof Repair Work Should Always Be Performed by a Professional Not only for reasons of safety, but also to ensure that the job is done correctly. Roof Repair Work should always be performed by a professional to ensure that the task is completed appropriately. Incorrect roof repairs will not only raise the cost of repairing the problem, but will also aggravate the leak. Roof leaks can be caused by a multitude of factors, and only a roofing expert can identify which treatment will be most successful.
- Pipes and plumbing - If you have leaks in your plumbing system, you will most likely need to replace key parts of it, most notably the pipes. Because plumbing parts are generally inexpensive, this is usually the most cost-effective technique of repairing leaks.
- Rain gutters: Just with the roof, any work on the rain gutters must be performed by a trained specialist. Fixing leaks in gutters caused by obstructions and replacing worn-out or loose sections can usually solve the problem. Hangers, spikes, and brackets are very significant in this aspect. If you employ professionals to do the work, you can be certain that the slope of the gutter, which is a critical component, will not be altered accidently while the repairs are being completed.
When it comes to making the essential repairs to your ceiling, the first thing you should do is make sure that these leaks are fixed. You will be wasting money if you get a new ceiling put but fail to halt the leaks at the same time. In a matter of days, your brand-new ceiling is likely to sustain damage from leaks, which will necessitate further maintenance on your part to fix the problem. If you do not take action to finally halt the leaks, this cycle will continue to repeat itself.
Leak In Ceiling Repair Process ( A Step By Step Guide)

A ceiling leak is more than simply an irritation to deal with. If you don't fix it very away, it has the potential to do catastrophic damage to the rest of your house. A repair job on a leaking ceiling necessitates both time and skill. Regardless, if you educate yourself properly, you can complete it without the assistance of a specialist. Repairing a ceiling leak is not nearly as difficult as it may look at first glance.
However, if you do not perform it correctly, additional leaks will continue to appear in the system. In addition, in order to resolve the fundamental issue, you must first identify the root of the problem. You will find instructions on how to carry out these actions below. When you have a leak, the first thing you should do is figure out where it is coming from. If water is pouring through the roof from the upstairs bathroom shower, you will almost certainly need to call a plumber.
This implies that there may be an issue with the pipes, and you should act as quickly as possible. If you don't, there's a danger the pipes will sustain enough damage to put your entire house at risk. Mold, on the other hand, is almost likely an issue if there is a leak in the ceiling that originates from the roof. Rotting wood or damaged screws could also be the root of the problem.
This is yet another issue that must be addressed right away, and you should not be hesitant to do so. Any type of water can do considerable harm to your house. Not to mention mould, which can be hazardous to one's health. Even minor leaks can grow into huge issues in a relatively short amount of time. They are also responsible for decaying sheathing and framing, ceiling damage, and insulation deterioration, in addition to mould growth.
As a result, you should take action as soon as you notice those dreadful water stains. The faster you fix them, the less damage there will be and the cost of repairs will be lower. Roof Repair & Restoration Systems is the dependable firm on which you should rely if you want the best roof restoration in Melbourne. There is no need to look any further.
Draining The Leak
Try to find any signs of moisture in the area. Finding the spot in your ceiling where water is getting in is the first step in fixing the problem. Check for sagging or cracked drywall to pinpoint the source of the leak. There's a chance this represents where water first starts seeping into the building. Some spots on the ceiling may also look like they were stained with coffee.
Tarps or drop cloths should be placed precisely beneath the leak. By placing a drop cloth or a plastic tarp beneath the bucket, you may protect your flooring and furnishings from becoming wet. You can use it to collect debris as you repair the water-damaged section of your ceiling. Cover the hole in the ceiling with a bucket. If you have a container or bucket handy, you can catch the water that is dropping from the ceiling. When you start draining the water from the leak, you will capture the water that prevents water damage to your floors and pouring from your ceiling.
To halt the leak, drill holes in the ceiling with a screwdriver. Insert a screwdriver into the centre of the area where the leak is occuring. Make the hole far enough away from the ceiling framework planks. As a result, water will be directed away from the ceiling and the potential for further water damage will be reduced. Don't forget to keep the bucket below the ceiling's water damage in case any leaks or drips occur.
- The weight of water on your ceiling can cause it to sag, which can result in a large hole or even the complete collapse of your ceiling if it continues to get heavier and heavier.
- By making the hole bigger, you must be able to pinpoint exactly where the water is escaping.
Fixing the problem at its source will prevent additional damage.There's more to fixing a leaky ceiling than just swapping out the damaged section. Ceiling leaks are commonly caused by malfunctioning pipes or gaps in the roof. After you have stopped the flow of water, you must hire a skilled roof specialist or a handyman to repair the issue that caused the leak.
- The leak is almost certainly the cause of the issue if it is situated beneath a plumbing fixture in a bathroom, kitchen or elsewhere.
- A leak under a sink, tub, or other piece of plumbing is almost certainly the cause of the problem.
- A broken air conditioner is another potential leak point. It's likely that obstructions in the condensate lines of your air conditioner are to blame for the overflow and leaks in your ceiling.
Ceiling Tear-Out and Repair
You'll need to make a tiny hole in the drywall for the inspector to look through. As a safety precaution, you should turn off the power before you cut the inspection hole. It is necessary to examine the area on the other part of the roof before repairing the damaged one on the other side of the room. Cut a tiny square incision in the drywall; it should be deep enough to get through, but not too deep that it would reach the other side. You will likely need to hire an expert to rebuild your ceiling if you find ventilation, plumbing, ductwork for heating or gas lines, and air conditioning system after cutting the hole.
Carve out a square encompassing the flooded area. The water-damaged ceiling can be removed after it is established that the area behind it will not be damaged. Trace a square around the water-damaged area of your ceiling to create a box.
- If you use a framing square, the hole you make will be uniform in size and shape, making repairs simpler.
- Damage to your ceiling should be repaired by a professional if it covers more than 7 square inches (16.28 square centimetres).
Work in and around the water-damaged areas. Make a utility saw cut into the ceiling, following the lines, and then begin removing the damaged drywall from the ceiling. After the lines have been cut, the damaged drywall can be removed from the ceiling with a small prying tool.
- Make every effort to remove only what is absolutely necessary from the ceiling. A one-foot (or thirty-centimetre) square ceiling patch is far easier to fix than the entire ceiling.
Using the cutout drywall, take measurements. Measure the precise dimensions of the hole in the drywall that you are cutting with a ruler or a tape measure. You will have the necessary dimensions for replacing the part of drywall after measuring the section that was chopped off.
Re-Ceiling a Room With a Leaky Roof
Make two cuts in the wood piece. With a saw, make two cuts in a piece of plywood measuring 9 by 4 by 1/2 inch (22.86 by 10.16 by 1.27 cm). These wooden pieces can be used to provide necessary structural support for your drywall. You won't need to make these wooden bracing if you already have a ceiling beam or metal runner installed in the hole you hacked in your ceiling to accommodate it. You will save time and effort as a result of this.
- You might also trim the drywall back until it is flush with the centre of each of the framing members closest to you. This allows you to skip the previous step.
Fit the wooden struts into the ceiling opening by screwing them in. Wooden bracing made of plywood is inserted into the opening, and the plywood is laid flat across the ceiling, with a gap of about two inches (4.79 cm) above the bracing. Drill two pilot holes through the existing ceiling and into the beam, then screw in two screws. Each piece of wood requires a screw on both the top and bottom. All that has been done thus far must be carried out once more on the opposite side of the void.
The drywall opening needs to be longer and broader by about 1 ½ inch (4.79 cm) than the removed section. After the replacement drywall is trimmed to size, there will be a gap of two inches (4.79 cm) on all sides.
- This is known as a hot patch, and it should only be used on patches no larger than two inches by two inches (5 cm by 5 cm).
Take a measurement and mark one inch (3.18 cm) away from the drywall piece's edge on each side. Flip the drywall square over and use a ruler to measure one inch in from each drywall edge (3.18 cm). Then, using a straightedge, draw lines both vertically and horizontally around the drywall piece to create the illusion of a 1 ½ inch (3.18 cm) wide frame. You will be able to easily incorporate the replacement drywall into the ceiling because of this slack.
When you cut through the drywall's back layer, you should expose the paper facing. You'll need to use a utility knife to slash through the drywall's paper backing and gypsum core to gain access to the surface layer. When cutting the drywall, refer to the marks you made on the back. Then, using the putty knife, carefully remove the back paper and drywall gypsum. This should allow the front side facing paper to form a 1 ½ inch (3.18 cm) wide frame around the drywall patch.
- You could do damage to the drywall's surface if you cut too deeply.
- Your top sheet of paper will serve as a blending tool for your patchwork.
Use a minimal amount of joint compound to patch the area around the crack. For the best results, use a lightweight or multipurpose drywall compound to secure the patch. This compound is available in a hardware store, on the internet, or both. Apply the joint compound around the outside of the hole with a trowel. Then, using the trowel, spread it around so that it's uniformly distributed across the area.
Paint over the drywall patch you just installed. Using the same paint that was used on the ceiling, paint directly over the recently applied paint on the drywall. If you do not have access to the original paint colour, you may need to repaint the entire ceiling. This will prevent the newly installed drywall from being apparent.
- You must first prep the area before painting it.
What To Do When Your Ceiling Has Water Damage?
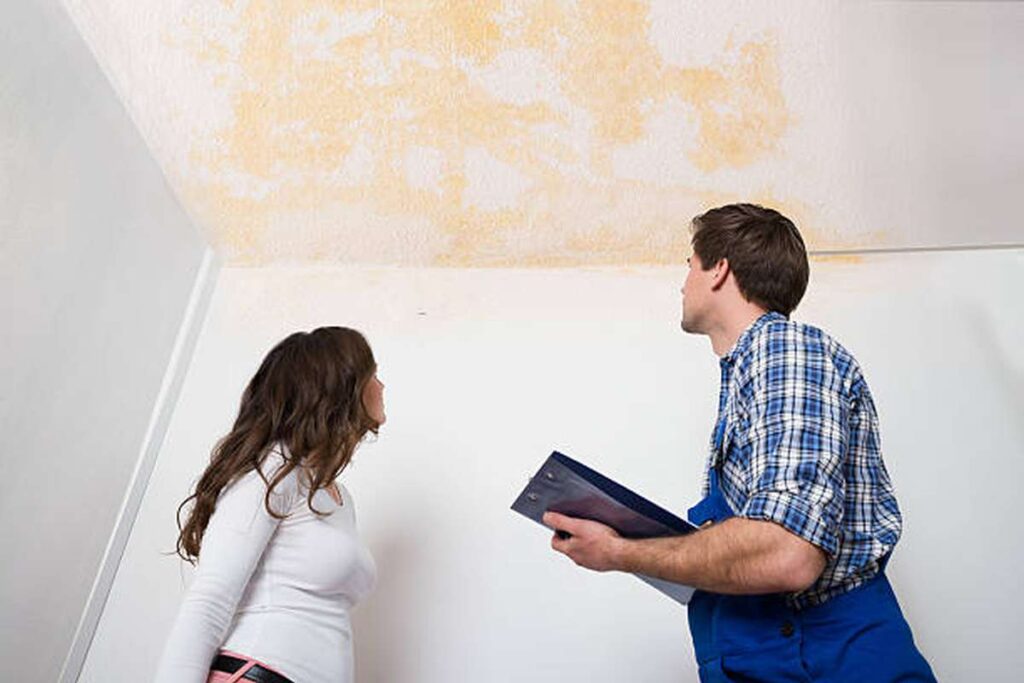
There are few situations more terrifying than discovering water damage. This paragraph explains what you should do if your ceiling is water discoloured, peeling, or cracked. There are few situations more terrifying than discovering water damage. This paragraph explains what you should do if your ceiling is water discoloured, peeling, or cracked.
Stabilise The Situation
The first thing that must be done is to secure the area around the leak. Remove any valuables that may be nearby, and then prepare a bucket and a tarp to capture and restrict any water that has pooled beneath the ceiling. The material that covers your ceiling is most likely drywall, which can either absorb or spread water. Take control of the spots where water leaks through the ceiling. To do so, make a small hole in the centre of the leak using an awl, a screwdriver, or any similar tool. This will allow water to flow into your bucket through the controlled aperture.
Track Down And Repair
The next step is to figure out what's causing the problem and then solve it. Water can travel a long distance from the initial leak, making it difficult to locate roof leaks in particular. Even in the most obvious instances, such as when a toilet is directly over a stain, there are numerous potential sources of water. If the supply line is leaking, it could be a problem with the caulk or the drain.
It's probable that you'll have to drill a hole in the ceiling to figure out where the water is coming from. If you can't reproduce the leak, an old method involves putting sheets and toilet paper along the pipes and ceiling joists. If this fails, you'll have to cut a hole in the ceiling. If the toilet paper responds in any manner to the wetness, it will be clear, allowing you to narrow the scope of your enquiry.
Dry The Damage
Allow any impacted items to completely dry out while you work on repairing the leak's source. Mold growth is more likely because moisture will be trapped beneath the drywall in the ceiling hollow. This is especially true of the cavity in the ceiling. A little leak may cease dripping on its own, but for larger leaks, it's usually preferable to drill a hole in the ceiling, insert a fan, and let the ceiling dry naturally.
Repair The Ceiling
Depending on the severity of the leak, this could mean simply touching up the ceiling with spackle and paint, or it could need removing the entire ceiling and beginning again. Remember that removing damaged drywall and starting over with dry material is usually the easiest option. This typically exposes the ceiling joists, making patching considerably easier. The same is true for painting; if there is a larger leak, it is usually easier to feather new paint into a larger area or even paint the entire ceiling rather than painting a smaller area. We are roof repair experts who take great pride in offering quality roof repairs to customers all throughout Melbourne. Investigate the Roof Repair & Restoration Systems accessible.
Conclusion
Ceiling leaks necessitate immediate attention to drying the damaged area. Putting in a dehumidifier and sealing up the area is your best bet. Do you need to find Melbourne roofers? Roof Restoration and Repair Systems can take care of it for you. There is a common misconception among do-it-yourself homeowners that repairing a leaking ceiling would permanently resolve the issue.
The problem hasn't been solved; this is only a stopgap measure. Talk to an expert to find out how your home's appliances are holding up. Leaks in the plumbing system usually mean that important components need to be replaced. Discovering the source of a leak is the first step towards fixing it. You should probably call a plumber if water is leaking through the ceiling from the shower in the upstairs bathroom.
Repairing a leaking ceiling takes both time and expertise. Damage to your home from water of any kind can be substantial. To say nothing of the health risks associated with mould. It's also possible that rotting wood or loose screws are to blame. It's cheaper and causes less damage if you get them fixed quickly.
The most typical causes of ceiling leaks are broken pipes or holes in the roof. You can stop the leak by using a screwdriver to make holes in the ceiling. The next step, after halting the flow of water, is to call in a roof repair expert. If the damage to your ceiling is larger than 7 square inches, you should have a professional fix it for you (16.28 square centimetres). Rather than replacing the entire ceiling, repairing a damaged section as little as 1 ft. (or 30 cm) square is far simpler.
Create a box by drawing a square around the water-damaged section of your ceiling. Wooden struts are screwed into the beam and the ceiling above, creating a sturdy support system. The drywall must be cut to size with a 2 in. (4.79 cm) border around all edges. You should only use a hot patch on areas no bigger than two inches by two inches. In the event that your ceiling has discoloured from water, peeled, or cracked, here is what you should do.
Joint compound should be used sparingly to repair the crack. If you want professional results, choose a lightweight or multipurpose drywall compound. This chemical can be purchased in a hardware shop, online, or at both. To pinpoint the source of the leak, you may need to make a hole in the ceiling. Putting sheets and toilet paper along pipes and ceiling joists is an old method to detect a leak if you can't recreate the problem. When possible, it's better to let the ceiling dry out on its own after a major leak.
Content Summary
- You should not feel bad if people don't come to you with questions regarding water damage or leaks in the ceiling.
- If your ceiling is leaking, you need to take immediate action to fix the problem and prevent more damage to your home.
- Ceiling leaks necessitate immediate attention to drying the damaged area. If you want to use a dehumidifier, you should not leave any windows open.
- Once you and your contractor have located the source of the water damage in your ceiling, the sort of repair work that needs to be done will be determined by the root of the issue.
- A necessary first step is to plug the leak. One of the most typical blunders people make when doing a home improvement project on their own is this.
- Instead of addressing the root cause of the problem, they plan to plaster over the affected areas of the ceiling and patch the leaks.
- A temporary fix that doesn't get to the root of the issue, unfortunately. To put it another way, just because you can't see the leaks doesn't mean they aren't there.
- The leak will worsen and the repair cost will increase if the roof is repaired incorrectly.
- Pipes and plumbing – If your plumbing is leaking, it's likely that you'll need to replace some important components.
- If you need to fix your gutters, you should hire a professional just like you would for your roof.
- Taking care of these leaks is the first order of business when it comes to repairing your ceiling properly.
- Repairing a leaking ceiling takes both time and expertise. You can do it on your own without the help of a professional if you just learn what you need to know.
- The process of fixing a leaking ceiling is much simpler than it may seem at first. In addition, you need to zero in on the source of the problem before you can fix the underlying issue.
- Discovering the source of a leak is the first step towards fixing it. Roof leaks are a common cause of mould growth in ceilings. Check for any traces of dampness in the region.
- You may begin repairing your leaky ceiling by locating the source of the water. If you want to find the leak's origin, look for sagging or broken drywall.
- Drop cloths or tarps should be positioned directly under the leak. While you fix the water damage to your ceiling, you can utilise it to gather garbage. Put a bucket over the hole in the ceiling for now.
- Water will be falling from the ceiling; if you have a bucket or other container, you can collect it.
- The water that would otherwise flood your floors and pour through your ceiling can be collected once you begin draining the leak.
- You can stop the leak by using a screwdriver to make holes in the ceiling.
- When the water supply has been cut off, call in a professional roofer or handyman to fix the problem that caused the leak.
- If the inspector needs to peek in, you'll need to cut a small hole in the wall. If you locate ducting for heating or gas lines, plumbing, or an air conditioning system after cutting a hole in your ceiling, you will likely need to contact a professional to replace the ceiling.
- Remove the water by cutting a square around the flooded area. Create a box by drawing a square around the water-damaged section of your ceiling.
- Using a framing square ensures that the hole you drill is perfectly square, which simplifies any necessary repairs. Using a utility saw, make a cut along the marked lines in the ceiling and start tearing out the damaged drywall.
- Use a ruler or tape measure to determine the exact measurements of the drywall hole you will be cutting. Use these wooden pieces as studs to reinforce your wallboard's structure.
- If you have already put a ceiling beam or metal runner in the hole you carved in your ceiling to accommodate it, you will not need to construct these wooden bracing.
- The wooden struts should be screwed into place in the ceiling opening. Put in two screws by drilling two pilot holes through the existing ceiling and into the beam.
- When the new sheet of drywall is cut to size, there will be a gap of two inches (4.79 cm) on all sides.
- Due to this slack, you'll have no trouble fitting the new drywall into the ceiling. You will see the paper facing when you cut through the rear layer of the drywall.
- The drywall's paper backing and gypsum core must be cut with a utility knife before you can reach the finished surface.
- This should allow the paper facing the front to frame the drywall repair to the tune of 1 1/2 inches (3.18 cm) in width. If you're doing a patchwork, the top sheet of paper will be used to blend the patches together.
- Joint compound should be used sparingly to repair the crack. A trowel can be used to spread the joint compound along the outside of the opening.
- Seal the drywall patch with paint. You can simply paint over the newly applied paint on the drywall with the same paint that was used on the ceiling.
- If you notice any discoloration, peeling, or cracking in your ceiling as a result of water, read on for some advice. First, the vicinity of the leak must be fortified.
- You need to take charge of the areas where water is leaking through the ceiling. To pinpoint the source of the leak, you may need to make a hole in the ceiling.
- An old technique that involves placing sheets and toilet paper along the pipes and ceiling joists can be used if the leak cannot be replicated. If that doesn't work, a hole will have to be cut in the ceiling.
- While you fix the leak's cause, give the affected items plenty of time to dry out. The space above the ceiling is a prime example of this.
- Small leaks may stop dripping without any intervention on your part, but larger leaks are best addressed by cutting a hole in the ceiling, installing a fan, and allowing the ceiling to dry out on its own.
- Depending on the extent of the leak, this may involve merely making cosmetic repairs with spackle and paint, or it may necessitate tearing out the ceiling and starting over.
Frequently Asked Questions About Leaking Ceiling
Small ceiling repairs take 1 to 3 hours, with labour costs of $40 to $80 per hour. Replacing a drywall ceiling takes 1 to 3 days for major repairs like water damage or bulging seams.
It can take a minimum of two weeks, sometimes up to four weeks. Ensure you address the leak's cause to ensure you are solving the problem rather than going in an endless circle. After all, things cannot dry if it is still getting wet!
Ceiling leaks can already be a cause of stress and danger. They can cause ceiling and attic damage, the growth of dangerous moulds and mildews, structural instability, and inefficient energy use that may result in higher utility bills. These risks can be amplified when ceiling leaks occur near light fixtures.
The national cost average for ceiling repairs is $250 to $850, with most homeowners paying $450 to patch a hole in a ceiling. The project's low cost is $100 to replace a damaged drop tile. The high cost for this project is $2,000 to deal with a serious leak.
A roof leak is considered an emergency if the repair to your roof cannot wait. For example, if your roof starts leaking profusely or part of the roof or ceiling comes in, it would be considered an emergency.