A leaky ceiling can cause expensive water damage to your home if you don't fix it right away. Make sure the source of the leak has been fixed before you start working on the ceiling. When the leak has been fixed, the water can be drained from the ceiling and the damage can be remedied.
Finding the source of the leak is the first step in fixing a leaking ceiling. If you notice any leaks or cracks in your roof, no matter how small, you should have it fixed right away to protect your home and possessions from water damage. There are a few options for stopping the water flow once you've located the leak.
A bucket placed upside down over the damage can serve as a makeshift patch until the real repair can be made. One of your options is this. Since serious structural damage can lead to mould growth and other health issues in the home, you should get an expert's opinion if this has persisted for more than two weeks. Since significant structural damage can encourage mould growth, this is essential.
Reducing the Drip
Try To Spot Any Telltale Signs Of Moisture.
It is necessary to track down the source of the leak in your ceiling before you can begin fixing it. Check for sagging or cracked drywall to pinpoint the source of water leaks. This might represent where water first enters the building. There could be coffee-colored stains on the ceiling, too.
Cover Leaks With Drop Cloths Or Tarps.
You can prevent water damage to your floors and furniture by placing a drop cloth or plastic sheet under the bucket. The debris that falls while you repair the water damage to your ceiling can be collected with its help.
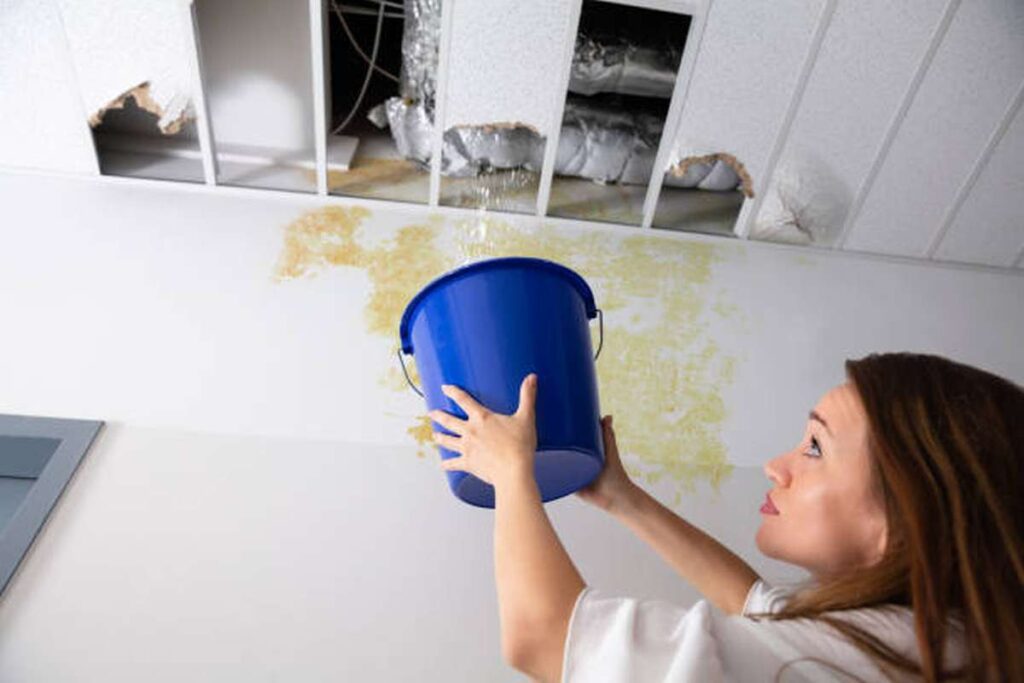
If There Is A Leak, Place A Bucket Under It.
Water dripping from your ceiling can be collected using a container or a bucket. This will catch the water that is dripping from the ceiling after you have begun draining the leak, protecting your flooring from damage.
Drain The Leak With A Screwdriver.
Put a screwdriver right in the middle of where the leak is occuring. Keep the hole a safe distance from the ceiling's joists. The water will then drain from the ceiling, hopefully preventing further water damage. Water leaking through the holes in the ceiling caused by the water damage can be collected in the bucket kept underneath the ceiling.
- Water buildup on a ceiling could lead to a collapse if the weight of the water isn't properly distributed.
- If you make the hole bigger, you might be able to tell where the leak is coming from.
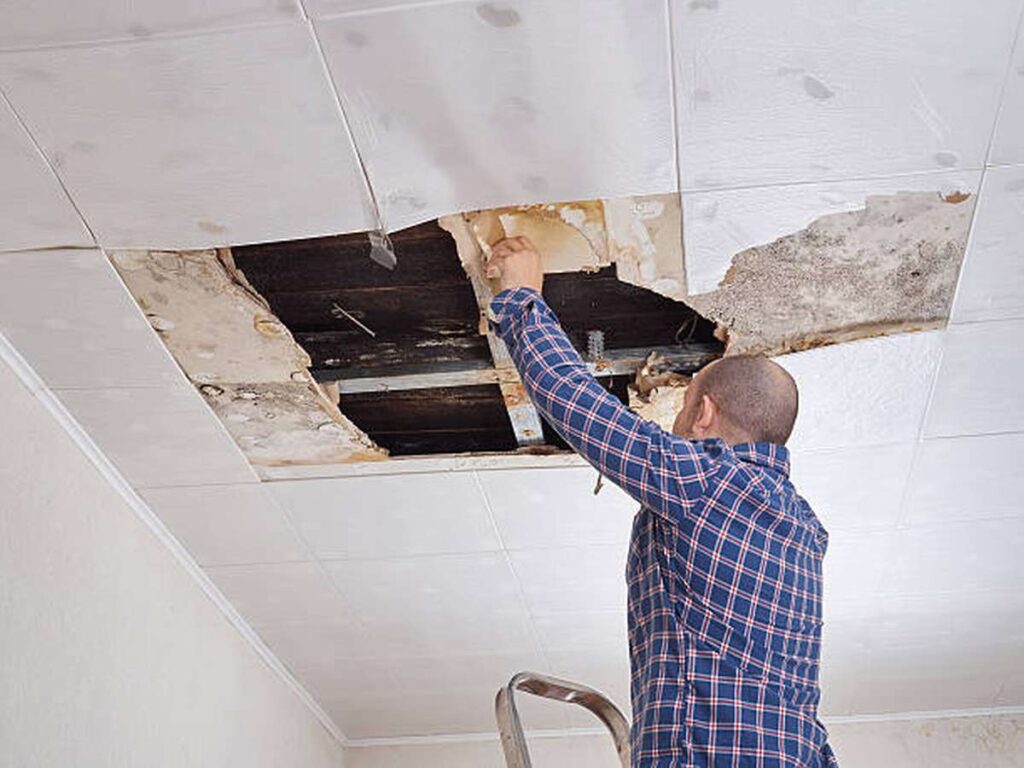
Repair The Leak To Prevent Damage.
Your ceiling may be leaking, but you should fix the source of the leak before you repair the affected area. The most typical causes of ceiling leaks are broken pipes and roof penetrations. A competent roof specialist or handyman should be hired to fix the issue that caused the leak once the water flow has been stopped.
- Whether the leak is under a sink, a toilet, or some other fixture, chances are it's the cause of the problem.
- Broken flashing around a roof pipe, a gutter that has been punctured, or a skylight that doesn't have a proper seal are all potential sources of leaks.
- A malfunctioning air conditioning system is another potential leak point. An obstruction in the condensate lines of your air conditioner is probably to blame for the overflow and leaks in your ceiling.
Repairing a Leaky Roof
Cut A Dry Wall Inspection Hole.
Cut your inspection hole after the power has been turned off. There needs to be an inspection of the area on the other side of the ceiling before you can start repairing the damaged ceiling across the room. Cut a small square hole in the drywall; it should be deep enough to reach through but not so deep that it will reach through anything on the other side. When cutting the hole, you may find pipes, gas lines, or HVAC ductwork, all of which will necessitate the services of a professional to repair or replace the ceiling.
Box Water Damage.
First, make sure you won't cause any damage to the area above your head when you remove the ceiling. Water damage on your ceiling can be easily identified by drawing a square around it.
- Using a framing square ensures that the hole you make is uniform in size and shape, making repairs much simpler.
- Professional assistance should be sought if the area of damage to your ceiling is more than 6 square inches (15.24 square centimetres).
Carefully Avoid The Soaked Areas.
Using the lines as a reference, cut through the ceiling with a utility saw and start tearing out the damaged drywall. Once you've cut the lines, you can pull the damaged drywall off the ceiling with a screwdriver or other tiny tool.
- Try to minimise the quantity of ceiling that is removed to the bare minimum. Rather than replacing the entire ceiling, a one-foot (or thirty-centimetre) square of damage is far easier to fix.
Drywall Cutout Measurement.
Use a measuring device like a ruler or tape measure to figure out the exact dimensions of the drywall hole you're about to cut. After taking measurements of the drywall scraps, you'll have all the info you need to properly replace the damaged area.
Repairing the Leaky Roof
Slice The Wood In Half.
Create two notches in a 9-by-4-by-1/2-inch plywood sheet using a saw (23.86 by 10.16 by 1.27 cm). If your drywall is sagging, you can reinforce it with these boards. Instead of using these wooden bracing, you could just drill holes in your ceiling and screw into your metal runner or ceiling beams. Cutting a hole in your ceiling without any of those items means you'll have to improvise your own support structure.
- The drywall could be recut so that it meets in the middle of each of the nearby framing members. As a result, you can bypass the preceding procedure.
Screw Wooden Braces Into Ceiling Holes.
Wooden bracing cut from the plywood should be inserted into the hole, and the panel should be laid flat over the ceiling with a two-inch (6.08 cm) overhang. Then, secure the beam to your ceiling by drilling two pilot holes through the existing ceiling and into the beam. One screw each into the top and bottom sides of the wood. Then, repeat the procedure on the other side of the opening.
The Hole Should Be 2 Inches Wider And Longer.
After adjusting the length and width of the new drywall, you'll have a gap of two and a half inches (6.35 mm and 6.35 mm).
- It's called a "hot patch," and it should only be used on patches that are no bigger than two inches by two inches.
Mark 1 Inch From Either Side Of The Drywall.
Using a ruler, measure in one inch from each side of the drywall square after you have flipped it over (2.54 cm). The next step is to use a straightedge to draw lines around the drywall in a vertical and horizontal orientation to simulate a 1-inch-wide frame (2.54 cm). The extra room will allow you to flush-mount the new drywall in the ceiling.
Cut The Drywall's Back Layer, Leaving The Paper.
To get to the drywall's front side, you'll must use a utility knife to slash through the drywall's gypsum and paper backing. Use the markings you made on the back of the drywall as guides while you make your cuts. Then, using a putty knife, carefully remove the back paper and gypsum board from the drywall. Therefore, the front-facing paper can construct a 1-inch (2.54 cm)-wide border around the drywall repair.
- The face layer of the drywall can be easily sliced through if you cut too deeply.
- When you're done fixing something, you can use the top sheet of paper to make the fix look if it was never there.
Cover The Hole With Joint Compound.
Lightweight or multi purpose drywall compound will do the trick for holding your fix in place. This substance is widely available, both online and at hardware stores. Start by filling up the hole's perimeter with a joint compound using a trowel. Then, carefully distribute it using the trowel to ensure even coverage.
Replace The Drywall.
Insert the new drywall into the hole at an angle so that the damaged piece can be removed easily. Following that, the drywall must be adjusted so that it is flush with the roof. You can use the beams you bolted in earlier as a backboard for your newly constructed drywall.
Drywall Into Wooden Braces.
Attach the freshly created drywall patch to the wooden braces you erected using a power drill. Then, screw the patch into all four corners until it is totally secure.
- To fix holes that are smaller than two inches by two inches (five centimetres by five centimetres), screws aren't necessary. Instead of using glue, you could use drywall paper to make the repair permanent.
Compound Your New Drywall.
If you're applying joint compound to a freshly hung sheet of drywall, use a trowel. Then, use joint compound to smooth the paper's front edges into the ceiling. Continue this process until the patch's edges are no longer visible and there are no visible screws.
- To achieve this result, multiple coats of compound will need to be applied.
Let Drywall Compound Dry Overnight.
You can test to see if the drywall compound is dry by touching the surface with your palm. You should wait until it's totally dry before sanding and painting it.
Sand Ceiling And Remove Joint Compound.
If you want your new drywall to look as smooth as possible, you should use fine-grit sandpaper. Next, you'll need to use a hand sander to get the new drywall to sit flush with the ceiling, without any gaps.
- Another option is to use a drywall sanding sponge, which is a special sort of sanding sponge made for use with drywall.
Overpaint Your Drywall Patch.
When painting over the freshly painted drywall, use the same paint you used on the ceiling. A new coat of paint on the ceiling may be necessary to hide the drywall repairs if you do not have access to the original colour.
- Prime the area before painting.
The Problem of Water Damaged Ceilings: What Can Be Done?

Extremely few things can match the terror of finding water damage in your home. This paragraph details the steps you should take if you notice water stains, peeling, or cracks in your ceiling.
Bring Calm To The Storm
The first step in fixing a leak is sealing off the immediate area. Get a bucket and a tarp ready to catch and contain any water that may have pooled underneath the ceiling, and then remove any valuables that may be nearby. Drywall, which is likely to be used as ceiling coverings, can either absorb or disperse water. Fixing the places where water is leaking through the ceiling should be a top priority for you. Making a small hole in the centre of the leak with an awl, screwdriver, or similar tool is the first step. Doing so will release the water through the valve and into your bucket.
Locate The Problem And Fix It
Finding the root of the issue and resolving it is the next step. Because water can travel such great distances after leaking, pinpointing the exact location of a leak can be challenging, especially in the case of a leaking roof. There can be a lot of potential sources of water even in the simplest of situations, like when a bathroom is built directly over a spill. If there is a leak, it could be caused by the supply line, the caulk, or the drain.
If you want to find out where the water is coming from, you may have to cut a hole in the ceiling. Old-fashioned methods like using sheets and toilet paper along pipes and ceiling joists can be helpful if you are having trouble reproducing the leak. Cutting a hole in the ceiling may be necessary if problems persist. If the toilet paper has any kind of reaction to the water, that will be a huge clue that you can narrow down your search.
Limit The Bleeding
It's important to allow everything affected by the leak dry out before attempting to fix the cause of it. There is a higher possibility of mould formation due to the trapping of moisture beneath the drywall in the ceiling hollow. Particularly true of the space in the ceiling. Small leaks may eventually stop leaking without any intervention, but larger leaks are better addressed by cutting a hole in the ceiling, installing a fan, and allowing the ceiling to dry up on its own.
Mend The Roof
Depending on the extent of the leak, this may involve simply touching up the ceiling with paint and spackle, or it may require tearing out the ceiling and installing a new one. It's important to remember that replacing wet drywall with new, dry drywall is the more time-consuming and difficult option. In many cases, this reveals the ceiling joists, making patching much less of a hassle. It's the same with painting; if there's a big leak, it's easier to paint the whole ceiling than it is to just fix the spot where the water got in.
Ceiling plumbing leaks
One more common source of water damage and leaks in the ceiling is trouble with the home's plumbing fixtures or pipes.
- It's highly likely that the water supply pipes or the drain pipes are the cause of a leaking ceiling or other visible water damage that appears below a kitchen or bathroom, or inside ceiling spaces where you know plumbing pipes are located. If the deterioration is visible inside of ceiling cavities where you have already determined the plumbing pipes to be situated, then it is more likely than not that the problem is with the plumbing.
- To identify if water leaking from the ceiling is the result of a burst pipe in the plumbing system, look for the absence of sediment rather than the presence of brown or muddy water.
Leaks in the plumbing system can be tricky to find and fix because they can occur in either the water supply or the drain (waste) pipes. A leak in the water supply will cause a constant trickle of water, while a leak in the drain line will only cause water to appear when the fixture is actively draining. There is a risk of water damage from leaking floors caused by plumbing fixtures such as showers and bathtubs. Leaks around the base of the toilet are another possible source of water under the bathroom floor.
The best way to find the source of a leak is to look for it without destroying any flooring, walls, or ceilings. It is important to take a systematic approach while investigating plumbing leaks, as this often involves a process of elimination. It is possible to find the leak's origin without breaking into the walls or ceilings in most cases.
Prior to Getting Started
If you see discoloration or other telltale signs of water leaking from the ceiling, you should know that there could be much more water spreading over the drywall above. This is the case regardless of what initially caused the ceiling to leak. Ceilings can be saved from further damage and extensive replacement by drilling a hole in the centre of the damaged area and directing any pooling water into a bucket below. Wet drywall can dry out without incident if the water is removed as soon as possible, but if it sits in a pool of water for too long, the paper backing can deteriorate or provide mould with a food source. Repairing a small hole in a drywall ceiling is much easier than replacing an entire panel.
When Should You Get Help from an Expert?
Roofing repairs are not something to be taken lightly because they entail working on a roof that is elevated many feet above the ground, but a do-it-yourselfer may repair little areas of damage or a single puncture in a roofing shingle. This is why most homeowners would rather hire a professional roofer or handyman to make these kind of fixes, and they have good reason to do so: Approximately 300 people lose their lives and over 164,000 visit emergency departments every year due to injuries sustained from ladder-related falls.
If your roof has a steep pitch or if it is very tall, you should probably have a professional roofer make the necessary repairs. However, if your roof is relatively low and flat, you could probably handle the repair on your own. Shingle replacements, flashings, and vent gaskets are not tasks you should attempt unless you have extensive roofing experience.
Conclusion
If you don't fix a leaking ceiling right away, the water can do a lot of damage to your home and cost a lot of money to repair. Before beginning any work on the ceiling, make sure the leak's origin has been addressed. After locating the source of the leak, you can take one of several approaches to repairing the problem. There is a risk of a ceiling collapsing if water accumulates there and the weight of the water isn't distributed evenly. A leaking ceiling is typically the result of a broken pipe or an opening in the roof.
If the area of damage is larger than 6 square inches, you should get in touch with a professional (15.24 square centimetres). The area should be primed because drywall can either absorb or disperse water. Using sheets and toilet paper along pipes and ceiling joists is an old but effective method. The leak can be fixed by either patching the ceiling with paint and spackle or completely replacing it. Floors are susceptible to water damage from plumbing fixtures like showers and bathtubs that leak. Unless the water is prevented from drying out, wet drywall can cause problems. The paper backing can rot or become a breeding ground for mould if it's submerged in water for too long.
Content Summary
- Before beginning any work on the ceiling, make sure the leak's origin has been addressed.
- The first step in repairing a leaking ceiling is locating the leak's origin.
- Before you can begin fixing the leak in your ceiling, you must determine where it is coming from.
- To find the source of water leaks, look for sagging or cracked drywall.
- A container or bucket can be used to catch water that is dripping from your ceiling.
- Use a screwdriver to plug the leak.
- Don't get too close to the ceiling joists with the hole you're cutting.
- Fix the leak before it causes more trouble.
- If you find water damage on your ceiling, it's important to address the underlying cause of the problem before repairing the damaged area.
- A leaking ceiling is typically the result of a broken pipe or an opening in the roof.
- A leak under a sink, toilet, or another fixture is probably to blame for the issue.
- The overflow and leaking ceiling are likely the result of an obstruction in the air conditioner's condensate lines.
- Remove the power source before cutting your inspection hole.
- Make a shallow square hole in the wall, just deep enough to reach through without cutting through the other side.
- Damaged Boxes Due to Leaks.
- Before you start tearing down the ceiling, make sure you won't ruin the space above you.
- If there is water damage on your ceiling, just draw a square around the affected area.
- More than 6 square inches of damage to your ceiling warrants calling in a pro (15.24 square centimetres).
- Calculate the precise dimensions of the hole in the drywall with a measuring device, such as a ruler or tape measure.
- You will have all the information you need to replace the damaged area once you have measured the drywall scraps.
- Boards like these can be used to reinforce drywall that has sagged.
- These wooden supports are unnecessary because you can simply screw into your metal runner or ceiling beams through holes you drill in the ceiling.
- If you want to cut a hole in your ceiling but don't have any of those things, you'll have to rig up some kind of makeshift support yourself.
- An appropriate piece of plywood bracing should be inserted into the opening, and the panel should be laid flat over the ceiling with a two-inch (6.08 cm) overhang.
- The next step is to secure the beam to the ceiling by drilling two pilot holes through the existing ceiling and into the beam.
- After cutting and fitting the new drywall, the space between the walls will be two and a half inches (6.35 mm and 6.35 mm).
- Put a mark on the wall at the 1-inch mark on both sides.
- Using a utility knife, cut through the gypsum and paper backing of the drywall to expose its front side.
- Make your cuts in accordance with the markings you made on the drywall's reverse side.
- After that, carefully cut away the drywall's backing paper and gypsum board using a putty knife.
- A 1-inch (2.54 cm) wide border can be created by the paper facing outward, enclosing the drywall patch.
- Use joint compound to seal the opening.
- Joint compound should be used to fill the hole's perimeter first using a trowel.
- The Drywall Must Be Replaced.
- To facilitate the removal of the damaged section, insert the new drywall at an angle into the hole.
- With a power drill, fasten the newly made drywall patch to the erected wooden braces.
- Drywall paper can be used as a permanent repair in place of glue.
- Requires New Drywall Compound.
- The paper's leading edges should then be smoothed into the ceiling with joint compound.
- The next step is to use a hand sander to ensure that the newly installed drywall is completely flush with the ceiling.
- To hide a drywall repair, paint over it.
- Use the same paint you used on the ceiling to paint over the freshly painted drywall.
- It's important to prime the surface before painting.
- What Can Be Done About Water Damaged Ceilings?
- Finding water damage in your home is one of the most terrifying things that can happen to you.
- If you see water stains, peeling, or cracks in your ceiling, follow the steps outlined in this paragraph.
- Put an end to the raging weather If there is a leak, the first thing to do is to seal off the affected area.
- You should prioritise repairing the points where water is leaking through the ceiling.
- The first step is to make a small hole in the middle of the leak using an awl, screwdriver, or other suitable tool.
- Find the Issue and Resolve It The next thing to do is to figure out what caused the problem and then fix it.
- Especially in the case of a leaking roof, locating the source of a leak can be difficult due to the water's ability to travel long distances after leaking.
- Perhaps a hole in the ceiling would be necessary to determine the source of the leak.
- Seeing if the toilet paper reacts to the water is a good indicator of where to focus your investigation.
- Stop the Blood Loss! If you want to fix the leak properly, you need to let everything it soaked dry out first.
- This is truer than ever of the empty space above your head.
- A small leak may stop dripping without any action on your part, but a large leak is best fixed by cutting a hole in the ceiling, installing a fan, and giving the ceiling time to dry out.
- Dripping pipes in the ceiling Water damage and ceiling leaks are also frequently caused by issues with the home's plumbing fixtures or pipes.
- A lack of sediment, rather than the presence of brown or muddy water, can help you determine if water leaking from the ceiling is the result of a burst pipe in the plumbing system.
- Floors are susceptible to water damage from plumbing fixtures like showers and bathtubs that leak.
- Searching for the leak without tearing up the floor, walls, or ceiling is the most efficient way to locate its origin.
- In most cases, the source of a leak can be located without having to make structural modifications to the building.
- Earlier Than We Begin Discoloration or other signs of water leakage from the ceiling should alert you to the possibility of much more water spreading over the drywall above.
- This holds true despite the original cause of the leaking ceiling.
- As opposed to replacing an entire ceiling panel, patching a small hole in the drywall is a quick and easy fix.
- You should probably hire a professional roofer to fix your roof if it has a steep pitch or is very tall.
- But if your roof is low and flat, you could probably fix it on your own.
Frequently Asked Questions About Leak Detection
Place a bucket below the damaged area of the ceiling or where dripping is occurring. With a drill and 1/2-inch twist bit, drill a hole in the centre of the damaged area. If there is active dripping, drill at the exact spot where the water is dripping. A steady stream of water may now flow down into your bucket.
Roof leaks during heavy rains may indicate the end of the shingles' life—metal corrosion. Cracks in metal and corrosion around fasteners can create enough space for water to leak. Over time, expansion and contraction can loosen the seams in a metal roof.
An inspection of a certified specialist can determine the real cause of the accident, but ceilings don't just fall from nothing. But leaks also take time before they can damage the ceiling to the point of collapsing, so there should have been more than one warning sign before the accident occurred.
Homeowners insurance may cover a roof leak if a covered peril causes it. In those cases, your homeowner's policy may help pay to repair the roof leak (unless your policy has a wind or hail exclusion). However, homeowners insurance generally does not cover damage resulting from lack of maintenance or wear and tear.
If you have tar paper and roofing cement, you can use that to quickly spread a few layers over the leak and seal it up. For smaller leaks, you can even use caulk or cement to plug the hole. However, the most common solution is using plastic sheeting or tarps to cover the leak until it can be repaired professionally.