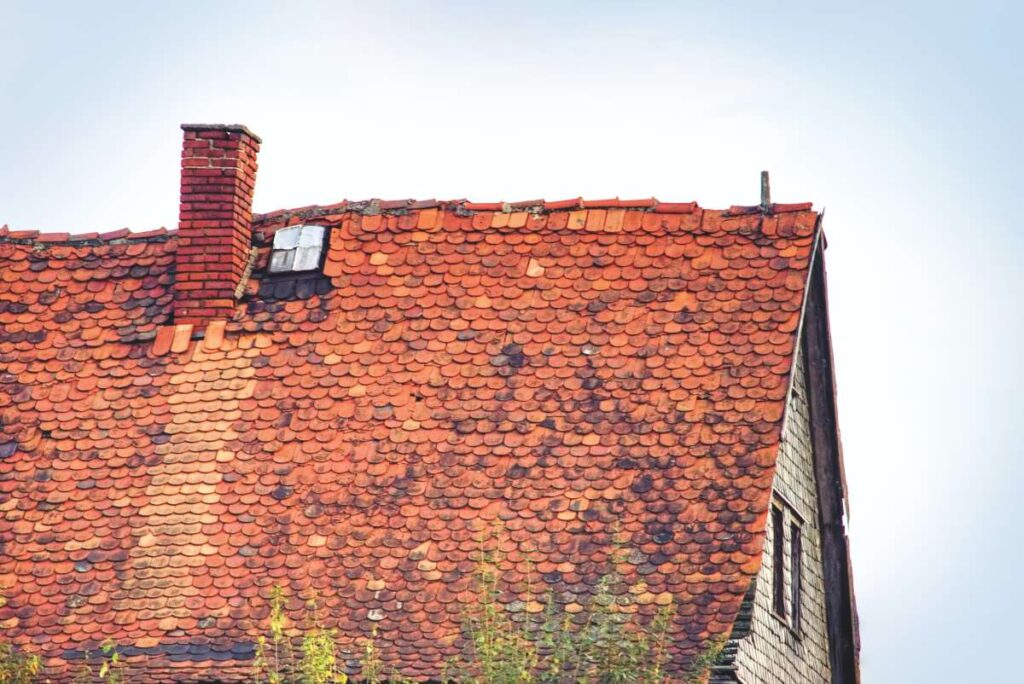
There are numerous possible causes for the leak in your clay tile roof. The approach for repairing your leaky roof is also dependent on the underlying cause of the problem. However, it is critical that you repair the leak in your clay tile roof as soon as possible.
Clay tile roofs with leaks that continue unrepaired for an extended period of time can cause significant damage to the roofing, ceiling, and even the appliances within the home.
Everyone understands the importance of the roof and how problems with it might jeopardise the safety of the occupants. "How much experience do you have in repairing roof leaks?" is the most critical question to ask.
We'll go through how to repair leaks in clay tile roofs in this article. It is critical to pay considerably more attention to the details. Following that, you have the option of performing the task yourself utilising a do-it-yourself technique or contracting it out to a third party to achieve a higher quality result.
The following steps should resolve any leaks in your clay tile roofs:
How To Fix Leaks On Clay Tile Roofs
If you’re searching for how to fix leaks on clay tile roofs, you’ve likely got a problem on your hands. If water gets into your home through the roof, it could cause the insulation to become damaged, the ceilings to become destroyed, and the need to replace things like sheetrock, carpet, and more.
Leaks in a clay tile roof can be caused by a variety of factors, including the tile itself, the installation process, and the passage of time. Depending on what caused the problem, there are a few different approaches that can be taken to fix the leak.
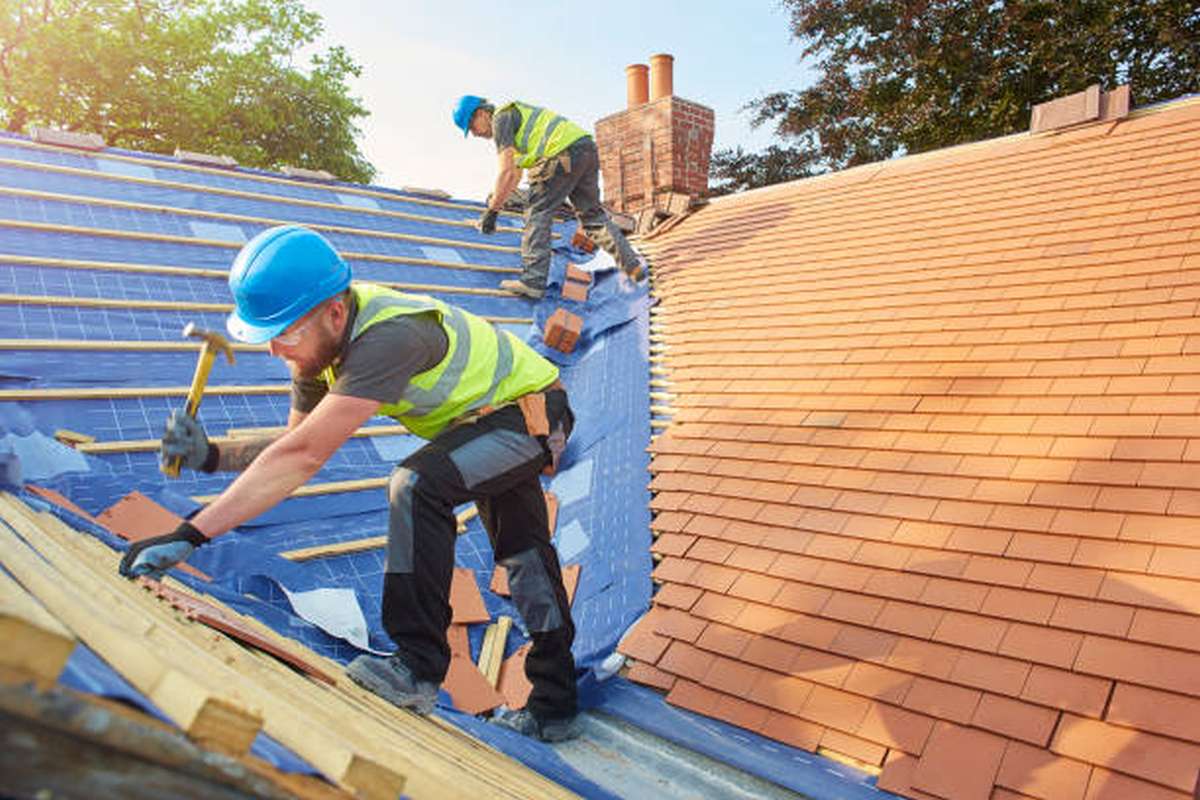
How To Repair A Tile Roof
Tile roofing is long-lasting and gives your home a beautiful appearance from the street. However, at some point or another, every roof will require some sort of maintenance and repair work.
The steps that are detailed below will show you how to repair a tile roof. In the event that you do not have the necessary tools or the necessary amount of time, our crew is always available to assist you in repairing your tile roof wherever you are in the Phoenix Valley.
Tools And Materials
Remember that the instruments and supplies required to fix the leak will change depending on the source of the problem.
- Nails
- Wet saw
- Hanger strap
- Pry bar
- Hammer
- RT-600 Sealer for Tile Roofs, in the Color Terracotta
- Caulk gun
- Membrane that is waterproof
- Mortar
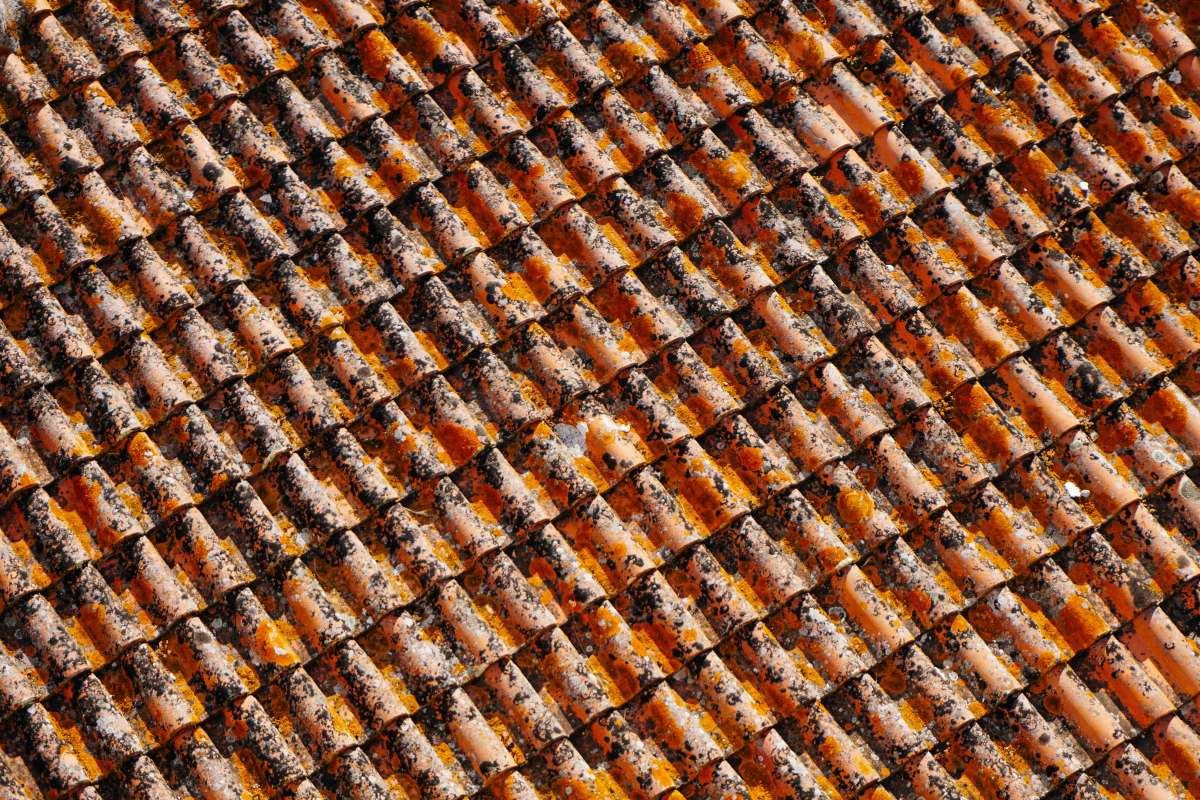
Identify What Caused The Leaks
Your very first step should be to investigate the causes of the problems that have resulted in leaks on your roof. Fixing the leaks in your roof requires determining the underlying problem, as was indicated earlier. Consequently, determining the reason enables you to determine the most appropriate method for resolving the issue.
The following is a list of some of the most prevalent problems that might lead to leaky clay tiles:
- Broken ceramic shards
- Damage to the membrane that prevents water from entering
- The accumulation of rubbish across the valley floor.
- Broken tiles
You will need to repair the problem that pertains specifically to you in order to plug the leak. When you step on your roof to investigate the source of the leak, you should exercise extreme caution because clay roof tiles are prone to cracking when subjected to force. Keeping this in mind will help you avoid injury.
Fixing The Issues
After you have determined what the problems are, the next stage is to find solutions to them so that they do not escalate to more serious and potentially catastrophic levels. The following is a list of potential solutions to some of the problems that have been found with the roof:
Cracks
Cracks in your clay tile roof can be easily repaired with RT-600, even if the leaks are caused by natural causes. Apply this remedy to the broken skin and wait the allotted amount of time. The afflicted tile will receive a generous coating of the solution, which will then dry within a few minutes.
If you find any fine cracks within the tiles, you can repair them by adding RT-600 to the damaged tiles, allowing it to spread throughout the entire tile, and then let it to dry. If you do notice any fine cracks within the tiles, you can repair them by following these steps:
Broken tiles are another another potential source of the leak. Sometimes the fissures are so minute that you might not even notice them with your bare eyes. Therefore, exercise extreme caution when inspecting. Repairing fractures in your clay tile roof with cement can be an attractive and effective solution.
Damaged Membrane
In the event that the problem lies inside the waterproof membrane, you will be required to remove the currently installed tiles and instal a brand new membrane in its place. After that, you will be required to replace the tiles on your roof. Again, you might need the assistance of a trained professional in order to remove and retile the floor.
It is possible that you will need the assistance of a specialist for this. This guarantees that the task will be completed successfully and that no additional damage will occur while the present ones are being repaired. After removing the damaged membrane, a new one is then installed in its place.
Debris Buildup
It is not uncommon for debris to accumulate in narrow roof valleys, which leaves these areas vulnerable to leaks. To fix leaks that have developed as a result of the accumulation of debris, take out the tiles in the affected area, clear away the debris, and then reinstall the tiles. It is possible that it would be best for you to convert your closed valleys into open ones this time. This is because closed valleys are more likely to collect debris.
A significant amount of debris will collect in the roof valleys, particularly the closed ones. This could result in leakage. You are going to have to take the tiles off the wall, clean the area, and then put the tiles back up in order to get rid of the debris that is causing the leaking. If you want to prevent the accumulation of debris in the future, you might want to think about converting the roof valleys on your house into open spaces.
It is possible for debris to accumulate under the tiles, which results in an increase in pressure. Therefore, you should routinely check your roof for any debris and clear it away. Clay roof tiles have a propensity for gathering more debris than other types of roof tiles do, most of the time. The most straightforward approach is to remove the tiles, clean the valley, and then retile the area.
Broken Tiles
Broken tiles are another potential cause for the leak in your roof that is made of clay tiles. In the event that the tiles have developed significant fractures, you will be required to replace them with brand new tiles. A harmer is required at this location. You can get rid of the tiles that are shattered by using your hammer. When you remove the cracked tiles, though, you need to exercise extreme caution so that you don't damage the good ones.
Nails are typically used to hold tiles together, which makes it more reasonable to replace broken tiles with new ones. Because of this, you need to use extreme caution while installing new tiles.
You are going to need a holder lash at this point. Put the tile on top of the holding lash, and then position it where the tile normally would be. If you need to cut the edges, you should do so using a wet saw since that is required. Using a hammer and a nail, reattach the tiles to their backing by driving the nail into each tile. Your tiles will remain securely adhered to one another if you use this.
The job is not finished at that point. You will still need to fill in the gaps around the new tiles with some sort of material. In order to accomplish this, you will need to apply RT-600 to the sides of the original tiles and then wait for them to dry. In order to accomplish the same thing with mortar is another option.
In order to stop the leak, any tiles that are cracked or have major cracks in them will need to be replaced. You will need to use a pry bar to remove the tiles that have been damaged.
You can make the removal process easier by using a hammer, but you must exercise extreme caution to avoid breaking any of the good tiles. If the roof is an older structure, there is a good probability that the tiles have mortar joints between them to hold them in place. In the event that this is the situation, you should instal the replacement tiles and then use mortar to secure them in place.
The nails that will hold the tiles in place on more modern rooftops will be affixed with nails. In the event that this is the case, you are going to require a holder lash. After positioning the new tile such that it is resting on the holding lash, you should then suspend it in the location where the new tile will need to be placed.
Be careful not to ram the tile into position by using excessive force. If you need to cut the edges, rather than using a dry saw, use a wet saw. Next, secure the new tile to the roof by hammering the nails into the top of the tiles. This will keep the tile in place. In the end, ensure that there is a complete seal by applying mortar or RT-600 to the sidewalls.
There is a high risk of damage occuring with clay tiles, thus they should be replaced as regularly as possible. (Perhaps once a year is a good frequency.) It is possible to stop water from seeping through the roof into the attic by removing any old tiles that are damaged or cracked.
Therefore, if your home is topped with clay tiles, it is imperative that you carry out the procedures outlined in the previous section.
To effectively fix a leak in the roof, it is best to seek the assistance of a specialist. They are aware of the proper process to correct the issue, and they have utilised tools that are capable of working the part effectively. Their prices are really reasonable, and the people that work there are all nice. Therefore, register right away in order to extend the lifespan of your clay roof tiles.
What To Pay Attention To
After going through the processes that are outlined in this article, you can't help but feel an overwhelming want to climb up on your roof and begin repairing the damage caused by the leaks. Even if this is fantastic, there are a few other things that demand your attention. This will ensure that you do not do any further damage to what you already have by preventing any further damage from being caused. Before getting the repair done, below are some of the more prevalent spots that need your attention.
Managing Materials Properly
In order to fix your leaky roof, you are going to require specific materials. Because clay tile roofs are prone to cracking, you will need to exercise extreme caution when placing some of these materials on your roof because some of them are rather heavy.
Going up to the rooftop with the appropriate supplies only when you actually need them is one strategy. But because you might be working on a tall rooftop, this might not be the best option, and you might need to go with all of your supplies at the same time.
If the second scenario describes your situation, you must ensure that your supplies are dispersed around the rooftop and not gathered in a single location. Because of this, the weight of your documents will not be concentrated in the same spot, which will prevent adjacent tiles from being damaged.
Accessing The Roof
In addition to the weight of the materials you are using, the manner in which you distribute your weight on roofs made of clay tiles is another crucial aspect that requires your attention. It is not a good idea to walk on the rooftop since it concentrates your weight on a very small area at a time. Because of this, such a region has a chance of receiving a light blow, which can result in holes being punched in the roof.
The most effective way to distribute your weight is to crawl. Also, make sure that you are not stepping on the margins of the tiles, as these are the regions of your roof that are the most susceptible to damage.
How To Repair Leaking Concrete Tile Roofs
Even if it may have been placed appropriately, a concrete tile roof will typically be robust enough for your home. However, this does not always prevent problems from occuring, especially in the event that a tree branch or severe weather strikes it. However, if you follow the steps that are required, you will find that it is not difficult at all to replace any tile that is leaking.
Inspect The Roof
You will begin the process of repair by inspecting the roof tiles to determine the extent of the damage that has been done. You'll be able to determine from this how many tiles need to be changed with new ones.
Even if it's possible that you'll be able to spot the broken tiles from the ground, you still need to perform a complete examination so that you may examine the tiles in greater detail. When you do this, you can ensure that you don't overlook any tiles that have cracked, and it will appear as though there is nothing wrong with them.
You might not be able to access the roof from the attic, but if you examine the roof while you're up there, you'll be able to determine how severe the damage is.
Gather Your Equipment
As soon as you have an accurate count of the required number of tiles, you will be able to ensure that you have an adequate supply of replacements. If it's necessary, remove any tiles from the roof that are broken or cracked and bring them with you when you go shopping for replacements.
Gather all of the tools and equipment that you will need to do the task, including footwear with the appropriate soles that will prevent you from slipping or breaking any additional tiles as you move around.
Remove The Damaged Tiles
Climb the ladder while carrying the tools, and then make your way to the part of the roof where the water is leaking. In the event that more than one tile needs to be replaced, you should begin at one end and then work your way across. You will need to locate the first tile that needs to be removed, then carefully raise it above the surface of the floor just enough to provide room for a crowbar beneath the tile.
Give the length of the crowbar the opportunity to rest on the rooftop that is in place in a way that is crooked and to one side. After then, you would move the title to the opposite side of the one that was being expelled while continuing to hold it up with the other. The tile can then be removed easily by sliding it out, however you might have to lift it first in order to disconnect it from the holding.
Replacing The Tiles
Simply reversing the steps you took to remove the tiles from the roof will allow you to successfully reinstall the tiles. You should have plenty of room on your crowbars to inspect the holdings and make adjustments to them as necessary. If that is not the case, positioning the tile should be a simple matter.
When you are satisfied with how everything fits together, grab hold of the raised tiles, move the first crowbar away from where it was while being careful not to scratch the tiles, and then repeat the process with the other crowbar. Replace the flashing as well if damaged tiles have caused damage to it. If this is the case, replace the flashing.
Repairing The Flashing For Clay Tile Roofs
If you are able to fix the flashing on your clay tile roof, you can prevent a lot of water damage from occuring inside your house. Skylights, chimneys, ridges, roof penetrations, and valleys are the most common places on a roof that require flashing, and it serves the purpose of waterproofing the roof. The flashing attack is your final line of defence before taking water damage.
It looks like the flashing will need to be replaced in order for this to be fixed properly. Because the roof and chimney are subjected to the weather, they experience a significant amount of wear and tear over time. You can save spending money on a roofer if you climb up there yourself. Before you attempt that climb, be certain you take precautions to protect yourself and invest in protective gear.
Removing The Tiles
Put on your gloves, and then remove the tiles that are located around the flashing by utilising the ripped slate. It's possible that you'll need to take off some of the tiles around these ones before you can access them.
Cleaning Up
After the tiles have been removed, it may be possible to find some things. It will be necessary to pick up and remove any broken tiles, dirt, and debris that have accumulated. Make sure that the outdated flashing is removed. It's likely that the old flashing had tar on it; if so, you should try to get rid of as much of it as you can. It is important to take precautions to avoid getting cut on the metal flashing.
Installing The Base Support
A flashing made of copper sheet metal will be nailed down, and this will serve as the basic support for the new flashing that will be installed. Additionally, this assists in preventing sagging from occuring under the lower roof tile. By utilising the support, you are adding another degree of complexity for water to navigate on its way to your house.
Installing New Flashing
To keep the flashing in place, you can use copper nails, and then hammer them into the roof deck. Make sure that the sides are bent back and up as well as both, which will prevent water from running to the sides. In addition to this, the water will need to be diverted away from any potential entry points it may have.
Along with the chimney, the roof of certain residences will also have a pipe protruding from it. Flashing must also be installed on the pipe, as this is an essential step. Caulking should be used to secure the flashing to the pipe, and the height of the new flashing should be more than that of the pipe. Tin snips with straight cutting blades should be used to cut the top off just above where the old pipe was. Because doing so helps to produce a watertight seal, you should bend it so that it fits into the pipe's top.
Replace The Roof Tiles
Finish the trimming, then place the new tiles. It is imperative that the newly installed clay roof tiles are an exact match for the existing ones. To keep them in place, use nails. When they are replaced, the tiles must be reinstalled in the exact same manner and direction as the previous ones. It is preferable to work from left to right when performing tasks.
Clay tiles are distinctive in that you must exercise special caution when you are working with them. It is crucial to take care of your roof, as improper roof maintenance can have negative effects on the interior and exterior of your home.
How To Repair A Concrete Tile Roof
A rooftop covered in concrete tiles is not only aesthetically pleasing but also quite practical. It can be used for a substantial amount of time without becoming obsolete. However, it is possible for it to crack under conditions of extremely high temperature.
In this kind of situation, your only choices are to either fix the damaged tiles or replace them with new ones. The task of repairing a roof that is covered in solid tiles is not an impossible one. You are able to carry out the activity on your own if you have the necessary equipment, a guide like this one, and the necessary insurance coverage. This is how to fix a roof that is made of concrete tiles.
Safety First
Before you start making repairs to your roof made of solid tiles:
Make sure that you are wearing your cowhide gloves and your protective eyewear before you proceed.
Utilise the stool as a stepping stone in order to access the rooftop.
Make sure that you chip away at the damaged tiles in a methodical manner. When you are treading on the solid tile rooftop, you need to be careful not to damage the different sections of the roof.
Replace The Tiles
The replacement tile ought to be an exact match to the solid tile that is already being used on the roof. You need to get your hands on the model number of the tile, and then you need to produce some minor aspects. The selection of the appropriate tile is of the utmost importance since a reliable tile roof replicates a particular pattern. The most stable salary would be achieved by purchasing it directly from the first maker.
Use A Crowbar
Put the crowbar in place underneath the broken section of the concrete tile. After that, position it so that it covers the damaged portion of the tile's leftmost edge.
Removing Damaged Tiles
Applying a little bit of pressure to the crowbar will allow you to remove the tiles that are damaged. Because of this, the tile is forced up, and it may then be removed.
Tiles Above The Damaged Tiles
Remove the tile that is directly over the one that you just took off by repeating the instructions from the previous section.
Replacing The Tile
Take out and throw away the tile that is damaged. Put in a new one in the space that was previously vacant, and check to see that it is properly fastened to the roof.
Secure The Tiles
The vast majority of modern tiles may be installed without the use of nails. Instead, you should arrange the tile so that it is aligned properly, and then you should snap it into place.
Repeat
Repeat the steps of snapping and putting the tiles back together until all of the broken ones have been replaced.
Finishing
Repeat the steps you took to change the tiles to ensure that they are all securely in their new positions. That is the extent of the work that is required.
Clay Tile Roof Repair: Mistakes You Should Avoid
When repairing a roof made of clay tiles, it is essential to complete the work using the appropriate procedures. Failing to do so may result in greater damage than was originally intended to be fixed.
Clay tile roofs are also quite delicate, so it is essential to exercise extra caution when working on these kinds of roofs. Before attempting your next repair, it is essential to recall these and other common mistakes.
Storing Materials Properly
Managing the storage of the materials that will be used in the process of repairing a clay tile rooftop will be one of the most important challenges that you will face when attempting to repair the roof. These rooftops, despite being loaded with distinctive charm and personality, are not able to support a significant amount of weight on their surface.
It is essential to disperse the weight across a more extensive region with the end goal to keep away from causing harm to the great earth rooftop tiles. It's also a good idea to avoid piling distinct groupings on top of each other, as this might make things more confusing.
A good rule of thumb is to stack packages so that they are within close proximity to one another. The most effective strategy calls for the organisation of space on the ground level, followed by the transport of the necessary components to the rooftop as needed. In any case, this can't be an expert in most cases, particularly when dealing with high rooftop lines.
Accessing The Roof
Due to the fragile nature of mud tiles, climbing up to the rooftop to carry out your repair is a very risky proposition.
Even while it's a good idea to prop the extension stepladder up against the overhang of the rooftop, you should still put some kind of protection in between the stepladder and the roof. Because of this, any dirt tiles that are at the edge will be less likely to crack or chip.
Putting a defensive drop material, such as an old cover, to work off is still another clever idea that might be considered. Putting your electronics down on the exposed mud tiles to store them can increase the risk of chipping and splitting.
After reaching the rooftop, you need to ensure that you are wearing shoes that won't slide and that you walk slowly while distributing your weight evenly throughout your steps. When walking, it is also recommended that you stay away from walking directly on the edge of a tile because these are the areas that are the most susceptible to damage.
Removing The Old Tiles
When repairing a roof made of clay tiles, you will need to section off the area that needs work so that you do not damage any of the tiles that are adjacent to the repair area. Clay tiles are susceptible to damage from falling trees and can also break after being exposed to the elements for a few times.
The majority of the time, all that is required to effectively complete the repair is the replacement of a few tiles. UnfortunatUnfortunately, unpractised will frequently harm neighbouring tiles while attempting to evacuate the damaged ones. This is because unpractised does not have much experience with the game.
Utilize some wood to wedge the tile up so that you can preserve some degree of space from the predicament. This will give you access to the nail that is keeping the damaged tile in place so that you can remove it.
An etch and a mallet are both utilised on the damaged tile during the process of breaking the tile apart. You will have increased control as a result of this, and any accidental blow-back to existing tiles will be contained. While removing an old tile, if you keep a strategic distance from the regular slip-ups that occur during the process, you can ensure that you do not create additional labour for yourself.
Conclusion
Clay tile roofs with leaks that continue unrepaired for an extended period of time can cause significant damage to the roofing, ceiling, and appliances within the home. Leaks in a clay tile roof can be caused by a variety of factors, including the tile itself, the installation process, and the passage of time. Fixing the leaks in your roof requires determining the underlying problem, as was indicated earlier. The following is a list of potential solutions to some of the most prevalent problems that might lead to leaky clay tiles. Repairing fractures in your clay tile roof with cement can be an attractive and effective solution.
In the event that the problem lies inside the waterproof membrane, you will be required to remove the currently installed tiles and instal a brand new membrane in its place. It is possible that it would be best for you to convert your roof valleys into open spaces. Broken tiles are another potential cause for the leak in your roof that is made of clay tiles. To stop the leak, any tiles that are cracked or have major cracks in them will need to be replaced. Using a hammer and a nail, reattach the tiles to their backing by driving the nail into each tile.
There is a high risk of damage occuring with clay tiles, so they should be replaced as regularly as possible. It is possible to stop water from seeping through the roof into the attic by removing old tiles that are damaged or cracked. To effectively fix a leak in the roof, it is best to seek the assistance of a specialist. How To Repair Leaking Concrete Tile Roofs. Even if it may have been placed appropriately, a concrete tile roof will typically be robust enough for your home.
However, this does not always prevent problems from occuring, especially in the event that a tree branch or severe weather strikes it. You might not be able to access the roof from the attic, but if you examine the roof while you're up there, you'll see how severe the damage is. If it's necessary, remove any tiles from the roof that are broken or cracked and bring them with you when you go shopping for replacements. If you are able to fix the flashing on your clay tile roof, you can prevent a lot of water damage from occuring inside your house. Simply reversing the steps you took to remove the tiles from the roof will allow you to successfully reinstall the tiles.
If damaged tiles have caused damage, replace the flashing. Clay tiles are distinctive in that you must exercise special caution when working with them. It is imperative that the newly installed clay roof tiles are an exact match for the existing ones. To keep them in place, use nails - it is preferable to work from left to right when performing tasks. Repairing a roof that is covered in solid tiles is not an impossible task.
You are able to carry out the activity on your own if you have the necessary equipment, a guide like this one, and the necessary insurance coverage. This is how to fix a roof made of concrete tiles. Clay tile roofs are fragile and delicate, so it is essential to exercise extra caution when working on these kinds of roofs. It's a good idea to stack packages so that they are within close proximity to one another. After reaching the rooftop, you need to ensure that you are wearing shoes that won't slide and that you walk slowly while distributing your weight evenly throughout your steps. Clay tiles are susceptible to damage from falling trees and can also break after being exposed to the elements for a few times.
Content Summary
- There are numerous possible causes for the leak in your clay tile roof.
- The approach for repairing your leaky roof is also dependent on the underlying cause of the problem.
- However, it is critical that you repair the leak in your clay tile roof as soon as possible.
- We'll go through how to repair leaks in clay tile roofs in this article.
- The steps that are detailed below will show you how to repair a tile roof.
- Fixing the leaks in your roof requires determining the underlying problem, as was indicated earlier.
- The following is a list of potential solutions to some of the problems that have been found with the roof:CracksCracks in your clay tile roof can be easily repaired with RT-600, even if the leaks are caused by natural causes.
- Repairing fractures in your clay tile roof with cement can be an attractive and effective solution.
- In the event that the problem lies inside the waterproof membrane, you will be required to remove the currently installed tiles and instal a brand new membrane in its place.
- After that, you will be required to replace the tiles on your roof.
- Again, you might need the assistance of a trained professional in order to remove and retile the floor.
- This is because closed valleys are more likely to collect debris.
- A significant amount of debris will collect in the roof valleys, particularly the closed ones.
- If you want to prevent the accumulation of debris in the future, you might want to think about converting the roof valleys on your house into open spaces.
- Therefore, you should routinely check your roof for any debris and clear it away.
- Broken tiles are another potential cause for the leak in your roof that is made of clay tiles.
- You can get rid of the tiles that are shattered by using your hammer.
- Using a hammer and a nail, reattach the tiles to their backing by driving the nail into each tile.
- You will need to use a pry bar to remove the tiles that have been damaged.
- Next, secure the new tile to the roof by hammering the nails into the top of the tiles.
- This will keep the tile in place.
- To effectively fix a leak in the roof, it is best to seek the assistance of a specialist.
- Therefore, register right away in order to extend the lifespan of your clay roof tiles.
- In order to fix your leaky roof, you are going to require specific materials.
- Going up to the rooftop with the appropriate supplies only when you actually need them is one strategy.
- Accessing The RoofIn addition to the weight of the materials you are using, the manner in which you distribute your weight on roofs made of clay tiles is another crucial aspect that requires your attention.
- Inspect The RoofYou will begin the process of repair by inspecting the roof tiles to determine the extent of the damage that has been done.
- Even if it's possible that you'll be able to spot the broken tiles from the ground, you still need to perform a complete examination so that you may examine the tiles in greater detail.
- You might not be able to access the roof from the attic, but if you examine the roof while you're up there, you'll be able to determine how severe the damage is.
- Gather Your EquipmentAs soon as you have an accurate count of the required number of tiles, you will be able to ensure that you have an adequate supply of replacements.
- If it's necessary, remove any tiles from the roof that are broken or cracked and bring them with you when you go shopping for replacements.
- Replacing The Tiles
- Simply reversing the steps you took to remove the tiles from the roof will allow you to successfully reinstall the tiles.
- Replace the flashing as well if damaged tiles have caused damage to it.
- Repairing The Flashing For Clay Tile RoofsIf you are able to fix the flashing on your clay tile roof, you can prevent a lot of water damage from occuring inside your house.
- Make sure that the outdated flashing is removed.
- A flashing made of copper sheet metal will be nailed down, and this will serve as the basic support for the new flashing that will be installed.
- Installing New FlashingTo keep the flashing in place, you can use copper nails, and then hammer them into the roof deck.
- Caulking should be used to secure the flashing to the pipe, and the height of the new flashing should be more than that of the pipe.
- Replace The Roof TilesFinish the trimming, then place the new tiles.
- It is imperative that the newly installed clay roof tiles are an exact match for the existing ones.
- It is crucial to take care of your roof, as improper roof maintenance can have negative effects on the interior and exterior of your home.
- This is how to fix a roof that is made of concrete tiles.
- Repeat the steps of snapping and putting the tiles back together until all of the broken ones have been replaced.
- Clay Tile Roof Repair: Mistakes You Should AvoidWhen repairing a roof made of clay tiles, it is essential to complete the work using the appropriate procedures.
- Storing Materials ProperlyManaging the storage of the materials that will be used in the process of repairing a clay tile rooftop will be one of the most important challenges that you will face when attempting to repair the roof.
- Accessing The RoofDue to the fragile nature of mud tiles, climbing up to the rooftop to carry out your repair is a very risky proposition.
- Putting a defensive drop material, such as an old cover, to work off is still another clever idea that might be considered.
- Putting your electronics down on the exposed mud tiles to store them can increase the risk of chipping and splitting.
- When walking, it is also recommended that you stay away from walking directly on the edge of a tile because these are the areas that are the most susceptible to damage.
- Removing The Old TilesWhen repairing a roof made of clay tiles, you will need to section off the area that needs work so that you do not damage any of the tiles that are adjacent to the repair area.
- This will give you access to the nail that is keeping the damaged tile in place so that you can remove it.
- An etch and a mallet are both utilised on the damaged tile during the process of breaking the tile apart.
Frequently Asked Questions About Clay Tile Roofs
Fasteners for clay tile roofs: clay tiles are secured to the roof deck using wire, special clips, concrete, ballast stones, or metal clips. Tiles are secured loosely - overly-tight wires or nails are likely to break the tile.
Walk slow and carefully to limit pressure on the tiles. Walking on the balls of your feet can reduce pressure on the tiles. Avoid walking on the thick heels of your shoes, which more easily break the tiles. For roof tiles with close curves or waves, place the heel and ball of your foot on the peaks.
“A natural clay roof delivers a character and richness that will last for the lifetime of the tiles, even mellowing and improving over time, while a concrete roof will tend to fade over the years. Indeed, achieving the subtle imperfections and varieties in texture, colour, and size is much harder with concrete.
Any tiles that break after curing are due to mishandling, improper installation, misuse, improper foot traffic or severe impact or force. Severe impacts or forces, such as a tree branch or a heavy tool dropped onto a roof, can crack or break roof tiles.
100 years
Long Lifespan With Little Required Maintenance
While clay tile roofs can cost a bit more than some other roof types, once you invest in a clay tile roof, you can expect it to stay in good shape for up to 100 years or even longer.