Unfortunately, a significant concern for many homeowners is having damp walls on the inside of their homes. When a home is damp, you'll find that it can have a significant impact on the ambience inside the house. General dampness is characterised by an offensive musty odour, and it frequently results in a chill since moist patches on walls diminish the amount of heat insulation they provide.
The mould that develops as a result is not only unsightly but also hazardous to your health. Breathing in mould spores, which can be toxic, can cause a variety of respiratory problems. In addition to these more evident problems, dampness can also cause structural damage, most notably to the timbers, as well as irreparable damage to the plaster, paint, and other finishes.
It is an indication that there is an underlying damp problem when you find symptoms of wetness on the walls inside the building. Condensation, structural defects or leaks in the building, bridging of an existing damp proof course, and, in extremely rare cases, increasing damp can all contribute to this issue. Prior to beginning the process of redecorating, the underlying problems need to be addressed and resolved first.
Before considering any of the following alternatives for interior damp proofing, it is necessary to address the problem that is causing the damp in the first place. It is best to have the assistance of a trained expert if you want to be certain that the damp issue has been fixed. When a room has been damp proofed in the proper manner, you will have a living area that is more habitable and comfortable for you to use.
Dampness in the home is something that a lot of people have dealt with at some point, and the results are almost never favourable. Dampness can cause damage to the inside décor of your home, such as paint that peels, plaster that crumbles, wallpaper that curls, and rotting skirting boards. Roof Repair is a firm based in Australia that specialises in the installation of solar panels in the Melbourne area.
The most significant effect is that it transforms the ambience of your home from somewhere warm and friendly to a space that is uninviting and unattractive. In the event that your damp problem is not addressed, it has the potential to develop into more serious complications in the future. In this tutorial, we examine different strategies for protecting inner walls against dampness.
We would prefer to avoid dealing with dampness at home as much as possible. It makes no difference to us whether we own our own home or rent an apartment. It's not a positive development at all. It can make a space feel cold, unwelcoming, and unhealthy, and in the worst cases, it can imply that there are concerns with the room's structure or its ability to weatherproof itself.
Dampness, on the other hand, may frequently be cured and prevented without the involvement of professionals. There are also obvious symptoms to watch for that could suggest a problem, and there are basic things you can try to do to prevent it from appearing in the first place. In this article, we will take you step-by-step through the process of recognising a damp problem and determining its source. After that, we will offer some suggestions on how to repair and remedy the problem so that you may once again enjoy your living area.
Identify The Type Of Damp
If you want to get rid of the damp for good, you need to address the underlying problem that's causing it; otherwise, you'll discover that it keeps coming back. For more in-depth information on recognising and eliminating dampness in your house, check out our comprehensive guide, Identifying and Getting Rid of Damp, or read the following general summary. The problem cannot be fixed unless you determine which kind of dampness is causing it. In this post, we will discuss the process of damp proofing interior walls as well as some of the most typical factors that contribute to damp on internal walls.
Many homeowners struggle with the issue of damp internal walls in their homes. Additionally, there are a variety of issues. Internal walls that are always wet can give a property a musty, disagreeable odour in addition to a pervasive sense of moisture throughout the space.
If we do nothing to treat it, it could eventually harm our health by causing respiratory disorders or making existing ones worse over time. Since wetness inhibits a home's ability to retain heat, the temperature inside will feel cooler. In addition to this, the damage it causes to the structure can be rather unattractive. Therefore, protecting the interior walls from wet is an important task that must be completed. The good thing is that there are a lot of potential options out there to choose from. You need to determine the type of damp that is impacting the property before you can choose the most appropriate line of action.
Condensation
An excessive amount of water vapour in the home causes condensation to form on cold surfaces, which in turn leads to foggy windows, moist walls, and mould growth. One of the most common causes is inadequate ventilation. In residential settings, condensation is perhaps the most frequent cause of dampness. It is also the least expensive to address in addition to being the easiest.
Normal, day-to-day activities like cooking delicacies, drying and washing clothes indoors all contribute to the formation of condensation. In its most basic form, condensation refers to the deposition of surplus water vapour on a not warm surfaces, such as walls and windows. Condensation can be identified by its telltale signs, which include steamed-up walls, windows that feel moist to the touch, areas of black mould on ceilings and peeling wallpaper.
Condensation may, in the great majority of instances, be managed in a relatively straightforward manner. Taking steps to improve the ventilation in the home, such as throwing open the windows to let in fresh air and putting in exhaust fans in the kitchen, the bathroom, and any other area that generates a lot of steam or moisture, for example. It is best to keep the heating on continuously at a low setting and to avoid sudden changes in temperature. Additionally, it is important to keep lids on pans while cooking and to avoid drying wet clothes on radiators. In general, anything that can reduce the amount of moisture in the home can make a difference.
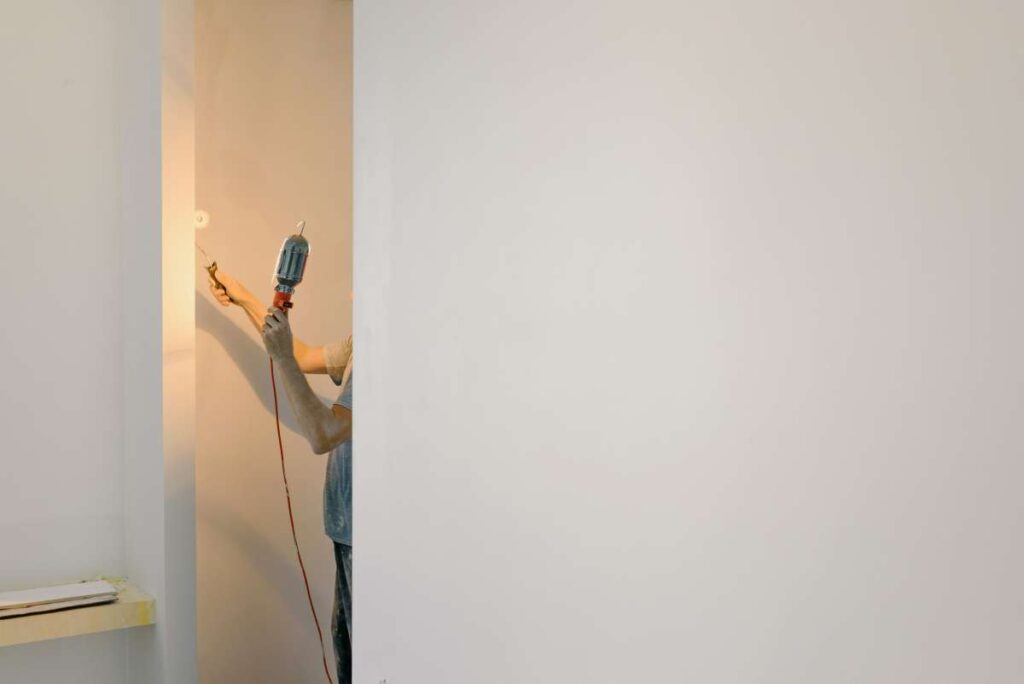
Paints that are resistant to mould and humidity are one alternative to the problem. Even in buildings where condensation is a persistent issue, these can be relied upon to do the job without breaking the bank. Mold and damp spots can be readily covered up with paint, and doing so should not only ensure that they won't return in the future but also make it easier to do so.
Paints that are resistant to dampness, on the other hand, should not be used until the root source of the dampness has been determined and addressed. If condensation damp is the only issue, it will function perfectly, but if other types of dampness, such as rising damp and penetrating damp, are left addressed, it will only provide a temporary reprieve from those sorts of dampness. When damp proofing inside walls, it is common practise to apply a layer of damp-proof paint before applying a render. This provides an additional waterproofing layer.
Penetrating Damp
When water from the environment seeps into the substrate of a building, a condition known as penetrating damp can develop. This may be the result of a number of problems with the structure of the building, including flaws in the joints, roofing, brickwork, failed external render, and improper pointing. Downpipes & guttering that are clogged or broken with debris. All of these very typical problems will eventually lead to moisture making its way inside your house.
When water comes in from the outside, this is referred to as penetrating wet. In most cases, this is the result of building defects such as flaws in the roofing or the brickwork, as well as faulty pipes and guttering or pipes that are clogged. Whether it's a roof that needs fixing, leaks or cracks in gaps or guttering around doors and windows that need addressing, the root source of the penetrating dampness must be fixed before any of these other issues can be addressed.
Penetrating dampness may also be brought on by issues with the cavity walls of the building. A hollow can be found between the interior and exterior walls of every contemporary home. It is possible for moisture to evaporate from the exterior wall in this gap before it is transferred to the inside wall. A cavity tray is required in any location where windows and doors are flush against a wall. It is possible that you will need to instal one if there isn't already one there, and it is also possible that the one that is already there is broken and requires repair.
The cost of working on cavities is usually not very high. The expense of clearing blocked cavities to prevent outer walls from accessing inner walls is normally around $130 for each impacted region. In the event that you require a new cavities tray, you should plan on spending approximately $250.
When it comes to moisture proofing the interior walls of your home, this is an essential point to keep in mind. With the exception of condensation wet, all damp originates from the outside, so addressing problems on the outside is essential to resolving the impacts of dampness on the inside. Again, once the necessary corrective actions have been made to address the factors that led to the penetrating damp, it may be advisable to apply a paint that is resistant to penetrating damp in order to offer an additional layer of defence against its recurrence in the future.
Rising Damp
The majority of homes have something called a damp proof course, which is a barrier that can stop dampness from increasing by preventing moisture from reaching lower levels. If this is not present or functioning properly, you may experience problems with increasing damp. Another factor that might contribute to problems is an increase in the exterior ground level that is higher than the damp proof course. If you want more information on how to identify and handle increasing damp, please read our guide.
Rising damp is a less common problem, but it is typically more difficult to fix and can be more expensive. In most cases, it is brought on by a damp proof course that is either insufficient or nonexistent. This indicates that a new damp proof course will likely be required in the majority of instances. The installation of a new damp proof course might run upwards of $400 for a single wall. A damp proofing treatment that involves injected silicone will likely cost closer to $700. On the other hand, kits for do-it-yourself projects can be found extensively and at a reasonable price.
Tanking is a type of internal damp proofing that prevents water from entering a building by forming a barrier, which is accomplished by sealing the walls with a material that is resistant to dampness. Despite this, it is not an inexpensive solution. The cost of repairing damage to a wall and its covering, replacing the tank, and redecorating a room that is three metres by three metres could exceed three thousand dollars.
Utilising a damp proof membrane is an alternative that comes at a lower cost. You may find do-it-yourself kits that cover 20 square metres for as cheap as $150. After a new DPC has been installed, a damp-proof membrane can be applied to the inside wall to create an impenetrable barrier. This step is necessary. Here in Roof Repair Roofing Systems, you can locate the most qualified roof guttering specialists.
It is possible to use damp-proof plaster when performing renovations on older homes. It is particularly useful in basement regions for lowering the amount of condensation that forms there. It can be utilised following the installation of a new damp proof course, and it possesses waterproofing properties that assist in preventing the expansion of mould.
It is essential to keep in mind that the root cause of the moisture must be treated before any method of damp proofing internal walls can be considered successful. This is true regardless of which method of damp proofing internal walls you choose to use. The severity of the damp problem and the amount of property damage that it has already caused will be used to evaluate the viability of various solutions.
Know When You Have Damp
If you have damp in the winter, you will most likely be able to see or smell it, but regardless of the season, you should constantly be on the lookout for warning indications that could indicate a potential problem. Check the following items to make sure they are correct:
- Walls: Put your hand against the wall and hold it there. Does it seem to be quite chilly or damp where you are? Check the painted walls, furniture, and wallpaper for signs of mould or fungal development, which will appear as black speckled markings or grey growths. Paint that is peeling or wallpaper that is curling can also be signs.
- Ceilings: When inspecting the ceiling, in addition to looking for any evidence of mould, pay careful attention to the colour of the ceiling. Is there a discoloration or staining in certain areas? Dampness can be indicated by brown spots in the exterior corners and at the chimney breasts.
- Windows: If you wake up to find condensation on the windows, as well as little puddles of water along the window sills, this may be an indication that there is a high level of humidity inside your home. This could either be the cause of the damp or a symptom of it. Mold can also grow on window frames made of wood or PVC, and silicone sealant is typically applied around the frames' edges to prevent this from happening.
- In bathrooms and kitchens, be on the lookout for any evidence of black mould in the grouting and the sealant. Conduct a search for comparable damage on the ceilings and around the window frames. Examine the interiors of the cabinets and cupboards, paying close attention to any musty odours and looking for any signs of discoloration or mould growth.
- Black mould can develop on the interior surfaces of upholstered surfaces, such as sofas, curtains, and blinds. Furniture and soft furnishings are also susceptible to the growth of black mould. Check the backs of the pieces of furniture for any signs of mould or foggy condensation that may have formed on the wooden or plastic surfaces.
- Lower levels of buildings and storage areas that are not heated — The presence of a musty and damp odour is probably going to be the first red flag that there is an issue here. While you're down there, check the painted walls and woodwork for any signs of discoloration or mould growth.
The first thing you need to do in order to get rid of walls that are damp is to figure out where the moisture is coming from. In order to achieve this goal, you will need to conduct inspections of your home not only from the outside but also from the inside. The following are some of the possible underlying causes that may be contributing to damp patches on walls:
- Condensation
- The infiltration of rainwater
- Roofing that is not up to par
- Leaking gutters
- Poorly functioning downpipes
- Vegetation harming masonry and render
- The destruction of foundations or damp proof courses by roots
- Rising damp
- faulty weather stripping on the windows and doors
- Insulation for Wall Cavities
After you have determined what brought about the problem, the following step is to look for a solution to the problem itself. Only then should you move on to addressing the effects that the moisture has on your property.
The Damp Proofing Process
The use of damp-proof membranes is an excellent method for damp proofing walls because these membranes are not only simple to instal but also very versatile. Because of their flexibility, they are able to accommodate structural movement, which ensures that your damp proofing will continue to function effectively for decades to come.
Installing A Damp Proof Membrane
- Once you have rectified the source of the damp, start by removing the old plasterwork and render back to the original masonry.
- Cut the damp proof membrane to size using scissors.
- Place the membrane on the wall, carefully folding around the corners.
- Drill the damp proof membrane to the wall, ensuring a tight fit
- Fix the membrane in place with special membrane fixing plugs
- Seal all joints and overlaps with Fleece Over Strip
Our PermaSEAL Mesh membranes offer a high-quality meshed surface that works well as a "key" for lime mortars, renders, plasters, or applied plasterboard. This surface can also be used for other applications. This translates to the fact that you will have more time to renovate. After you have installed your damp proof membrane, you should get more information about how to re-render walls.
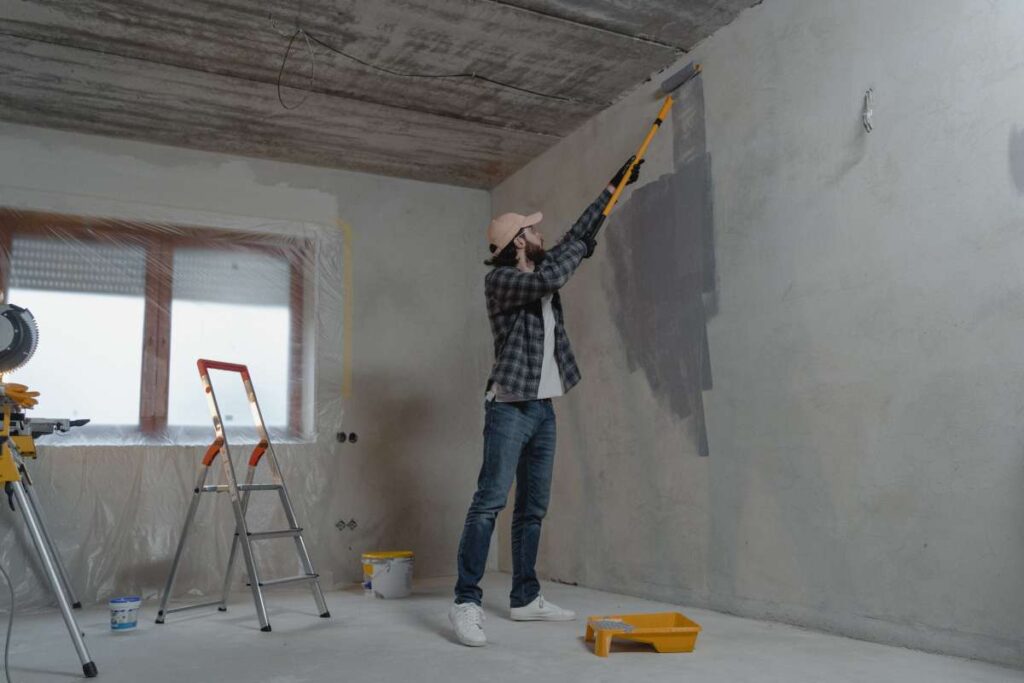
Damp Proofing Walls With Damp Proof Paints
When it comes to protecting walls from dampness using damp-proof paint, the greatest results are achieved by first applying the paint to the backdrop substrate and then covering it with a render or plaster. This method yields the longest-lasting and most effective protection. This results in the formation of a sandwich structure that embeds the damp-proof layer into the wall's composition, so preventing the accumulation of moisture.
Additionally, damp-proof paints may be applied directly to the plaster surface in some applications. However, because it prevents moisture from escaping gypsum-based materials, it might hasten the material's deterioration over time. Because salt can cause damp proof paint to lose its bond, we do not recommend using it on surfaces that are already polluted with salt.
Damp Proofing Brick Walls With Tanking Slurry
Hacking back to the original masonry of brick, concrete, or masonry walls and applying a tanking slurry is an additional method for damp proofing these types of walls. Tanking Slurries are a type of waterproof coating that is based on cement and is applied with a brush on masonry in order to produce a barrier that is completely waterproof. They are resilient enough to tolerate significant water pressures. Although they are most commonly utilised for the purpose of waterproofing basements, they are also effective for preventing dampness above ground.
After the surface has been adequately prepared, the Salt Inhibitor primer should be applied. After that, you should apply two coats of tanking to the wall at intervals of between four and eight hours, and then render over the surface with rejuvenating plaster or a sand and cement render. This will provide you with a coating that is completely bonded and waterproof, which will prevent any dampness from penetrating through to your new finish.
It is not possible to achieve a dot-and-dab finish or a natural plaster finish using tanking slurries. Before either of the aforementioned can be applied, the surface must first be covered with a minimum of 10 millimetres of a cement-based render.
Replastering Damp Walls
In many situations, it is possible to chop back to the original masonry, apply a water-resistant render to the damp wall, and then re-render and re-plaster the wall. This will contain any remaining moisture in the wall and prevent it from passing through to new finishes, while at the same time enabling the wall to naturally dry out.
A water-resistant, salt-resistant, lightweight, and fiber-reinforced pre-bagged refurbishing render is one of the products that Permagard offers its customers. Because of this, it is the perfect render for applying to damp walls even after a new damp proof course has been installed because it is water resistant.
Alternately, we provide a waterproofing admixture called Perma Proof that can be mixed with a render mix made of clean, sharp sand and cement to produce a render that is resistant to water and salt.
Cavity Wall Damp Proofing
Cavity walls are utilised in virtually all residential construction beginning in the 1920s and continuing beyond. They were first designed with the primary purpose of preventing water from entering a person's house through any openings. This results in fewer occurrences of piercing wetness, but it is still possible for it to take place. In these types of situations, you ought to proceed with the therapy approaches described before.
Nevertheless, cavity walls may experience difficulties on occasion in the event that the damp proof course (DPC) is bridged. This may take place if the external ground levels are elevated above the DPC or if there are intersecting masonry constructions, such as garden walls that are adjacent to one another. Debris in the wall cavity or the subfloor void is one of the concerns that arises most frequently.
During the construction phase or after cavity wall insulation has been installed, debris may accumulate in the cavity. This may also occur after installation. Because of this, there is a potential for an issue to arise in which the debris that is present within the cavity crosses the DPC, thus allowing water to enter the interior wall.
The wall cavity needs to be cleaned out in order to find a solution to this problem. In order to access the cavity, this will require the removal of a significant number of bricks. Before beginning work on this project, it is strongly suggested that you get advice from an expert first. Would you like the roof to be replaced? Then you can get assistance with it from Roof Repair Roofing Systems.
Conclusion
The mood within a home can be drastically altered by the presence of moisture. An unpleasant musty odour is a telltale sign of general moisture, and the chill that often follows, as the loss of thermal insulation caused by damp spots on walls is exacerbated by the general lack of ventilation. Timbers, plaster, paint, and other finishes can all suffer permanent damage from prolonged exposure to moisture. Internal wall dampness is a common problem for many households. An unpleasant musty odour and a pervasive feeling of dampness can spread throughout a home if its interior walls are always damp.
Until the source of the dampness is identified, the problem cannot be resolved. Then, we recommend potential solutions to the issue. When there's too much humidity in the air, condensation forms on cold surfaces, resulting in misty windows, soggy walls, and even the potential for mould to take hold. Ignoring it could have negative long-term effects on our health by contributing to or exacerbating preexisting respiratory conditions. The bright side is that you have a wide variety of choices available to you.
Paints can do the job even in buildings where condensation is a constant problem, and they don't have to break the bank doing it. Covering over mould and wet places with paint is a simple solution that should prevent the problem from returning and make it easier to fix. However, you shouldn't apply damp-resistant paints until you've identified and fixed the underlying cause of the moisture problems. Building's cavity walls could be the cause of penetrating dampness. Every modern house has a space between its inner and outer walls.
This space allows outer wall moisture to dissipate before it may penetrate interior walls. There must be a cavity tray installed whenever there are flush-mounted windows or doors. Because of its rarity, rising damp is sometimes more challenging and costly to repair than other types of damp. Most situations will call for a new damp proof course. To prevent water from getting inside a building, tanking seals the walls with a material that is impervious to moisture, creating a barrier that water can't penetrate.
In the winter, dampness can usually be detected by sight or smell. But you should always be on the watch for warning signs that could suggest a problem, regardless of the time of year. Brown patches in external corners and around chimney breasts are signs of moisture. Interior surfaces of upholstered items like couches, drapes, and blinds are susceptible to black mould growth. One of the best ways to prevent moisture damage to walls is to instal a damp-proof membrane.
These membranes are not only easy to instal but may be used in a variety of applications. When you have finished installing your damp proof membrane, you should research re-rendering your walls for more details. PermaSEAL When used as a "key" for lime mortars, renders, plasters, or applied plasterboard, mesh membranes provide a high-quality meshed surface. In order to prevent mould growth, a layer of damp-proof paint should be placed to the background substrate before any render or plaster is applied. As a result, a sandwich structure is created, with the damp-proof layer permanently encased within the wall's composition.
A slurry is a cement-based waterproof coating that can be painted onto brick or stone to create an impermeable barrier. Since the 1920s, and even into the later decades, cavity walls have been widely used in residential building. Their original intent was to seal off any potential entry points for water into a home. An often-cited issue is the presence of debris in the subfloor or wall void. In order to get started on this job, it is recommended that you consult an expert first.
Content Summary
- Having damp walls within one's house is a major cause for worry for many homeowners.
- The mood within a home can be drastically altered by the presence of moisture.
- Finding signs of wetness on the walls inside the structure is a sign of an underlying damp problem.
- The fundamental issues must be fixed before any redecorating can begin.
- The source of the damp must be fixed before any of the following options for damp proofing inside the home may be considered.
- If you want to be sure the damp problem has been resolved, it is advisable to get help from a skilled professional.
- If you take the time to properly damp proof a room, you'll be rewarded with a liveable and pleasant space.
- The most noticeable consequence is that it makes your home feel cold and unwelcoming instead of cosy and welcoming.
- Your damp issue may lead to even bigger problems down the road if you don't take care of it.
- Several methods of damp-proofing interior walls are discussed in this tutorial.
- We will show you how to identify dampness and track down its cause in your home.
- Then, we'll give you some advice on how to fix the issue for good so that you may use your living space again without hassle.
- The damp won't go away permanently unless the underlying issue that's generating it is fixed; otherwise, it will constantly reappearing.
- Until the source of the dampness is identified, the problem cannot be resolved.
- The most common causes of wet on interior walls are examined here, along with the process of damp proofing those walls.
- Internal wall dampness is a common problem for many households.
- What's more, the structural damage it produces can be pretty unsightly.
- As a result, preventing moisture damage to the internal walls is crucial.
- When there's too much humidity in the air, condensation forms on cold surfaces, resulting in misty windows, soggy walls, and even the potential for mould to take hold.
- Under-ventilation is a common contributing factor. Condensation is one of the most common sources of moisture in homes.
- opening windows to let in fresh air and installing exhaust fans in the kitchen, the bathroom, and any other location that generates a lot of steam or moisture are all good examples of how to increase ventilation at home.
- Generally speaking, any measure taken to lower indoor humidity will be helpful. One potential solution is the use of mold- and humidity-proof paints.
- However, you shouldn't apply damp-resistant paints until you've identified and fixed the underlying cause of the moisture problems.
- It will work flawlessly if condensation damp is the only problem, but it will only provide a temporary reprieve if other types of moisture, such as rising damp and penetrating damp, are left unaddressed.
- It is usual practise to first apply a layer of moisture-proof paint before a render when damp proofing interior walls.
- Penetrating damp occurs when water from the outside penetrates into the structure's foundation.
- Moisture will find its way inside your home due to all of these very common issues. Penetrating damp is the state of being soaked from the outside in.
- The source of the penetrating moisture must be rectified before other problems, such as a leaking roof or damaged guttering around doors and windows, may be fixed.
- Building's cavity walls could be the cause of penetrating dampness. Every modern house has a space between its inner and outer walls.
- This space allows outer wall moisture to dissipate before it may penetrate interior walls. There must be a cavity tray installed whenever there are flush-mounted windows or doors.
- About $250 is what you should budget for a new cavities tray.
- This is a critical consideration while working to prevent mould and mildew growth on the inside of your home's walls.
- Except for condensation wet, all damp comes from the outside, so fixing the causes of the problem outside is crucial to resolving the effects of dampness inside.
- A damp proof course, a barrier that prevents dampness from spreading by preventing moisture from reaching lower floors, is standard equipment in most modern homes.
- It's possible that you'll have dampness issues if this isn't there or isn't working properly. Elevation of the external ground level over the damp proof course is another potential source of trouble.
- This means that in most situations, a new damp proof course will be necessary. A cheaper solution is to use a damp proof membrane.
- When making repairs to older houses, damp-proof plaster might be used. This holds true irrespective of the strategy adopted for damp proofing interior walls.
- Various remedies will be assessed based on how severe the damp problem is and how much property damage it has already caused.
- You may be able to detect wet in the winter by sight or smell, but it's important to be on the alert year-round for any signs of trouble.
- Look for black speckling or grey growths on painted walls, furniture, or wallpaper to indicate the presence of mould or fungal development.
- This could be the root of the problem, or it could just be a symptom. Always inspect the grout and sealant in your bathroom or kitchen for signs of black mould.
- Explore the ceilings and the areas around the windows for similar damage.
- Pay particular attention to any musty odours and search for discoloration or mould growth as you investigate the interiors of the cabinets and cupboards.
- Black mould can also spread to and infest furniture and other soft items.
- Look check the underside of each item of furniture to see whether any dampness or mould has settled on the wooden or plastic frames.
- When trying to get rid of wet walls, the first step is to identify the source of the problem. First, you need to dry out your home, and then you can move on to fixing the damage that moisture has done.
- Once the damp problem has been fixed, the first step is to strip away the old plaster and render to reveal the underlying masonry.
- Use scissors to snip the moisture barrier to fit the desired opening size. Fold the membrane carefully around the wall's edges and attach it to the surface.
- When you have finished installing your damp proof membrane, you should research re-rendering your walls for more details.
- Applying damp-proof paint to the substrate behind a wall and then covering it with a render or plaster provides the best protection against moisture.
- Brick, concrete, or masonry walls can also be damp proofed by hacking back to the original masonry and adding a tanking slurry.
- It is often possible to re-render and re-plaster a wall by chopping it back to the original brickwork, applying a water-resistant render, and then re-plastering it.
- Permagard provides its customers with a pre-bagged refinishing render that is fiber-reinforced, lightweight, resistant to water and salt, and pre-packaged.
- Since it is water resistant, it is the ideal render for use on damp walls once a new damp proof course has been built.
- To counter this, we offer a waterproofing admixture called Perma Proof, which may be added to a render mix of clean, sharp sand and cement to increase the render's resistance to water and salt.
- However, if the damp proof course (DPC) is breached, cavity walls can develop issues.
- The presence of debris in the wall cavity or the subfloor void is one of the most commonly mentioned causes for alarm. Any time there is work going on, or after cavity wall insulation has been put, debris might find its way into the cavity.
Frequently Asked Questions About Damp Internal Wall
Damp Proof Membranes can be applied internally with little or no surface preparation. However, it is very important to install the membrane correctly to prevent expensive water ingress in the future. They should be used in conjunction with a Damp Proof Course in outer walls to create a continuous barrier to water.
The most common way to damp-proof a wall is to apply a damping resin, epoxy, or spray to the wall’s surface. You can also use plastic sheeting to cover exterior wood walls or silicone to fill in gaps in masonry and keep dampness out.
Damp-proof courses can sometimes be replaced or inserted/injected without removing plaster; however, the contractor must ensure the plaster is tested for the presence of hygroscopic salts, which are often present due to being drawn up into the plaster by the rising damp.
One of the most common causes of damp on internal walls is condensation. Condensation forms when warm moist air within a room touches a cold internal wall or surface. The warm moist air cools down and condenses back into the water.
Aftercare. Our One Coat Damp Seal isn’t designed to be a top coat of paint, so you will need to cover it with paint or wallpaper.