We at Roof Repair Roofing Systems understand how important the value of a home is to homeowners since we recognise that a person's home is a reflection of their individuality. In addition to focusing on painting, homeowners need to give attention to other aspects of home care. You are looking for roofing specialists in Melbourne, right? Roof Repair Roofing Systems can take care of it for you.
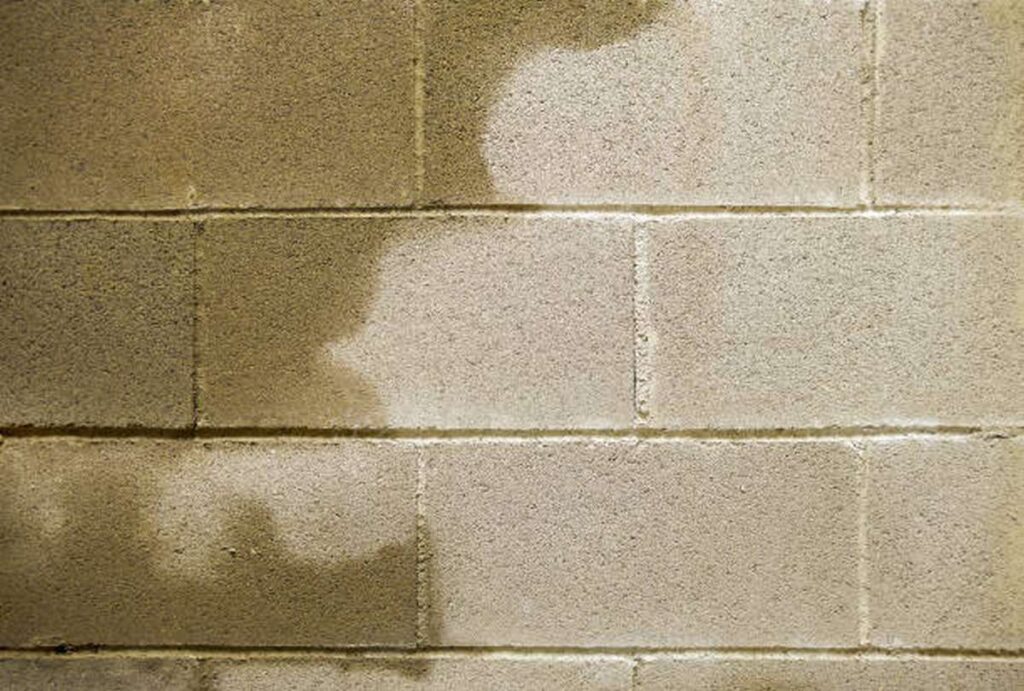
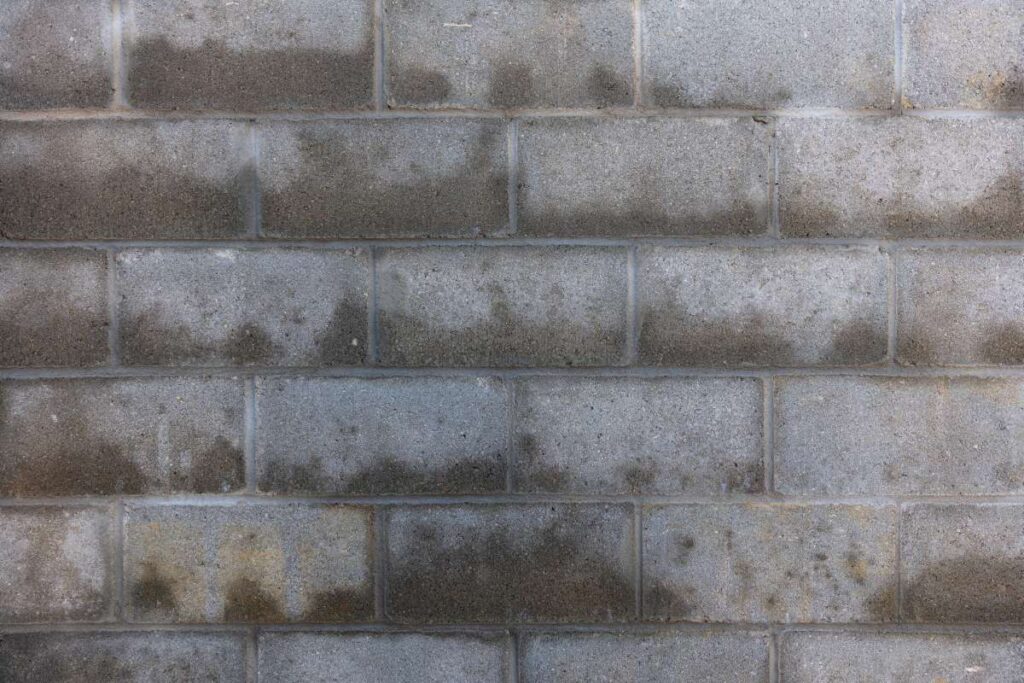
It is common knowledge that the walls of a home can suffer irreparable damage if the appropriate care and maintenance are not provided for them. The structural soundness of homes is frequently compromised by issues such as seepage, humidity, leaking, and cracks, all of which can be found in common. The majority of us will, unfortunately, have to deal with the consequences of having moist walls. It causes the walls to become severely discoloured, so destroying the overall appearance and atmosphere of the living space.
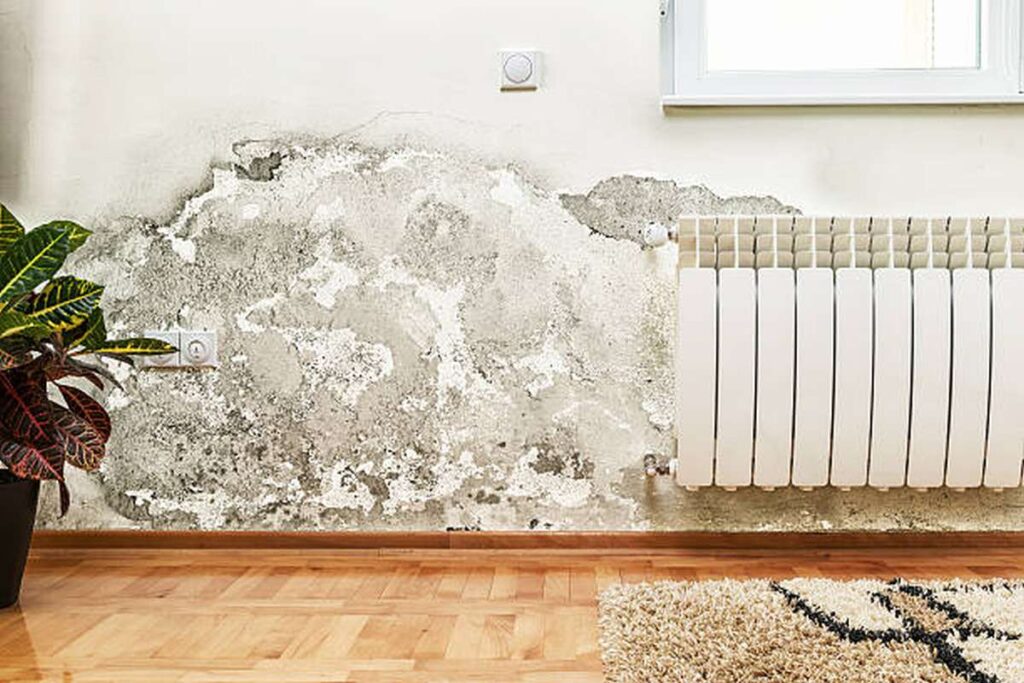
Mold can easily grow inside a home if there is a lot of dampness and moisture in the air. If treatment is not sought for this issue, it may develop into one that affects the entire house. There is a high probability that you will find that the air within the house has a musty and disagreeable odour. This is risky since those who suffer from asthma and live in the same residence have a greater chance of having an asthma attack. In addition, it is possible to bring on severe allergic reactions, lung damage, persistent coughing, and various other respiratory problems.
As long as the appropriate damp-proofing solutions are used and the process is carried out by a trained professional, however, repairing and damp-proofing the walls of a home does not have to cost an arm and a leg. If you ignore this issue, it may become even more serious, particularly when multiple contributing factors come together. You may end up spending a lot more money as a result of doing this in the long run.
We are aware of the importance of protecting the house and have developed strategies for damp-proofing that take into account this requirement. We supply a variety of cutting-edge items, each of which makes the bold claim that it can offer unwavering defence against the severe forces of nature that can have an impact on a dwelling.
The ultimate solution to the majority of issues that reduce the aesthetic appeal of homes may be found in solutions that waterproof against moisture and repair cracks. These products also bring the ability to fill in holes.
Each solution is crafted utilising a unique combination of chemicals and cutting-edge technology, and it is designed specifically to address a different issue. Express Painting Services is able to put the waterproofing solutions into action, and they guarantee that the walls will retain their beauty while being protected from moisture. After all, your lovely house need to retain its attractiveness throughout the years.
In the event that you find yourself in a circumstance in which you have walls that are moist, here is Roof Repair Roofing System's three-step remedy to put an end to the problem. If you want to have a healthy house as well, you should make this investment because it is the ideal choice for the long run. Are you interested in learning the methods for damp-proofing walls? Let's get started!
First Step
The Roof Repair Roofing Systems Team will first use a moisture metre to inspect your entire property, looking for areas that need to be water-proofed based on the current moisture level. We will do a thorough cleaning of the affected walls once we have identified where the problems are. Cleanup is using a putty knife to scrape away grime and other deposits.
After spraying the area with water, it will be left to dry naturally. Once that is done, we'll fill the cracks with Crack Fill Paste, the industry standard and the best crack filler for indoor walls. The walls will then be primed with Dampstop using a brush. Dampstop is a single-package, high-performance polymer-modified cement product. Mixing ratio of Dampstop with water, expressed as a fraction. Between four and six hours will be set aside to let it dry.
The Next Stage
Afterward, two layers of Waterproof Putty will be spread throughout the area using a putty knife. This high-end powder putty made from white cement is good for waterproofing because it has a few key characteristics that set it apart from other options. Between four and six hours will be set aside to let it dry.
Afterward
You must prime the area using Seal-O-Prime. When it comes to interior and exterior applications, nothing beats Seal-O-Prime, a high-quality acrylic primer. A mixture of equal volumes Seal-O-Prime and water is recommended for best results. Around four to six hours will be set aside to let it dry. The next step is to add a finishing coat of paint with a brush.
The discussion is over. The three-step process outlined here will make your home more water-resistant, saving you the trouble (and potential embarrassment) of having guests over when it rains. If you have any suspicion that your home has a damp problem, please contact us so that we can assist you in avoiding the hassle that could arise from unsightly wet conditions.
How to Damp Proof Walls?
Waterproofing and damp-proofing are two terms that are often used interchangeably; nevertheless, the primary distinction between the two terms is that waterproofing prevents water from entering an area totally while damp-proofing prevents moisture from accumulating. You can damp-proof a wall if you live in a dry environment that does not receive a lot of precipitation. Waterproofing is a more safer option for the option for maintaining the structural integrity of your walls, but damp-proofing can be done.
Applying a damping epoxy, glue or spray on the surface of a wall is the most popular method for preventing dampness from penetrating the wall. Plastic sheeting can also be used to cover outside wood walls, and silicone can be used to fill in holes in brickwork in order to prevent moisture from getting in.
Applying a Damp Coating to the Interior Walls
You should protect your walls against moisture by purchasing a coating designed for that purpose. Different types of damp-proof coatings are available on the market nowadays. In most cases, they take the form of a epoxy, resin, spray or cement and they are applied to a wall in order to wick away moisture and prevent water from penetrating the surface.
The application process for the various coatings varies. Obtain a coating that is resistant to dampness and is tailored for the material of your walls. Stucco, wood, cement and concrete each require their own particular type of coating. You can buy a coating either online or at a store that sells construction supplies.
- The process of damp proofing is often considered to be less successful than waterproofing. If you encounter water in your room on a regular basis or if there is obvious water damage, damp-proofing will not resolve either of these issues for you.
- In a perfect world, sheets of damp-proofing material would be installed into the framing of a house at the time it was built. If a structure isn't finished being built but you still want to damp proof it, you should have the builders put polyurethane sheets made specifically for damp proofing inside the walls of the building. Due to the fact that this job includes drilling into the foundation of a building, it can only be carried out by a qualified and certified contractor.
- When it comes to waterproofing a wall made of concrete or cement, hydraulic cement is an excellent choice for filling up areas of exposed masonry. It is most commonly used for waterproofing, but it also has the additional benefit of preventing moisture from entering the walls.
Put on some gloves, goggles, and a respirator to protect yourself. It doesn't matter what kind of damp-proof coating you're dealing with; it's critical to observe proper safety precautions at all times. Put on some heavy gloves so that your hands are shielded from the elements. Always safeguard your eyes by using protective eyewear, especially while working with spray coatings. Put on a respirator to safeguard yourself against any potentially hazardous or damaging fumes.
- Even while the majority of damp-proof coatings are non-toxic, there are a few that are. However, it is always best to err on the side of caution rather than regret, and this is especially true when working with substances that you are unfamiliar with.
Prepare the first wall that you are going to work on by laying a drop cloth down down its length. Because cleaning your walls will cause a significant amount of dust to be removed from them, this is an extremely vital consideration to make before damp-proofing masonry. In addition to this, you will want to prevent the coating from dripping onto the floor. Put down your drop cloth and spread it out to cover the floor so that it is protected. ands. Always safeguard your eyes by using protective eyewear, especially while working with spray coatings. Put on a respirator to safeguard yourself against any potentially hazardous or damaging fumes.
- While you work, ensure that the space you are in has adequate ventilation by opening the windows.
To clean up any damp spots, use a cloth that doesn't leave lint behind. Get a cloth that's clean, sturdy, and lint-free and grab that. You should have a firm grip on it in your palm and use it to brush any areas of your wall that are moist. You will not be able to eliminate all of the wet; but, the more you are able to soak up, the more effective your damp-proof coating will be. To remove any surface dust or filth from the wall, run the cloth over the dry sections of the wall in a light, circular motion.
- While you work on damp-proofing a room, you should put on the heat and place a dehumidifier in the area you are working in. This will help ensure that the walls you are working on are dry. As you do this, the moisture will be drawn out of the air and knocked out of the wall with your towel.
- As you make your way around a room, you should move the drop cloth from one wall to the next.
When applying liquid coatings, a paint roller and brush are the tools of choice. To apply a liquid coating, pour your damp-proofing liquid into a paint tray and then paint it on. When painting the trim, dip a brush made of natural hair or nylon into the coating. To paint the 6–8 inch (15–20 cm) area that is along the edge of the floor and ceiling, as well as the areas where the corners meet, apply careful back-and-forth strokes. Then, cover the bigger areas of your walls by rolling on the paint with a roller that has a thick nap.
- Before they can be applied, certain liquids and pastes that are used as wet coatings need to be blended.
- The floor is typically the point of entry for moisture, and it travels upward from there. When it comes to putting the coating at the base of your walls, you want to make sure that you give it your full attention and do a thorough job.
- Before you go back into your room, you should wait until it has dried for the amount of time that is recommended. In most cases, a damp-proof coating needs at least 24 to 48 hours to completely dry off.
Spray the coating from the aerosol can all over the walls. To apply the coating, first remove the cap from a clean spray bottle or paint sprayer and then open the top of the applicator. Turning the knob inward will secure the lid in place. Pull the bottle or sprayer's trigger while holding the nozzle 10 to 12 inches (25 to 30 centimetres) from the wall. You should spray each portion of your walls by moving your arm in a horizontal motion.
- Allow the spray to penetrate the walls for a minimum of 24 hours.
- When you are doing this, you are required to wear a respirator.
- To avoid getting the damp-proof finish on the ceiling, prop up a poster board or a sheet of corrugated plastic against the ceiling as you paint.
Utilise a putty knife to spread the cement coating. Get a cement damp-proof coating on a wall made of concrete or cement to prevent dampness from rising up the wall. Use a grinder or a wire brush to scrape the areas of your wall that have become damp. To load your putty knife, open the lid of the container, and scoop out a sufficient amount of cement to fill it. The concrete can be slid over the dampened surface with the help of a putty knife scraped against by the wall at a 45 ° angle. Repeat this process as many times as necessary until all of the wet surfaces have been completely covered. s in order to use the spray.
- This technique is useful for preventing dampness in masonry only when applied to very limited areas.
- It will take the cement about three to four days to thoroughly settle.
Protecting External Walls from Moisture by Using Plastic Sheeting
Determine the problematic location as well as the origin of the moisture. Take a look at the wall you wish to damp proof while you are outside. Examine the wall by touching it and looking for signs of dampness. You can be considered damp proof if there is no moisture present or if the dampness is confined to the base of the wall. If, however, the water is penetrating the wall at either the middle or the top, you will need to engage a professional to waterproof the repair and wall any leaks that may exist.
If a wall is damp at its base, this is an indication that moisture is rising from the foundation higher up the wall. Damp-proofing is a process that can reduce the amount of dampness of this kind. The practise of utilising highly-engineered coating solutions in order to "restore" an existing roof deck to an almost brand-new condition is referred to as roof restoration. Roof Repair Roofing Systems is the company that will take care of it for you.
- Don't confuse rain for wetness; check the wall after it's rained for a few days.
Start by cleaning your wall to get it ready. To prepare an outside wall for damp-proofing, you must first clean it thoroughly and remove any debris or filth that may be present. Gather a cleaning spray that does not include bleach as well as a garden hose. The wall that you are going to damp proof should be sprayed with the liquid. You can clean the wall using a cleaner by using a hose to spray it down and working it into the substance. Before cleaning the wall down with a rough cloth that is lint-free, you should give it 12 to 24 hours to dry naturally.
- If you want to avoid ricochets, don't spray upwards. To get a better spraying vantage point, climb a ladder to lift your hose.
To prevent moisture from getting into the wood on the outer walls, cover them with polythene sheeting. If your walls are composed of wood, you should invest in adhesive polythene sheeting that is at least 6 millimetres thick (0.24 in). Bring the sheeting you are using outside to the side of the wall that is facing the outside of the building that is damp. After drying the wall with a clean cloth, remove the backing from the self-adhesive side of your sheeting. To secure the sheeting to the wall, press it into the surface of the wall.
- Similar sheeting is used on the interior of walls by construction crews. In other words, this is an excellent method of preventing leaks. Unfortunately, you can’t apply them to brickwork.
To even out the wrinkles in the sheeting, you can use a credit card or a squeegee. After you have attached your sheeting to the wall, grab a credit card or a squeegee to smooth it out. Use the item's flat, extended edge to force bubbles out towards the sheeting's edge. Remove any unnecessary bulk with a utility knife or scissors.
Caulk made of silicone should be used to fill any spaces left by cracked masonry. Acquire a few additional tubes of silicone caulk in addition to a caulking gun. Cut off the top one to two centimetres (ten to twenty millimetres) of a tube with a pair of scissors or a utility knife, and then insert the tube into your caulk gun. Check your walls to see if there are any openings, gaps, or cracks. Caulk will be dispensed into any openings that you locate if you first insert the opening of the tube into the opening and then push the trigger. Even though this is not strictly considered damp proofing, it will assist in preventing moisture from entering the interior of your walls.
- It's recommended to give the caulk at least 48 hours to dry before painting over it.
- A wood filler is not a good choice for repairing cracks. Sheets can be filled to masonry using wood putty or trimmed panels.
Get in touch with a contractor to handle the installation of plastic sheeting in the walls. If applying a coating, outside sheathing, or caulk hasn't helped to keep the dampness out, you may need to contact a professional contractor to open up your wall and instal plastic sheeting. This may be necessary. Find a waterproofing contractor by looking them up on the internet. Unfortunately, due to the fact that it requires working and drilling on support beams as well as the foundation of the building, you cannot do this on your own.
- If you only need to reduce the noise from one wall, this is an excellent choice. However, it will cost you tens of thousands of dollars to have your entire home sheeted.
- Depending on the details of your project, this could cost you anywhere from $ 500 all the way up to $10,000.
Engage the services of a contractor to have chemical damp-proofing installed in masonry walls. It is not possible to lay plastic sheeting over concrete walls that have already been built if they are being affected by dampness. Employ a waterproofing company to inject a chemical that prevents dampness into the wall of your home. They will drill holes in strategic locations in your wall and then stuff those holes with a specialised foam or rod that will absorb the moisture that is present in your walls and prevent it from causing damage to your walls. Because doing so typically requires drilling into the joists in your wall, this is not something that you are able to perform on your own.
- This is more cost-effective than tearing down a wall and replacing it, but it doesn't work very well on plaster or drywall.
Keeping Your Space Not Wet
Fans and windows can significantly help you improve the ventilation in your space. A lack of ventilation is frequently the root cause of dampness. Keep your windows open between 2 and 3 inches (6.1 and 7.5 cm) for as long as the weather permits, so that you can optimise the ventilation in your room. If you are unable to keep the windows open, invest in some fans that are efficient with energy and keep them running. Place them against a wall that does not have any issues with wetness, adjust the power so that it is low, and then configure it so that it oscillates.
- If it turns out that this is the problem with your room, you should think about having a professional who works with heating, ventilation, and air conditioning (HVAC) instal additional vents in the area of the room where you are finding moisture.
- If you don't have screens for your windows, you shouldn't leave them open all the time. It is also not a good idea to do this if the window is situated low to the ground, as this will increase the likelihood that rainfall will flood into your space.
- If you reside in a location that has a high relative humidity, leaving your windows open is a poor idea. This will just make the situation even more difficult.
- If you want your fans to be effective in your space, they don't even need to have a particularly high power setting.
Maintain a dry environment in the space by keeping the heating on or making use of a radiator. Increasing the temperature in a room is still another method of keeping it dry. By doing so, you can ensure that the moisture in the air quickly evaporates and does not remain on the surface of your walls. If you don't want to heat your entire house or your heating bill will skyrocket as a result of this, consider purchasing a modest radiator for your basement and keeping it turned on whenever you are there.
Make sure there is no dampness in the room by using a dehumidifier. If you don't want to throw off the temperature balance in your house, you should get a dehumidifier and put it in the area that's having problems with condensation. Connect it to an outlet and switch it on. Check to see if the dampness goes away after you have adjusted the settings on your dehumidifier to the driest setting that is available.
- This is a great precaution to take to avoid having your basement become moist over time.
Maintaining clean gutters will help prevent water from leaking over the edge. If you find that the dampness in your home returns a few days after it has rained, the source of the issue is most likely on your roof. Obtain a ladder, and ask a companion to hold it for you as you climb it. Proceed to the exterior wall where you are encountering wetness and examine it. Put on a pair of gloves before climbing the ladder, and get ready to get dirty. If you have any debris, leaves or other foreign objects in your gutter, you should scoop them out to see if this addresses the problem.
- When it rains, water may pool along the sidewalls if the gutter is blocked or full. It may eventually run down your wall and soak into the ground below your foundation if you do this. Marks of dampness form on walls because water condenses inside them.
Waterproofing And Damp-Proofing Materials.
Bitumen
Material
- A thick, black liquid consisting of hydrocarbons that can be found in nature or as a byproduct of refining petroleum.
Application
- When laying concrete or mortar for a foundation, a 3mm layer of bitumen is typically put on top.
- Under high temperatures, it is painted on with a brush.
Tacky asphaltic or bituminous fabric
Material
- Bitumen-based, pliable rolls are installed in parapet walls, roofs, and elsewhere.
Application
- One hundred millimetres of overlap on either side is included. Bitumen is then used to plug the gaps.
- Putting down asphalt roofing felt. Roof repairs are more affordable than roof replacement. Roof Repair Roofing Systems will help you get more life out of your roof.
Sticky asphalt made with mastic
Material
- Consists of appropriately graded limestone aggregates bonded together with asphalt cement.
Application
- When hot, it's delicately applied with a hand float.
Bricks
Material
- These bricks have a water absorption rate of 5% or below.
Application
- These bricks are typically put in cement mortar in two to five courses.
Stones
Material
- Slates, granite and trap are used.
Application
- These stones span the entire breadth of the wall.
Conclusion
Everyone's home is a microcosm of their personality. If there is a lot of moisture in the air, mould can quickly spread throughout a house. There is no need to spend a fortune to have your home's walls repaired and water proofed. Each remedy is made with its own special recipe of chemicals and state-of-the-art equipment. There will be a light misting of water applied, and then the area will be permitted to air dry.
When it comes to repairing cracks in interior walls, Crack Fill Paste is the gold standard. Dampstop is a polymer-modified cement product with exceptional performance. Following these three simple steps, you may increase the water resistance of your home. Seal-O-Prime, a premium acrylic primer suitable for both indoor and outdoor use, must be used to prepare the surface. There are a variety of damp-proof coatings currently on the market.
Many people believe that damp proofing is not as effective as waterproofing. Maintaining a focus on safety at all times is essential. Wear goggles or other eye protection if dealing with spray coatings. Wear a respirator to protect yourself from toxic or harmful vapours. Warm up the room and put a dehumidifier in there while you work on damp-proofing it.
Doing so will aid in keeping the walls you're working on from becoming damp. Painting rollers and brushes work well for applying liquid coats. If you want to stop moisture from seeping up a concrete or cement wall, you should seal it with a damp-proof coating. Before using, make sure the spray bottle or paint sprayer you're using is clean. Coat the walls with the aerosol paint.
If a wall is damp at the bottom, that means moisture is moving up the wall from the foundation. We can lessen its severity with a method called damp-proofing. This is a job for Roof Repair Roofing Systems. Caulk composed of silicone should be used to fill any spaces left by cracked masonry. Use a credit card or a squeegee to smooth out the wrinkles in the sheeting.
Getting in touch with a pro is recommended if installing a coating, outside sheathing, or caulk hasn't solved the problem. Dampness often results from a lack of airflow. Open your windows to a distance of 2 to 3 inches (6.1 to 7.5 cm) for as long as the weather permits. Employ a waterproofing business to inject a chemical that inhibits dampness into the wall of your home. Keeping the gutters clean will reduce the likelihood of water seeping over the edge.
One more strategy for preventing condensation is to raise the room's temperature. Repeated moisture after rain indicates a problem with your roof. Roofing felt made of asphalt was being laid down. It is more cost-effective to have a roof repaired than replaced. If the gutter is clogged or overflowing, water may collect along the foundation's edges. If you ignore it, it can leak down the wall and seep into the soil around the basement.
Content Summary
- Homeowners shouldn't limit themselves to just painting when caring for their dwellings.
- Walls can be damaged beyond repair if they are not properly cared for and maintained.
- If there is a lot of moisture in the air, mould can quickly spread throughout a house.
- Repairing and damp-proofing the walls of a home doesn't have to break the bank if the right damp-proofing solutions are employed and the work is done by a qualified professional.
- We have created solutions for damp-proofing that take into account the need to safeguard the house.
- Solutions that protect against moisture and fix cracks may be the ultimate solution to the majority of difficulties that impair the aesthetic appeal of homes.
- Express Painting Services can implement the waterproofing solutions, and they promise that your walls will look as good as new even if they're protected from water damage.
- If your walls are absorbing water, Roof Repair Roofing System has a three-step solution to get rid of the problem.
- A brush will be used to apply Dampstop primer to the walls.
- First, apply Seal-O-Prime to the area.
- Applying a final layer of paint by hand is the next stage.
- Following the three steps indicated here will make your house more watertight, preventing you from having to cancel plans with guests because of the rain.
- If you reside in an area that does not get a lot of rain, you may be able to damp-proof a wall.
- An anti-moisture coating can help you keep your walls in good condition.
- There are a variety of damp-proof coatings currently on the market.
- Get a coating that will protect your walls from moisture and that is designed specifically for the material you're using.
- If you want to damp proof a building while it's still being constructed, have the contractors instal polyurethane sheets designed for that purpose inside the walls.
- No matter the type of damp-proof coating you're working with, it's essential to take the necessary safeguards at all times.
- Putting a drop cloth along the length of the first wall you'll be working on is a good way to get ready to paint or do other work.
- It's also important to make sure the coating doesn't spill onto the ground.
- It's important to have fresh air flowing through your workspace, so cracking open some windows is a good idea.
- If there are any damp areas that need cleaning, use a lint-free cloth.
- Damp-proofing a space requires heating and dehumidifying it to prevent mould and mildew growth.
- Doing so will aid in keeping the walls you're working on from becoming damp.
- The drop cloth should be moved from one wall to the next as you work your way around the space.
- A paint roller and brush are the standard instruments for applying liquid coatings.
- Liquid damp-proofing can be applied by pouring the product into a paint tray and then painting it on.
- Give the spray at least 24 hours to soak into the walls.
- If you want to keep dampness from creeping up a concrete or cement wall, you should seal it with a damp-proof coating.
- Damp spots on your wall can be easily removed with a grinder or wire brush.
- While you're outside, take a look at the wall you plan to damp proof.
- Check for evidence of moisture by feeling the wall and looking for cracks.
- It is best to begin by preparing the wall by cleaning it.
- Before you can start damp-proofing an outside wall, you'll need to give it a good scrub down and remove any dirt or grime.
- The liquid should be sprayed onto the wall you intend to damp proof.
- Polythene sheeting should be used to protect the wood on the exterior walls from dampness.
- To protect the wall from moisture, move the sheeting to the exterior side of the wall.
- Press the sheeting into the wall's surface to fasten it in place.
- Use a credit card or a squeegee to smooth out the wrinkles in the sheeting.
- Then, using a credit card or a squeegee, smooth down the sheeting once you've connected it to the wall.
- Use a utility knife or scissors to lop off any excess material.
- In addition to a caulking gun, you should pick up a couple extra tubes of silicone caulk.
- Contact a professional to instal plastic sheeting on the interior walls.
- Without success from coatings, exterior sheathing, or caulking, you may need to hire a contractor to cut into your wall and instal plastic sheeting to prevent further moisture intrusion.
- This might cost you anywhere from $ 500 to $10,000, depending on the specifics of your project.
- To prevent dampness in masonry walls, hire a professional contractor to apply a chemical treatment.
- To keep moisture out of your property, have a waterproofing service inject a chemical into the walls.
- It's possible to greatly enhance ventilation with the help of fans and windows.
- The best way to ventilate your room is to leave the windows open by two to three inches (6.1 to 7.5 cm) for as long as possible.
- Keep energy-efficient fans going if you can't keep the windows open.
- You shouldn't leave your windows open all the time if you don't have screens.
- A high relative humidity makes it dangerous to leave windows open.
- In order for your fans to accomplish their job, they don't even need to be set to their maximum power level for the room.
- Make sure the area stays dry by turning on the heat or using a radiator.
- One more strategy for preventing condensation is to raise the room's temperature.
- Utilize a dehumidifier to ensure the absence of moisture in the air.
- Get a ladder, and have a friend hold it as you ascend it.
- Check the outer wall where you are detecting moisture.
- Scooping away the leaves, twigs, and other debris from your gutter may solve the clogging issue.
- If the gutter is clogged or overflowing, water may pool around the walls during a rainstorm.
- If you do this, it could seep down your wall and pool around your foundation.
- A 3mm layer of bitumen is often applied after placing concrete or mortar for a foundation.
Frequently Asked Questions About Waterproof Damp Walls
You can protect a wall susceptible to wetness by installing a damp-proof membrane. This highly flexible material is fashioned out of high-density polyethylene, which protects against water and salts.
The most effective and economical treatment of rising dampness is a damp-proofing injection cream. You can choose between complete kits or individual cartridges of cream from leading brands such as Kiesel C and Aida. The cream is injected or hand-pumped into specially-positioned holes in the mortar course.
Rising damp problems: The most popular solution is to install a water repellent remedial damp proof course (DPC). This involves injecting a damp proofing cream into the mortar bed of the ground floor wall. After replastering, the DPC is invisible.
PermaSEAL damp-proof paint can be used to treat a variety of damp proof problems. It can be used under a render as a waterproof layer when damp proofing walls or as a cover-up to treat damp stains on painted surfaces. Aside from this, the reliable paint can be used as part of a basement waterproofing system.
Excess water from downspouts, runoff or saturated ground, can penetrate even the tiniest cracks in your foundation or wick through porous walls. This moisture can make your walls feel wet as it is prone to causing damp patches on walls after heavy rain.