The question of how to properly waterproof a garage arises frequently for homeowners. Despite the fact that it is a simple task, homeowners may not know where to begin or what materials to use. Fortunately for them, this article will start them on the path to a dry garage, so they won't have to worry about it any longer!
Protecting Your Belongings By Waterproofing Your Garage
However, in the modern era, many of us want to store more than just cars in our garages, and we need the peace of mind that comes from knowing that our valuables are safe from the elements.
A modern garage's sectional roller door is built to endure the elements and keep water out. On the other hand, if you have an older garage that leaks water, waterproofing it yourself can be your best option.
Waterproofing Options
There are a wide variety of options to consider when waterproofing your garage. In particular, these:
- Crystalline concrete agent – This is a long-lasting solution that does not call for any additional applications. As the crystals grow along with the concrete, they fill in the voids and pores to provide a barrier that is impermeable to water. And in the event that cracks do occur, the crystals can be reactivated to restore the waterproofing and fill in the spaces.
- When the garage is being constructed, a waterproof membrane is put to the underside of the concrete slab. This stops any moisture flow at its point of origin and ensures that the garage remains dry.
- Tiles made of polypropylene that are used for garage floors are resistant to both water and spills.
How To Use Cementitious Tanking To Waterproof A Garage
Cementitious tanking, often called tanking slurry, is a reliable technique for preventing water damage. These alternate names are used by some. It doesn't cost a lot but has a high return on investment. Here you'll find a detailed description on how to apply it to the walls of your garage.
Prepare The Tanking Slurry
Tanking slurry, regardless of where you get it, will almost always come in powder form and will need to be mixed before use. To accomplish this, you must guarantee that the chemical does not come into contact with any portion of your skin at any time. Put on protective gear like goggles and a mask to keep debris and dust out of your eyes and cover any skin that isn't already protected.
In order to avoid mistakes and anomalies, be sure to follow the instructions provided on the container for the tanking slurry when mixing it. Keep in mind that slurry is useless after around 45 minutes of mixing, however this time can vary greatly from maker to manufacturer. Since any extras you produce would be wasted, it is important that you only produce the exact amount needed.
Put some clean water in a box, can, or whatever else will do for mixing the tanking. After that, pour in exactly the amount called for by the recipe, and then gradually add the powder while stirring.
When adding the powder, you can use a drill and mixing paddle to thoroughly include everything, but the drill speed must be kept low.
After you've finished adding the powder, keep mixing for another three minutes to get the right consistency. Give it a minute to settle, and then mix everything together. After that, it should be prepared for use.
Wet Your Walls
All tanking slurry mixtures should be applied to wet walls. If the mixture is applied to dry walls, it will peel and flake off. It's important to wet the walls with clean water before starting the application, but you don't want to overwrite the walls.
Rather than having the walls fully soaked, a slight dampness is preferable. Make sure there are no puddles on the surfaces before you apply the mixture.
Prepare Your Walls
Make sure your garage walls are ready for waterproofing before you start the process. Remove any remaining paint or coating from the wall, along with any dust or plaster, before proceeding. All of the original bricks must be clearly visible to give the impression that the building was just built.
Holes and cracks in the wall can be repaired using sealant. Because of this, the wall will be more resistant to water. Before moving on to the next step, you should make sure that your wall is completely clean and free of any cracks or holes.
Tackle The Weak Points
Now that the wall is soaked and the tanking slurry is ready, you can start fixing the weak places, commonly known as the wall-floor joints. These connections are prime targets for water infiltration, therefore addressing them is essential for a successful garage waterproofing project.
What you need to do is follow your feet as they run over the floor. With adequate space, you can cut into the wall to create a chase that measures 0.8 by 0.8 inches. When you're done, clear out the chase and get rid of any leftover trash or debris.
Spread your tanking slurry in an even layer four inches thick along the floor and up the walls. Once the chase is full, a sealant should be put over the top to keep it from drying out. If you take this route, you'll be able to seal off the space between the wall and the floor, preventing water from seeping into the building. If the floor is waterproof or if you want to waterproof it, you can skip this step.
Use the Tanking Slurry
Many times, the tanking slurry is put in two or more coats, with the exact quantity depending on the mixture's consistency and the wall's state. This section contains detailed directions for completing both layers.
First Layer
For the first coat of slurry, move horizontally across the bricks. It doesn't matter what kind of paintbrush or roller you use; you'll get the same result.
The slurry can be applied to a height of up to forty inches, which is more than enough to safeguard your belongings and walls from any potential flood. Assuming the conditions are favourable, you are free to go higher; nevertheless, doing so may be dangerous.
Following the application of the slurry to the wall, it is crucial to take this additional measure to divert water away from any weak points in the construction, such as the floor-wall connection, which is located around four inches across the floor.
If you want to make sure that your second coat completely covers the first, there's a nice trick you may do. Tanking slurries often seem watery or grey in colour. If you buy both colours, you can use them interchangeably in any combination you like. This way, you can ensure that no bases have been left unchecked because any omissions will be easy to spot.
Second Layer
Once the first layer has dried fully, you can move on to applying the second. The slurry is the main factor in deciding how long it will take, which might be as little as two hours or as long as half a day. Applying a second coat requires waiting for the first to dry to the touch. Therefore, it is time to paint the second layer. If this doesn't happen, it'll fall off since it can't handle the extra weight.
Having said that, the first application of the layer shouldn't be delayed by more than 24 hours. Even if it seems dry to the touch, apply the second one as soon as feasible.
Brush the slurry in a vertical motion to redistribute it, and don't forget to get it into the seam between the floor and the wall.
Finish The Waterproofing
After applying both layers of tanking slurry, the wall will need at least two days to cure. Even if you notice some damp spots on the wall, you shouldn't worry too much about it. Sweating describes this process, and it is a common one. However, the typical time is around two days, while it could take anywhere from one to three days.
If you're finishing anything, don't touch it for a full day after applying the slurry. Doing so will ensure that the slurry dries out completely. Making a render mix involves blending one part cement with three parts washed sharp sand in a large mixing container. This render needs to be applied at a thickness of between 0.4 and 0.6 inches for the vast majority of tanking slurries.
If you plan on painting the garage, you shouldn't do it just above the tanks. You might also attempt multi-finish or dabbing some plasterboard.
Mould
Waterproofing your garage won't solve a mould problem, so if your stored items are still wet and smell funny after you've done so, that's a sign that you need to take a closer look. Poor air circulation and a lack of natural light can encourage the growth of mould, which poses serious health risks and must be eradicated.
Asthma and other allergic reactions can be made worse by mould, and the mould itself is toxic. Cleaning your garage with a solution like distilled white vinegar or hydrogen peroxide is necessary if you find mould. Should the mould have spread, this action will be required. Wear safety clothing such as gloves, goggles, and a mask when carrying this out.
Alternatives To Tanking Slurry For Garage Waterproofing
The most reliable technique of waterproofing is employing tanking slurry, but there are simpler alternatives. Having them on hand is a good idea if you have no idea how to properly mix tanking or apply it. Here's a quick summary of the three most common methods of attack.
Crystalline Waterproofing
The first choice, crystalline concrete coating, is a long-term answer that prevents the need for reapplication after a set period of time has passed. After the treatment, the wall's pores and cracks will fill with insoluble crystals, creating an impermeable barrier against water. Inconveniently, the crystals keep growing everytime they're exposed to water, thus the sealant keeps improving over time.
If your wall starts to crack, you may always activate the crystals to make the cracks go away on their own.
Polypropylene Tiles
If you'd rather not make any structural changes to your garage, waterproofing the floor can help prevent mould and other problems brought on by humidity.
Polypropylene flooring tiles may be cleaned up after any accidental spillage. Therefore, if you have the funds, use them to remodel the garage floor. It's a win-win since they'll look great and keep the water out.
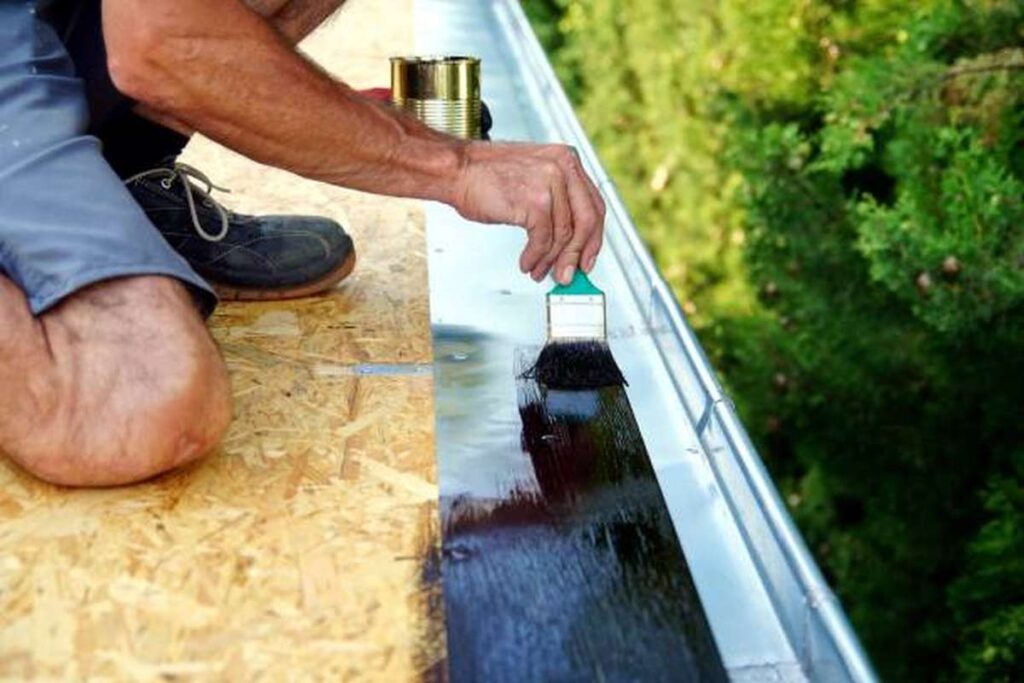
Waterproof Epoxy
You might find the solution to the problem you're having in your garage by putting up some waterproof epoxy. If you want it to work properly after applying it to your wall, you have to give it a few days to dry and cure.
In a few cases, using epoxy will improve things. First, it protects the garage's walls from rain and snow, and second, it can take all the abuse you can dole out without breaking a sweat.
Epoxy is also resistant to corrosion, so there won't be any rust appearing on the walls any time soon. The coating also protects walls against solvents, oil, and other harmful substances.
In the absence of epoxy, you can use waterproof paint, which serves a similar purpose but is less effective.
How to Make Your Garage Floor Waterproof
Your garage floor may have to endure strenuous activities, like the repeated lowering and raising of heavy things, on a regular basis. Your vehicles' weight isn't the only thing it has to bear; the surface also has to withstand other abrasive activities that could cause chips, scratches, or dents. Many homeowners also utilise their garages as workspaces for light manufacturing or creative pursuits. The floor's susceptibility to wear and tear is scarcely surprising.
Important Factors For Waterproofing A Garage Floor
Applying multiple coats of coating to your garage floor will not only make it look better, but will also extend its life. Waterproofing the garage floor, for instance, will make the floor look cleaner and glossier, and it will also likely extend the floor's lifespan. All of these problems are solved by sealing the floor with waterproofing. Waterproofing the garage floor makes it much more difficult for liquid to penetrate the inside layers, reducing the risk of future damage. This may have an effect on your budget because you won't have to repair your floor as often after it's been chipped or scraped.
DIY vs. Professional Services
A coating for the garage floor can be applied in one of two ways: as a DIY effort, or by hiring a professional. There are advantages and disadvantages to each of these options.
If you do the garage floor yourself, you might be able to get everything done that you want to without breaking the bank (Do-It-Yourself). You're in a stronger monetary situation now. However, you must take full responsibility for the risks involved. Prepare yourself to deal with the fallout of whatever mistake you make. Garage owners without experience with floor coatings should generally look elsewhere. If this is something you've never done before, it's best to leave it to the experts.
When you go the professional installation route, you know the job will be done right and just how you wanted it. However, this level of accuracy does not come cheap, so you may need to allocate more funds to complete the project.
Different Waterproof Options
Waterproofing the garage floor makes it much easier to clean and prolongs the durability and stability of the surface. Can you see that there is more than one path forwards here?
Alternatively, you might use a crystalline concrete agent that lasts for a long time and doesn't need to be reapplied often. The crystals of crystalline concrete grow with the concrete, sealing any gaps or pores as they form. This will lead to the development of an impermeable structure. If any cracks do appear, reactivating the crystals will cause them to fill in, preserving the waterproof property.
You might also try epoxy or water-resistant paint. This method is one of the simplest because you just need to pour the paint (or epoxy) over the floor. The next step is to let it air out and dry so that it may heal.
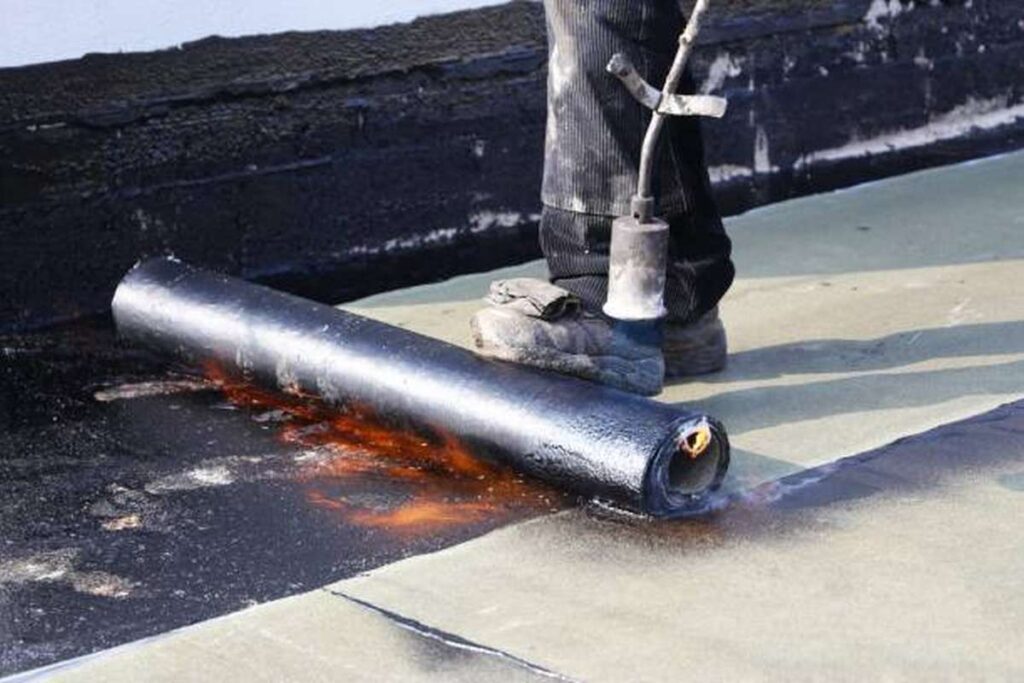
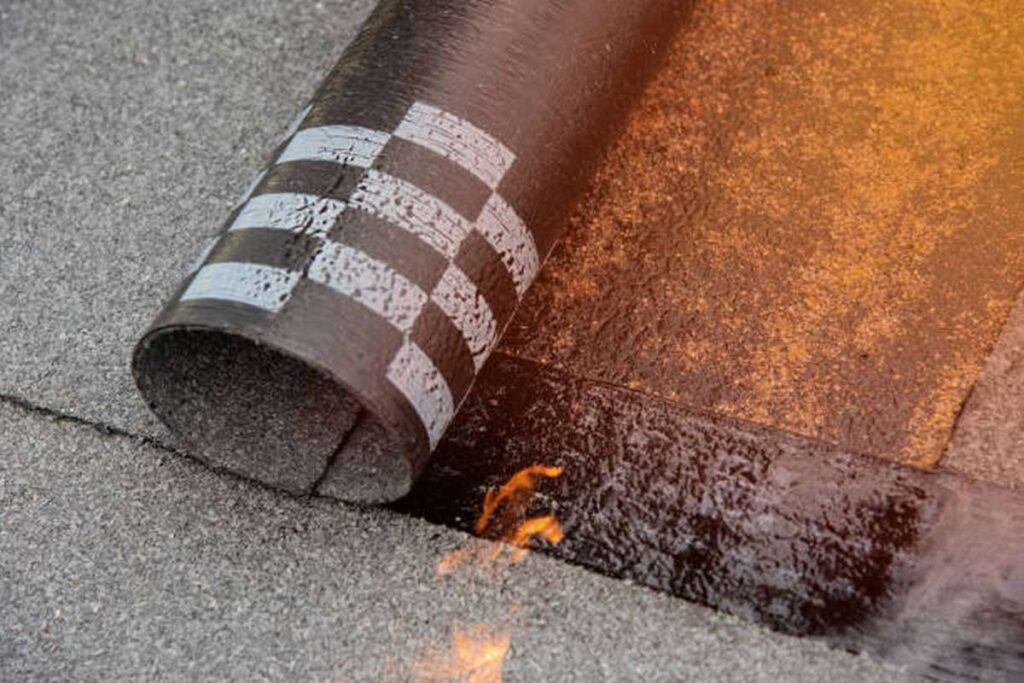
The use of a watertight membrane is another option. The membranes are fastened to the underside of the concrete slab, where they will act as a barrier against the passage of moisture.
Of course, there is a wide range of additional strategies that can be implemented, such as laying polypropylene tiles on the garage floor because of their resistance to water and liquid spills. Be sure you understand the difference before settling on a system.
Conclusion
Waterproofing your garage may sound easy, but many homeowners need to learn how. This page explains how to use these garage goods. Before tanking slurry loses effectiveness, there's normally a 45-minute mixing window. However, this varies by manufacturer. Before application, moisten the walls with clean water, but don't overflow. Check for puddles before tanking.
Each coat's thickness depends on the wall's condition and the mixture's composition. Up to 40 inches of slurry will safeguard your possessions and walls from a flood. However, inadequate ventilation and lighting raise mould health risks. Mould in your garage can be cleaned with white vinegar or hydrogen peroxide. Many homeowners use their garages as fabrication or art studios.
Waterproofing improves the floor's cleanliness, brightness, and lifespan. One can coat the garage floor themselves or employ a pro. Each option has perks and cons depending on your situation and budget. Inexperienced garage owners should let specialists handle floor coatings.
Content Summary
- The question of how to properly waterproof a garage frequently arises for homeowners.
- There are a wide variety of options to consider when waterproofing your garage.
- When the garage is being constructed, a waterproof membrane is put to the underside of the concrete slab.
- Here you'll find a detailed description of how to apply it to the walls of your garage.
- To avoid mistakes and anomalies, follow the instructions provided on the container for the tanking slurry when mixing it.
- Give it a minute to settle, and then mix everything.
- All tanking slurry mixtures should be applied to wet walls.
- If the mixture is applied to dry walls, it will peel and flake off.
- It's important to wet the walls with clean water before starting the application, but you don't want to overwrite them.
- Make sure your garage walls are ready for waterproofing before you start the process.
- Holes and cracks in the wall can be repaired using a sealant.
- Before moving on to the next step, you should ensure that your wall is completely clean and free of any cracks or holes.
- Now that the wall is soaked and the tanking slurry is ready, you can start fixing the weak places, commonly known as the wall-floor joints.
- Spread your tanking slurry in an even layer four inches thick along the floor and the walls.
- If you take this route, you'll be able to seal off the space between the wall and the floor, preventing water from seeping into the building.
- If you want to make sure that your second coat completely covers the first, there's a nice trick you may do.
- Once the first layer has dried fully, you can apply the second.
- Applying a second coat requires waiting for the first to dry to the touch.
- Even if it seems dry to the touch, apply the second one as soon as feasible.
- Brush the slurry vertically to redistribute it and remember to get it into the seam between the floor and the wall.
- After applying both layers of tanking slurry, the wall will need at least two days to cure.
- If you're finishing anything, wait to touch it for a full day after applying the slurry.
- Doing so will ensure that the slurry dries out completely.
- This render needs to be applied at a thickness of between 0.4 and 0.6 inches for the vast majority of tanking slurries.
- If you plan on painting the garage, you should do it at the top of the tanks.
- Waterproofing your garage won't solve a mould problem, so if your stored items are still wet and smell funny after you've done so, that's a sign that you need to take a closer look.
- Cleaning your garage with a solution like distilled white vinegar or hydrogen peroxide is necessary if you find mould.
- You might find the solution to the problem you're having in your garage by putting up some waterproof epoxy.
- The floor's susceptibility to wear and tear is scarcely surprising.
- Applying multiple coats of coating to your garage floor will make it look better and extend its life.
- Waterproofing the garage floor, for instance, will make the floor look cleaner and glossier and will likely extend the floor's lifespan.
- A coating for the garage floor can be applied in one of two ways: as a DIY effort or by hiring a professional.
- Waterproofing the garage floor makes it much easier to clean and prolongs the durability and stability of the surface.
Frequently Asked Questions About Waterproof A Garage
Patch obvious holes with hydraulic cement, and coat the walls with waterproof masonry products that create a membrane through which water can't pass. With wood or concrete walls, seal any potential water entrances, such as electrical wiring, cables, or pipes entering the garage.
To permanently stop water and water vapour from entering your foundation walls, you need to waterproof them. Several systems do this, but I prefer the spray-on systems that seal the pores of the concrete.
One of the common causes of mould (inside the garage, too) is high humidity, which is often a problem due to a lack of windows, air vents, or air ventilation. To reduce humidity inside your garage, install dehumidifiers and keep the humidity level between 30% and 50%.
Concrete's porous nature means that water from under your home can seep up through your concrete floor, making it damp. Sealing the concrete can help eliminate the dampness on your floor.
A dehumidifier is the most direct way to deal with humidity in a garage and prevent condensation and mould. It will keep moisture levels in check, reduce the moisture that mould spores require for growth, and prevent tools from rusting and structural wood rot.