To get a surface ready for tiling, you can use any number of methods and materials.
Applying a latex-based adhesive like thin-set mortar or contact cement to a porous and absorbent substrate is possible.
To begin preparing your surface for tiling, remove any paint or old sealant from the area. As a result, you'll have a surface that's ready for tile.
Get rid of any dirt or garbage that might be in the way before you start working. Doing so will ensure appropriate adhesion once the adhesive has been applied.
Advice That Is Both Methodical and Crucial
Make advantage of our lucid instructions as a guide while preparing your walls for a new installation of wall tile, and save yourself time and effort in the process.
As long as the surface is clean and smooth, new tiles can be put. Make sure the ground is even and free of debris.
Putting glue on the back of each tile and sticking it to the wall is all that's required to instal new tiles after the wall has been properly prepared.
Take Up the Current Floor
Wear a face mask and safety eyewear to prevent injury. Start by prying up the old flooring or wall covering with a pry bar or smashing it with a hammer and other equipment.
If your floor was covered in carpet in the past, you'll want to scrape away the remaining glue, remove the carpet tacks, and throw away the remnants.
Steps to Take Before You Start Tiling a Wall
- Remove any fasteners that have seen better days, such as rusty pins, screws, or rivets.
- Replaster or remove the old wall.
- Get rid of the wallpaper, or at least get it treated (if present)
- Repair any damage that is readily apparent, such as cracks.
- The earth must be levelled.
- To improve glue adhesion, sand the surface.
- Verify that the surface is clean and free of any debris.
- Depending on the surface you're painting, use a primer accordingly.
Other essential aspects of preparation to attend to before beginning
- Find out how much space you have by measuring it.
- Estimate how many tiles you'll need for the job.
- If any tiles break during installation, you should plan on buying at least 10 percent more than you need. Intricate designs often necessitate an increase of 20% to 30% in the total number. It is a wise precaution to take because there is no guarantee that you will be able to get the same batch in the future or even one that will nearly resemble what you purchased.
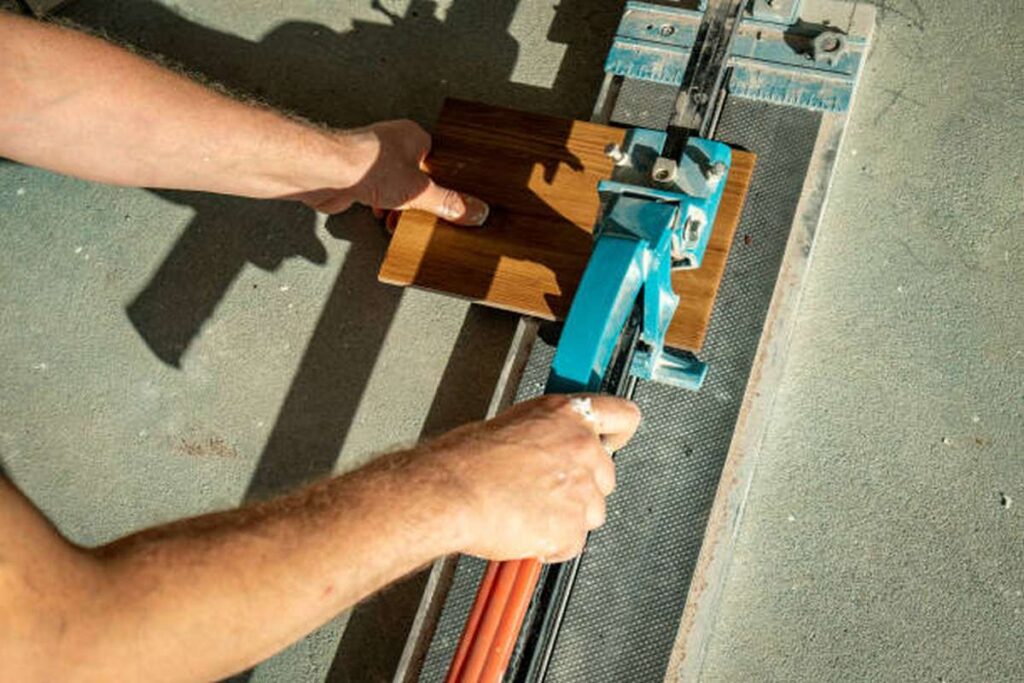
Obtain the proper adhesive and get the job done.
Fantastic Tilers' experts say that while ready-mix adhesives may be suitable for inexperienced DIYers, only powdered adhesives are suitable for professional tilers. You'll have more time to adjust and align the wall tiling as a whole because of the slower drying period.
Water-resistant glue is necessary for tiling kitchen splashbacks, installing tiles in wet locations, or laying tiles in bathrooms. Definitely a useful piece of advice.
Inspect the Ground
If you want a tile floor that looks great and lasts a long time, it's important that the subfloor you use is sturdy and flat. Ideally, the subfloor would be 1.125 inches thick. To ensure an exact outcome, measure using a ruler.
Tiles may fracture in the future if the subfloor is too flexible, so make sure to check it. If the subfloor needs reinforcement, more floor support can be installed. This means that the surface must be stable and unmoveable to ensure the tiles' continued stability.
It's important to check the wall's level before tiling it to avoid any problems.
It's a recipe for disaster to try tiling an uneven wall. Sliding a long, flat object (such a typical plank) along the wall is a quick and easy way to spot any imperfections. In this way, any lumps or sores, should they exist, can be quickly and easily pinpointed.
If the adhesive fails to properly adhere to an uneven wall, the entire structure may fall apart.
Expert tile installers indicate that materials between 3 and 6 millimetres in thickness are manageable, whereas materials thicker than that may present challenges.
You may try to compensate by applying an adhesive coating that's somewhat thicker than usual, but doing so could cause its grip to weaken, leading to unwelcome issues down the line.
Level The Floor Out
The floor should be levelled by using cement or plywood. Tiles should be installed on a properly prepared surface using adhesives designed for use with plywood.
You can apply the primer with a paintbrush or a roller. Kitchen and bathroom backer boards require careful reading of installation instructions before being put into place. Then, using a table saw to reduce the plywood to the appropriate size for your construction.
Hardened Concrete For The Interior Or Exterior
Concrete floors and walls require special adhesives to patch cracks and holes.
A patch of concrete can be used to fix the hole, and then the area can be smoothed out. To protect your concrete subfloor, you might use plywood or a ceramic tile backer board. Most concrete floors require extensive work on their surface to make them uniform and smooth.
Scrub
Remove any dirt, oil, adhesive residue, or other impurities from the area where you plan to instal the tile by giving it a good scrub. If you've just finished cleaning the floor with mild soap and water, you should let it dry completely before proceeding. Once that is done, you can get rid of any remaining dust on the floor by vacuuming it.
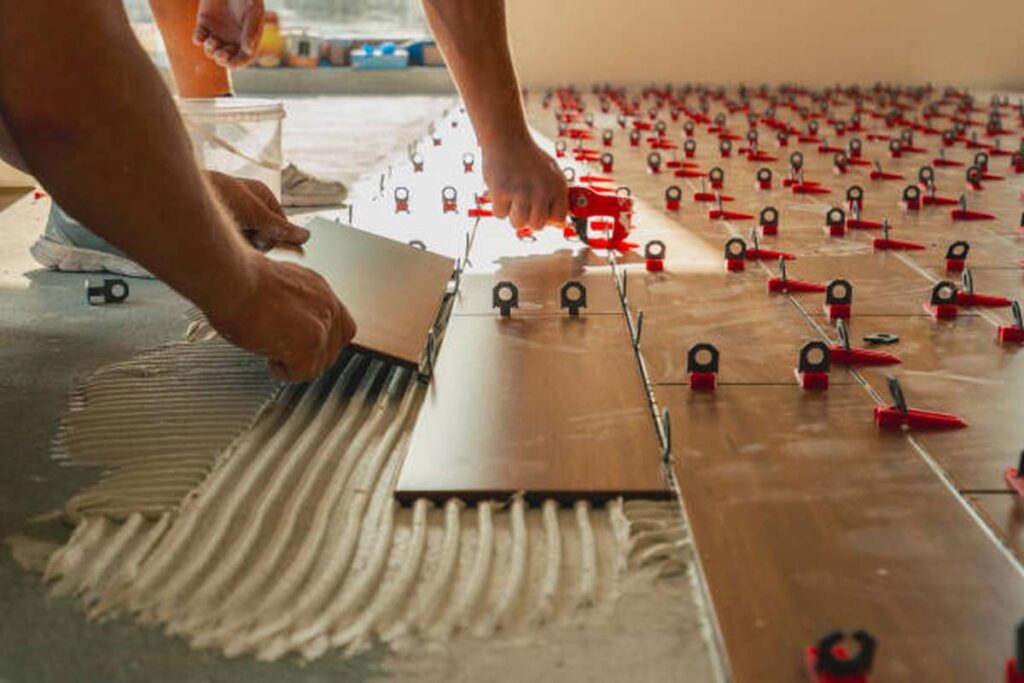
Get some tile cement or mortar and put tiles in your project. To ensure the tile mortar has a secure and long-lasting grip on the facing surface, you should first use the grooved trowel to roughen the surface. Before you can start laying the tiles, this must be done. After that is done, you can tile over the area.
Preparation methods vary depending on the type of surface being worked on.
Drying time for some surfaces, like newly placed drywall, is at least a month. However, polyurethane paint is required when tiling directly onto wood.
It's important to use the right solution for the wall you're tiling, so if you're unsure what to use, consult a professional tiler.
Tile board backers are an excellent, low-maintenance option for dealing with uneven floors.
The somewhat more expensive tile board backers can help you solve the problem, and they are also water-resistant, so they will not encourage mould growth. You may find tile board backers in stores (which is known to grow on porous materials in warm, moist conditions).
This advantage makes tile backer boards a great option for wet locations like showers, bathrooms, and kitchen sinks.
The use of tile backer boards raises the price of installing new tiles because of the additional time and materials required.
As a piece of advice, make sure the boards are sturdy and mounted properly; this is one of the most crucial aspects to check.
Room Squaring: The Secret to Easy Tiling
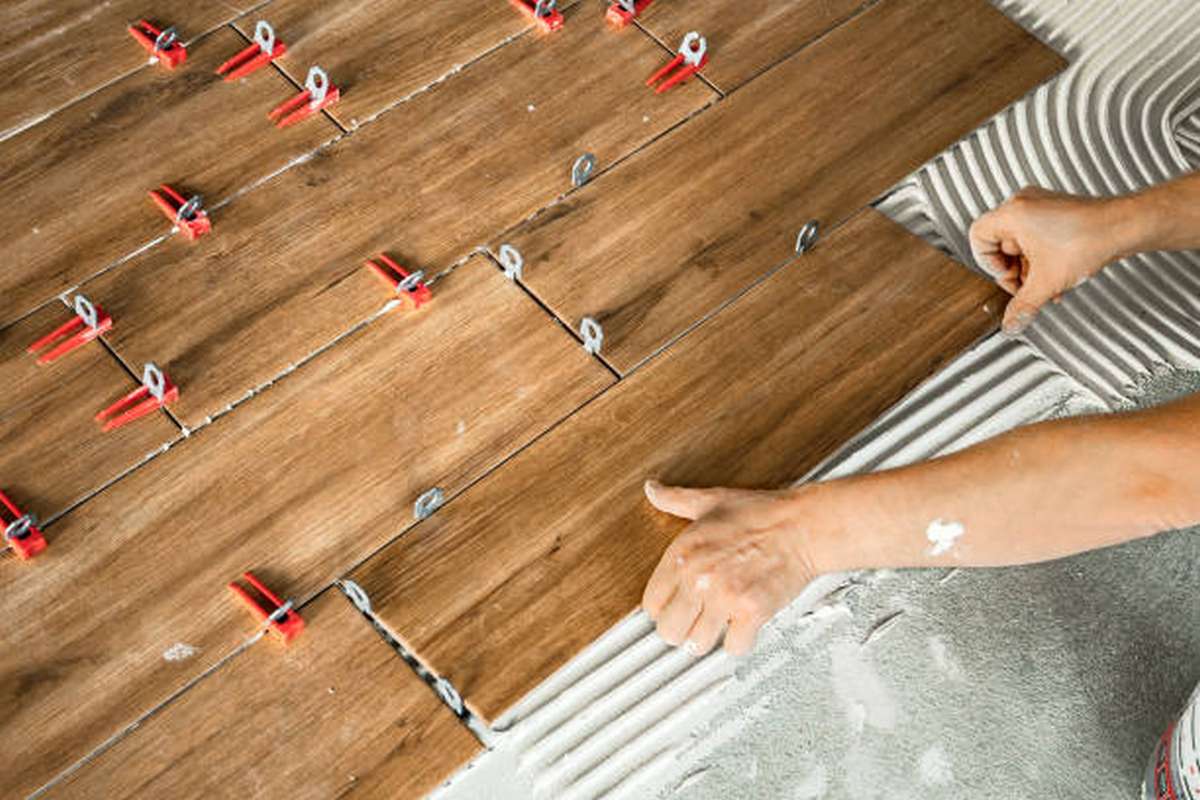
Flooring tiles can be laid out in a grid starting in the middle of the floor, which is suitable for most simple applications. Doing so guarantees symmetrical proportions for any incisions along the floor's border.
A possible method for achieving this objective is to partition the floor into four equal sections that meet in the centre.
That these four corners are square to one another is crucial. However, this could be a problem in older houses where rooms are less likely to be perfectly square. Because of this, you shouldn't rely on the wall positions to construct your grid; instead, you should square it off manually in the middle.
Use one of the measuring tapes to locate the exact centre of the floor, and then mark it with a pencil. Once you've finished with that side of the floor, simply repeat steps 1-3 along the opposite side.
Mark off a section of the floor, and then use chalk to draw a line from one spot to the other. Avoid the line from smudging by spraying it with hairspray.
Measure out the remaining two sides and place a centre mark on the floor. Create a second line that extends from one of the marks to the other and converges with the first one in the centre of the room using a snap line. Take care to stay within the boundaries of the discussion.
As the first step, lay down a thread and a chalk line to create an intersection, and then position a carpenter's square at any of the four corners.
The edges of the carpenter's square will be parallel to the lines and the thread if they are truly perpendicular to one another.
To ensure the string is parallel to the chalk line, alter its orientation as necessary. Once the string is at the proper length and is parallel to the line, snap it. When you're done, set the line with hairspray so it doesn't smudge.
It's best to use the plus sign as a guide and start tiling the floor from the centre outward. Tile doesn't expand or contract like other flooring materials, so there's no need to provide a space around the tiles for expansion or contraction.
Do You Need To Remove The Old Tiles Before Installing The New Ones?
Although tiling over old tiles is possible, removing the old tiles and replacing them is always recommended.
Glue doesn't stick well to most tiles because their surfaces are too smooth, therefore they need to be treated before they can be installed.
Depending on the instruments at your disposal, you could use a sander (with sandpaper of medium to coarse grit) or a grinding disc. It is imperative that you exercise utmost caution so that the integrity of your older tiling is not compromised.
It is crucial to frequently inspect the area behind any old tiles for any vacant space. Tap each object gently on the side with your hand and listen closely for any hollow sounds to accomplish this.
You run the risk of having your new tiles collapse in the not-too-distant future if you don't find spots with hollow space before tiling over them. It's not hard to spot empty spots, but that doesn't mean you shouldn't be careful.
What Do I Need to Do It Myself? Install Tiles.
- Paintbrush
- Roller for applying paint
- Waterproofing Membranes in Liquid Form (or plastic sheets)
- Blade geometry typical of utility blades
- Stapler
- Eye and face protection is required (to keep you safe from heavy particles)
- Gloves
- a straight edge (or a similar tool)
- Pencil
- Tape measure
- Drill
- Pins (to support the tile till the adhesive adheres and dries off) (to support the tile until the adhesive bonds and dries off)
- Level
If you don't maintain the surface clean and dry, the glue may not stick properly.
Most brick surfaces are suitable for laying ceramic or vinyl tiles on, while timber surfaces must be painted or primed before being tiled.
Where Can I Find Instructions on How to Properly Prepare Dry Wall Prior to Installing New Tile?
Since newly installed drywall needs to cure for at least a month before it can be tiled, taping the joints is unnecessary until that time comes.
Only a skim coat and some little sanding will bring the surface up to par. The next step is to clean the area of any dust that may be there, let it dry fully, and then apply the glue.
Waterproof plasterboard should be used in humid climates.
What Steps Should I Take To Get Old Drywall Ready for New Tile?
Making sure the wall is strong enough to hold the weight of the tiles once they've been installed requires a thorough inspection. A tiler with experience is the best person to consult when questions arise.
Priming, drying, and more sanding are required before to adhering the substrate. You should start by repairing any damage to the wall that may have been caused by nails, pins, or other wall fixtures.
How Do I Prep The Wall For Tiles If The Drywall Is Already Painted Or Textured?
The experts recommend that you use PVA or prepare a primer yourself by adding more water to your adhesive and following the instructions on the package.
After that, there are a few other crucial tasks that need to be completed:
- Remove any paint that has lost its value.
- Patch up any splits or holes you find.
- Sand in the event that there are bumps.
- Clear the area with a wipe.
- Check that there are no traces of oil or grease anywhere.
A helpful hint: Trisodium phosphate might be used to treat the wall (TSP). Keep in mind that although it is an effective cleaner, stain remover, and degreaser, young children should be kept a safe distance away from the product at all times.
How Do I Prep A Plywood Surface For Fresh Tiling?
The truth of the matter is that plywood can be used for tiling your floors, but it is not nearly as practical for tiling your walls.
Because the substance is composed of compressed wood that has been combined with a variety of oils, it is susceptible to heat. It is highly likely that tiles and grout will break if they are subjected to frequent and significant shifts in temperature.
How Do I Prep A Wallpapered Wall For Tiling?
When it comes to the durability and functionality of wall coverings, tiles offer considerably greater advantages than wallpaper does, and the best course of action is to remove wallpaper whenever it can be done so.
Steaming the room is the method that is the most effective and requires the least amount of effort, but it does carry with it a certain degree of danger.
If you treat drywall or engineered wood with steam, you run the risk of causing damage that is typically beyond the scope of a straightforward repair due to the high temperatures and moisture involved.
Alternately, you can clean the surface with a damp rag that has been warmed up. In this manner, moisture will not be able to seep through to the substrate itself; nonetheless, this will result in the wallpaper being more loose. Make a couple more passes through the technique, and then use the scraper to peel everything with as little effort as possible.
After you are finished, all that is left to do before applying primer or glue is to make certain that the surface is dry and free of debris.
Why Buy Tile Glaze?
Tile glaze is an excellent technique to revitalise and maintain the quality of your tiles throughout time. The following are some of the reasons why you should think about using a tile glaze on your tiles:
Commercially Glazed Tile
The glaze on the tile that you purchase for use in your house is typically applied at the factory. The process of glazing involves the application of intense heat to completely cover the tile. This results in a tile that is water-resistant and does not need to be sealed.
The most common locations for the installation of these tiles are kitchen counters, bathrooms, entryways, and floors. Other common uses include bathtub surrounds, backsplashes, walls, and entryways.
Custom Tile
If you want to do the tile installation yourself, you can either buy ceramic tiles already made or manufacture your own and then glaze them. After that, they will need to undergo the process of being baked in a kiln in order to attain the durable finish that is characteristic of glazed tiles.
Tiles that are made to order allow you to design the colours and patterns that you want, and the finished product has a really unique appearance as a result. On the other hand, it takes a significant amount of time to make enough tiles to cover even a modest area.
Tile Glazes
There are products on the market that make the promise that they can refinish or reglaze tile surfaces. It is not a glaze, but it may be an excellent option for people who loathe the colour of the tile they currently have because it comes in a variety of colours.
When To Not Start In The Middle Of The Room
There are occasions when the centre of a room is not necessarily the finest arrangement for the application of your floor tile. If the sole room being tiled is a simple rectangle or square form similar to the diagram above, for instance, you would begin the tiling process in the middle of the room.
Take, for instance, a room that is square or rectangular in shape yet quite open. It's possible that this is a dining room, but it could also be an open bedroom.
You wouldn't simply put the focal point in the middle of the room in a kitchen. You would instead put your entire tiles at the transition to the larger neighbouring room, which is most commonly the living room. After that, the tiles that had been cut would be placed against the walls and at the cabinets.
In most instances, while tiling a hallway bathroom or laundry room, you would begin by tiling the doorway and the wall that is the longest and most straight.
This is the wall that the door swings inward towards when it is opened. This would place your cuts against your cupboards, behind your toilet, and against the wall of your tub or shower. They may also be placed underneath your appliances in the laundry room. The doorway and main walls serve as the primary points of emphasis in these locations.
It is common practise to begin tiling an entire wall or floor at the entrance door of a master bathroom. Put your complete tiles against the tub and shower side of the room, and allow the cuts to rest at the cabinets. In contrast to a conventional hall bathroom, the focal point of a master bathroom is frequently the side of the room that contains the shower and tub. This is something that is dependent on the configuration of the room.
Chalk guidelines are always an excellent initial step to take, regardless of whether you choose to begin your layout in the centre or at a focal point, since they can help guarantee that your final layout is straight and parallel. You can decide the primary focus of the space as well as the optimal starting point for the tiling project by practising with a dry layout of your tile first.
Conclusion
As long as the surface is clean and smooth, new tiles can be put on a wall. Getting rid of any dirt or garbage that might be in the way will ensure appropriate adhesion once the adhesive has been applied. Wearing a face mask and safety eyewear to prevent injury are essential for safety. If you want a tile floor that looks great and lasts a long time, it's important that the subfloor you use is sturdy and flat. You'll have more time to adjust and align the wall tiling as a whole because of the slower drying period.
Preparation methods vary depending on the type of surface being worked on. Tiles should be installed on a properly prepared surface using adhesives designed for use with plywood. Most concrete floors require extensive work on their surface to make them uniform and smooth. Flooring tiles can be laid out in a grid starting in the middle of the floor. This guarantees symmetrical proportions for any incisions along the floor's border.
A possible method for achieving this is to partition the floor into four equal sections that meet in the centre. It's best to use the plus sign as a guide and start tiling the floor from the centre outward. Tile doesn't expand or contract like other flooring materials, so there's no need to provide a space around the tiles for expansion or contraction. It's not hard to spot empty spots, but that doesn't mean you shouldn't be careful. Priming, drying, and sanding are required before adhering the substrate.
You should start by repairing any damage to the wall that may have been caused by nails, pins, or other wall fixtures. A tiler with experience is the best person to consult when questions arise. Clean the surface with a damp rag that has been warmed up. This will help to maintain the quality of your tiles throughout time. Tile glaze is an excellent option for people who loathe the colour of the tile they currently have because it comes in a variety of colours.
If the room being tiled is a simple rectangle or square form similar to the diagram above, for instance, you would begin the tiling process in the centre of the room. It is common practise to begin tiling an entire wall or floor at the entrance door of a master bathroom.
Content Summary
- To get a surface ready for tiling, you can use any number of methods and materials.
- To begin preparing your surface for tiling, remove any paint or old sealant from the area.
- As long as the surface is clean and smooth, new tiles can be put.
- Replaster or remove the old wall.
- To improve glue adhesion, sand the surface.
- Verify that the surface is clean and free of any debris.
- Find out how much space you have by measuring it.
- Estimate how many tiles you'll need for the job.
- Obtain the proper adhesive and get the job done.
- Inspect the GroundIf you want a tile floor that looks great and lasts a long time, it's important that the subfloor you use is sturdy and flat.
- If the subfloor needs reinforcement, more floor support can be installed.
- It's important to check the wall's level before tiling it to avoid any problems.
- It's a recipe for disaster to try tiling an uneven wall.
- The floor should be levelled by using cement or plywood.
- Get some tile cement or mortar and put tiles in your project.
- After that is done, you can tile over the area.
- The somewhat more expensive tile board backers can help you solve the problem, and they are also water-resistant, so they will not encourage mould growth.
- The use of tile backer boards raises the price of installing new tiles because of the additional time and materials required.
- Room Squaring: The Secret to Easy TilingFlooring tiles can be laid out in a grid starting in the middle of the floor, which is suitable for most simple applications.
- A possible method for achieving this objective is to partition the floor into four equal sections that meet in the centre.
- Mark off a section of the floor, and then use chalk to draw a line from one spot to the other.
- Create a second line that extends from one of the marks to the other and converges with the first one in the centre of the room using a snap line.
- As the first step, lay down a thread and a chalk line to create an intersection, and then position a carpenter's square at any of the four corners.
- It's best to use the plus sign as a guide and start tiling the floor from the centre outward.
- Do You Need To Remove The Old Tiles Before Installing The New Ones?Although tiling over old tiles is possible, removing the old tiles and replacing them is always recommended.
- It is crucial to frequently inspect the area behind any old tiles for any vacant space.
- You run the risk of having your new tiles collapse in the not-too-distant future if you don't find spots with hollow space before tiling over them.
- Install Tiles.
- You should start by repairing any damage to the wall that may have been caused by nails, pins, or other wall fixtures.
- Clear the area with a wipe.
- How Do I Prep A Wallpapered Wall For Tiling?When it comes to the durability and functionality of wall coverings, tiles offer considerably greater advantages than wallpaper does, and the best course of action is to remove wallpaper whenever it can be done so.
- Alternately, you can clean the surface with a damp rag that has been warmed up.
- Why Buy Tile Glaze?Tile glaze is an excellent technique to revitalise and maintain the quality of your tiles throughout time.
- The following are some of the reasons why you should think about using a tile glaze on your tiles:Commercially Glazed TileThe glaze on the tile that you purchase for use in your house is typically applied at the factory.
- Tile GlazesThere are products on the market that make the promise that they can refinish or reglaze tile surfaces.
- There are occasions when the centre of a room is not necessarily the finest arrangement for the application of your floor tile.
- You wouldn't simply put the focal point in the middle of the room in a kitchen.
- In most instances, while tiling a hallway bathroom or laundry room, you would begin by tiling the doorway and the wall that is the longest and most straight.
- The doorway and main walls serve as the primary points of emphasis in these locations.
- It is common practise to begin tiling an entire wall or floor at the entrance door of a master bathroom.
- Put your complete tiles against the tub and shower side of the room, and allow the cuts to rest at the cabinets.
- In contrast to a conventional hall bathroom, the focal point of a master bathroom is frequently the side of the room that contains the shower and tub.
- This is something that is dependent on the configuration of the room.
- You can decide the primary focus of the space as well as the optimal starting point for the tiling project by practising with a dry layout of your tile first.
Frequently Asked Questions About Tiles
Tiles can be applied to many stable surfaces (often referred to as substrates) once the right preparation occurs. Tiles are rigid and will not bend or flex. So to stop them from fracturing or becoming lost, the surface needs to be firm and secure.
If you're tiling an uneven surface, sometimes the best solution is to opt for mosaic tiling. This involves using much smaller pieces of tiles of various shapes to create a well-covered wall that minimises the effects of an uneven surface.
Ceramic tile can adhere to anything with limitations. You can adhere to glass, metal, wood, drywall, fibreglass, etc. with limitations. The substrate material has to be structurally stable and can't have any deflection more than L/360, so it has to be sturdy.
You may tile over existing tile, painted or unpainted drywall, plaster and textured walls. However, tiling over tile can add quite a bit of thickness, so make sure your wall can handle the weight. You should not tile over wallpaper, glossy surfaces, lead paint or plywood.
This is the industry standard most preferred by construction pros when installing ceramic or porcelain tile. The Backer board comes in four-foot-by-eight-foot and three-foot-by-five-foot rigid panels that contain a combination of cement, fibreglass, and sometimes crushed glass particles.