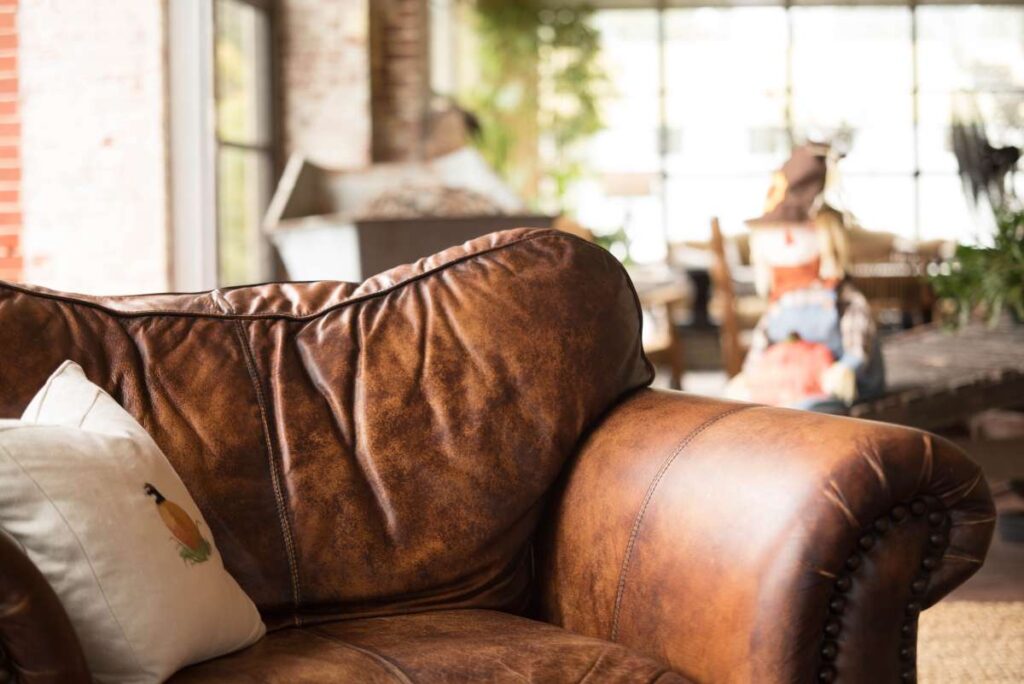
Leather couches are an excellent choice because they are both long-lasting and stylish. The leather on your couch, however, may get dirty, torn, discoloured, or worn to the point that its colour changes after some time has gone. Wiping it down with a basic cleaning solution, trying various home treatments to remove stains, patching up any holes, and fixing the colour of the leather are all you need to do to restore your leather couch to its former glory.
Tips for Restoring Leather
Cleaning
Washing the leather's surface is the first stage in the leather restoration process. Get rid of any loose debris, dirt, or surface stains using a leather cleaning product. Use a commercial leather cleaner, like Leather Honey Leather Cleaner, to get the leather surface looking like new again.
Slowly and steadily rub the leather with the cleaning agent using even, thin strokes in a circular motion. When finished, throw it away and replace it with a new, lint-free towel bearing the same insignia. To reduce waste and save the planet, try mixing one cup of mink oil with half a cup of vinegar.
Damage Minimization
Finished leather, which is commonly used for furniture, can be damaged by jewellery, pet claws, and other sharp objects. Though guides on fixing leather furniture are plenty online, the best method for restoring scratches is to utilise a product called Leather Honey Leather.
Conditioner will be used to recondition the region, rehydrate the dry spots, and hide the scuffs and stains. Due to the potential for leather conditioner to darken some leather, a small test is recommended before using it on the entire item, rather than only the regions that need it. The original hue often reemerges after some time has gone, too.
Conditioning
Leather requires regular conditioning to restore any lost moisture, keep the flexibility of the fibers, and prevent further damage, in addition to conditioning to cure existing damage.
Use a high-quality, all-natural leather conditioner, like Leather Honey, for optimal results. Leather Honey can be used to restore and condition leather by applying thin layers to the surface with a lint-free cloth, foam sponge, paintbrush, or even your hands. Allow the conditioner to work for at least two hours (preferably 24). Finally, wipe away any remaining conditioner with a clean, lint-free cloth.
Discoloration Touch Up
If the leather is exposed to direct sunlight or undergoes typical wear and tear, the original colour may fade over time. Similarly, as leather ages, it darkens. Leather Honey can be applied to faded spots on the leather's surface to bring back its natural colour.
Honey for Leather is a great way to bring back the lost colour! However, we recommend treating the entire item with the treatment rather than just a few problem spots. If you feel the need to inject some more colour, you can choose from a wide array of shades and tones of leather colour balm that are made to harmoniously pair with the leather's inherent hue.
Substitute, Or Repair
If the surface of the leather is scratched or dented only slightly, a patch or filler can be used to fix it. With a palette knife, spread the filler evenly throughout the leather until the hole is flush with the surface; then, let it cure completely.
In the case that the leather needs to be patched, liberally coat the patch's edges with adhesive before glueing it to the leather canvas. Once the patch has been properly bonded to the leather, any remaining holes can be filled in with the putty. Do you find it to be terrifying? We are quite aware of the difficulty involved in resolving this issue. It could benefit you to consult an expert.
Repairing Water Damage
Leather that has been damaged by water can be restored, albeit it may be difficult. If the leather gets wet, the best way to dry it is to wipe it with a dry cloth. You shouldn't use heat to dry the wet surface because it will only make things worse. Time heals most things, but The Leather and the Honey aren't far behind. Water damage to leather can cause it to dry out and become brittle if it isn't conditioned properly.
Vacuum The Couch To Remove Any Debris or Dust.
After connecting a bristle or brush end to your vacuum, power it on. Next, vacuum the entire sofa, paying special attention to the cracks and crevices around the cushions and armrests. The couch will be clean and free of clutter if you do this. However, if you don't have a vacuum with a brush attachment, you can use your standard vacuum on the sofa as well. In order to avoid further wear and soiling of the leather, care should be taken to avoid pressing down too hard on it.
Dilute some white vinegar and use it as a cleaning solution.
Although there are many different leather cleaning chemicals available for purchase, diluted white vinegar is one of the most easy and effective cleaners. Mix white vinegar and water in a bowl until the vinegar has dissolved.
- Apple cider vinegar can be substituted with any type of vinegar that doesn't have a particularly strong smell.
- You can find leather cleaners as part of larger leather repair kits that also contain the other tools and materials necessary to restore worn or damaged leather. This will work just as well, if not better, than the remedy you whipped up in your kitchen.
Use your cleaning solution to dampen a microfiber cloth.
Use a clean, dry microfiber cloth to buff the leather without damaging the finish. Then, rinse the microfiber cloth in clean water and return the excess cleaning solution to its original bottle.
- The cloth should be damp from absorbing the cleaning solution, but not dripping wet.
- You should always have some microfibre towels on hand because of how useful they are for cleaning a wide range of objects. A store selling housewares, either online or in person, should carry them.
When cleaning the couch, use gentle circular motions.
Start from the top corner and work your way clockwise across the sofa's surface to clean it. Move the microfiber cloth over the sofa in light, circular motions, dipping it into the cleaning solution anytime it becomes dry or filthy, to thoroughly clean all of its surfaces.
- Small, circular motions while cleaning leather will help the cleaning solution penetrate the leather's fibres, allowing you to remove more grime and dirt without damaging the leather.
Use a clean towel to dry the sofa.
After you've completed washing the couch's surface, use a clean, dry towel to soak up any excess cleaning solution that could still be visible. After that, wipe the entire sofa off with a dry cloth to remove any remaining moisture and keep it from seeping into the leather. Air-drying the couch is not recommended because it often leaves lines or other marks on the fabric. Instead, once you're done washing it, immediately dry it off with a towel.
Dealing With Tough Stains
Use diluted rubbing alcohol to remove mould and mildew.
When leather stays wet for too long, it becomes susceptible to mould and mildew growth. If either of these ends up on your leather sofa, all you have to do is combine equal parts water and rubbing alcohol in a basin. Then, using a microfiber cloth and the diluted rubbing alcohol, wipe the area down using gentle, circular strokes.
- After applying rubbing alcohol, the mould on your couch will be killed and easier to remove.
- Repeat soaking the cloth in the diluted rubbing alcohol solution if it becomes filthy or dry.
Use eucalyptus oil or hairspray to get rid of pen smudges.
It's highly likely that your couch will get a mark from a dropped pen if you do a lot of writing or other activities while seated on it. The ink from a ballpoint pen can be removed by rubbing a cotton swab dipped in eucalyptus oil over the stain. It ought to wipe out the blemish. In order to get rid of the excess marker, you could try spraying it with aerosol hairspray and then wiping it away. Any remaining marker stains should now be gone.
- In the absence of eucalyptus oil, rubbing alcohol can be used for the same purpose.
- The cleaning product you choose could potentially leave a stain, so it's best to check it out on a small, hidden section of your couch first.
To remove greasy smudges and stains, try using baking soda.
Oily spills can degrade the look and feel of your leather furniture. Putting a thin layer of baking soda on the affected, fatty area and softly sprinkling it might help. The recommended waiting time is three to four hours before wiping it away with a clean cloth.
- Baking soda can help absorb the grease, making cleanup a breeze once it's been eliminated.
- If there is still oil on your couch after cleaning it with baking soda, try wiping it off with a dry towel. If that doesn't do the trick, try applying more baking soda and waiting longer before wiping it away.
Lemon Juice and Cream of Tartar Remove Light Leather Dark Stains.
White or tan leather sofas may make it easier to see dark stains than sofas in deeper colours. Combine the cream of tartar and lemon juice to make a paste in a bowl. To ensure consistency, measure out each ingredient at the same rate. The stain can be entirely removed by applying the paste to the spot with a damp cloth and letting it sit for ten minutes.
- The leather can be cleaned of the stain and restored to its original lighter hue with the help of some lemon juice and cream of tartar. Darker leather, on the other hand, shouldn't be treated with it because it will change the leather's colour.
Putting Band-Aids On Blisters
Fix Tears Smaller Than 2 Inch (5 Cm) With Superglue.
A minor tear in your sofa's leather may be repaired with super glue. Apply a tiny layer of super glue inside the tear and press it together with your fingertips. Keep the leather in place until the glue dries.
Use a leather binder to cover the area where the tear was repaired once the superglue has dried and set. This will make the patch look less out of place. Work this into the tear with a paper towel or sponge until it is unnoticeable.
The area around the tear can also be softly sanded with fine-grain sandpaper. While the adhesive is drying, sand the incision with sandpaper in the grain range of 220 to 320. Leather dust will be created as a byproduct, which can then adhere to the bond and conceal the tear. The leather may get too worn and require refinishing at this point.
When Patching A Larger Hole Or Tear, It's Best To Start With A Rounded Sub-Patch.
A sub-patch, typically of leather, suede, or another material with a comparable texture, is sewn in place underneath the tear to keep the garment together. For the patch to be sewn onto the couch's interior, a quarter inch (6.5 mm) of extra space is needed around all sides. Clip the edges of the patch using a pair of scissors to make them more rounded.
- If you round the patch's corners, sewing it onto the garment will be much less of a hassle and will leave the fabric smoother.
- A leather repair kit, available at leather speciality stores and online, can be used in place of a sub-patch if you don't have any on hand. Everything you need to fix a hole in your leather couch, including a few smaller patches, is included in this kit.
Place the patch behind the hole using tweezers.
When you're holding the sub-patch in place, make sure it's centred over the tear. Using a pair of tweezers, place the patch so that its adhesive side is tucked under the leather upholstery. Place the patch so that it is evenly seated behind the tear using the tweezers, working your way around the perimeter.
- Once you've gotten the patch where it needs to be, you should feel around to see if there are any bumps or divots that you missed. You should use the tweezers to fix the nodes inside the couch and smooth out the patch before proceeding.
- Whether the tear is in the cushion, examine the sofa for a zipper that will allow you to gain access to the sofa's interior and determine if the cushion can be removed. If you can remove the cushion from the leather covering and turn the cover so that the inside is facing outside, you will have much better luck quickly smoothing the patch and applying it.
Glue the Sub-Patch to the Leather.
Small amounts of leather or fabric glue can be applied to the end of a toothpick or a cotton swab. Then, working around the patch and avoiding the flaps surrounding the tear, rub the glue between the under-patch and the interior of the leather. If you find that more glue is needed, apply it all the way around the patch.
- To get rid of any remaining glue on the leather, simply use a paper towel to wipe it off.
Seal and weight the tear while the glue dries.
Start by using your fingertips to press the two halves of the tear or hole back together. If you can make the area look as uniform as possible, you can then place something heavy on top of the tear to keep it from spreading. This will ensure that the parts stay in place while the glue dries and that the assembly is stable.
- Careful alignment of loose threads or deformed edges may be required if the tear or hole is not uniformly distributed. Carefully reconnect these, making sure the edges are aligned and the loose threads overlap, and hiding the tear as much as possible.
- Read the package instructions if you need to know how long it will take for your leather glue to dry. Most adhesives need to set up in less than 10 minutes.
Superglue the patched area.
Super glue can be used to restore the leather's original appearance after it has been patched with leather glue, which will also help to reinforce the repair. If there's a tear in your couch, you can fix it by applying a thin line of super glue over the damage and working it into the gap with a toothpick. As soon as the bond is formed, wipe away any excess glue with a paper towel and roughen up the adhesive.
- If the couch appears good after you apply the sub-patch, there's no need to keep trying to hide the damage.
- You'll have to work lightning fast when handling the super glue. Your toothpick or the paper towel fibres could become permanently embedded in the couch if this doesn't happen.
- Nail polish removers, which typically contain acetone, can be used to get rid of super glue.
Sand In The Direction Of The Tear With Fine Grit Sandpaper.
While the superglue is still slightly damp, smooth down the area around the tear using sandpaper. Use fine-grit sandpaper (between 220 and 320) to generate dust that can be used to help fill the crack in your sofa. The result will be a more rugged landscape.
- The region around the tear will suffer some slight wear as a result. Using a repair compound, leather colourant, and leather conditioner, the damaged leather may be refinished in no time. Doing so will return the leather to its original state.
- If the appearance of the tear is not satisfactory after the first application of superglue, you can repeat the process. To get a smoother finish, let the adhesive dry for a few minutes between coats of paint.
Restoring Damaged Leather
Spread out some newspaper in case of spills.
The leather-repair and recoloring materials you apply will do wonders for the couch's appearance, but they will quickly discolour any nearby carpets or fabrics. Instead, lay a drop cloth under the sofa or cover the floor surrounding the couch with old newspapers.
- In case any of the leather colourant gets on your hands or clothes, it is advised that you wear disposable gloves and clothes that are several years old.
To fix the worn spots, use a leather repair compound.
Leather binders, or repair compounds, are absorbed by the substance and aid in the leather's ability to preserve its original form. A small amount of leather repair compound or binder should be put on a clean sponge. Cover the entire couch with the binder using slow, steady strokes, starting in one of the corners.
- Your couch's seams and ridges may collect the excess leather binder if you don't pay attention. Use a clean paper towel to remove any lingering residue while you apply it.
- Leather repair compounds and leather binder should be available from leather supply stores and on the Internet.
Apply Another Coat After Repair Compound Dries.
Let the patch dry for at least half an hour, preferably an hour, in a well-ventilated area. After the first coat has dried, you can use the same sponge to apply the second coat or the binder. Three to five times, depending on how you like the look of the couch after each iteration.
- The number of coats you'll need to apply to your couch's leather will depend on how severely it's been scratched and worn. The number of applications needed to cover surface cracks depends on their depth, however it may just be one or two. If the leather is very worn, you may require four or five coatings.
- Some products can have their drying time cut down significantly with the use of a heat gun or a hair dryer. Reduce the temperature as much as you can to protect the leather from overheating.
Buy A Couch-Matching Leather Colorant.
Using a leather colourant that isn't the right shade for your sofa will leave it looking blotchy and unnatural. Your best bet is to look online for a colour that closely matches the one already on your couch. In addition, you can take a sample of the leather to a repair shop and have them mix up some colourants that are an exact match.
- You may quickly check the colour of your couch without leaving your house, making online research for the best colourant more practical.
- Taking a picture of your sofa to use as a colour reference can be helpful, but it may not be a perfect representation of the leather's actual color.
- By adding several coats of leather colourant, you can make the leather darker. So, rather than getting anything too black, choose a shade that is lighter than your couch.
Apply a little coat of leather dye to the couch.
Lightly dab a foam applicator or clean sponge with leather dye. Start at one sofa corner and spread the paint evenly across the surface as you move to the other sides. To achieve an even coating of colour across the entire sofa, focus on the more inaccessible areas like seams and wrinkles.
- Do not touch any of the leather once it has been dyed. There's a chance the paint will smear, leaving a mark.
- A small area that needs recoloring should be your sole focus. As long as the couch's colour is the same as the colorant, you should be able to successfully blend in the colourant so that it is undetectable.
Dry the surface before applying more coats.
It takes anywhere from half an hour to an hour for a first coat of leather colourant to dry completely after being applied. Coats should be applied in a manner analogous to the initial one. Take as much time as you need to get the desired result.
- If you prefer, you can also use a spray gun or an airbrush to add the extra layer of color. Working in thin layers and allowing adequate time for each layer to dry between applications can help improve the leather's overall appearance.
Leather conditioners keep couches shiny and soft.
When the leather has been coloured to your liking and has had time to dry, condition it with a thin layer of leather conditioner using a clean sponge. This step is recommended after the leather has been colored. The best way to condition a sofa is to use a circular buffing motion, starting in one corner and working your way around the sofa. It's recommended to give the conditioner at least three hours to dry.
- Leather conditioners should be sold in speciality leather shops and on the internet. You might also say that it's a part of a leather repair kit.
What Can Be Done About Scrapes?
A minor cut or scrape doesn't take much time or effort to heal. It's possible to get rid of them entirely and covertly, leaving no trace that they were ever there. First, soak the damaged area in water and smooth it down with a piece of 1000-grit sandpaper. Following that, sand the space evenly with the abrasive until it is absolutely smooth.
The more worn areas of the floor may require re-dying. Sand the space methodically, pausing at regular intervals to check the condition of the leather's surface. Stop sanding the area after you've reached the point where you no longer see any further improvement.
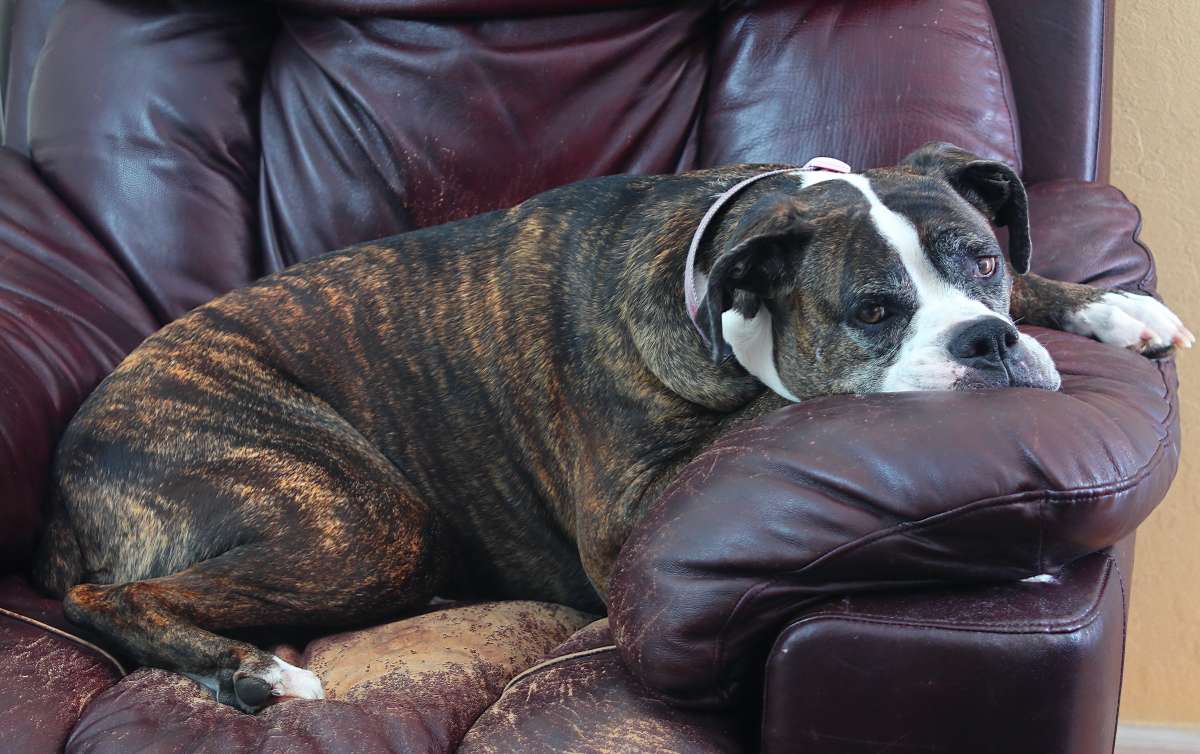
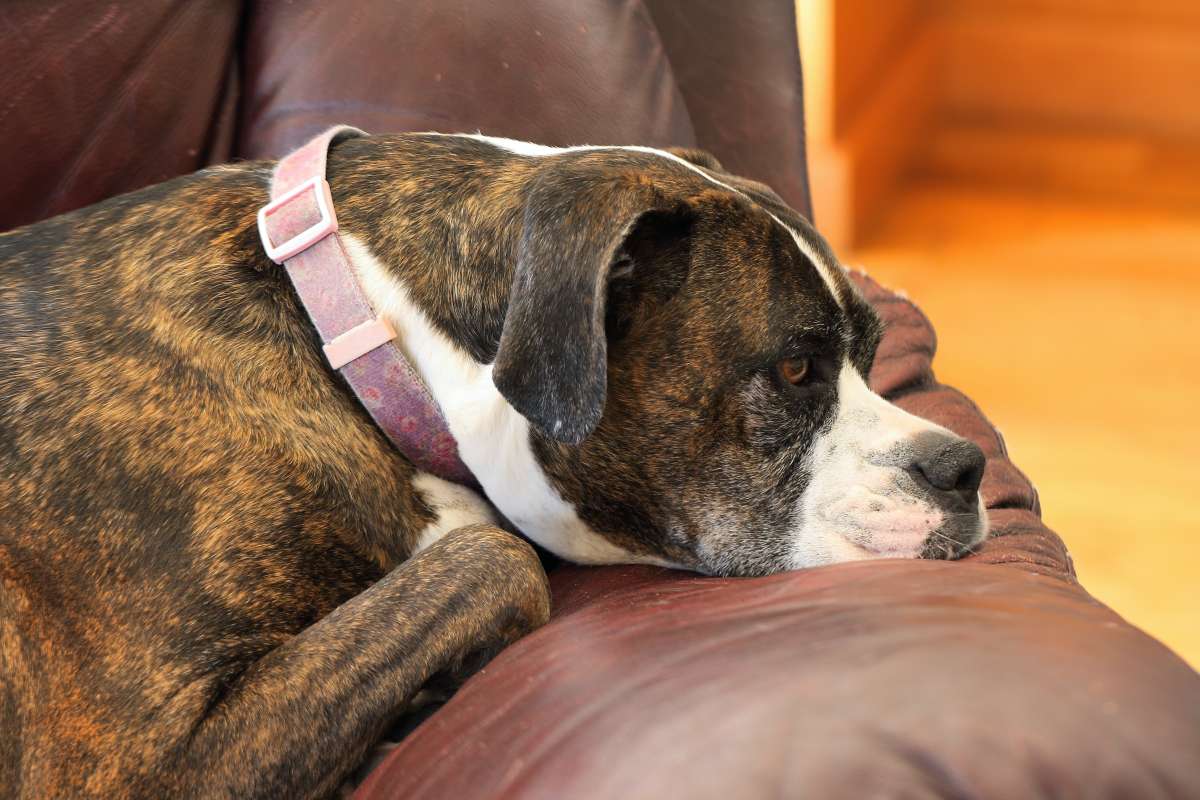
Urine Removal: Train Your Pet First!
The occasional accident or inadvertent marking of leather furniture by a pet's faeces or urine is to be expected. Even while it may seem impossible to thoroughly remove all traces of pet urine from leather furniture without damaging the table, it is possible to do so. To help get rid of pet pee stains on leather furniture, you can use paper towels. To one cup of cold water, add one cup of white vinegar. Do this until all of the urine has been soaked.
Apply the solution to a clean cloth, wring it out, and rub it on the damaged leather region. Take care of any stains that have appeared in the space next to it by cleaning it thoroughly. In the end, dry the leather's surface with a clean towel.
How Can I Repair Sagging Pillows?
Your old, sagging couch cushions won't be out of commision for long. First, design a pattern of the desired cushion's shape out of the batting. Cut out a mould from the foam with a bread knife, just like the one you made from the batting. The next step is to spray adhesive onto one side of the foam and adhere the batting to it.
The rough side of the foam should face the back of the chair, thus spray adhesive should be applied to both sides before it is inserted into the cushion. Always use the smooth side of the foam up front. This is why the foam gives the cushion some structure. Put the cushion back inside its cover when you're done.
Avoid Further Cracking Over Your Leather
It's inevitable that leather furniture will crack and break if it's not properly maintained and repaired. The only proven method for repairing cracks is to completely replace the damaged area. The leather, however, should be recolored after a thorough washing if you want it to look as good as new. The simplest solution is to do it like this. However, it will only hide the damage rather than cure the cracks. Although this is not a long-term solution, it postpones the inevitable expense of replacing the leather.
Repairing Leather Furniture
Flaps are used to treat small wounds by:
- Get started by thoroughly cleaning the affected area.
- Use a sponge and leather cleaner to wipe down the area surrounding the cut in the leather.
- Leather glue must be applied to the flap's reverse side.
Use extreme caution and only a tiny bit of glue when applying it. Put the flap back on and make sure it's securely fastened to the leather. Once the glue has dried as desired, any excess can be scraped from the piece of furniture.
Cleansing The Ink Spots
Finding a stain on leather furniture, especially if it's light-colored leather and the stain is likely to be ink, is disheartening. All ink stains on leather should be wiped away as soon as possible after discovery. Avoiding further wear and discoloration to the leather is achieved by doing so.
Use a soft cloth to wipe away as much of the ink from the leather as you can. Next, apply a small amount of dish soap (not bleach!) to a toothbrush and gently wipe it over the ink stain in a circular motion.
Put away the toothbrush after it appears that the ink stain has been gone or at least diminished in intensity. Finally, a moist rag should be used to wash off the leather surface once again.
Conclusion
Leather sofas are a great option because they are both durable and fashionable. After some time has passed, the leather on your couch may become stained, torn, discoloured, or worn to the point where the colour changes. A variety of home remedies can be used to treat leather for stains, holes, and discoloration. When applied to worn or discoloured areas, Leather Honey restores the leather's original hue. Leather colour balm comes in a wide variety of tones and shades designed to complement the leather's natural colour if you feel the need to inject additional colour.
A wide variety of leather-cleaning products are commercially available. White vinegar, when diluted, is one of the simplest and most efficient cleaning solutions. If you don't have access to apple cider vinegar, you can use any mild-smelling vinegar in its place. Mold and mildew can be wiped away with rubbing alcohol. Remove oil and grease stains from leather furniture with baking soda and cream of tartar.
To remove pen ink from leather furniture, try using eucalyptus oil and hairspray. Tan or tan leather seats may be cleaned of light stains with cream of tartar and lemon juice. Superglue can repair tears less than 2 inches (5 cm) in length. Use your fingers to apply a thin layer of super glue inside the tear and press it together. Byproduct leather dust can stick to the bond and cover the tear.
Applying a thin line of super glue over the tear and working it into the gap with a toothpick can be an easy way to repair your couch. After leather glue is used to repair a hole, the hole can be hidden with super glue. As acetone is a common ingredient in nail polish removers, it can be used to get rid of super glue. Damaged leather can be refinished with the help of a repair compound, leather colourant, and leather conditioner. It's up to you how long it takes to give your couch a new leather dye job.
The depth of the surface cracks will determine the number of coats you need to apply. Your sofa may need as many as four or five coats if it's seen a lot of use. A circular buffing motion, beginning in one corner and working your way to the other, is the most effective method for conditioning a sofa. It's normal for pets to accidentally mark leather furniture with their faeces or urine once in a while. Create a template out of batting in the shape you want the finished cushion to be.
Before inserting it into the cushion, spray adhesive should be applied to both sides. In terms of foam, the smooth side should always be facing forwards. The discovery of what appears to be ink stains on leather furniture is disheartening, especially if the furniture is made of a lighter colour of leather. By removing the ink with a damp cloth or some soap, you can keep the leather from getting any worse for wear.
Content Summary
- However, after some time has passed, the leather on your sofa may become stained, torn, discoloured, or worn to the point where the colour changes.
- A simple cleaning with a mild cleaner, some experimentation with home remedies for removing stains, the repair of any holes, and the recoloring of the leather will bring your couch back to its former glory.
- Use a leather cleaner to remove any visible debris, dirt, or stains.
- In order to restore the leather's original appearance, use a leather cleaner such as Leather Honey Leather Cleaner.
- Despite the abundance of online how-tos, Leather Honey Leather is the best product for restoring scratches in leather furniture.
- For the best results, use a premium leather conditioner made from natural ingredients, such as Leather Honey.
- You can use a lint-free cloth, foam sponge, paintbrush, or even your hands to apply Leather Honey in thin layers all over the leather's surface to revive and condition it.
- When applied to worn or discoloured areas, Leather Honey restores the leather's original hue.
- Alter, Restore, Or Replace Even minor damage to the leather's surface can be easily repaired with a patch or filler.
- When the patch has fully adhered to the leather, any remaining holes can be patched up with putty.
- Vaccuum the sofa to get rid of the dust and dirt.
- On the other hand, if you don't have a vacuum with a brush attachment, a regular vacuum will do the trick on the couch as well.
- While there are many commercially available leather cleaners, white vinegar with a little water added works just as well.
- In a bowl, dissolve white vinegar in water by mixing the two together.
- Wet a microfiber cloth with the cleaning solution you plan to use.
- To buff the leather without scratching the finish, use a clean, dry microfiber cloth.
- Use light, circular motions to clean the couch thoroughly.
- Get a fresh towel and wipe down the couch.
- Managing Persistent Stains To get rid of mould and mildew, use rubbing alcohol that has been diluted with water.
- Then, using gentle, circular motions, wipe the area down with a microfiber cloth dampened with the rubbing alcohol solution.
- Applying rubbing alcohol to the mouldy section of your couch will kill it and make it much easier to clean up.
- If the cloth gets dirty or dries out, soak it again in the diluted rubbing alcohol solution.
- For eraser or pen smudges, try using hairspray or eucalyptus oil.
- It should completely remove the imperfection.
- You can use baking soda to clean up oily fingerprints and smears.
- It has been suggested that applying a light coating of baking soda to the affected area and gently sprinkling it with fat may be of some assistance.
- Three to four hours should pass before you try to remove it with a damp cloth.
- After cleaning with baking soda, if there is still oil on your couch, try removing it with a dry towel.
- Citrus juice and tartar sauce Get Rid of Dark Stains on Light Leather.
- In a bowl, make a paste out of the cream of tartar and lemon juice.
- If you want your results to be uniform, make sure you use the same amount of each ingredient.
- You can use super glue to fix a small tear in the leather on your couch.
- Use your fingers to apply a thin layer of super glue inside the tear and press it together.
- While waiting for the glue to dry, hold the leather in place.
- When the superglue is completely dry, cover the area with a leather binder.
- Doing so will help the patch blend in better with its surroundings.
- It is recommended to begin repairing a larger hole or tear with a smaller, rounded patch.
- To prevent the fabric from unravelling further, a smaller patch is sewn in place beneath the damaged area. This sub-patch is typically made of leather, suede, or another similar material.
- Added room of a quarter of an inch (6.5 mm) is required on all sides for sewing the patch onto the couch's interior.
- In the absence of a sub-patch, you can get the job done with a leather repair kit, which can be found in leather speciality stores and online.
- This kit contains several smaller patches as well as everything else you'll need to repair a hole in your leather sofa.
- Using the tweezers, attach the patch behind the damaged area.
- Once the patch is in place, you should check the surrounding area for any divots or bumps that you may have missed.
- Before moving forwards, use the tweezers to fix the nodes inside the couch and smooth out the patch.
- Check for a zipper that provides access to the sofa's interior to see if the cushion can be removed and replaced if the tear is located there.
- Affix the Sub-Patch to the Leather with Glue.
- Next, rub the glue between the under-patch and the interior of the leather, making sure to avoid the flaps surrounding the tear.
- While the glue dries, you should press down on the repaired tear.
- To begin, press the two ends of the tear or hole back together using your fingertips.
- For information on how long leather glue needs to dry, please refer to the manufacturer's instructions.
- Put some superglue on the patch.
- Once the adhesive has set, you should roughen it up and wipe away any excess glue with a paper towel.
- There's no point in continuing to try to conceal the damage if the couch looks fine after you apply the sub-patch.
- You'll need to move lightning fast if you want to avoid getting super glue on your fingers.
- Remove super glue with acetone-based nail polish remover.
- Sand down the area around the tear while the superglue is still slightly damp.
- Get some fine sandpaper (between 220 and 320 grit) and use that to create dust that you can use to patch up that hole in your couch.
- Because of this tear, the area around it will experience some minor wear.
- Damaged leather can be easily refinished with the help of a repair compound, leather colourant, and leather conditioner.
- In this way, the leather can be restored to its original condition.
- If the appearance of the tear after the first application of superglue is not satisfactory, you can do it again.
- Instead, use a drop cloth or old newspapers to protect the floor around the sofa.
- Apply some leather repair compound to the creases and wear areas, and you'll have them looking like new again.
- After the initial coat of repair compound has dried, apply a second coat.
- Dry the patch in a well-ventilated area for at least 30 minutes, preferably 1 hour.
- The first coat can dry, and then you can use the same sponge to apply the second coat or the binder.
- Get Some Leather Dye to Match the Couch.
- If you dye your leather couch with a dye that is too light or too dark, it will look patchy and artificial.
- To achieve a deeper colour in the leather, apply multiple coats of leather colourant.
- Leather furniture can benefit from a light application of leather dye.
- Using a clean foam applicator or sponge, lightly dab some leather dye onto the surface.
- After the leather has been dyed, you must not touch it.
- It is possible to successfully blend in the colourant so that it is undetectable if the colourant is the same colour as the couch.
- Please wait until the surface is dry before applying additional coats.
- A first coat of leather colourant takes 30 minutes to an hour to dry completely after application.
- After the leather has dried and been dyed to your satisfaction, condition it with a leather conditioner using a clean sponge.
- Allow the conditioner at least three hours to dry before handling.
- Sand the area methodically, pausing occasionally to inspect the leather's condition.
- White vinegar can be used in place of the cold water.
- Use the diluted solution on a clean, wrung-out cloth to rub into the leather where it has been damaged.
- Use a clean towel to dry the leather's surface afterwards.
- It won't be long before your sagging couch cushions are back in service.
- Create a template out of batting in the shape you want the finished cushion to be.
- Use the bread knife to carefully carve out a form from the foam, just as you did with the batting.
- Next, spray adhesive onto the foam, then adhere the batting to that side.
- In terms of foam, the smooth side should always be facing forwards.
- The foam provides shape to the cushion in this way.
- When you're done using the cushion, please return it to its cover.
- Do what you can to stop the leather from cracking any further. Without regular care and TLC, leather furniture will eventually split and tear.
- Replacement of the damaged area is the only tried and true method of repairing cracks.
- That's the quickest and easiest way to get the job done.
- Restoration of Leather Furniture In order to treat minor wounds, surgeons use flaps by: First, you should clean the area where the problem is.
- Wipe the area around the cut with a sponge dampened with leather cleaner.
- The back of the flap needs to be glued with leather glue.
- When you're done, replace the flap and make sure it's properly attached to the leather.
- Erasing The Pen Stains It's disappointing to discover a stain on your leather furniture, especially if the leather is light in colour and the stain is likely ink.
- The moment an ink stain is noticed on leather, it should be removed with a damp cloth.
- As much ink as possible should be removed from the leather using a soft cloth.
- on a toothbrush and using circular motions, gently scrub the stain until it disappears.
- At last, you should wipe the leather down with a damp cloth.
Frequently Asked Questions About Worn Leather Couch
To revive the lustre of leather furniture and buff out small scratches and fading, try a natural leather cleaner like coconut oil. Use a clean, dry cloth to rub coconut oil into the leather in a circular motion, much like shoe polish. Let it penetrate for 10 minutes, and buff out the excess oil with a new, clean cloth.
You will have to reach out to a leather expert if the tears and scratches are too deep. A leather repair kit will come in handy if you deal with holes and punctures on your leather furniture; it can be purchased from local hardware or an auto spare shop.
A faded leather sofa can be dyed back to its original colour. Clean the leather and strip away the existing polish and dye. You can use a commercially prepared solution or denatured alcohol to strip the leather. Once the old finish is removed, apply new dye by rubbing it in with a lambswool pad.
It is possible to soften and restore the leather by using Leather Revive. Leather Revive is a water-based oil emulsified conditioner that works to soften leather by replenishing the fat liquors.
Olive oil, and every oily substance for that matter, will not “nourish” your leather but accelerate its deterioration. Leather is extremely absorbent and will soak up any oils you put on it. When oil first saturates leather, it seeps to the back—to the part you can't see.