Even though metal roofs are incredibly durable and long-lasting, they can become damaged and require maintenance. Purchasing a metal roof is a good investment in your home because it will last for many years and protect you from the elements.
If you have a metal roof and it is leaking or decaying in any manner, there are certain steps you can take to solve these minor issues before they become worse and necessitate more extensive repairs.
This blog post discusses the many sorts of damage to look out for so that you can identify when it is necessary to seek the services of specialists to repair your metal roof.
What You'll Need
Equipment / Tools
- snips made of metal
- Drill without a cord
- Brush made of wire
- Emery cloth or a metal file
- Caulking gun
- Paintbrush
- Pencil
- Putty blade
Materials
- Sheet metal that matches the metal used on the roof
- Color-matched urethane sealer for metal roofing patches
- Patching membrane impregnated with asphalt (as needed)
- Sheet metal screws with pan heads
- Color-matched paint for the metal panel being repaired (optional)
- Green is simple (or another cleaner that does not leave a residue)
Step-by-step Metal Roof Repairs
If the damage is extensive, you may be able to replace an entire part of the roof. However, unless you have prior experience working on this type of roofing, do not attempt this as a do-it-yourself project. It is always better to contact a metal roofing specialist who is familiar with your roofing material.
If you are an experienced do-it-yourselfer, you can perform certain minor repairs. Here are some general inspection, maintenance, and minor repair tips:
Look For Loose Nails.
They need to be pulled and re-nailed.
Look For Holes, Rust Patches, Or Other Signs Of Deterioration.
Rust can be removed with a wire brush and some steel wool if it is discovered. Next, apply a coat of metal primer to the surface, and after that, finish by applying a top coat that is the same colour as the roof. An auto parts retailer will often stock a comprehensive range of colour options for metal spray paint.
Seal Up Leaks.
There are a few different approaches you might take to accomplish this goal. Urethane roof cement, as opposed to regular asphalt or plastic roof cement, offers superior defence against the damaging effects of ultraviolet rays and is hence the material of choice.
Utilising a putty knife, spread it evenly over the hole or damaged area until it is completely covered. An other choice is to make use of a watertight flashing membrane that is self-adhesive, similar to the one depicted on the right.
Over time, the urethane roof cement and the watertight flashing membrane will both deteriorate to the point where they need to be replaced.
In the event that it is required, use urethane roofing cement to reseal all of the seams and edges along the flashing.
Call someone who specialises in fixing metal roofing if the flashing is seriously damaged and needs to be replaced.
Common Causes Of Metal Roof Leaks
Metal Roofing Screws
The bulk of leaks on metal roofs are caused by roofing screws. [Case in point:] [Case in point:] The rubber washer that is located at the base of metal roofing screws is compressed, which prevents water from entering the structure.
The rubber washer acts as a "gasket" between the metal roofing panel and the screw head when it is driven into the panel with the screw.
It may appear to be a straightforward task, but there are a number of ways that it can go wrong, including driving the screws too lightly, pushing them too heavily, driving the screws at the wrong angle, and driving the screws so that they miss the frame member.
Screws that have had an excessive amount of force applied to them Many roofing providers overdrive the screw in an effort to create a more airtight seal between the metal roofing and the screw head. Unfortunately, the surplus torque causes the rubber washer to crack and has a tendency to spin out to the side.
Under driven screws are those in which there is insufficient torque applied to the screw, preventing the rubber washer from being seated correctly to the metal roofing panel. As a direct consequence of this, the rubber washer is never subjected to compression, and hence, no gasket is produced.
The rubber washer is unable to rest level on the metal roofing because the screws were driven at an angle that was not optimal. A portion of the screw is hermetically sealed, while another portion is not.
Screws that did not secure themselves to the metal strut or the wood framing below These have nothing to seal against, hence they are not included.
These kinds of leaks can be difficult to locate since, in many cases, the screw is present; but, if you did not touch it, you would not be able to tell that it did not strike anything and did not seal.
Even though the screws were fastened with the appropriate amount of torque and were put in the correct orientation, this does not guarantee that the rubber washer is risk-free.
Rubber washers don't fare well in climates that experience hot summers followed by harsh winters. As a consequence of this, they deteriorate and lose their ability to seal, and as a result, it can be quite challenging to determine which screw is leaking and which is not.
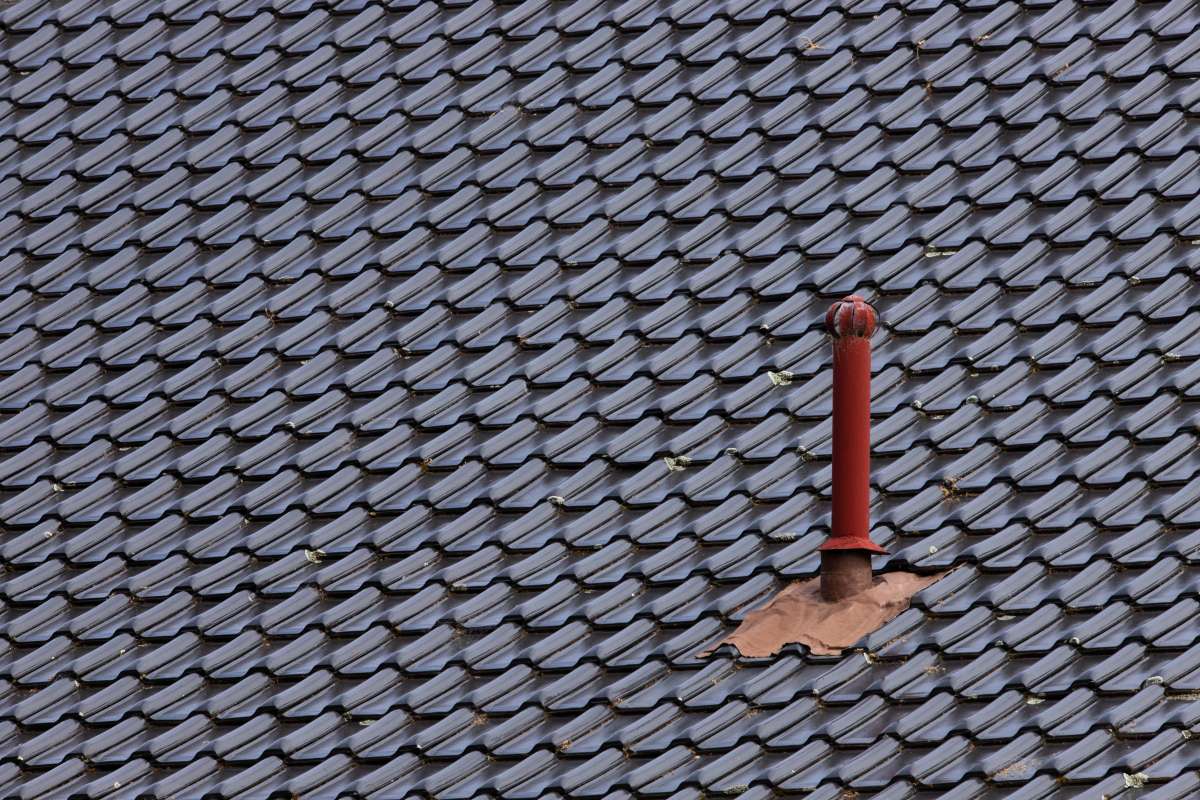
Stack Flashings
On a metal roof, another region that has a high propensity for water damage is the area around the stack flashings. The "boots" or flashings that surround pipes that protrude through a metal roof are known as stack flashings.
Vents for the heating, ventilation, and air conditioning system (HVAC), air vents, and plumbing lines all need to vent and come through the metal roof. The watertightness of the pipe is ensured by the stack flashing.
The majority of stack flashings are made of rubber or a substance that has been rubberized. They are designed to rest flat on the metal roof and create a seal, but they also "squeeze" around the pipe to create a second seal. These seals are constantly being put to the test because of the movement in the metal roofing caused by expansion and contraction.
Additionally, the sun damages the rubber flashings, which only last approximately fifty percent as long as the metal roof. It's a catch-22 situation because the more caulking, sealer, or tar that is placed behind and around the stack, the more it appears that they will pond water and leak.
In order to prevent water damage to your building, you should make plans to replace any stack flashings that are worn out or rotten.
Missing Sealants
Sealants for metal roofs, when put in conjunction with metal roofing panels, often do not have a lifespan comparable to that of the metal roofing panels, and therefore need to be updated as part of routine roof maintenance.
Sealants beneath trims such as metal ridge caps and Z flashings, as well as surrounding roof transitions, counter flashings, reglets, and pitch pans, will all require "topping off" from time to time as they wear. This is because sealants under trims tend to dry out first. Utilize a sealer for metal roofs that was developed specifically for use with metal roofing.
There are additional kinds of silicone caulking, and some of them might not stick to the paint on the roofing panel or the trimmings. Because metal roofing goes through a daily cycle of expansion and contraction, any sealants that are intended to be long-lasting need to be able to maintain their flexibility and stretch together with the metal without breaking their seal.
Curb Flashings
In most cases, the HVAC units for metal roofs are installed on curbs. The installation of metal roof panels is a very straightforward operation; however, the flashing is what truly puts a metal roofer's skills to the test. Regrettably, HVAC leaves little room for mistake when manufacturing the flashing, and maintaining a dry kerb is sometimes easier said than done.
Particularly challenging regions are the uphill side of curbs as well as the two top corners of the kerb flashing. This is especially true for larger HVAC systems. Water frequently becomes entrapped behind the unit and "stands" behind the flashing. Over time, this causes the sealants to become eroded and finally causes leaks.
It is possible to increase the amount of water the uphill side can hold by caulking, sealing, or tarring it. Unfortunately, there isn't a simple solution to this Catch-22 that doesn't involve tearing up the metal roofing panels and beginning over.
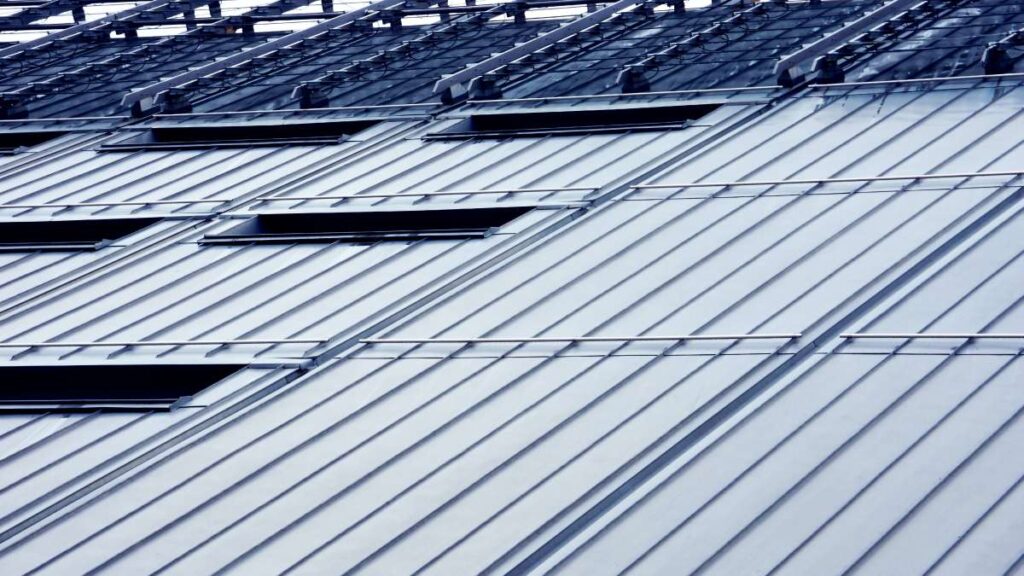
Seams And Over Laps
Because of a situation known as capillary draw, seams that occur where two sections of metal roofing overlap each other sometimes develop leaks.
When water is able to move uphill between two closely linked pieces of metal, this phenomenon is known as capillary draw. The capillary pull between the two pieces of metal can be broken by using sealant or butyl tape in between them; however, if the sealant or tape is not applied properly, it can make leaks worse than if it had not been used at all.
Metal roofs have their own special considerations.
Roofing composed of metal presents unique difficulties when they need fixing. Furthermore, the patched area may have a different rate of expansion and contraction than the metal surrounding it, making repairs to metal roofing more likely to fail prematurely than repairs applied to other forms of roofing.
Because of the different rates of expansion and contraction, stress is placed on the patch, causing it to crack and eventually fail.
A metal roof with a hole can be repaired following the steps listed below. Almost every type of metal roof should be repairable as long as you use a patching material that is suitable with the type of metal used in your roof.
The majority of the tools and materials you'll need may be found at any home centre or hardware store; however, it's conceivable that you'll need to buy some of these things from a roofing store that offers a selection of roofing materials and repair solutions.
Issues of Security
In the process of fixing a roof, one of the first things to think about is the workers' safety. A building's overall structural health, including decking deterioration, could be compromised by a roof leak. Make sure an under-deck safety inspection and roof analysis have been completed before doing this or any other sort of roof repair.
Do not attempt repairs that require going on the roof if you are afraid of heights or using ladders. If you are worried about fixing your roof on your own, you should contact a professional roofing contractor who can complete the task for you in an expert and risk-free manner.
How To Maintain And Repair A Metal Roof
Causes Of Leaks In Steel Roofs
Make sure that you are not dealing with significant condensation instead of a leak before beginning your search for the source of the problem. Check for moisture in the ductwork associated with the air conditioner as well as the pipes that lead from the water heater.
There are two main causes that lead to roof leaks.
Poor installation, including:
- In the longitudinal roof seam cavities, the missing or incorrect installation of needed caulking sealants and bar.
- Installing an additional sealant strip at four-way panel laps and eave connectors was not done.
- Lack of installation of tape sealant under screw holes
- Lack of caulking between the additional trim and the bottom of the roof panels
- Flashing, roof penetrations, or joint sealants that have not been put properly
Damage from weather or aging
Seams that have become separated, rusted regions that have coating that is either damaged or worn, sealant failure around a fastener, and ice dams are all potential issues.
Inspecting The Roof
When doing a normal inspection or attempting to identify the origin of a roof leak, there are a number of locations that require particular attention from the inspector.
Conduct a thorough inspection of the areas surrounding the end laps and side laps, as well as the penetrations, transitions, J-rails, seams, and sealant.
Pay particular attention to any parts that have rusted or worn away, as well as any "rumble buttons," which are metal washers combined with neoprene washers. When the neoprene washer is exposed to the elements, it degrades and becomes more likely to leak.
Routine Maintenance And Recoating
You should perform an annual inspection on your steel roof. With the passage of time, the previous coating will get damaged and scratched, which could result in a roof that leaks.
When it is time to recoat your metal roof, clean the roof thoroughly to remove all debris and loose coating, scrape away any rust that has formed on the surface, and make any necessary repairs before putting on the new coating.
Sanding, grinding, cleaning with a wire brush, or using a high-pressure washer are all effective methods for removing rust and grime.
Emissivity and reflectance can both be improved with a new coating, which will result in increased energy efficiency.
Repairing Your Metal Roof
Rust removal on a smaller scale Sanding, grinding, or using a wire brush to scour the area can all be used to remove rust on a smaller scale. After that, you can recoat the area after using an approved primer or rust inhibitor and covering it with a new coat.
When you inspect your roof, be on the lookout for fasteners that are highly corroded or that are missing entirely. These will need to be replaced. The butyl rubber washers should all be replaced with new ones, and the resulting caulk should be coated with the proper sealant. After the sealant has had time to dry and harden, a roof coating should be applied on top of it.
Patch holes: If you just have one or two holes and the damage is not widespread, you should be able to patch the holes with only a few different materials and a little bit of extra work:
- You need to clean the environment around you so that it is clear of any dirt or trash.
- Utilise a putty knife to remove any coating on the roof that is loose or flaking.
- Butyl tape should be applied in strips of one to two inches along the perimeter of the patch area.
- It is necessary to cut a patch out of galvanised metal to a size that is large enough to cover the hole by two to three inches on all sides. You also have the option of covering the opening with a layer of metal fibre membrane and applying glue in an even layer both underneath and on top of the membrane.
- Insert screws after first predrilling holes through the patch and the material of the roof.
- The butyl tape, the patch, and the existing material on the roof all need to be penetrated by the screws, which then need to be tightened up against the roof panel. Rafters and trusses should NOT have any screws driven into them.
- Install screws at regular intervals of two inches, and check to see that the patch is level with the roof.
In that case, you should use screws every inch. - Caulk should be used to seal the area surrounding the screw and patch, then you should wait for it to dry. Install a roof coating over the surface.
Repairing a small, narrow hole with a membrane is possible if the hole is in an area that is already sewn together. After the region has been cleaned in the same manner as previously, apply a roof coating of superior quality that is based on aluminium to the area.
Be sure to cover both sides of the seam, but don't let the coating harden all the way before moving on to the next step. A cloth impregnated with asphalt should be used to cover any holes or splits in the glass membrane. Place it so that it straddles the seam and then lay it on top of the roof coating. Be certain that it is broader than the seam and that it overlaps it by a distance of at least two inches on all sides.
Apply a second coat of coating to the roof so that it completely covers the membrane.
Replace a whole section If there is significant damage to one or more roof panels, it may be necessary to replace the sections. While you are doing this, you should thoroughly inspect the area under the roof as well as the rafters that are underneath it for any additional damage.
Examine the overlay for any signs of structural damage, and replace any insulation that has become wet. Before entirely replacing the portion, you should give the attic space some time to dry out.
When attaching the roof to the rafters, do not use screws. The panels of a galvanised metal roof are allowed to expand and contract in response to the fluctuating temperature because the roof is only secured at its perimeter. It is not necessary to include any rumble buttons.
Steps For Replacing A Roof Section
Remove the screws from both sides of the roof in the area where you will be overlaying fresh material. This will allow you to loosen the J-rail. You only need to loosen the J-rail enough that the old part may be eased out. The new section will slide out from underneath. There is no need to entirely remove the J-rail.
Use a flashlight to investigate the interior of the roof, looking for and fixing any broken insulation, as well as removing any standing water.
Before installing new overlay, you should repair any damaged rafters and give the attic sufficient time to dry out. If you need to get access to the attic, you can remove the damaged edges by cutting them away with tin snips. If not, there is no reason to do so.
When you are cutting the new sheet, make sure that it has the same length as the section that was damaged and is at least a foot wider on both sides.
After applying butyl tape to the bottom edges of the new metal sheet, position it over the damaged portion, and then remove the old sheet.
Slide the end under the J-rail on both ends, and then insert screws that are long enough to go through not just the J-rail but also the butyl tape, the new roof metal, and the side of the house.
To attach the sides, insert screws through the old roof materials, butyl tape, and the newly installed portion of metal until the metal is flush with the roof materials.
A metal roof coating should be used to seal the edges on all four sides as well as the seams.
Conclusion
Purchasing a metal roof is a good investment because it will last for many years. There are certain steps you can take to solve minor issues before they become worse. Do not attempt this as a do-it-yourself project unless you have prior experience working on this type of roof. Use urethane roof cement to seal seams and edges along the metal flashing. An alternative is to make use of a self-adhesive, self-sealing membrane.
Call someone who specialises in fixing metal roofing if it needs replacing. Common Causes Of Metal Roof Leaks include roofing screws. Rubber washers don't fare well in climates that experience hot summers followed by harsh winters. As a consequence, they deteriorate and lose their ability to seal. Stack flashings are designed to rest flat on the metal roof and create a seal, but also "squeeze" around pipes.
Sealants beneath trims and flashings, as well as surrounding roof transitions, will all require "topping off" from time to time. Utilize a sealer for metal roofs that was developed specifically for use with metal roofing. Increase the amount of water the uphill side of curbs can hold by caulking, sealing, or tarring it. A metal roof with a hole can be repaired following the steps listed below. Almost every type of metal roof should be repairable as long as you use suitable patching material.
The majority of the tools and materials you'll need may be found at any home centre or hardware store. You should perform an annual inspection on your steel roof. Be on the lookout for fasteners that are highly corroded or missing entirely. Sanding, grinding, and using a high-pressure washer are all effective methods for removing rust. After that, you can recoat the area with a new coat.
Repairing a small, narrow hole with a membrane is possible if the hole is in an area that is already sewn together. You also have the option of covering the opening with a layer of metal fibre membrane and applying glue underneath and on top of the membrane. If there is significant damage to a galvanised metal roof, it may be necessary to replace a section. Inspect the area under the roof and underneath it for any additional damage. Repair any damaged rafters and give the attic sufficient time to dry out before replacing it.
After applying butyl tape to the bottom edges of the new metal sheet, position it over the damaged portion, and then remove the old sheet. If you need to get access to the attic, you can remove the damaged edges by cutting them away with tin snips.
Content Summary
- Even though metal roofs are incredibly durable and long-lasting, they can become damaged and require maintenance.
- Purchasing a metal roof is a good investment in your home because it will last for many years and protect you from the elements.
- If you have a metal roof and it is leaking or decaying in any manner, there are certain steps you can take to solve these minor issues before they become worse and necessitate more extensive repairs.
- This blog post discusses the many sorts of damage to look out for so that you can identify when it is necessary to seek the services of specialists to repair your metal roof.
- It is always better to contact a metal roofing specialist who is familiar with your roofing material.
- If you are an experienced do-it-yourselfer, you can perform certain minor repairs.
- Here are some general inspection, maintenance, and minor repair tips:Look For Loose Nails.
- Utilising a putty knife, spread it evenly over the hole or damaged area until it is completely covered.
- Over time, the urethane roof cement and the watertight flashing membrane will both deteriorate to the point where they need to be replaced.
- In the event that it is required, use urethane roofing cement to reseal all of the seams and edges along the flashing.
- Call someone who specialises in fixing metal roofing if the flashing is seriously damaged and needs to be replaced.
- Common Causes Of Metal Roof Leaks Metal Roofing ScrewsThe bulk of leaks on metal roofs are caused by roofing screws. [
- The rubber washer acts as a "gasket" between the metal roofing panel and the screw head when it is driven into the panel with the screw.
- The rubber washer is unable to rest level on the metal roofing because the screws were driven at an angle that was not optimal.
- Even though the screws were fastened with the appropriate amount of torque and were put in the correct orientation, this does not guarantee that the rubber washer is risk-free.
- As a consequence of this, they deteriorate and lose their ability to seal, and as a result, it can be quite challenging to determine which screw is leaking and which is not.
- Stack FlashingsOn a metal roof, another region that has a high propensity for water damage is the area around the stack flashings.
- The "boots" or flashings that surround pipes that protrude through a metal roof are known as stack flashings.
- The watertightness of the pipe is ensured by the stack flashing.
- The majority of stack flashings are made of rubber or a substance that has been rubberized.
- Additionally, the sun damages the rubber flashings, which only last approximately fifty percent as long as the metal roof.
- In order to prevent water damage to your building, you should make plans to replace any stack flashings that are worn out or rotten.
- This is because sealants under trims tend to dry out first.
- Utilize a sealer for metal roofs that was developed specifically for use with metal roofing.
- Curb FlashingsIn most cases, the HVAC units for metal roofs are installed on curbs.
- Particularly challenging regions are the uphill side of curbs as well as the two top corners of the kerb flashing.
- Unfortunately, there isn't a simple solution to this Catch-22 that doesn't involve tearing up the metal roofing panels and beginning over.
- Seams And Over LapsBecause of a situation known as capillary draw, seams that occur where two sections of metal roofing overlap each other sometimes develop leaks.
- The capillary pull between the two pieces of metal can be broken by using sealant or butyl tape in between them; however, if the sealant or tape is not applied properly, it can make leaks worse than if it had not been used at all.
- A metal roof with a hole can be repaired following the steps listed below.
- Almost every type of metal roof should be repairable as long as you use a patching material that is suitable with the type of metal used in your roof.
- Make sure an under-deck safety inspection and roof analysis have been completed before doing this or any other sort of roof repair.
- If you are worried about fixing your roof on your own, you should contact a professional roofing contractor who can complete the task for you in an expert and risk-free manner.
- There are two main causes that lead to roof leaks.
- Seams that have become separated, rusted regions that have coating that is either damaged or worn, sealant failure around a fastener, and ice dams are all potential issues.
- Inspecting The RoofWhen doing a normal inspection or attempting to identify the origin of a roof leak, there are a number of locations that require particular attention from the inspector.
- Conduct a thorough inspection of the areas surrounding the end laps and side laps, as well as the penetrations, transitions, J-rails, seams, and sealant.
- Routine Maintenance And RecoatingYou should perform an annual inspection on your steel roof.
- When it is time to recoat your metal roof, clean the roof thoroughly to remove all debris and loose coating, scrape away any rust that has formed on the surface, and make any necessary repairs before putting on the new coating.
- When you inspect your roof, be on the lookout for fasteners that are highly corroded or that are missing entirely.
- The butyl rubber washers should all be replaced with new ones, and the resulting caulk should be coated with the proper sealant.
- After the sealant has had time to dry and harden, a roof coating should be applied on top of it.
- Utilise a putty knife to remove any coating on the roof that is loose or flaking.
- It is necessary to cut a patch out of galvanised metal to a size that is large enough to cover the hole by two to three inches on all sides.
- Insert screws after first predrilling holes through the patch and the material of the roof.
- The butyl tape, the patch, and the existing material on the roof all need to be penetrated by the screws, which then need to be tightened up against the roof panel.
- Install a roof coating over the surface.
- Repairing a small, narrow hole with a membrane is possible if the hole is in an area that is already sewn together.
- A cloth impregnated with asphalt should be used to cover any holes or splits in the glass membrane.
- Place it so that it straddles the seam and then lay it on top of the roof coating.
- Apply a second coat of coating to the roof so that it completely covers the membrane.
- Replace a whole section If there is significant damage to one or more roof panels, it may be necessary to replace the sections.
- While you are doing this, you should thoroughly inspect the area under the roof as well as the rafters that are underneath it for any additional damage.
- Examine the overlay for any signs of structural damage, and replace any insulation that has become wet.
- Before entirely replacing the portion, you should give the attic space some time to dry out.
- When attaching the roof to the rafters, do not use screws.
- Steps For Replacing A Roof SectionRemove the screws from both sides of the roof in the area where you will be overlaying fresh material.
- This will allow you to loosen the J-rail.
- The new section will slide out from underneath.
- There is no need to entirely remove the J-rail.
- Before installing new overlay, you should repair any damaged rafters and give the attic sufficient time to dry out.
- If you need to get access to the attic, you can remove the damaged edges by cutting them away with tin snips.
- After applying butyl tape to the bottom edges of the new metal sheet, position it over the damaged portion, and then remove the old sheet.
- Slide the end under the J-rail on both ends, and then insert screws that are long enough to go through not just the J-rail but also the butyl tape, the new roof metal, and the side of the house.
- A metal roof coating should be used to seal the edges on all four sides as well as the seams.
Frequently Asked Questions About Metal Roofs
If desired, the surface of the patch can be painted to match the colour of the metal roof panels. To do this, lightly wire-brush the surface of the metal patch and the metal panel just past the patch's edges. Paint over the surface of the patch and onto the surface of the underlying panel.
We recommend that if you have an exposed fastener metal roof, it's best to get it checked every ten years or even sooner. It's very likely that in 10 – 15 years, your exposed fastener metal roof is going to need a re-screw.
silicone sealant
For a metal roof system, a silicone sealant is preferred as it adheres well to metal and other common construction materials. It also offers excellent moisture and UV protection and features exceptional joint movement capabilities.
That being said, metal roofs aren't indestructible, and they can leak. Here are five common reasons even properly installed metal roofs can leak. Roofing screws are responsible for the majority of leaks on metal roofs. Metal roofing screws seal water out by compressing a rubber washer at the base of the screw head.
Metal Roof Screw Replacement Cost
The cost of screw replacement for metal roofs is between $150 and $1,000. The price depends on the number of screws that need replacing. In some cases, only a small roof section may need replacement screws. In other situations, the entire structure might need new screws.