The reason you should repair rotten wood beams or other rotten wood in your home is that it spreads to other wood in your home. If you discover wood rot and do nothing about it, what was a simple remedy in the beginning may become a more serious problem later on. Are you looking for the most trustworthy roofers in Melbourne? Worry no longer; Roof Repair & Restoration Systems can provide experienced roofing service and repairs.
You want to make certain that you completely repair it so that it does not become a more costly repair project or grow so serious that you must pay a professional to remove and replace the beam.
Many wood beams are as long as 20 feet, so you'll probably need help repairing or replacing them. The wood beams in log cabins and homes are treated to withstand a variety of temperatures. Wood beams can be damaged by rain, wind, sun, and snow, and even when treated, they can deteriorate with time. It only takes one small untreated spot for issues to emerge.
When you discover decaying wood beams, you must decide whether to replace or repair them. Experts who see rotten wood beams claim that you can repair up to 20% of the wood beam before having to replace it.
You can fix surface damage that can progress to more severe wood beam rot up to a half-inch deep if you do it yourself. Before you can sand, prime, and repaint it, you must first repair it with spackling paste. If the damage is severe, apply an epoxy filler before rebuilding it as you would a less damaged wood beam.
Also, before repairing damaged wood beams, make sure they are dry. You might apply a wood preservative containing borate or copper in addition to the spackling paste or epoxy filler. If you caught the rotted wood beams in time, you can halt it with boric acid as long as the fungus haven't penetrated more than a quarter-inch.
Simply sprinkle or spray the boric acid all over the decayed area of the wood beam. You must leave it on for two to three days.
If you do need to replace the rotten wood beam, hire a professional to guarantee that it is done properly and correctly. The cost of replacing rotten wood beams might range anywhere between $600 and $3,000. It is dependent on the contractor and how much of the beam needs to be replaced.
When you have wooden furniture and home, such as cabinets, decks, and beams, it is unavoidable for fungi to breed, spread, and divide infesting in the wood, which finally leads to wood rot.
If you've been wondering how to repair rotten wood beams, this is the post for you!
Although your wood beams may be rotting, they may be in various stages of decay. Your beam may simply be rotting on the surface, which may be easily repaired with boric acid.
The rays may decay at the connecting locations, which must be carefully avoided. We discussed the various strategies for repairing rotten wood beams based on their stage of decay.
It is also critical that you understand the reasons of rot in wooden beams and how to prevent it, which are thoroughly detailed in this article.
A resounding YES to that question. If you do not repair rotting wood beams or any wood in the rotting process, the rot will spread to other wood in your home. The degradation worsens with time, and no wood near the rotting ones is safe.
If you observe that wood is decaying and decide to do nothing about it, what you ignored that would have required a simple repair method will become a major problem.
As a result, cure the wood rot as soon as you see it to avoid future costly repairs that may necessitate the services of a wood professional to correct the problem.
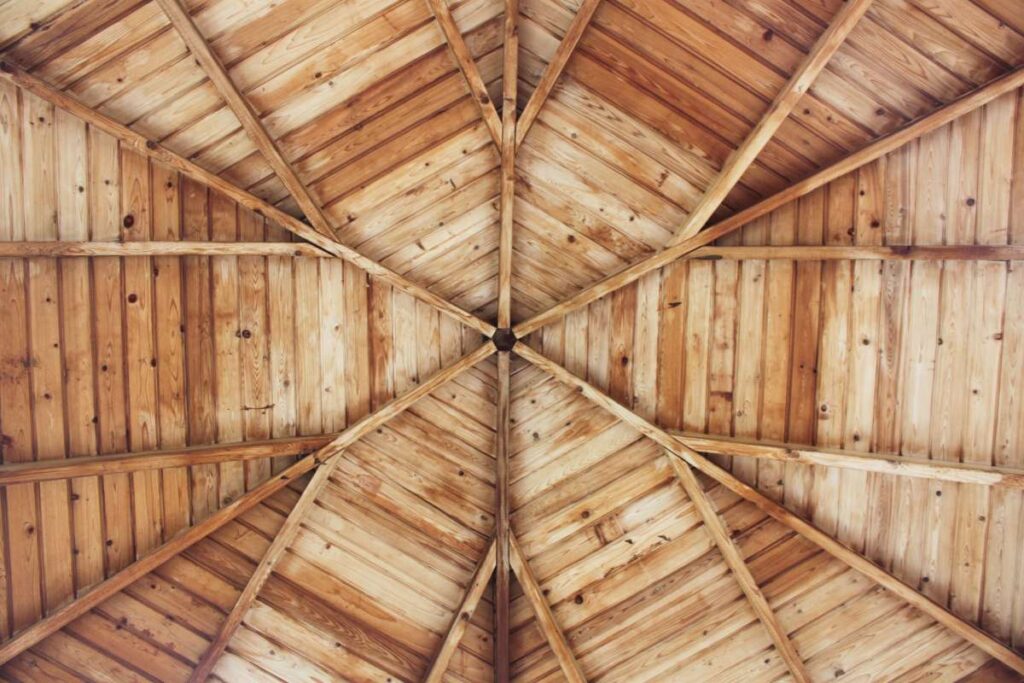
Those Dirty, Rotten Beams
Every day, you gaze up at their simple beauty, but you never see what's decaying there in front of your eyes: dry rot and water damage!
Mid-century modern architecture allows your home's outside horizontal beams to be easily exposed to the elements. The beams extend to or past the roof-edge framework. Their sensitivity is determined by the orientation of the home to the sun, the amount of exposure to adverse weather, and how well the beams are maintained.
A lack of routine maintenance ensures deterioration over time. Eichlers are largely affected in their atriums and carports, whereas Streng houses are mostly affected in their overhangs. Decades of exposure erode paint, leaving beams vulnerable to cracking, dry rot, and termites.
Dry rot is caused by a fungus that digests the portions of the wood that give it strength and rigidity. It all starts with too much wetness. Moisture can quickly attract termites, eat and ruin a beam, and compromise its structural integrity.
years of contractors who thought the job was "too tiny." "However, we noticed the condition worsening over time, with the roof collapsing and rot and decay spreading." We were running out of options."
Then she discovered Eichler experts in Construction Services. "They came in and did a good job," she says. "They replaced the beam from post to post—no jerry-rigging with a part taken off and patched with an insert."
When beams deteriorate, you have two options for maintenance: repair or replacement. A deteriorating atrium beam needed locating an experienced and willing contractor to coordinate a replacement for Eichler owner.
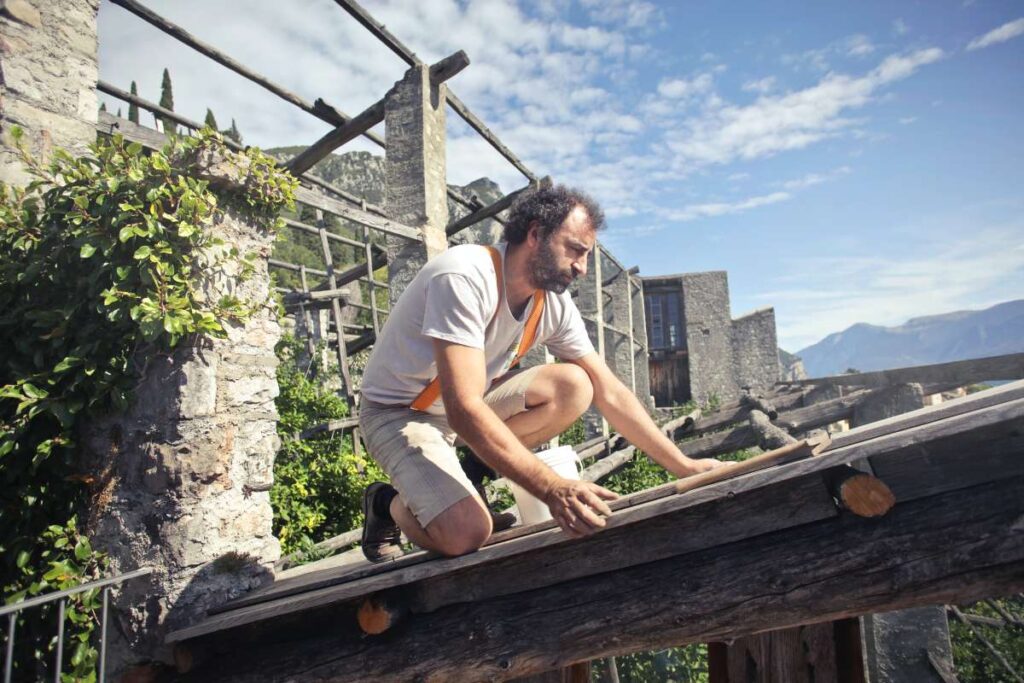
Telltale signs
Sometimes beam damage is evident, and other times it takes a lot of detective work to figure out since layers of fillers and coatings can hide the damage. If you haven't maintained or examined your beams in a while, it's time to hire a qualified contractor. However, before you take that step, you should search for unmistakable indicators of damage.
On Strength, crumbling or deformed beam ends—both symptoms of extensive decay—are the calling cards for damaged overhanging beams. Peeling paint, caulking that has detached from the wood, and the appearance of mildew or fungus are all signs of moisture issues.
Check for wood pushing downward and beam undersides that bubble out on Eichler beams. If a beam appears to be coming in, it could be an indication of dry rot or termites.
"Dry rot is a slow-growing problem, and people can become immune to it," says one expert. When you see a fracture or an indentation, it is a clue that something is wrong. To determine how deep the erosion is, you must enter the area and clean it out."
Replacing Rotted Beams on a Seaside Condo
On a recent project that was representative of many of the structural repairs we make along New Jersey's southern coast, we discovered extensive rot in many of the dimensional and engineered wood beams. The beams were not sufficiently detailed for protection from the relentless coastal rains that we experience in this region.
It's a harsh environment for wood: not only do we get a lot of wind-driven rain, but the ocean air is extremely humid all year. When wood isn't allowed to cure, it rots quickly—and engineered materials, with all of their adhesives, are no exception. Waterproofing under these situations entails more than simply deflecting water away from the structure; you must also devise a method to drain the building assembly and allow air to pass over the wetted structure to aid drying. Do you want to replace your roof? Then finest Glaze Roofing Systems can assist you.
Water was coming out of the aluminium capping that covered a beam above one of the condo owners' second-floor balcony.
The Problem
The issue was first noticed by one of the condo owners, who noticed water flowing out of the aluminium capping that covered a beam above his second-floor balcony. When we were called in to check the leak, we discovered mildew and rot in the beam beneath the capping. The balcony on which we were standing was supported by a similar beam in the carport's first-floor ceiling. We removed the coating off this beam as well and found comparable issues.
We were called in to inspect and found mildew and rot in the beam beneath the capping.
The homeowner warranty would cover the repairs because the complex was less than ten years old, so the insurance company was contacted. Because the beams are deemed common features and are the responsibility of the condo association rather than the individual owners, all of the beams in all three buildings of the complex had to be stripped of cladding and checked. After removing the coating from the remaining beams, it was revealed that several of them were in very poor condition.
A consultant engineer was recruited to inspect the beams and surrounding construction to identify which beams needed to be replaced and which could still be used structurally. Nine engineered beams and two dimensional-lumber beams had to be replaced in total. According to the engineer's findings, one of the unit's beams had deteriorated to the point where the structure was declared unsuitable to live and would have to be temporarily stored for the rental season. We were able to sustain both the balcony and the third-floor bedroom without impeding access or use of the areas because to the engineer's temporary shoring scheme.
The Cause
The beams were covered with an aluminium trim coil that trapped water at the assembly's bottom. As bad as that detail was, it would have been fine if the tops of the beams had been shielded, but that wasn't the case.
The second floors of the buildings have a decorative band around the perimeter that creates a break in the siding and is made up of a 2x8 topped in the aluminium trim coil. This ring moved ahead of the beams. It was sprayed on top of the sheathing and house wrap. This allowed water to enter the trough formed by the capping beneath the beam.
Over the beams, aluminium capping had been put, forming a trough and collecting water that had leaked in from above.
Because some of the lower beams had OSB sheathing on the front, they protruded past the front border of the fibreglass balcony. This let water to flow directly into the capping from the balcony. Because none of the buildings had gutters, when it rained, roof water ran straight down the vinyl siding.
There is a common misconception that because some engineered wood has so much glue, it is less prone to rot. Not so. An untreated Parallam beam recovered from the structure demonstrates how bad the bottom of an engineering beam may become by sitting in a dip caused by poorly planned aluminium capping.
We hired an architect to specify new beams and prepare a replacement plan after we received a list of the beams that needed to be replaced. The existing structure was made of both treated and untreated glulams and Parallams, and it will be replaced with exterior-rated Parallam beams.
The Solution
We noticed that much of the surrounding sheathing and structure had been weakened after removing the aluminium capping, siding, and soffits. We had covered most of this in our scope of work since we thought that if the beams were wet, so would the regions around them.
After removing the aluminium capping, siding, and soffits, we discovered that much of the surrounding sheathing and structure was also deteriorated, as expected.
Cutting through many nails, many of which were buried or difficult to access, was required to remove the beams. Some toenails were used in the upper beams to secure the trusses above and the 6x6 posts, king and jack studs below. A few of the beams also carried drywall screws, necessitating drywall repairs and repainting on interior walls.
We removed and disposed of the hangers and toenails that held the balcony joists in place on the lower beams. (Because we were close to the ocean, we later replaced them with stainless steel hangers and fasteners.) The plywood for the fibreglass balcony was nailed into the top of the beam, and finish nails were used to fasten a 1-by fascia board to the beam's outside face. At each end, the beams sat on bearing walls and were nailed to these wall plates.
In addition to all of those fasteners, we had to cut or remove several straps that connected the beam to the surrounding structure, as well as lag bolts that connected the balcony railing posts. We used a combination of reciprocating saws, oscillating tools, and grinders to cut the fasteners.
We could cut the old beams out once all of the fasteners were removed. Some came out in two parts and were simple to remove, whilst others had to be sliced into many pieces and took significantly more time and work.
The new beams were difficult to instal, but we used our adjustable support columns to elevate the structure and make way for the new beams.
Fitting the new beams required some care after we had a clean space. The old beams had squeezed at their bearing points, and the new beams didn't always have enough clearance. However, the movable columns utilised for our temporary supports came into play and simplified the job: we could slightly lift the structure with the screw jacks to get the space we need.
We partially loaded the new beams after nailing them in place and removed the temporary supports.
On the outside of the beam, we installed Home Slicker, a matrix-style rainscreen. Then, before joining a 2x8 band, we added 2-inch-wide strips of 3/4-inch marine plywood.
We placed Home Slicker, a matrix-type rainscreen, to the outer side of all the new beams to protect them from water and avoid decay. Before joining a 2x8 band, we put 2-inch-wide strips of 3/4-inch marine plywood. This component allows for unfettered water flow for precipitation or snowmelt that passes through the siding and flashings, as well as ample ventilation for drying.
We added a ventilated soffit at the bottom of the beam to allow water out and air in, and we used L-shaped bends of aluminium capping on both the exterior and interior sides of the upper beams.
To isolate the aluminium trim coil from the pressure-treated beams, we put Tyvek house wrap on the interior of the beam. We added a ventilated soffit at the bottom of the beam to allow water out and air in, and we used L-shaped bends of aluminium capping on both the exterior and interior sides of the upper beams.
We built a Z-bend on the exterior, which was taped to the sheathing under the house wrap and curved over the top edge of the band board. Any water that gets behind the siding will be forced to the outside over the beam. To prevent water from getting between the cladding and the beam on the lower beams, the capping was slid between the fibreglass fascia and the beam. We are roof repair specialists who take pleasure in providing superior roof repairs throughout Melbourne. Look into Roof Repair and Restoration Systems.
Before repairing the house wrap and reinstalling the siding, all damaged sheathing was replaced with water-resistant Zip sheathing. We had labelled all of the pieces when removing the siding and soffits, which made putting them back together much easier.
Conclusion
Many wood beams are as long as 20 feet, so you'll probably need help repairing or replacing them. Wood beams can be damaged by rain, wind, sun, and snow, and even when treated, they can deteriorate with time. It only takes one small untreated spot for issues to emerge. The cost of replacing rotten wood beams might range anywhere between $600 and $3,000. If you do need to replace the rotten wood beam, hire a professional to guarantee that it is done properly and correctly.
It is also critical that you understand the reasons of rot in wooden beams and how to prevent it. A lack of routine maintenance can cause beams to deteriorate over time. Dry rot is caused by a fungus that digests the portions of wood that give it strength and rigidity. Peeling paint, caulking that has detached from the wood, and appearance of mildew or fungus are signs of moisture issues. Many of the dimensional and engineered wood beams were not sufficiently detailed for protection from the relentless coastal rains that we experience in this region.
Waterproofing entails more than simply deflecting water away from the structure. Do you want to replace your roof? Then finest Glaze Roofing Systems can assist you. Nine engineered beams and two dimensional-lumber beams had to be replaced in total. One of the units' beams was deemed unsuitable to live in and would have to be temporarily stored for the rental season.
The existing structure was made of untreated and untreated glulams and Parallams. Cutting through many nails, many of which were buried or difficult to access, was required to remove the beams. A few of the beams also carried drywall screws, necessitating drywall repairs and repainting on interior walls. The old beams had squeezed at their bearing points, and the new beams didn't always have enough clearance. On the outside of the beams, we installed Home Slicker, a matrix-style rainscreen.
Before joining a 2x8 band, we put 2-inch-wide strips of 3/4-inch marine plywood. We added a ventilated soffit at the bottom of the beam to allow water out and air in.
Content Summary
- The reason you should repair rotten wood beams or other rotten wood in your home is that it spreads to other wood in your home.
- When you discover decaying wood beams, you must decide whether to replace or repair them.
- Experts who see rotten wood beams claim that you can repair up to 20% of the wood beam before having to replace it.
- Also, before repairing damaged wood beams, make sure they are dry.
- Simply sprinkle or spray the boric acid all over the decayed area of the wood beam.
- If you do need to replace the rotten wood beam, hire a professional to guarantee that it is done properly and correctly.
- If you've been wondering how to repair rotten wood beams, this is the post for you!Although your wood beams may be rotting, they may be in various stages of decay.
- We discussed the various strategies for repairing rotten wood beams based on their stage of decay.
- It is also critical that you understand the reasons of rot in wooden beams and how to prevent it, which are thoroughly detailed in this article.
- If you do not repair rotting wood beams or any wood in the rotting process, the rot will spread to other wood in your home.
- As a result, cure the wood rot as soon as you see it to avoid future costly repairs that may necessitate the services of a wood professional to correct the problem.
- A lack of routine maintenance ensures deterioration over time.
- Decades of exposure erode paint, leaving beams vulnerable to cracking, dry rot, and termites.
- "When beams deteriorate, you have two options for maintenance: repair or replacement.
- Telltale signsSometimes beam damage is evident, and other times it takes a lot of detective work to figure out since layers of fillers and coatings can hide the damage.
- If you haven't maintained or examined your beams in a while, it's time to hire a qualified contractor.
- However, before you take that step, you should search for unmistakable indicators of damage.
- On Strength, crumbling or deformed beam ends—both symptoms of extensive decay—are the calling cards for damaged overhanging beams.
- Peeling paint, caulking that has detached from the wood, and the appearance of mildew or fungus are all signs of moisture issues.
- Check for wood pushing downward and beam undersides that bubble out on Eichler beams.
- If a beam appears to be coming in, it could be an indication of dry rot or termites.
- On a recent project that was representative of many of the structural repairs we make along New Jersey's southern coast, we discovered extensive rot in many of the dimensional and engineered wood beams.
- The beams were not sufficiently detailed for protection from the relentless coastal rains that we experience in this region.
- Waterproofing under these situations entails more than simply deflecting water away from the structure; you must also devise a method to drain the building assembly and allow air to pass over the wetted structure to aid drying.
- Do you want to replace your roof?
- Water was coming out of the aluminium capping that covered a beam above one of the condo owners' second-floor balcony.
- The ProblemThe issue was first noticed by one of the condo owners, who noticed water flowing out of the aluminium capping that covered a beam above his second-floor balcony.
- When we were called in to check the leak, we discovered mildew and rot in the beam beneath the capping.
- We removed the coating off this beam as well and found comparable issues.
- We were called in to inspect and found mildew and rot in the beam beneath the capping.
- Because the beams are deemed common features and are the responsibility of the condo association rather than the individual owners, all of the beams in all three buildings of the complex had to be stripped of cladding and checked.
- After removing the coating from the remaining beams, it was revealed that several of them were in very poor condition.
- A consultant engineer was recruited to inspect the beams and surrounding construction to identify which beams needed to be replaced and which could still be used structurally.
- Nine engineered beams and two dimensional-lumber beams had to be replaced in total.
- According to the engineer's findings, one of the unit's beams had deteriorated to the point where the structure was declared unsuitable to live and would have to be temporarily stored for the rental season.
- We were able to sustain both the balcony and the third-floor bedroom without impeding access or use of the areas because to the engineer's temporary shoring scheme.
- The CauseThe beams were covered with an aluminium trim coil that trapped water at the assembly's bottom.
- The second floors of the buildings have a decorative band around the perimeter that creates a break in the siding and is made up of a 2x8 topped in the aluminium trim coil.
- An untreated Parallam beam recovered from the structure demonstrates how bad the bottom of an engineering beam may become by sitting in a dip caused by poorly planned aluminium capping.
- We hired an architect to specify new beams and prepare a replacement plan after we received a list of the beams that needed to be replaced.
- The existing structure was made of both treated and untreated glulams and Parallams, and it will be replaced with exterior-rated Parallam beams.
- We noticed that much of the surrounding sheathing and structure had been weakened after removing the aluminium capping, siding, and soffits.
- After removing the aluminium capping, siding, and soffits, we discovered that much of the surrounding sheathing and structure was also deteriorated, as expected.
- We removed and disposed of the hangers and toenails that held the balcony joists in place on the lower beams. (
- We could cut the old beams out once all of the fasteners were removed.
- The new beams were difficult to instal, but we used our adjustable support columns to elevate the structure and make way for the new beams.
- On the outside of the beam, we installed Home Slicker, a matrix-style rainscreen.
- Then, before joining a 2x8 band, we added 2-inch-wide strips of 3/4-inch marine plywood.
- We placed Home Slicker, a matrix-type rainscreen, to the outer side of all the new beams to protect them from water and avoid decay.
- This component allows for unfettered water flow for precipitation or snowmelt that passes through the siding and flashings, as well as ample ventilation for drying.
- We added a ventilated soffit at the bottom of the beam to allow water out and air in, and we used L-shaped bends of aluminium capping on both the exterior and interior sides of the upper beams.
- To isolate the aluminium trim coil from the pressure-treated beams, we put Tyvek house wrap on the interior of the beam.
- We built a Z-bend on the exterior, which was taped to the sheathing under the house wrap and curved over the top edge of the band board.
- Any water that gets behind the siding will be forced to the outside over the beam.
- To prevent water from getting between the cladding and the beam on the lower beams, the capping was slid between the fibreglass fascia and the beam.
- We are roof repair specialists who take pleasure in providing superior roof repairs throughout Melbourne.
- Before repairing the house wrap and reinstalling the siding, all damaged sheathing was replaced with water-resistant Zip sheathing.
- We had labelled all of the pieces when removing the siding and soffits, which made putting them back together much easier.
Frequently Asked Questions About Rotted Beam
Beam and Joist Rot
- Remove any loose wood and allow the beam to become reasonably dry.
- Saturate the beam end with our CPES™.
- Wait for several days (or longer).
- Fill the vacant area with our Fill-It™ Epoxy Filler or new CPES-treated wood bonded with the Fill-It Epoxy Filler.
Support Beam Replacement
The average cost of replacing a support beam in a home's living space or basement is $6,500 to $25,000 or more. Replacing a beam in a crawl space will likely cost between $1,500 and $4,000, and the average cost to repair or clean a crawl space is about $6,000
The price for beams that fit 10 feet of space will range from $3 to $5 per linear foot, while a 20-feet span will need a beam that costs $6 to $11 per linear foot.
A joist and a girder are both types of beams. The term “beam” is a general, all-encompassing term that refers to a structural member in a structure that supports a roof or floor above it. A rafter is the main load-bearing beam in a structure and is supported by posts. A joist is a structural member supported by beams.
Generally, when the wall in question runs parallel to the floor joists above, it is not a load-bearing wall. But if the wall runs perpendicular (at a 90-degree angle) to the joists, there is a good chance that it is load-bearing.