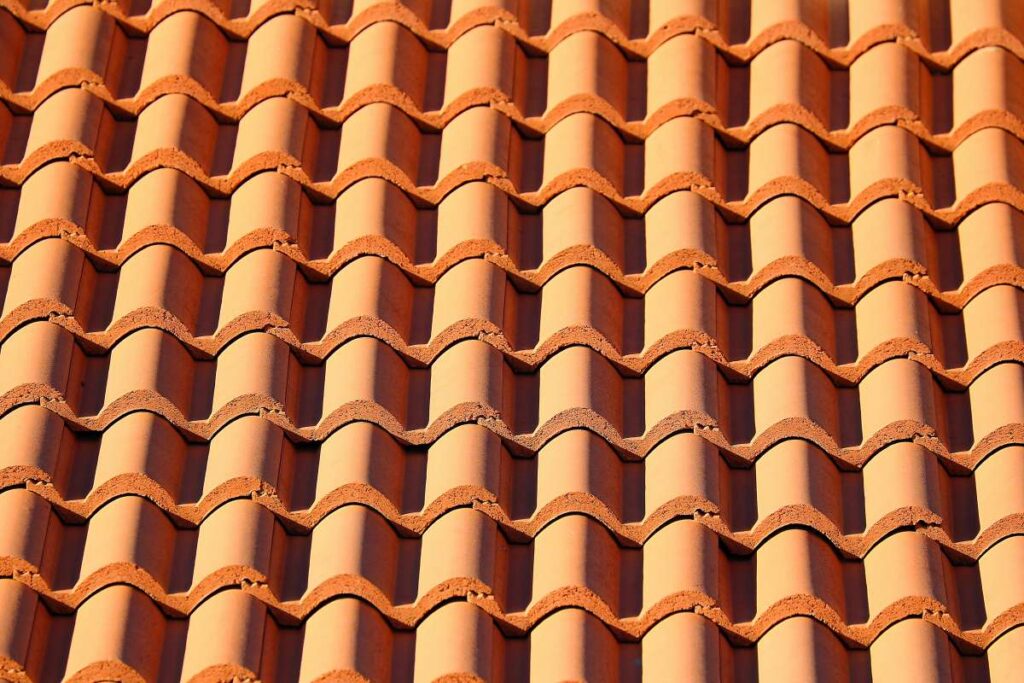
Terracotta roof tiles are a popular choice among building companies since they are made from natural materials and have a low environmental impact. Furthermore, they aid in keeping a comfortable indoor temperature in our humid and muggy climate.
Clay roofs require less maintenance. On the other hand, if you don't perform normal maintenance on your tiles, such as cleaning and sealing at regular intervals, you'll shorten their lifespan in half. The most crucial step in this sort of maintenance is to thoroughly clean the roof to remove any dirt, mould, algae, or other unwanted particles that have gathered on the tile surface.
What are the benefits of getting your roof cleaned? Why should we bother cleaning our roof if no one else notices how filthy it is? Why should we care if no one else notices how filthy your roof is?
The benefits of cleaning your roof tiles.
- They appear to have progressed.
- Avoid algae damage.
- Increase the amount of time your roof tiles can last you.
- A chance to undertake a roof examination before the damage worsens.
While you and I may not see the buildup of mould, grime, and dirt on your roof, it is the first thing that visitors to your home notice. Cleaning the grime that has gathered on your roof tiles improves the overall impression that people have of your property.
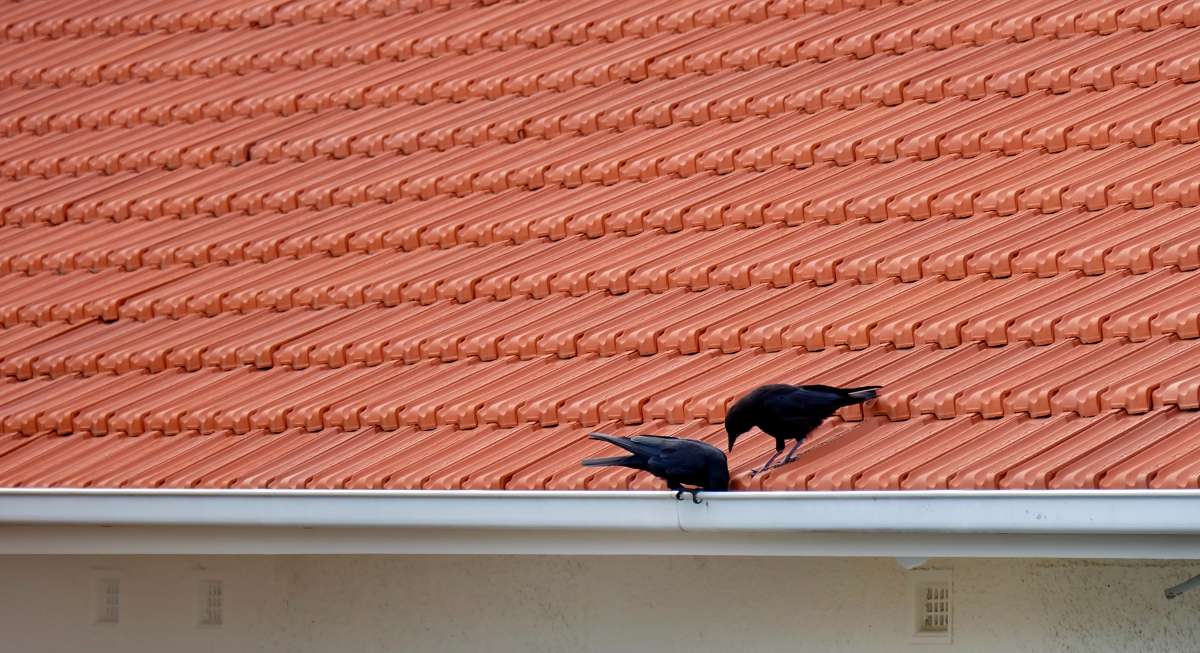
If mould, algae, lichen, and moss are developing on your roof tiles, they can all move into your roof cavity and spread throughout your home by airflow. Roof tiles can also support the growth of moss. It is even more important to maintain your roof tiles clean on a regular basis if any members of your family are prone to allergic reactions or respiratory diseases.
Cleaning Your Terracotta Roofing Tiles
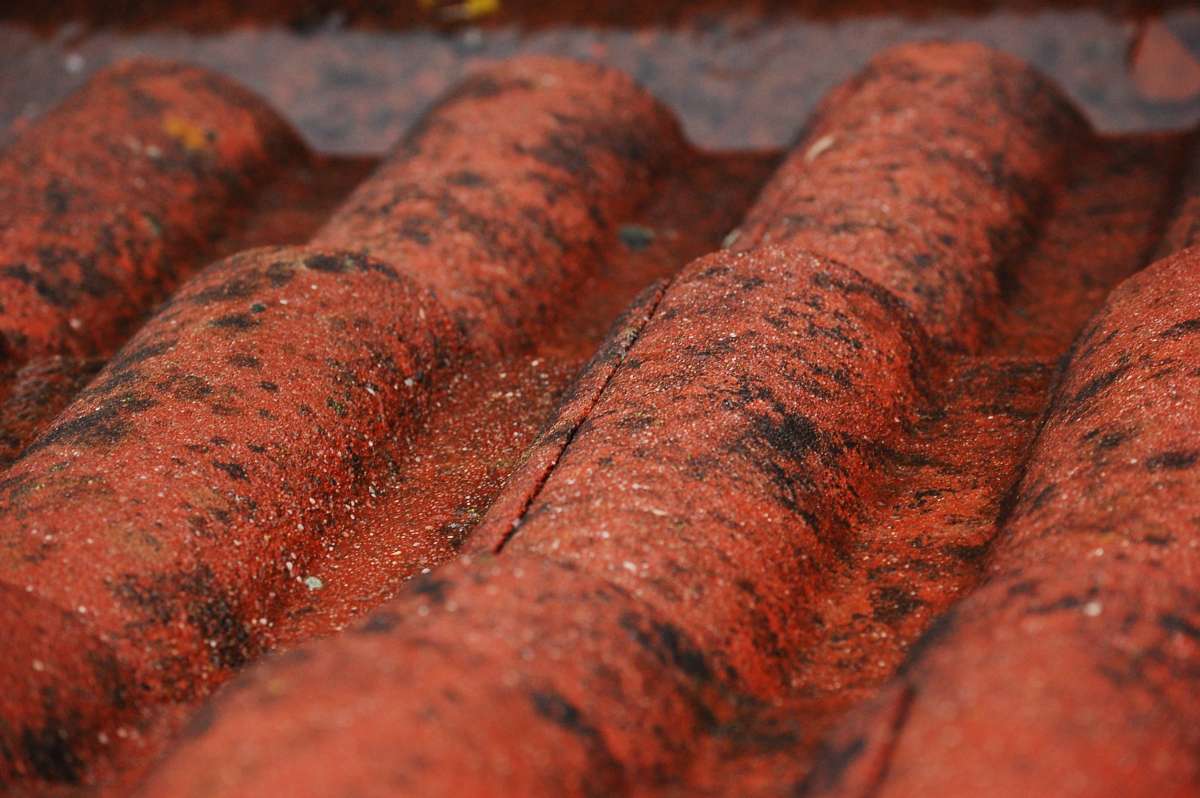
Although cleaning your roof is time-consuming, failure to do so can cause individual tiles to deteriorate and eventually produce holes. Even if your tile roof does not appear dirty, one of the first things you will notice is that it has started to lose its beautiful crimson colour.
When your terracotta roof in Clearwater grows dull, it's time to think about pressure washing it. Cleaning roof tiles properly will allow you to take the essential precautions to safeguard them and extend the life of the roof that covers your building.
Steps To Cleaning Your Roof Tiles
The benefit of cleaning your roof is that the process will enable you to undertake an inspection of individual tiles, allowing you to identify those that may be cracked or damaged in various ways as a result of severe weather or simple wear and tear.
When even very little damage is allowed to progress, it might eventually result in serious issues. Therefore, before doing anything else, you need to do a thorough inspection of the roof, identify any problem areas, and fix them if necessary. After the examination, it is imperative that you carry out these procedures.
Maintain Safety
When cleaning terracotta roofing tiles, exercise extra caution at all times. After being sprayed with water and a cleaning solution, the tiles of this kind of roofing can quickly become dangerously slippery, making the task of cleaning the roof a potentially hazardous endeavour. Put on some shoes with treads that are meant to grip the ground well.
Because of the curvature of the tiles, a person won't be supported correctly if they stand on the roof; thus, whenever possible, stand on a sturdy ladder instead. If you must step on a set of tiles, try to keep your weight concentrated on the lower third of each one to minimise the amount of damage done. This portion of the tile is more effectively supported by the tiles below it. Try to avoid walking on the hips and valleys of the roof.
Cleaning Dirt, Mold And More
Mold can readily grow on your roof if you live in or around Clearwater because of the humid climate here and in the neighbouring areas. In addition, if you live close to the water, the presence of algae may make the situation even worse. The presence of these substances will not only cause terracotta roof tiles to become more fragile, but they will also obstruct drainage, which can result in damaged tiles in other areas of the roof or even leaks.
The use of pressure washing is the most effective method for cleaning roofs; nevertheless, this method requires users to exercise caution when using the associated apparatus.
In order to prevent the tiles from being broken, the pressure washing machine should be set to a low setting, roughly 1,200 PSI. Additionally, when cleaning your roof, pay attention to the guidelines that the manufacturer gives you regarding the angle that you should use. This will help you avoid breaking anything.
Use a solution that consists of one part water and one part common household bleach to clean the surface of the roof. In addition to this, you can use a commercial cleaner to assist you in removing grime and any other unwelcome particles. Before you use your pressure washer, you should make sure that the vegetation around your structure is covered. This is because the runoff containing the bleach solution may do harm to some of the plants that are in the area.
If you want to prevent particles from building up on your tile roof, a decent rule of thumb is to wash it every two years. However, if you see development before that time, you shouldn't be afraid to undertake the cleanup more frequently.
Rinse The Roof
It is necessary to perform a final rinsing of the surface, even if the cleaning solution that you use on the terracotta tiles won't cause any damage to the roof. The tiles can be preserved for a longer period of time and prepared for sealing and other protective measures if they are simply rinsed to remove any detergents or cleaning solutions that may have been used.
Post-cleaning Tasks
After you have cleaned the terracotta tiles on your roof, you need take precautions to ensure that they are not damaged in any way. Primers and sealants are utilised in order to hermetically seal the terracotta tiles as part of the protection procedures. At this time, it is essential to replace any tiles that are broken, loose, or missing in order to make certain that the roof is intact and does not have any other types of damage.
Protecting against efflorescence involves avoiding the appearance of white streaks and other light traces. This is especially important when tiles are already in use. This takes place as a result of the clay reacting to the air and the rainwater. Buff newly cleaned tiles with cloths made of clean, dry cotton to ward off the possibility of this front occuring.
A Better Way To Clean Your Terracotta Roof
When you attempt to clean your terracotta roof tiles, you are faced with a number of unknowns, one of which is the most effective and appropriate method for cleaning the surfaces. You have undoubtedly done some research on "roof cleaning near me" at some point. Therefore, why not delegate the work to a company that has prior experience?
The greatest pressure washing services for roof tiles, siding, and other external elements can be found at Pressure Washing Clearwater, which is your source for these services.
When you hire our services to clean your roof, not only will you have more time to spend on the activities that bring you joy, but the quality of the work will also be superior to what you could do on your own. Terracotta roofing tiles may be cleaned in a way that is safe by our professionals, which means that they also know how to clean them more effectively. Intrigued? You really ought to be.
Methods for Cleaning Roof Tiles
- Engage the services of a qualified roof cleaning crew.
- Utilise a pressure cleaner along with a cleaning solution designed specifically for roof tiles.
- Utilise a Product That Requires No Drying Out
How To Pressure Clean Your Terracotta Roof Tiles
When properly maintained, terracotta roof tiles, a common roofing material in Sydney's older, more traditional neighbourhoods, take on a stunning appearance.
Mold, oil, and dirt buildup on terracotta roof tiles can be prevented if these substances are removed during routine cleaning.
You should have a plan of action for your roof time before you get up there. Identify the starting point of your cleanup. First-time roof cleaners often find themselves in sticky situations since they haven't thought out the best way to clean their roof. It's best to start at the very top and work your way down the building.
A mould remover should be applied to the surface from the outermost part and worked towards the centre. Please soak it for the period specified by the manufacturer.
It's time to blow the grime away from the tiles after the disinfectant has had a chance to work its way into the porous surface.
Before utilising a pressure washer to clean your home, you should empty the gutters and downpipe. We must now get down to business, so prepare accordingly.
Although you should use a pressure washer set to around 3000 psi, cleaning older, more fragile tiles requires a lower setting. Keeping the pressure setting on your pressure washer at the medium level will provide you with sufficient force to remove stubborn stains from your tiles. The tiles won't break if you do this.
Using long, smooth strokes and keeping the nozzle at a distance of about 30 centimetres, you will wipe the surface clear of the cleaning solution and any debris that has settled there. You need to begin at the exit and make your way backwards until you reach dry ground. Break up the work into smaller, more doable tasks. Clean up that area thoroughly, and then go on to the next. To focus on making your way safely across your roof will be much easier.
Too much force can crack the tiles and force water into the roof's hollow, causing costly repairs. Although it might be tempting to crank up the intensity in order to get things done faster, that approach rarely ends well.
Zebra stripes can be avoided by carefully cleaning the surface in a uniform manner while keeping the nozzle at least 30 centimetres away from the surface. So that water doesn't get pushed up under the shingles and into the roof hollow, it's crucial that the proper angle be maintained.
The most secure portion of the floor is the overlap between tiles, thus that's where you want to put your feet when walking. Avoid damaging the tiles by treading lightly and carefully so as not to crack, snap, or otherwise damage them. Find the rafters and beams that will sustain your weight before you set foot on the roof.
Tips for Cleaning Your Roof with Wet & Forget
Wet & Forget is the easiest treatment available for cleaning off lichen, algae, moss, and mould. Pressure washing is the most effective method for eliminating mould from a roof, but this alternative is faster and more convenient. Better results will be achieved, however, with the use of pressure cleaning.
Make sure there will be no rain on your planned day trip. One part product to five parts water is the recommended dilution for use in a garden sprayer. Wet down the area of the roof that will be the primary focus of the cleaning. By starting at the farthest point and working your way back, you can be sure that your feet are always on dry ground. Concentrate the fluid on the dirtiest parts of the roof and scrub thoroughly. The product can be installed by only being set down on the roof.
Nothing to spray, scrub, or rinse. Leaving the product alone and letting it clean itself out over time is the best option. The manufacturer estimates a time frame of "six to twelve months" before the roof is completely free of debris. Keep in mind that although this is the quickest and most painless way to get rid of mould and mildew, it will not get rid of the grime, grease, and dirt that has accumulated on the roof tiles.
How To Repair A Leaking Roof
In terms of necessary repairs, roofs are constantly at the top of every homeowner's priority list. This is great news because it means you won't have to pay for expensive expert help for trivial issues.
Finding the source of the leak is the first step in fixing the roof, but you'll also want to fix any broken shingles or shakes, tears in the flat roll roofing, or cracks in the joints. Roof inspections are recommended if the roof is more than 20 years old, has extensive damage, shows signs of structural problems, or has a high likelihood of leaking.
Repairing Roof Shingles Made of Asphalt
Water staining on the ceiling is an indicator that you should look for roof damage.
As an alternative, I suggest you wait for it to rain so you can pinpoint the source of the leak. The water damage in your home should prompt you to look for the leak's origin, if you haven't already. You should check the attic for mould and water damage using a flashlight if you have one.
Note the exact location of any clues you find, and then check the exterior of your home in that area.
- The areas of a slanted roof that are higher than the points within your home where you've detected leak symptoms should be checked. As water begins to seep in through the hole, it is pulled downward by gravity and eventually reaches the attic.
- For a minute or two at a time, move a hose across the roof's various sections if you're having issues. Send in a scout to look for leaks and report back to you.
Check For Extensive Damage To Your Roof
Investigate the general condition of your roof, and look specifically for damaged or missing shingles around the leaking spot. Look for signs of considerable wear and tear, such as a high percentage of missing or damaged shingles, wide cracks where the roof material meets vents or a chimney, and so on.
- Changing out a few shingles or patching up small holes or cracks in the roof are examples of easy repairs that can be made. However, if your roof is older than 20 years, symptoms of roof failure include failing shingles in specific spots and overall wear and tear.
- Furthermore, if you check your attic and notice extensive rot or mould on your roof boards or trusses, you may have structural issues that require the attention of a professional roofing contractor.
Reattach Curled Roof Shingles After Straightening Them
After some time has passed, it is common for the corners of asphalt shingles to curl. Make sure any tiles that have curled back are carefully smoothed out, and then use a caulking gun to apply a small amount of roof sealant under each of the raised corners. Following this, roof cement should be applied to the shingle's edges using a trowel, and the shingle should be pressed into place.
- Shingles soften and expand in the heat. Since shingles are more easily damaged when it's cold outside, you might need to use a blow dryer on a shingle that has become crinkled. Avoid using a heat torch or anything hotter than a blow dryer if you care about the shingle's condition.
Use Roof Sealant To Fix An Uncluttered Hole
A shingle with a clean tear in it does not need to be repaired. Instead, use a caulking gun to apply a thick bead of roof sealant under the crack. To finish, you need to apply another bead of sealant over the crack and then push the shingle back down. In the end, a putty knife should be used to smooth the top bead along the crack's two edges.
- Look for asphalt granule accumulations around the roof and in the gutter to hide the signs of repair work. To get the right shade for your shingles, collect a small amount and mix it into the sealant.
Repair any Damaged or Missing Roofing Shingles
The hardware store is the place to go to find a replacement shingle if one is broken or missing. Carefully pry the shingles above the damaged one up with a bar to remove it. Then, scrape away the leftover roofing cement from the space just beneath the damaged shingle, and use a hammer to pry up the nails from the shingle's four corners.
- Apply heat from a blow dryer to the area around the damaged shingle to soften it up, if necessary. Once the old shingle is removed, use a utility knife to round the back corners of the new shingle so that it may be more easily installed. This step must follow the removal of the previous shingle.
- After the new shingle has been slipped into place, the shingle above it should be carefully removed. Nail the shingle into place with 1 14-inch (3.2 cm) galvanised roofing nails in each of the four corners.
- Replace any nails that you removed from the broken shingle that were securing the one above it.
- Finally, use a trowel to spread roofing cement over the nail heads and edges of the newly installed shingle.
Repairing Damaged Roll Roofing
Examine The Roofing For Cracks Or Blisters
If the roof were constructed of shingles, you would look for signs of damage on the outside of the structure to explain the water stains you've seen on the ceiling. Look carefully for tiny fractures in the roofing material wherever penetrations occur, such as around joints, vents, chimneys, and other objects. Visible leaks include splits or holes in the roof, as well as water and air accumulation that has led to blisters or bubbles.
- To repair even the tiniest cracks around chimneys, vents, and joints, use roofing sealant. Holes, open splits, or blistering regions bigger than 0.64 centimetres (0.25 inches) must be repaired.
- Repairing asphalt or rubber roll roofing is easy and similar to fixing shingle roofing. But if you see general wear, water stains, mould, or rot on the roof or ceiling, you should call in an expert.
Remove Air and Water from Blisters by Slicing Them
First, clean the area to ensure there is no foreign matter present, and then, very carefully, cut into the centre of the blister with a utility knife. If you need to make a hole in the roof, only cut through the blister on the surface; don't go through the roof substrate or the fibreboard beneath the rubber or asphalt.
- Using a dry cloth, wipe away any moisture from the blister. After the damp area has been wiped up, give it 12 to 24 hours to dry. A hair dryer can help speed up the drying process if time is of the importance, but it's important to wait until the item is completely dry before trying any repairs.
- Blisters form on leaky roll roofing quite often. If there is no blister in relation to your leak, you can continue on to fixing the tear without doing this.
Evenly apply roofing cement under the crack.
Inspect the fibreboard base that is beneath the damaged rubber or asphalt. If the substrate is in good condition, the tear can be repaired by spreading cement with a thick layer under the damaged edges and smoothing it out with a little trowel. The cement should be pushed as far beneath the margins of the roofing as possible to stop any further tearing.
- To secure the patch, three inches (or seven and a half centimetres) apart galvanised roofing nails should be driven down either side of the repair once the cement has dried.
- If the fibreboard substrate isn't in good shape, you'll need to fix the broken section.
If the roof's substrate needs to be replaced, do so. If you're dealing with a large open seam, you should inspect the roof substrate for rot or holes. The substrate of a roof is the layer below the asphalt or rubber. If it's failing, you can get rid of the bad part by cutting it out with a straightedge and a razor-sharp utility knife. Next, carefully remove the damaged roofing by cutting out a rectangle-shaped section of roof.
- You should inspect the roof substrate for metal washers and screws that may be holding it to the underlying structure.
- High-density fibreboard can be found at your local hardware store, and you can use it to make a new substrate if you just cut off a small section. To do this, make a copy of the section you just cut out.
- After you have the new substrate in the right spot, use roofing screws with 1 12 in. (3.8 cm) long built-in hex washers to secure it there.
Roll roofing should be used to cover the repaired area.
Cutting a new patch of tar paper or rubber roll roofing that is 12 inches wider and 30 centimetres longer than the portion that was repaired is acceptable if it was not necessary to replace the roof substrate. Once the hole has been patched, roof cement should be liberally spread around the surface, and the patch should be installed on top. Drive 1 14-inch (3.2-centimeter) galvanised roofing nails every three inches over the patch's edges after giving it a gentle squeeze (7.6 centimetres).
- If the substrate was really replaced, then proceed to add more and more layers of rubber roll roofing until the region is flush with the roofing material all around it. Apply a thick layer of cement to the patched area, and then cover it with a piece of tar paper or rubber roll roofing that is at least 12 inches (30 cm) longer and wider than the damaged area.
- Once you get the patch in place, give it a gentle squeeze to make sure it is secure, and then nail it down using roofing nails. Make sure the nails used to secure the patch do not intersect with the fasteners holding the fibreboard substrate in place.
Ensure that the hole is completely sealed by applying a final coat of roofing cement.
The following steps can be taken after the patch has been applied:
- Use your trowel to spread a thick layer of roofing cement over the entire repaired area.
- Cement should be applied around the patch's edges, with the nail heads covered as you proceed.
- For a seamless, water-resistant finish, it's necessary to feather the cement past the patch's edges with a putty knife.
- When installing asphalt roll roofing, spread a layer of asphalt gravel over the wet cement. As a result, the asphalt will be better able to withstand rain. It will help keep the roofing material safe.
Repairing Missing or Damaged Wood Shakes
Search For Roof Damage
If you haven't found the leak's origin yet, treat the roof like any other and follow the same procedures. Look at the roof from the outside to see if there are any damaged spots that could mean there is a leak inside. Inspect the roof regularly for damage, such as missing shingles, deteriorating flashing, and other flaws.
- Shakes, unlike asphalt shingles, are made entirely of wood. If you have slate shingles, you'll need to remove the nails and break them just like you would with wooden shakes.
- While it's not too difficult to repair a shingle or shake here, any damage beyond that should be looked at by an expert.
Hammer and chisel to break up shaky pieces that have been damaged
A chisel should be placed carefully within the broken shaking, and then pounded with a hammer. The neighbouring shakers won't be harmed if you utilise a regulated, consistent motion.
- Using pliers, split the shattered shake into segments, and then pull out the separate pieces.
Remove the broken shaker by cutting the nails holding it in place with a hacksaw.
If you look inside the gap left by the missing shingle, you should be able to locate the nails that were holding it in place. To cut the shingle just above the one you just removed, lower the hacksaw's blade. Those protruding nails on the roof board will need to be cut using a saw so that you can instal the new shingles.
- Please use great care while using a hacksaw or any other similar sharp tool. If you are uncomfortable with your competence with saws, hammers, or other implements when working at an incline, it is recommended that you employ a professional.
Reduce the size of the existing shake by cutting a new one
You may get a replacement shake that is a perfect match for the ones already on your roof by shopping either online or at a local hardware store. Following this, you'll need to measure the width of the area where the old shake was sitting, and then use a utility knife or a saw with fine-toothed slats to cut the new shake to size.
- If the new shake needs room to expand during installation, trim its width to around 0.95 centimetres (3/8 inch).
Put in the new shake, then nail it down with two galvanised nails.
First, slide the new shaking beneath the existing one atop the gap, and tap it until it is within an inch (2.5 cm) of its final location (it should stick out a bit). Two galvanised wood shingle nails are then driven into the new shake at an upward angle, right below the edge of the shake directly above it.
- After that, you'll need to press a block of wood on the new shaking and tap it into place with a hammer. The nail heads under the shaking will be lifted when it pushes the final quarter inch (2.5 centimetres) into place.
- If you are unable to secure the nails in place using this manner, you should instead hammer them into the wood immediately below the shake that is situated above the replacement.
Roofing cement should be used to cover any protruding nail heads.
Shake should be placed over the replacement, and if it doesn't entirely cover the nail heads, cement should be dabbed over each one. The cement's surface can then be evened out with a putty knife or a little trowel.
- If the sealant holding your shakes or shingles together was damaged when you removed the old piece, you should apply a bead of roof sealant or cement around the edges of the replacement shake. Shakes or shingles that aren't sealed together should be removed and replaced.
Conclusion
If you don't perform regular maintenance on your tiles, you'll shorten their lifespan in half. Failure to do so can cause individual tiles to deteriorate and eventually produce holes. Cleaning roof tiles properly will allow you to take the essential precautions to safeguard them. When cleaning terracotta roofing tiles, exercise extra caution at all times. After being sprayed with water and a cleaning solution, the tiles can quickly become dangerously slippery.
Mold can readily grow on your roof if you live in or around Clearwater because of the humid climate. If you want to prevent particles from building up on your tile roof, a decent rule of thumb is to wash it every two years. Primers and sealants are utilised in order to hermetically seal the terracotta tiles as part of the protection procedures. pressure washing services for roof tiles, siding, and other external elements can be found at Pressure Washing Clearwater. Terracotta roof tiles may be cleaned in a way that is safe by our professionals, which means that they also know how to clean them more effectively.
Wet & Forget is the easiest treatment available for cleaning off lichen, algae, moss, and mould. Wet down the area of the roof that will be the primary focus of the cleaning. Pressure washing is the most effective method for eliminating mould from a roof. Roof inspections are recommended if the roof is more than 20 years old or has extensive damage. Water staining on the ceiling is an indicator that you should look for roof damage.
Leaving the product alone and letting it clean itself out over time is the best option. If your roof is older than 20 years, symptoms of roof failure include failing shingles in specific spots and overall wear and tear. If you notice extensive rot or mould on your roof boards or trusses, you may need a professional roofing contractor to help repair them. Repairing asphalt or rubber roll roofing is easy and similar to fixing shingle roofing. But if you see general wear, water stains, mould, or rot on the roof or ceiling, you should call in an expert.
The hardware store is the place to go to find a replacement shingle if one is missing. Blisters form on leaky roll roofing quite often. If there is no blister in relation to your leak, you can continue on to fixing the tear. If the substrate is in good condition, the tear can be repaired by spreading cement under the damaged edges and smoothing it out with a little trowel. Cut a new patch of tar paper or rubber roll roofing that is 12 inches wider and 30 centimetres longer than the damaged area.
Drive 1 14-inch (3.2-centimeter) galvanised roofing nails every three inches over the patch's edges after giving it a gentle squeeze. Use careful care while using sharp tools when working at an incline if you are uncomfortable with sawing at uneven angles. Shakes or shingles that aren't sealed together should be removed and replaced. Two galvanised wood shingle nails are driven into the new shake at an upward angle. The nail heads will be lifted when it pushes the final quarter inch (2.5 centimetres) into place.
Content Summary
- What are the benefits of getting your roof cleaned?
- Increase the amount of time your roof tiles can last you.
- When your terracotta roof in Clearwater grows dull, it's time to think about pressure washing it.
- Cleaning roof tiles properly will allow you to take the essential precautions to safeguard them and extend the life of the roof that covers your building.
- Maintain SafetyWhen cleaning terracotta roofing tiles, exercise extra caution at all times.
- In order to prevent the tiles from being broken, the pressure washing machine should be set to a low setting, roughly 1,200 PSI.
- Additionally, when cleaning your roof, pay attention to the guidelines that the manufacturer gives you regarding the angle that you should use.
- Use a solution that consists of one part water and one part common household bleach to clean the surface of the roof.
- Rinse The RoofIt is necessary to perform a final rinsing of the surface, even if the cleaning solution that you use on the terracotta tiles won't cause any damage to the roof.
- A Better Way To Clean Your Terracotta RoofWhen you attempt to clean your terracotta roof tiles, you are faced with a number of unknowns, one of which is the most effective and appropriate method for cleaning the surfaces.
- The greatest pressure washing services for roof tiles, siding, and other external elements can be found at Pressure Washing Clearwater, which is your source for these services.
- Methods for Cleaning Roof Tiles Engage the services of a qualified roof cleaning crew.
- Utilise a pressure cleaner along with a cleaning solution designed specifically for roof tiles.
- Before utilising a pressure washer to clean your home, you should empty the gutters and downpipe.
- Keeping the pressure setting on your pressure washer at the medium level will provide you with sufficient force to remove stubborn stains from your tiles.
- Using long, smooth strokes and keeping the nozzle at a distance of about 30 centimetres, you will wipe the surface clear of the cleaning solution and any debris that has settled there.
- Clean up that area thoroughly, and then go on to the next.
- Better results will be achieved, however, with the use of pressure cleaning.
- Wet down the area of the roof that will be the primary focus of the cleaning.
- Concentrate the fluid on the dirtiest parts of the roof and scrub thoroughly.
- The water damage in your home should prompt you to look for the leak's origin, if you haven't already.
- You should check the attic for mould and water damage using a flashlight if you have one.
- Send in a scout to look for leaks and report back to you.
- Check For Extensive Damage To Your Roof
- Investigate the general condition of your roof, and look specifically for damaged or missing shingles around the leaking spot.
- Reattach Curled Roof Shingles After Straightening ThemAfter some time has passed, it is common for the corners of asphalt shingles to curl.
- Look for asphalt granule accumulations around the roof and in the gutter to hide the signs of repair work.
- To get the right shade for your shingles, collect a small amount and mix it into the sealant.
- The hardware store is the place to go to find a replacement shingle if one is broken or missing.
- Carefully pry the shingles above the damaged one up with a bar to remove it.
- After the new shingle has been slipped into place, the shingle above it should be carefully removed.
- Nail the shingle into place with 1 14-inch (3.2 cm) galvanised roofing nails in each of the four corners.
- Repairing asphalt or rubber roll roofing is easy and similar to fixing shingle roofing.
- But if you see general wear, water stains, mould, or rot on the roof or ceiling, you should call in an expert.
- Using a dry cloth, wipe away any moisture from the blister.
- Evenly apply roofing cement under the crack.
- Inspect the fibreboard base that is beneath the damaged rubber or asphalt.
- If the fibreboard substrate isn't in good shape, you'll need to fix the broken section.
- If the roof's substrate needs to be replaced, do so.
- Next, carefully remove the damaged roofing by cutting out a rectangle-shaped section of roof.
- Cutting a new patch of tar paper or rubber roll roofing that is 12 inches wider and 30 centimetres longer than the portion that was repaired is acceptable if it was not necessary to replace the roof substrate.
- Once the hole has been patched, roof cement should be liberally spread around the surface, and the patch should be installed on top.
- Apply a thick layer of cement to the patched area, and then cover it with a piece of tar paper or rubber roll roofing that is at least 12 inches (30 cm) longer and wider than the damaged area.
- Ensure that the hole is completely sealed by applying a final coat of roofing cement.
- Inspect the roof regularly for damage, such as missing shingles, deteriorating flashing, and other flaws.
- While it's not too difficult to repair a shingle or shake here, any damage beyond that should be looked at by an expert.
- Hammer and chisel to break up shaky pieces that have been damagedA chisel should be placed carefully within the broken shaking, and then pounded with a hammer.
- Remove the broken shaker by cutting the nails holding it in place with a hacksaw.
- Those protruding nails on the roof board will need to be cut using a saw so that you can instal the new shingles.
- Reduce the size of the existing shake by cutting a new oneYou may get a replacement shake that is a perfect match for the ones already on your roof by shopping either online or at a local hardware store.
- Put in the new shake, then nail it down with two galvanised nails.
- After that, you'll need to press a block of wood on the new shaking and tap it into place with a hammer.
- If the sealant holding your shakes or shingles together was damaged when you removed the old piece, you should apply a bead of roof sealant or cement around the edges of the replacement shake.
Frequently Asked Questions About Terracotta Roof Tiles
The most effective system for cleaning terracotta or concrete roof tiles is using a pressure washer. This can effectively eliminate moss and other foreign elements. A normal washing detergent can also be mixed with water.
Sealing of Terracotta Tiles is necessary to protect them from premature decay and contamination, i.e., oil, grease and dirt. Even old Terracotta Tiles and grout can be cleaned and resealed to give them back a new lease of life!
Not only will these substances weaken terracotta roof tiles, but they also interfere with drainage, which can also lead to broken tiles in other areas or even leaks. The best way to perform roof cleaning is through pressure washing, which means you also need to take care when operating the machinery.
about 50 years
The life expectancy of terracotta roof tiles can be as long as 75 years with proper maintenance. Even on the low end, terracotta roofs last for about 50 years. For most people, that is the entire life that they'll spend in a home.
Broken tiles can easily compromise the roof's integrity, leading to structural and roofing damage and costly repairs. Therefore, to protect your expensive investment, you should avoid walking on your clay roof, leaving inspections, maintenance, and repairs to the roofing professionals.