
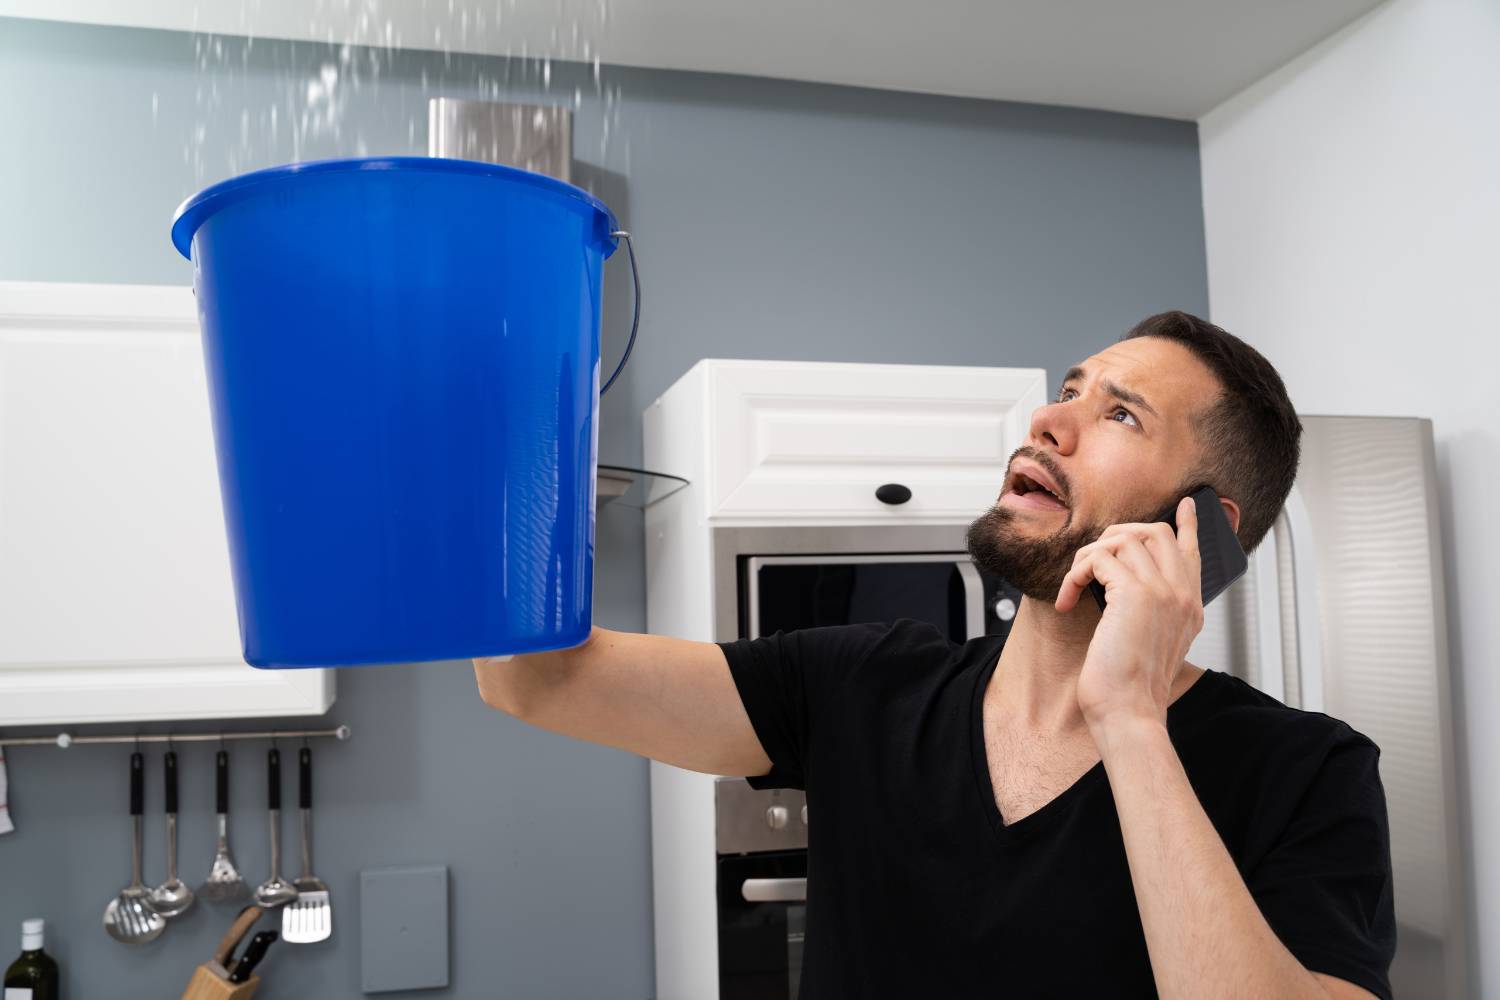
Roof leaks are a common yet potentially damaging problem that homeowners often face. These leaks can lead to significant structural damage and costly repairs if not addressed promptly.
In this blog, we'll talk about effective strategies to temporarily stop a roof leak, giving you the necessary time to arrange for professional repairs. By following these steps, you can minimise the impact of a leak and protect your home from further damage.
Identifying The Source Of The Leak
Roof leaks are one of the most common and potentially damaging issues homeowners face. Identifying the source of a leak quickly and accurately is crucial to preventing further damage and costly repairs. This blog combines insights from various sources to provide a comprehensive guide on how to locate and address roof leaks effectively.
Recognising Signs of a Roof Leak
Water Stains
One of the most apparent signs of a roof leak is the presence of water stains. These typically appear as discoloured patches on your ceiling or walls. The stains can vary in color from light yellow to dark brown, depending on the severity and duration of the leak. The shape of water stains can also differ, often presenting as irregular rings or blotches. Pay particular attention to areas directly under the roof, around chimneys, and near skylights, as these are common places where leaks might start.
Bulging Paint
Another indicator of a potential roof leak is bulging or peeling paint. When moisture accumulates behind the paint, it causes the paint to lose its adhesion and separate from the surface. This can lead to bubbles or blisters forming on the walls or ceiling.
Over time, this trapped moisture can worsen the damage, leading to larger areas of peeling paint and potential structural issues. Regularly inspect painted surfaces in rooms directly below your roof for any signs of bulging or peeling.
Musty Odors
A musty or mouldy smell in your attic or other parts of your home is a strong sign of moisture problems, often stemming from a roof leak. Mould and mildew thrive in damp, dark environments, and a persistent leak can create the perfect conditions for their growth.
If you notice an unusual odour, especially in combination with other signs like water stains or bulging paint, it's crucial to investigate further. Mould not only damages your home but can also pose health risks, making prompt attention essential.
Missing or Damaged Shingles
The condition of your roof shingles is a direct indicator of the roof'sroof'sroof'sroof's overall health. Regularly inspect your roof for shingles that are missing, cracked, or curled. Shingles play a critical role in protecting your home from water ingress.
Missing shingles can leave your roof vulnerable to leaks, while cracked or curled shingles indicate ageing and wear, reducing their effectiveness. If you notice any damage, it's important to address it promptly to prevent more extensive and costly repairs in the future.
Initial Steps to Identify a Roof Leak
Inspect During Wet Weather
- The easiest time to identify a leak is during or immediately after rainfall.
- Observe the patterns where water is collecting or running.
- Use a hosepipe to simulate rain if the weather is dry, and have someone inside the house monitor for leaks.
Examine the Attic
When inspecting the attic, start by looking for water stains on the underside of the roof sheathing and on the rafters. These stains are usually a sign that water has seeped through the roof and is making its way into the attic. Pay close attention to the areas around chimneys, skylights, and vents, as these are common places for leaks to occur.
Next, search for any dripping spots or puddles on the attic floor. These indicate active leaks that need immediate attention. Moisture buildup can be identified by areas of the attic that feel damp or have condensation on surfaces, particularly around insulation or on the walls.
Inspect the Roof
Safety First
Before inspecting the roof, ensure you have the necessary safety equipment. This includes a sturdy ladder, non-slip shoes, a safety harness, and gloves. If the roof inspection seems too dangerous, consider hiring a professional.
Visual Examination
Begin your inspection by visually examining the roof from the ground. Use binoculars to get a closer look at the condition of the shingles, gutters, and other roof components without having to climb up immediately. Look for any visible signs of damage or wear.
Climbing the Roof
If it's safe to do so, carefully climb onto the roof using a ladder. Ensure the ladder is stable and placed on a flat, secure surface. Have someone assist you by holding the ladder steady.
Advanced Techniques for Locating Hard-to-Find Leaks
Spray the Roof with Water:
- Have an assistant inside the attic to spot leaks while you spray different sections of the roof with water.
- Mark the location where the leak becomes visible inside.
Use Technology
- Infrared cameras can detect temperature differences and identify moisture areas not visible to the naked eye.
- Moisture meters can also help identify wet areas behind walls or under the roof.
Immediate Temporary Solutions
When faced with a leaking roof, quick action can prevent extensive water damage and costly repairs. While these solutions are not long-term fixes, they can help manage the situation until professional repairs can be made. Here are some effective temporary fixes for a leaking roof:
Temporary Fixes
Replacing Shingles
Assess the Damage
Begin by inspecting the roof to identify all damaged or missing shingles. Pay special attention to areas where leaks have been reported or where shingles appear loose or cracked.
Safety First
Before starting any roof repair, ensure you have the proper safety equipment. Use a sturdy ladder, wear non-slip shoes, and consider using a harness if working on a steep roof.
Remove the Damaged Shingle
- Carefully lift the edges of the surrounding shingles. Use a pry bar or a flat roofing shovel to gently lift and remove the damaged shingle.
- Remove the nails that hold the damaged shingle in place. Be cautious not to damage the surrounding shingles while doing so.
Inspect the Decking
Check the underlying roof decking for any signs of water damage, rot, or mould. If the decking is compromised, it must be repaired or replaced before proceeding with shingle replacement.
Cut and Prepare the New Shingle
- If using sheet metal, cut it to the exact shape and size of the shingle you are replacing. Ensure the new shingle matches the existing shingles in colour and thickness for a uniform appearance.
- If using a standard replacement shingle, select one that matches the existing shingles in size, style, and colour.
Install the New Shingle
- Slide the new shingle into place, aligning it with the surrounding shingles.
- Nail the new shingle securely using galvanised roofing nails. Position the nails just below the adhesive strip on the shingle, typically about 1 inch above the cut-out sections.
- Be sure to use enough nails to secure the shingle properly, but avoid over-nailing, which can cause damage.
Seal the Shingle
- Apply a generous amount of roofing sealant or adhesive under the edges of the new shingle and any adjacent shingles that were lifted.
- Press the shingles down firmly to ensure a good seal and to prevent wind from lifting the shingles in the future.
Final Inspection
- Once the new shingle is in place and sealed, a final inspection will be performed. Check for any gaps or areas where water could potentially seep through.
- Ensure all shingles lie flat and that there are no loose nails or debris left on the roof.
Cleanup
Clean up any old shingles, nails, and debris from the roof and surrounding area. Dispose of the waste according to local regulations.
Monitor the Repair
- After the first significant rainfall, check the interior of the home and the attic for any signs of leaks to ensure the repair was successful.
- Periodically inspect the repaired area, especially after storms, to ensure the shingle remains secure and the roof is in good condition.
Using Polyethylene Plastic Sheets
Measure and Cut the Polyethylene Plastic Sheets
- Start by measuring the dimensions of the leaking area. This will help you determine the size of the polyethylene plastic sheet needed.
- Use a pair of sharp scissors or a utility knife to cut the polyethylene sheet to the required size. Make sure to cut the sheet slightly larger than the leaking area to ensure full coverage.
Position the Plastic Sheets
Lay the cut polyethylene sheet over the leaking area. Ensure that the sheet extends beyond the edges of the leak by several inches on all sides. This will provide a secure barrier and prevent water from seeping under the edges.
Secure the Sheets with Duct Tape
- Use high-quality, weather-resistant duct tape to secure the edges of the polyethylene sheet. Press the tape firmly to ensure a strong bond with both the plastic sheet and the surface around the leak.
- Apply the duct tape along all edges of the sheet, making sure there are no gaps or loose areas where water could penetrate.
Weigh Down the Sheets with Heavy Materials
- To further secure the polyethylene sheet and prevent it from being blown away or dislodged, place heavy materials such as bricks, stones, or sandbags along the edges and corners of the sheet.
- Ensure the heavy materials are evenly distributed to keep the sheet flat and in close contact with the surface beneath.
Ensure UV Resistance
- Polyethylene plastic sheets can degrade quickly when exposed to sunlight. To extend the lifespan of your repair, use UV-resistant polyethylene sheets. These sheets are specially treated to withstand prolonged exposure to ultraviolet rays, reducing the risk of brittleness and cracking.
- If UV-resistant sheets are not available, consider adding a secondary layer or covering the plastic sheet with an additional protective material to shield it from direct sunlight.
Applying Roofing Cement
To apply roofing cement for small holes, start by ensuring the area around the leak is clean and dry. Once prepared, take a generous amount of roofing cement and spread it directly over the leaking spot. Use a trowel or putty knife to smooth out the cement, ensuring it forms a flat and even layer that fully covers the hole and extends slightly beyond the damaged area to create a watertight seal.
For added durability and protection, you can reinforce this repair by placing a piece of roofing felt over the cement. Apply another layer of roofing cement over the felt, smoothing it out once again to secure the felt in place and create a double barrier against leaks.
Allow the cement to cure according to the manufacturer'smanufacturer'smanufacturer'smanufacturer's instructions before checking the repair to ensure it is completely dry and solid. This method not only addresses the immediate leak but also provides additional security to prevent future issues.
Using Silicone or Caulk
To address the leaking area, apply silicone or caulk as a sealing agent. Start by selecting a product that is compatible with the specific type of roofing material you are working with. Clean the area thoroughly to ensure the sealant adheres properly. When applying the silicone or caulk, follow the manufacturer'smanufacturer'smanufacturer'smanufacturer's instructions for the best results.
Carefully and evenly spread the sealant over the leaking area, making sure to cover all potential entry points for water. Allow sufficient time for the sealant to cure and create a watertight barrier. This method helps effectively seal the leak and prevent further water damage to your roof.
Using Rubber Sealant
Using a rubber sealant such as Flex Seal is an effective method to address leaks in various environments, whether dry or wet. This versatile product works by forming a durable, waterproof barrier upon application, which can seal cracks, holes, and leaks. Before applying the sealant, it is crucial to clean the surface thoroughly to remove any dirt, grease, or debris that could impede adhesion.
Once the area is prepped, the sealant can be sprayed directly onto the leaking spot. Its liquid form allows it to seep into cracks and crevices, ensuring comprehensive coverage. As it dries, it transforms into a rubberised coating that is flexible and resistant to water, air, and moisture, providing long-lasting protection.
Using Tarps
To address a leaking area effectively, start by covering the affected section with a waterproof tarp. This tarp will act as a temporary barrier against water infiltration. Secure the tarp firmly in place using roofing nails or a suitable adhesive, ensuring it doesn't shift or get displaced by wind or rain. It is essential to use a tarp that is UV resistant to withstand prolonged exposure to sunlight without deteriorating.
Additionally, careful attention must be paid to sealing the edges of the tarp properly. This prevents water from seeping underneath, ensuring the covered area remains dry and protected until a more permanent repair can be made.
Using Tar Paper
To address the affected area, begin by covering it with tar paper. Ensure the tar paper is spread evenly over the area, taking care to align it properly. If feasible, tuck the edges of the tar paper beneath the existing shingles to create a more secure and seamless repair. Secure the tar paper in place using roofing nails or an appropriate adhesive. This will help to stabilise the tar paper and ensure it remains firmly in place, providing effective coverage and protection for the damaged section.

Patching Using Roofing Tape
Patching a roof using roofing tape involves applying the tape directly over the damaged area to create a seal. This method is effective for stopping leaks once the rain has stopped, providing a quick and temporary solution to prevent further water damage.
However, it's important to note that roofing tape may lose its adhesive properties during heavy rain, which can compromise its effectiveness. Therefore, while it can offer immediate relief from leaks, it should not be relied upon as a permanent fix, especially in conditions of ongoing or heavy precipitation.
Using Roof Flashing
Using roof flashing effectively involves installing it around the leaking area to redirect water flow, thereby preventing it from penetrating the house. To achieve this, it'sit'sit'sit's crucial to ensure that the flashing material is compatible with the existing roofing.
The installation must be precise and thorough, with the flashing placed under the shingles and securely fastened to create a watertight seal. Additionally, it's essential to check that all edges and joints are sealed properly, using appropriate caulking or sealant to prevent any gaps through which water could seep. By following these steps, you can effectively use roof flashing to protect your home from leaks.
Replacing Roofing Pipe Flashing Boot
Replacing the roofing pipe flashing boot involves a few key steps to ensure a proper fit and prevent any potential leaks. First, carefully remove the old flashing boot, which may involve prying up surrounding shingles and loosening any nails or screws holding the boot in place. Once the old boot is removed, clean the area around the pipe to remove any debris or old sealant that could interfere with the new installation.
Next, slide the new flashing boot over the pipe, making sure it fits snugly against the roof'sroof'sroof'sroof's surface. It is crucial to check that the boot'sboot'sboot'sboot's flange lies flat and tight against the roof to create a watertight seal.
Secure the new boot by nailing or screwing it into place, being careful not to damage the roof or the boot in the process. Apply roofing sealant around the edges of the boot to provide an additional layer of protection against water infiltration.
Finally, replace any shingles that were removed or disturbed during the process, ensuring they overlap the top of the flashing boot for proper drainage. This will help direct water away from the pipe and flashing, minimising the risk of leaks. By following these steps and paying close attention to detail, you can effectively replace a damaged flashing boot and maintain the integrity of your roofing system.
Conclusion
Dealing with a roof leak can be a daunting task, but taking swift and effective action can prevent further damage and give you time to arrange for professional repairs. By identifying the source of the leak, recognising the signs, and employing temporary solutions like replacing shingles, using polyethylene sheets, or applying roofing cement, you can mitigate the immediate risks posed by a leaking roof.
While these temporary fixes are crucial for preventing extensive damage, it's important to remember that they are not long-term solutions. Engaging a professional roofer for a thorough inspection and permanent repairs is essential to ensure the longevity and safety of your home. Regular roof maintenance and prompt attention to any issues can help protect your property and provide peace of mind.
By staying vigilant and taking proactive measures, you can effectively manage roof leaks and safeguard your home from the potentially severe consequences of water damage.
Frequently Asked Questions
To temporarily stop a roof leak, you'll need a few key materials: roofing tape or patch, a tarp, roofing cement, a putty knife, and roofing nails. In some cases, you may also need a ladder, gloves, and a bucket to catch dripping water.
To find the source of a roof leak, start by inspecting the interior of your home for signs of water damage, such as stains on the ceiling or walls. Once you have a general idea of where the leak might be, go up to your roof and look for obvious signs of damage, like missing shingles, cracks, or gaps around vents and chimneys. You can also check your attic for water trails or damp insulation.
Yes, using a tarp is an effective temporary solution to stop a roof leak. To secure it, place the tarp over the affected area, ensuring it extends past the leak on all sides. Use roofing nails or screws with washers to anchor the tarp'starp'starp'starp's edges to the roof, and make sure it is taut to prevent water from pooling on top.
To apply roofing cement, first clean and dry the area around the leak. Use a putty knife to spread the roofing cement over the crack or hole, ensuring it covers the entire damaged area. For larger holes, you might need to use a piece of roofing fabric embedded in the cement for added strength. Press the cement firmly to ensure a good seal and smooth it out to prevent water from pooling.
A temporary roof repair can last anywhere from a few days to several months, depending on the materials used and the severity of the damage. However, these fixes are not meant to be permanent solutions. You should call a professional roofer as soon as possible to assess the damage and perform a permanent repair to prevent further water damage and ensure the long-term integrity of your roof.