Dealing with a roof leak can be daunting, but with the right guidance and materials, you can tackle the problem yourself.
A leaking roof not only causes significant stress but can also lead to extensive damage to your home if not promptly addressed. By understanding how to identify the source of the leak and gathering the necessary materials for repair, you can protect your home from water damage, mould growth, and structural issues.
This comprehensive guide will walk you through the process of detecting a roof leak, preparing for repairs, and effectively fixing common types of leaks, empowering you to safeguard your home with confidence.
Identifying The Leak Of Roof
A leaking roof can cause significant stress and damage to your home, necessitating prompt identification and repair. Understanding the signs and methods for detecting leaks can help protect your home from water damage, mould growth, and structural issues.
Common Signs of Roof Leaks
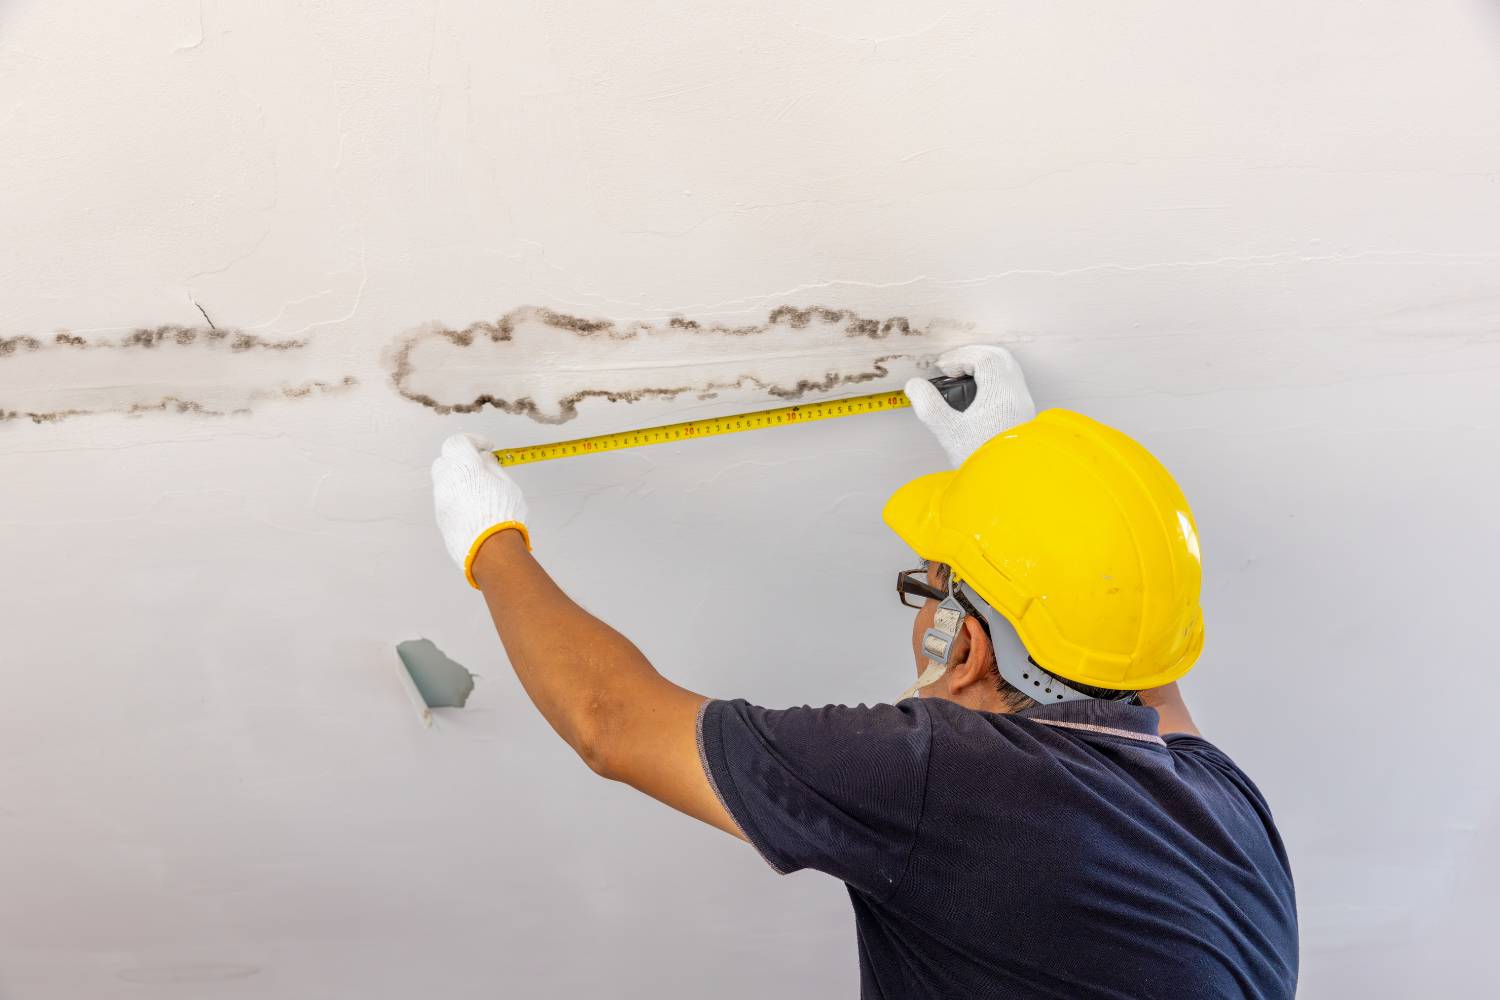
- Water Stains: Look for discolouration on your ceilings or walls.
- Dampness: Check for moisture in your attic or around your roof.
- Mould Growth: Watch for mould or mildew, which can indicate a persistent moisture problem.
- Damaged Shingles: Notice any missing, cracked, or curled shingles.
Steps to Detect a Roof Leak
Start at the Stain
Begin by identifying the initial signs of a leak, such as water stains on ceilings or walls. Trace these stains back to their source, which might involve removing parts of the wall or ceiling to inspect the internal structure.
Inspect the Attic
Use a flashlight to check your attic for moisture, mould, or water stains along the rafters and roof sheathing. Be mindful of condensation on nails or metal pipes, which can also cause minor leaks.
Inspect the Roof Exterior
From the outside, inspect for obvious damage, such as missing shingles, torn flashing, or structural issues. Pay special attention to roof valleys, edges, and areas around chimneys, vents, and skylights.
Simulate Rain
If the leak isn't immediately apparent, use a garden hose to soak different sections of the roof. Have someone inside the house to watch for drips and pinpoint the leak's source.
Remove Shingles
If necessary, carefully remove shingles in the suspected area to examine the roof's sheathing for water damage or rot. This can often reveal the exact location of the leak.
Gathering Necessary Materials For Fixing Roof Leaks
Roof leaks can cause significant damage to your home, and addressing them promptly is crucial. To effectively fix roof leaks, gathering the necessary materials and understanding the repair process are essential. This guide will help you prepare for roof repairs by detailing the essential materials and steps involved.
Materials Checklist
Basic Roofing Materials
- Gutters: Essential for directing rainwater away from your home's foundation, preventing soil erosion and water damage.
- Flashing: Thin metal material used to prevent water from penetrating critical areas like chimneys, vents, and skylights.
- Sealant: Protects against water infiltration and seals cracks or gaps in roofing materials.
- Measuring Tools: Traditional measuring tapes or laser devices ensure accurate placement of roofing materials.
- Roofing Accessories: Bent products are used for drainage and covering joints and corners of the roof.
- Main Roof Panels: The primary material for your roof can be metal, clay, or asphalt. Metal roofs are recommended for their durability and cost-effectiveness.
Specialised Repair Materials
Roofing Cement
Roofing cement, often known as mastic or asphalt cement, is a versatile material used to patch small holes, cracks, and seams in various types of roofs. It is typically made from a blend of asphalt, plasticisers, and reinforcing fibres, which ensures it adheres well to most roofing materials.
Roofing cement provides a watertight seal, preventing water infiltration and protecting the roof from further damage. It's easy to apply with a trowel or putty knife, making it a go-to solution for minor repairs.
Caulk and Sealant
Specialised roof sealants and caulks are essential for creating effective and durable repairs. These products are designed to remain flexible and withstand the harsh conditions roofs face, such as temperature fluctuations, UV exposure, and weather extremes.
Silicone, polyurethane, and acrylic are common types of sealants used in roofing. They are ideal for sealing around roof penetrations, such as vents, chimneys, and skylights, as well as for filling in minor cracks and gaps that can allow water to seep through.
Patching Materials
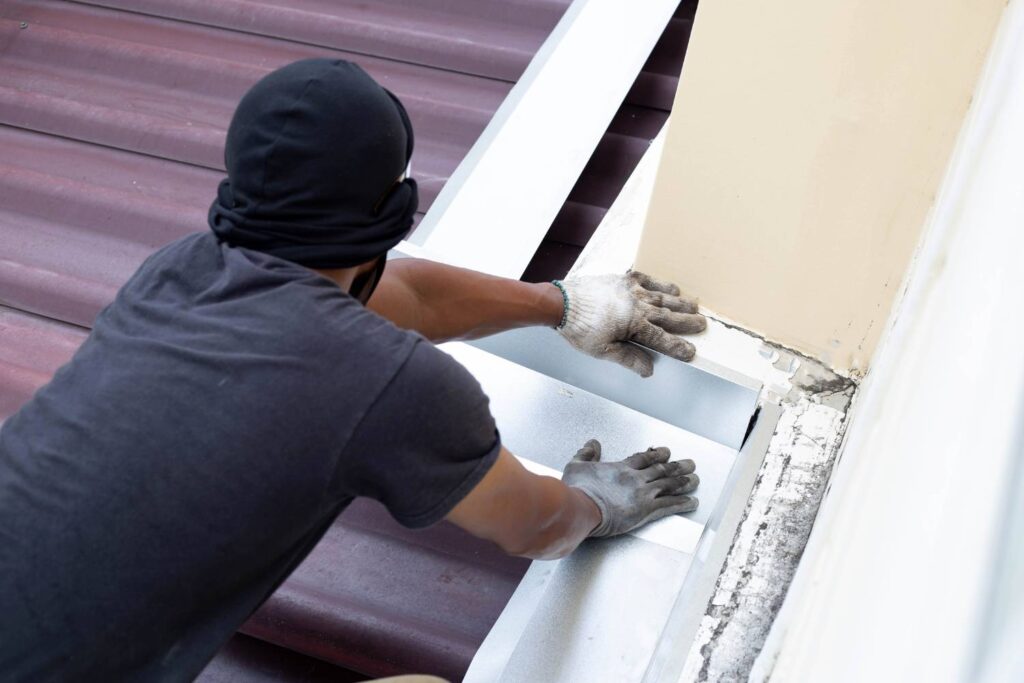
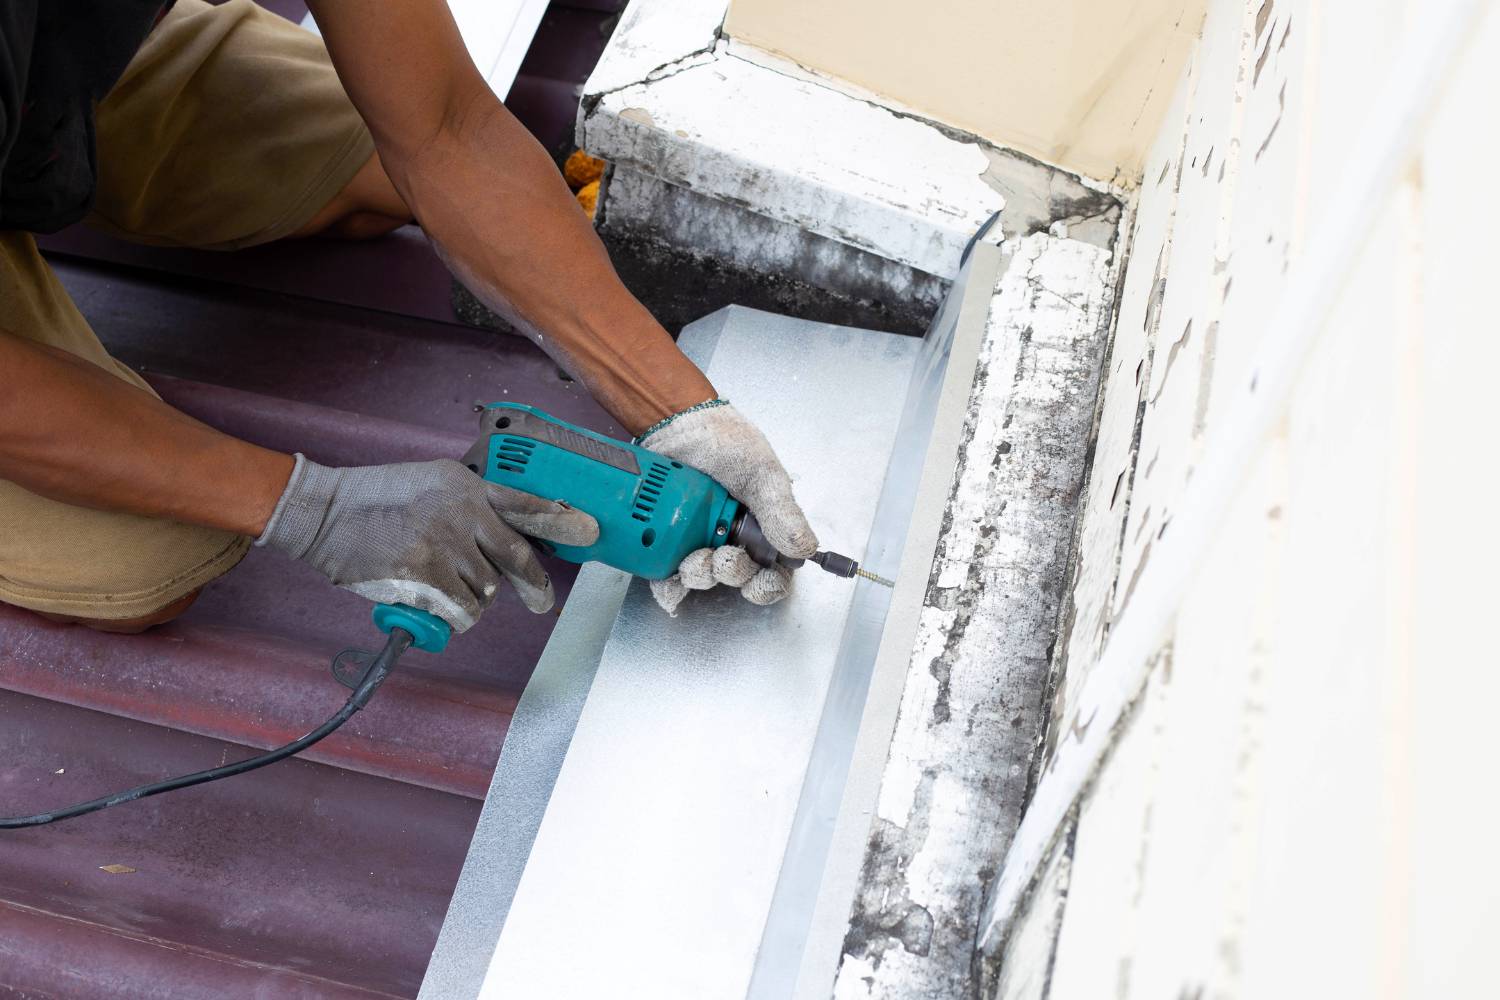
Patching materials come into play for larger damaged areas that cannot be effectively repaired with roofing cement or sealants. These materials include roof patches or flashing, which are designed to cover and protect against significant damage.
Patches can be made from the same material as the roof or from compatible materials that provide a robust and seamless repair. Flashing, often made of metal, is used to direct water away from critical areas such as valleys, chimneys, and roof edges. Properly applied, these materials offer a long-lasting solution, restoring the roof's integrity and preventing leaks.
Preparation Steps
Identify the Source of the Leak
Look for Damaged or Missing Shingles
Start by closely examining the shingles on your roof. Missing or damaged shingles are often the primary culprits behind leaks. Look for any that are cracked, curled, or entirely gone. These vulnerable spots can allow water to penetrate and cause damage to your home's interior.
Check for Deteriorated Flashing
Flashing is the material used to seal joints and seams around roof features like chimneys, vents, and skylights. Over time, flashing can deteriorate, become loose, or get damaged, creating potential entry points for water. Inspect these areas carefully to ensure the flashing is intact and securely fastened.
Inspect the Gutters
Clogged gutters can lead to water overflow, which can damage the roof edges and create leaks. Ensure your gutters are clean and free from debris like leaves, twigs, and dirt. Properly functioning gutters direct water away from your roof and home's foundation, preventing leaks and other water damage.
Evaluate the Damage
Determine the Extent of the Problem:
Once you've identified the source of the leak, assess the damage's extent. This step is crucial in deciding the appropriate course of action. Minor issues, such as small cracks or isolated areas of damage, might be manageable with simple repairs.
Minor Issues
If the damage is limited to small cracks or a few missing shingles, you might be able to fix it with basic roofing materials and tools. Applying roofing cement to cracks and replacing damaged shingles can often resolve these minor leaks effectively.
Major Problems
In cases where the damage is more extensive, such as widespread shingle deterioration, significant flashing issues, or structural damage, more comprehensive repairs will be necessary. Major problems might require professional intervention to ensure the repairs are thorough and prevent future leaks.
Repairing Different Types Of Roof Leaks
Dealing with roof leaks can be a stressful experience for homeowners. Understanding the common types of roof leaks and how to address them effectively can prevent extensive damage and costly repairs. Here's a comprehensive guide to help you identify and repair different types of roof leaks.
Pipe Boot Leaks
- Cause: Deterioration of the rubber boot around the pipe due to UV exposure.
- Identification: Leaks typically appear in ceilings near bathrooms or closets, indicated by water stains, peeling paint, or damp spots.
- Repair: Place a new rubber collar over the old, cracked one to extend its life. Ensure the new collar fits snugly and use sealant around the edges for added protection.
Improperly Driven Nails
- Cause: Nails that are not driven in correctly can back out over time, creating holes.
- Identification: Leaks can occur anywhere nails are improperly installed, often manifesting as isolated drips or water spots.
- Repair: Reposition the nails, ensuring they are driven straight and flush with the roof surface. Properly seal the nail holes with roofing cement or sealant to prevent further leaks.
Blocked Gutters
- Cause: Accumulation of debris in gutters leading to overflow and leaks.
- Identification: Water damage often occurs near the roof edges and fascia boards, visible as streaks or rot.
- Repair: Clean the gutters thoroughly to remove all debris. Install gutter guards to prevent future blockages and flashing to redirect water away from vulnerable areas.
Chimney Leaks
- Cause: Issues with chimney flashing, worn mortar, or structural problems.
- Identification: Water leakage around the fireplace or adjacent walls, seen as damp patches or water stains.
- Repair: Seal or replace the chimney flashing. Repair any cracked or worn mortar and address any structural issues with the chimney to ensure stability and prevent leaks.
Skylight Leaks
- Cause: Improper installation or deteriorated seals around skylights.
- Identification: Leaks around the skylight area, damaging the surrounding drywall or ceiling.
- Repair: Reinstall the skylight's flashing and seals as per manufacturer guidelines. Ensure the flashing overlaps correctly, and the seals are intact to prevent water ingress.
Vent Pipe Collar Leaks
- Cause: Incorrect installation of vent pipe collars.
- Identification: Leaks around appliances connected to vent pipes, often noticeable as water spots on ceilings.
- Repair: Properly adjust and seal the vent pipe collar. Use high-quality roofing sealant to secure the collar and prevent water from seeping in.
Seams and Loose Fasteners
- Cause: Leaks from roof seams or loose fasteners such as nails or screws.
- Identification: Water seepage along seams or where fasteners penetrate the roof, seen as streaks or damp spots.
- Repair: Secure loose fasteners and seal seams with roofing cement or appropriate sealant. Regularly inspect and maintain these areas to ensure ongoing protection.
Flashing Problems
- Cause: Loose, corroded, or improperly installed flashing.
- Identification: Leaks around roof penetrations like chimneys, vents, and skylights, visible as water stains or damp areas.
- Repair: Ensure flashing is properly installed and maintained. Replace any corroded or damaged sections and reseal them with appropriate sealant to ensure a watertight barrier.
Roof Valleys
- Cause: Debris accumulation in roof valleys causing water dams.
- Identification: Leaks along the valley lines of the roof are seen as water stains or rot in these areas.
- Repair: Regularly clean roof valleys to remove debris. Ensure proper drainage by checking that the valley lining is intact and free of obstructions. Repair or replace any damaged sections to maintain effective water flow
Conclusion
Fixing a roof leak yourself can be a challenging but rewarding task that helps you save money and protect your home from further damage. By carefully identifying the source of the leak, gathering the necessary materials, and following the outlined steps, you can effectively address common types of roof leaks.
Remember to take your time, use the right tools, and ensure safety precautions throughout the process. With patience and attention to detail, you'll be able to tackle roof leaks confidently, preserving the integrity and longevity of your home. If the repair seems too complex or extensive, don't hesitate to seek professional help to ensure the job is done correctly and efficiently.
Frequently Asked Questions
To fix a roof leak yourself, you'll need:
- Roofing nails or screws
- Roofing cement or sealant
- Roofing tape
- Patching material (such as shingles or metal flashing)
- A hammer or screwdriver
- A utility knife
- A pry bar
- A ladder
- Safety gear (gloves, safety glasses, and a harness if working on a steep roof)
To locate the source of the leak:
- Inspect the attic for signs of water damage, such as stains or mould.
- Look for any holes or gaps in the roof.
- Check around roof penetrations like chimneys, vents, and skylights.
- Use a hose to simulate rain on the roof while someone watches from inside the attic to see where the water enters.
To repair a roof leak:
- Clean the area: Remove any debris, dirt, or old roofing material around the damaged area.
- Apply roofing cement: Use roofing cement or sealant to fill in small cracks or holes.
- Patch the area: For larger holes, apply a patch of the same roofing material. Secure it with roofing nails or screws and seal the edges with roofing cement.
- Replace damaged shingles: If shingles are damaged, remove them and replace them with new ones, securing them with roofing nails and sealing them with roofing cement.
- Inspect and test: After repairs, inspect the area for completeness and test for leaks by simulating rain with a hose.
Yes, always prioritise safety when working on your roof:
- Wear non-slip shoes with good grip.
- Use a sturdy ladder and ensure it's on stable ground.
- Avoid working on the roof during wet or windy weather.
- Use a harness and secure it to a stable structure if working on a steep roof.
- Have someone assist you or keep an eye on you while you work.
To prevent future roof leaks:
- Regularly inspect your roof for damage or wear and tear.
- Clean gutters and downspouts to prevent water backup.
- Trim overhanging tree branches to avoid debris accumulation and potential damage.
- Ensure proper attic ventilation to prevent moisture buildup.
- Schedule professional inspections and maintenance periodically.