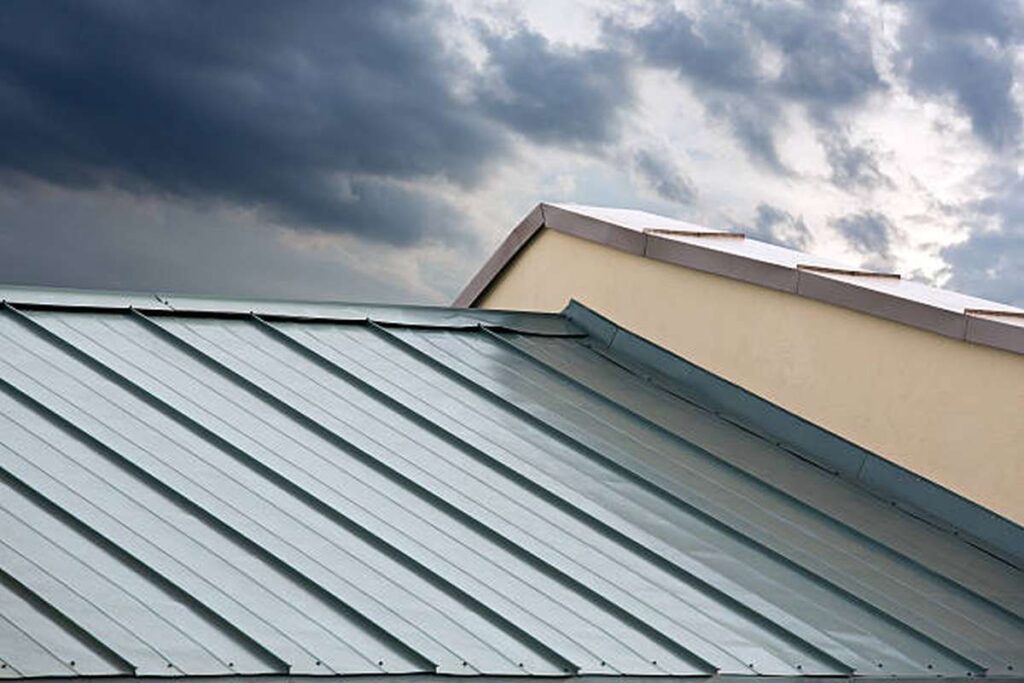
Flashing for roofs is a thin material used by skilled roofers to divert water away from vulnerable areas of the roof. In most cases, galvanised steel is used for its construction. Roof flashing is used at any point where the roof plane meets a vertical surface, such as a wall or a dormer. Flashing on a roof can also be used to prevent water from entering the attic.
Flashing is used around roof features including vents, chimneys, and skylights to prevent water leakage. Water should run off the flashing and onto the shingles rather than onto the roof deck, hence the flashing should be sloped.
Waterproofing the Roof Using Flashing
Almost as many roof flashing styles exist as there are roofing materials. The truth is that all of the components of the roof require security. It is necessary, however, to be aware of the following varieties of roof flashing:
- Since apron flashing creates an effect similar to that of an apron, it has earned another name: continuous flashing. It's just one continuous piece of metal that channels rainwater down to the roof shingles. When the house expands and contracts during the year, long stretches of continuous flashing will have a hard time adjusting to the changes. It could break or distort if left unattended, rendering it useless for its intended purpose of preventing water seepage. So as to accommodate the natural expansion and contraction of the building, expansion joints have been incorporated into the design of longer pieces.
- Base flashing: Certain chimneys and other roof elements require the use of two pieces of flashing. This guarantees that precipitation will always make contact with a downward-sending flashing surface. And flashing around a chimney is notoriously tricky to instal. Two-piece flashing is preferable because it allows for movement as the roof materials expand and compress with the seasons. The bottom part is the flashing around the foundation (or apron flashing).
- Flashing in the opposite direction, or atop the base flashing, completes the duo.
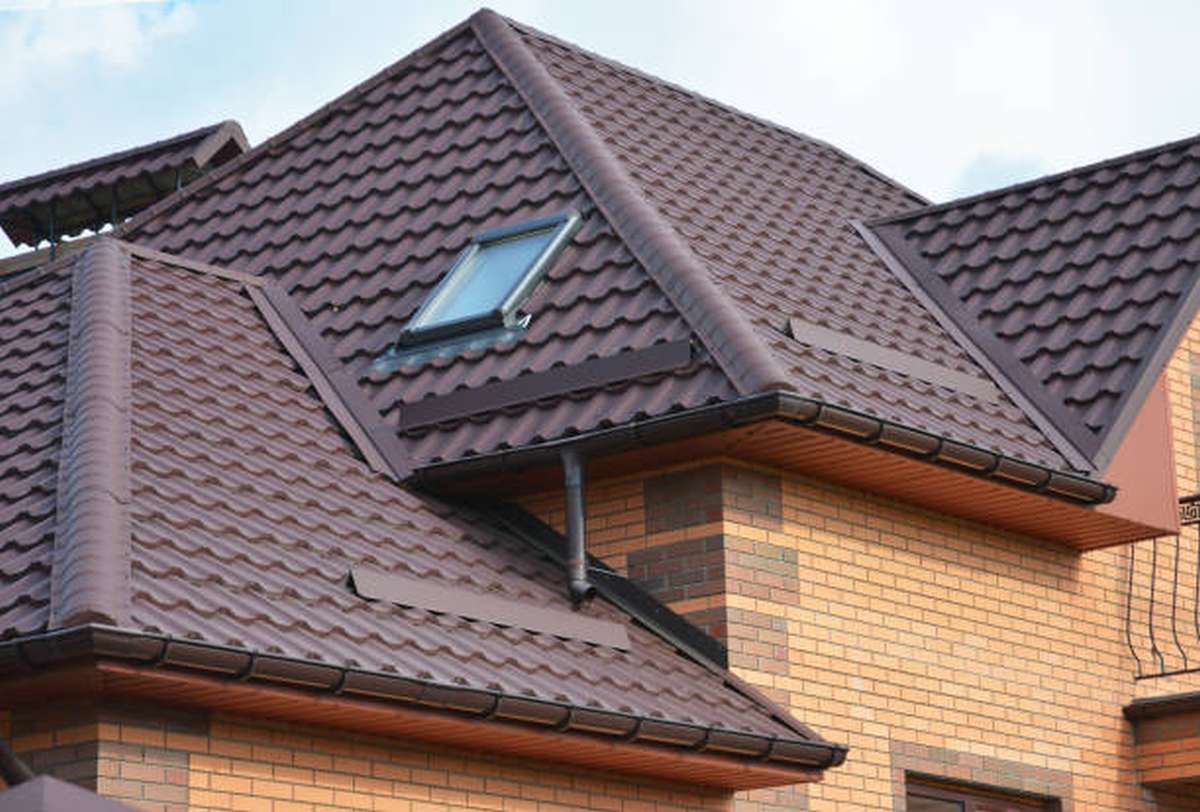
- Step flashing is rectangular flashing that is angled at a right angle in the middle. Flashing is used to seal the joint between the roof and the wall. A lot of flashing pieces will be layered under the shingles to direct water away from the wall. Discover the installation process by reading on.
- Some skylight systems come with flashing already installed, but roofers often have to make or buy their own.
- Metal flashing is installed in roof slopes to prevent water damage.
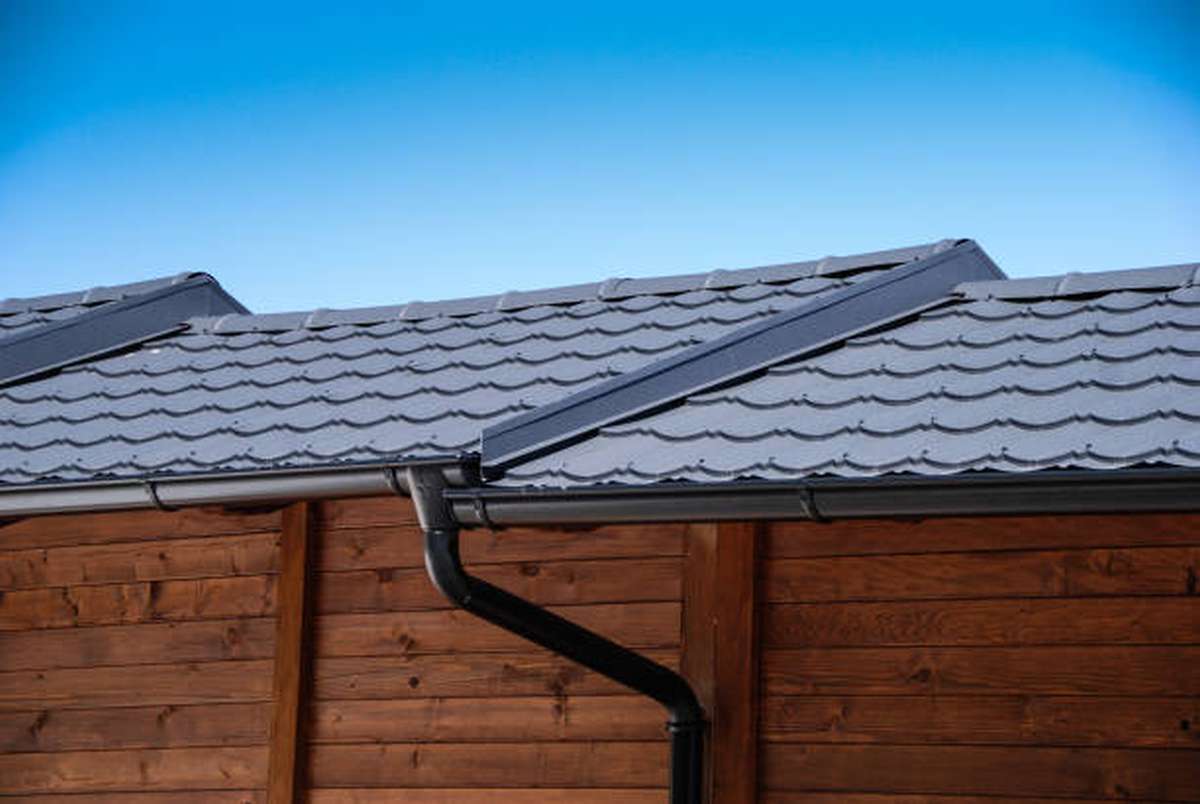
- Water may flow down the roof's edge and not seep into the house thanks to the flow edge's light metal flashing.
- Kickout flashing is used by roofers to connect the end of the step flashing to the start of the gutter. With the help of kickout flashing, water is diverted from the wall and into the downspout. Check out the clip below to see how to put kick-out flashing into practise.
- Despite the availability of prefabricated flashing elements, many roofers still opt to build their own flashing from sheet metal.
They will use tin snips to cut the sheets to size and then bend them to shape on the roof.
However, if you must go into a store to buy your item, do so with caution. There are other types of flashing that aren't meant to be used on roofs and might easily break if installed there. Head flashing, also known as cap flashing, is used to prevent water from entering through windows and doors.
Sizes of Roof Flashings
Pay close attention to the dimensions if you intend to instal new roof flashing or repair already existing flashing. For instance, the flashing you select for your plumbing vent must be broader than the diameter of the vent so that it may completely encircle the vent.
It's also important that the length of your step flashing pieces is 10 inches (254 mm) and that they're at least 2 inches (50 mm) larger than the exposure of the shingle you're using. Typically, the exposure for shingles with three tabs is five and 5/8 inches (143 mm). As a result, 10x8 inches has become the conventional size for flashing (253 millimetres by 203 millimetres). This width of 8 inches is more than adequate for concealing the uncovered edge of typical shingles.
Accessories for a Roof's Flashing
Historically, roofers would use lead, or materials coated in lead, for flashing. However, many North American roofers now favour the use of non-traditional materials such as:
Flashing made of aluminium has the advantages of being lightweight and easy to shape by roofing professionals. Uncoated aluminium reacts and degrades when exposed to alkaline surfaces, so it must be coated before it can be used with concrete and masonry. Even if the aluminium flashing does not come into contact with any concrete or masonry, it should nevertheless be coated to prevent corrosion in coastal locations.
Because of its malleability and solderability, copper makes for excellent roof flashing. Furthermore, it has a very high level of durability and lasts for a very long time. However, with time, it will acquire a patina, which some homeowners may find unappealing but others may find appealing. Copper flashing is still widely utilised and is especially common around chimneys.
Steel is the material of choice for flashing in nearly all cases. When galvanised, it not only has pliability and visual appeal, but also resistance to corrosion.
The roofing firm you employ may be required by code to utilise a specific type of flashing. The minimum possible thickness may also be specified. Most building codes require the use of galvanised steel at least 26 gauge in thickness. Constantly double-checking your adherence to local regulations is a good habit to get into.
A Guide to Fixing Roof Flashing
Corroded or damaged flashing can be easily patched. Holes as small as an inch and a half in diameter can be patched with roof cement, and larger holes can be repaired with patches produced from the same material as the flashing.
It is possible to clean the region around the hole after roughing it up with a wire brush or sandpaper. Then, as illustrated on the right, use roofing cement to bind the repair, and then cover it with more roofing cement to ensure that it doesn't come loose.
The flashing will need to be replaced if the corrosion is too severe. To do this, you'll need to take off the old flashing and many rows of shingles. If you don't have the knowledge, you may choose to hire a roofing expert.
Once you have updated the flashing seals, chip away the old mortar and reseal the flashing by caulking along the margins of the flashing. Use caulk made for masonry when caulking the joints between the flashing and the chimney.
In order to weatherproof the joint between the cap and the step flashing, apply a urethane roofing cement or silicone caulking solution, as shown on the right. Roof cement should be applied to valley flashing about 6 inches in from the edge of the shingles after the edges have been raised. Doing so will guarantee an airtight flashing.
Before you reseal the drip edging, make sure you do it only along the eaves and not underneath the shingles.
To begin replacing the flashing around the vent pipe, you must first remove the shingles hiding the flange at the back and sides of the pipe.
Flashing can be taken down by prying it off and then lifting it up. Take out or lop off any nails you find. To protect the vent pipe from the shingles, a new flashing should be placed over it, pulled down into place, and stapled. After the shingles have been replaced, the nail heads should be covered up with roofing cement.
What You Need To Know To Fix Roof Flashing
Roof flashing repairs are typically easy and inexpensive when damage is identified in its early stages. Example: if your roof's flashing has developed small holes due to corrosion, you can patch holes up to three quarters of an inch in diameter using roofing cement and a patch made of the same material as the flashing.
Patching Up Minor Tears
If the roof flashing has a small hole, the area around it can be made rough with sandpaper or a wire brush so that the hole can be patched. This allows for stronger cement adhesion. Once that's done, the flashing may be cleaned and prepared for repairs.
The patch should be cut slightly bigger than the hole so that it will fit properly and overlap on all sides. After cleaning and preparing the flashing, roofing cement can be used to glue the patch to the flashing. After the repair has dried, apply another layer of roofing cement to ensure that the roof is completely watertight.
Repairing or changing out corroded or broken flashing
It is more likely that flashing will need to be replaced than repaired if it has been substantially damaged or corrupted.
This requires removing many rows of shingles to have access to the flashing at the roof's base. The shingles are often damaged during removal attempts. Therefore, it is highly suggested that only competent people be entrusted with this task.
Disposing of Used Mortar and Caulk
Old mortar and caulk must be scraped away from the flashing's edges before it can be successfully replaced.
To avoid injuring the surrounding materials, the seals must be peeled away carefully. Then, masonry caulk can be used to seal the joints between the new flashing and the structure.
Further, the joint between the step flashing and the cap must be sealed using roofing cement made of urethane or silicone. Roofing cement should also be applied about six inches out from the shingle's edges and under the shingles' borders.
Re-Seal the Drip Edge
It's possible that resealing the drip edge will be necessary after you've replaced the flashing on your roof. To do this, you'll need to seal the space under the shingles but not the drip edge, which can be found around the eaves.
If a roof vent pipe's flashing has to be replaced:
- The first step is to take off the shingles that are covering the flange on the building's sides and back.
- After prying and lifting the flashing, you'll want to check for nails before replacing the flashing over the vent pipe. Then, replace any broken or missing shingles and secure
- them with nails.Roofing cement can be used to conceal nailheads.
Roof Flashing: How to Preserve It
To prevent roof leaks in the future, be sure to follow these key maintenance instructions for roof flashing immediately. You should also learn some tips for evaluating the flashing's condition.
If your roof springs a leak, metal flashing rusting and peeling is probably at cause. Flashing is used to seal the edges of a roof, as well as the intersections of roof planes, and the places where the roof meets dormers, skylights, and chimneys. Waterproofing a roof is another function of flashing.
Water can seep in through the angles and troughs made by sheet metal (or sometimes plastic) after enough time has passed for the metal or plastic to rust, corrode, or just work its way loose from the surfaces it is covering. Water can also seep into a home if the flashing around the roof is damaged. This is because flashing is generally used in locations that experience high water flow rates.
The condition of the shingles and the flashing on your roof are two things you should check. Carefully inspect the flashing and the seals around its edges for damage such as loose nails or holes. The cement and caulking used in roof construction can dry up, split, and crumble away with time, exposing the roof's joints to the elements. In contrast to the laborious and time-consuming task of removing water stains from walls and ceilings, resealing the flashing is a simple and quick fix.
New flashing may have a shiny appearance that stands out, so it's a good idea to paint it and touch up any existing flashing so it blends in better with the roof. Even flashing composed of galvanised metal will rust if it's exposed to the elements for too long.
Use a stiff brush and some solvent to clean up the flaking paint, rust, and dirt. Asphalt shingles, however, should be kept far away from the solvent because it will cause them to crumble. Applying a zinc-based primer first and then two or more thin layers of rust-preventive metal paint from a spray can is the better method.
To reduce glare near dormers, one should:
- Use a scraper to get rid of the old caulking compound, and then scrub the flashing clean with a wire brush.
- Urethane roofing cement should be used to seal the joint between the flashing and the siding or shingles on the roof.
- Put a stop to the exposed stitching.
- Maintenance Checkups for the Roof
Roof inspections are crucial for keeping tabs on the condition of the flashing and other roofing components. At this point in the process, we will be looking for any gaps or cracks in the flashing that could allow water to enter the building.
Also, check for cracks or other signs of roof cement deterioration. Flashing can sometimes be fixed with a simpler way than patching: resealing the area. However, you might need to paint your flashing if you've replaced or repaired it and want it to look like the rest of your roof. The metal roof emphasises this point even more.
Please Watch Your Step Around Any Flashing
Never kneel or stand on the flashing while working on your roof; this will cause serious damage. When working within 12 inches of the flashing, you should take extra care not to apply too much force. Putting too much pressure on the roof might break down the seams and upset the flashing, both of which are vulnerable to water damage.
Repairing Flashing That Has Been Damaged
Roof flashing is available in a wide range of materials, from galvanised steel and copper to aluminium and more. To keep the overall look of the roof consistent, if you need to replace a section of flashing, use the same material as the rest of the roof. Get in touch with a roofing expert to find out what kind of material is being utilised and where you may find a matching accessory.
Flashing a Roof: How to Do It
Warning: Only qualified roofing contractors who are up to date on local best practises, safety requirements, and building ordinances should instal roof flashing. The primary intent of these recommendations is to help homeowners understand what they should anticipate from their roofing contractor.
Since it must be done in stages as the shingles are being installed, step flashing is the most time-consuming of the flashing techniques that must be performed on the roof. But first, there are some best-practice guidelines you should be familiar with before we go in.
Siding cannot go up until the step flashing is in place to conceal the flashing at the roof's peak. Siding removal and flashing installation would be required if the work being done is a repair. The National Roofing Contractors Association (NRCA) suggests a height of 8 to 14 inches for the roof's step flashing, above the shingles (NRCA).
Before installing flashing, make sure the offending wall has a corner on the roof face. The picture below serves as an example of this.
If this is the case, go to the next stage of setup. If the item doesn't have a corner and instead looks like the one shown in the image below, you'll need to follow the second installation technique.
Incorporating a Wall Corner Into the Installation of a Step Flashing
If a corner of a wall is up on the roof, you'll need to use a special step flashing piece to create a flashing for that corner. In this guide, you will find detailed directions for building a corner piece and installing step flashing.
- First, you'll complete installing the underlayment and the shingles until you reach the beginning of the wall. This will make sure that the first piece of flashing, the corner flashing, rests on a shingle.
- Step Two: Cut a line at a 45-degree angle from one exterior corner to the centrefold of the metal to create corner flashing with your tin snips. Afterwards, remove the resulting triangle by making a cut along the centrefold. This will allow you to smoothly curve the step flashing around the corner. If you don't want to bend the flashing yourself, you can use a piece of corrugated aluminium, which is more malleable. You can also buy pre-bent components and modify them to your specifications.
- Third, tightly wrap the corner flashing around the corner. Make sure it is sitting flush and that it reaches at least 8 inches past the shingles. Two nails, one on each side of the top edge, will secure it. It will be held firmly in place by this.
- Fourth, you'll need to cut another section of flashing to size and position it properly. To make it overlap the corner flashing, bend it back in this way.
- When you get to the overlap of the flashing in Step 5, you can remove the second piece and apply the sealant. The part should then be set aside. Nail the flashing near the bottom, high enough that the next row of shingles will hide it.
- The sixth stage is to instal a full course of shingles above the flashing.
- Seventh, at the spot where the next row of shingles will be laid, you must instal a piece of step flashing. This section of flashing must overlap the preceding section by at least three inches. Apply sealant to the area where the flashing's base will rest, and then instal the flashing.
- Step Eight: Keep laying shingles and adding flashing as you make your way to the roof's peak.
- In Step 9, you'll flash the roof's apex by making a custom flashing component that's designed just for your roof. Make a slit in the middle of the fold of a standard length of step flashing.
- Tenth, although one end of the snipped material remains straight, the other end is bent to conform to the roof's apex. Use roofing cement and a single nail at the bottom to secure this piece. After that, you'll put the finishing touches on it by installing ridge shingles.
When there is no wall corner, how to instal step flashing
If the roof face of your building attaches straight to the wall without producing a corner, you can skip fabricating a corner flashing piece. If you want to divert water into the gutter, you'll need to instal kick-out flashing. Some skilled roofers make their kick-out flashing by hand from copper, but you can't get it to bend well with galvanised steel because of how brittle it is. Rather, you could buy a premade kick out flashing part.
The following are some methods for putting in kick out flashing and step flashing:
- To begin, put the kick out flashing right where the roof meets the base of the wall. Take it out of commision momentarily, and then cover the spot with roofing cement.
- Step Two: Over the end of the starter strip, position the first section of step flashing such that it goes directly into the kick-out flashing. Mount it firmly to the roof deck with the help of roofing cement and two nails. Place the nails near the base of the step flashing piece to ensure that you are nailing into the deck. Also, place the nails high enough that the succeeding row of shingles will cover them up.
- Once the kick flashing and the initial piece of step flashing are securely secured, you may go on to the third and final phase of the project: installing the shingle. The first step is to seal the flashing's foundation. Simply place a shingle over the flashing and secure it with nails. Note how the shingle covers over the nail and flashing base.
- The fourth step is to finish laying all of the shingles.
- Fifth, complete the step flashing by beginning with Step 7 from the section above where it is shown how to instal step flashing with a corner piece. The procedure is now complete.
Counter-flashing Installation Instructions for a Chimney
The roofer will need to cut a ridge out for the counter-flashing if it is not installed when the bricklayer is installing the brick and mortar. This is the time to put up the flashing around the chimney. When the flashing is in place, the roofer can then fill and seal this depression.
- Before anything else, make sure the chimney's base flashing is in good shape and fastened to the roof as the mason or manufacturer specifies. This work needs to be completed below the roof shingles. If you were not given base flashing, you can instal step flashing up the side of the chimney.
- Secondly, make a hole in the top of the chimney using a diamond bit saw or a diamond grinder disc. Here is where you will hang the anti-flashing material.
- Counterflashing is added to the indentation as the third stage. Make sure it hangs so that at least two inches of it is outside the base flashing.
- In the fourth phase, roofing cement will be used to secure the counter-flashing, the base flashing, and the chimney.
- The counter-flashing won't sag if you use roofing caulking to fill the indent in the fifth stage.
Flashing a plumbing vent on a roof: installation instructions
Flashing a chimney is typically more challenging than placing a plumbing vent on a roof. The procedure entails the following steps:
- Install the shingles in the standard fashion up to the bottom of the plumbing vent first.
- Second, secure the flashing or boot to the plumbing vent so that its bottom rests on the roof decking. For the flashing to remain in place, lift the boot for a split second and apply sealant.
- Third, push the light firmly back into its housing.
- Stage Four of the Process involves installing the next row of shingles. At the plumbing vent, check that the shingles are overlapping the top of the flashing.
- Fifth, remove a circular section of roofing material to make room for the vent itself, as seen in the image below.
- Step six involves smearing roofing cement directly under the shingle's circular edge, where the shingle will be attached. Also, don't forget to do a great job where you normally would.
Conclusion
Flashing for roofs is a thin material used by skilled roofers to divert water away from vulnerable areas of the roof. Roof flashing is used at any point where the roof plane meets a vertical surface, such as a wall or a dormer. Flashing on a roof can also be used to prevent water from entering the attic. Flashing around a chimney is notoriously tricky to instal. Certain chimneys and other roof elements require the use of two pieces of flashing.
Kick-out flashing is used by roofers to connect the end of the step flashing to the start of the gutter. The length of your step flashing pieces is 10 inches (254 mm) and that they're at least 2 inches (50 mm) larger than the exposure of the shingle you're using. Pay close attention to the dimensions if you intend to instal new roof flashing or repair existing flashing. Most building codes require the use of galvanised steel at least 26 gauge in thickness. Corroded or damaged flashing can be easily patched with roof cement and patching.
If you don't know how to fix flashing, you may choose to hire a roofing expert. Roof flashing repairs are typically easy and inexpensive when damage is identified in its early stages. If flashing has a small hole, the area around it can be made rough with sandpaper or a wire brush so that the hole can be patched. Once that's done, the flashing may be cleaned and prepared for repairs. Flashing is used to seal the edges of a roof, as well as the intersections of roof planes, and the places where the roof meets dormers, skylights, and chimneys.
Carefully inspect the flashing and the seals around its edges for damage such as loose nails or holes. To keep the overall look of the roof consistent, use the same material as the rest of the building. Userethane roofing cement should be used to seal the joint between flashing and siding or shingles. Siding cannot go up until the step flashing is in place to conceal the flashing at the roof's peak. Siding removal and flashing installation would be required if the work being done is a repair.
In this guide, you will find detailed directions for building a corner piece and installing step flashing. First, apply sealant to the area where the flashing's base will rest, and then instal the flashing. In Step 9, you'll flash the roof's apex by making a custom flashing component designed just for your roof. If the roof face of your building attaches straight to the wall, you can skip fabricating a corner flashing piece. If you want to divert water into the gutter, you'll need to instal kick-out flashing.
The following are some methods for putting in kick out flashing and step flashing. Make sure the chimney's base flashing is in good shape and fastened to the roof as the mason or manufacturer specifies. This work needs to be completed below the roof shingles. If you were not given base flashing, you can instal step flashing up the side of the Chimney.
Content Summary
- Flashing for roofs is a thin material used by skilled roofers to divert water away from vulnerable areas of the roof.
- Flashing on a roof can also be used to prevent water from entering the attic.
- Waterproofing the Roof Using FlashingAlmost as many roof flashing styles exist as there are roofing materials.
- The truth is that all of the components of the roof require security.
- It is necessary, however, to be aware of the following varieties of roof flashing:Since apron flashing creates an effect similar to that of an apron, it has earned another name: continuous flashing.
- When the house expands and contracts during the year, long stretches of continuous flashing will have a hard time adjusting to the changes.
- Base flashing: Certain chimneys and other roof elements require the use of two pieces of flashing.
- Flashing in the opposite direction, or atop the base flashing, completes the duo.
- Discover the installation process by reading on.
- Metal flashing is installed in roof slopes to prevent water damage.
- Kickout flashing is used by roofers to connect the end of the step flashing to the start of the gutter.
- Check out the clip below to see how to put kick-out flashing into practise.
- Despite the availability of prefabricated flashing elements, many roofers still opt to build their own flashing from sheet metal.
- They will use tin snips to cut the sheets to size and then bend them to shape on the roof.
- Sizes of Roof FlashingsPay close attention to the dimensions if you intend to instal new roof flashing or repair already existing flashing.
- The roofing firm you employ may be required by code to utilise a specific type of flashing.
- To begin replacing the flashing around the vent pipe, you must first remove the shingles hiding the flange at the back and sides of the pipe.
- Example: if your roof's flashing has developed small holes due to corrosion, you can patch holes up to three quarters of an inch in diameter using roofing cement and a patch made of the same material as the flashing.
- After cleaning and preparing the flashing, roofing cement can be used to glue the patch to the flashing.
- Re-Seal the Drip EdgeIt's possible that resealing the drip edge will be necessary after you've replaced the flashing on your roof.
- After prying and lifting the flashing, you'll want to check for nails before replacing the flashing over the vent pipe.
- Then, replace any broken or missing shingles and secure them with nails.
- The condition of the shingles and the flashing on your roof are two things you should check.
- Maintenance Checkups for the RoofRoof inspections are crucial for keeping tabs on the condition of the flashing and other roofing components.
- To keep the overall look of the roof consistent, if you need to replace a section of flashing, use the same material as the rest of the roof.
- Siding cannot go up until the step flashing is in place to conceal the flashing at the roof's peak.
- Siding removal and flashing installation would be required if the work being done is a repair.
- Incorporating a Wall Corner Into the Installation of a Step FlashingIf a corner of a wall is up on the roof, you'll need to use a special step flashing piece to create a flashing for that corner.
- In this guide, you will find detailed directions for building a corner piece and installing step flashing.
- This will allow you to smoothly curve the step flashing around the corner.
- Third, tightly wrap the corner flashing around the corner.
- Seventh, at the spot where the next row of shingles will be laid, you must instal a piece of step flashing.
- In Step 9, you'll flash the roof's apex by making a custom flashing component that's designed just for your roof.
- When there is no wall corner, how to instal step flashing
- The following are some methods for putting in kick out flashing and step flashing:To begin, put the kick out flashing right where the roof meets the base of the wall.
- The first step is to seal the flashing's foundation.
- Simply place a shingle over the flashing and secure it with nails.
- The fourth step is to finish laying all of the shingles.
- This is the time to put up the flashing around the chimney.
- Before anything else, make sure the chimney's base flashing is in good shape and fastened to the roof as the mason or manufacturer specifies.
- This work needs to be completed below the roof shingles.
- Counterflashing is added to the indentation as the third stage.
- In the fourth phase, roofing cement will be used to secure the counter-flashing, the base flashing, and the chimney.
- The procedure entails the following steps:Install the shingles in the standard fashion up to the bottom of the plumbing vent first.
Frequently Asked Questions About Roof Flashing
Flashing should overlap the roof-covering material, but on asphalt shingle roofs, for aesthetic reasons, the part of the headwall flashing that extends down over asphalt shingles is often covered with a course of shingle tabs.
Common Types of Flashing:
Continuous flashing: Also known as “apron flashing”. Installing one long piece of continuous flashing protects the joint between a vertical wall and a sloped roof. Drip edges: Often installed under the roofing felt along the eaves of a roof.
Some roof flashing types are counter flashing, chimney flashing, step flashing, headwall flashing (also called apron flashing), valley flashing, and gutter apron flashing.
It's a crucial roofing material that every roof needs to have. You'll have different metal options to choose from for your roof flashing. These common types of metals are aluminium, steel, and copper.
The Critical Areas of Your Roof that Require Flashing
These areas include: Side walls and front walls (the roof surface that joins the wall), Valleys (low points where two roof slopes join), Roof protrusions (bathroom vents, kitchen vents, and skylights)